Linux 系统下 NTP 时间服务器配置与 SSH 免密登录实现
·
一、实验要求
- 配置NTP时间服务器,确保客户端主机和服务端主机同步时间;
- 配置SSH免密登录,能够实现客户端主机,通过服务端的redhat账户进行基于公钥验证方式的远程连接。
二、实验目的
- 掌握 Linux 系统中 NTP 时间服务器的部署方法,实现客户端与服务端的时间同步,保障分布式系统的时间一致性。
- 理解 SSH 公钥认证的原理,完成客户端对服务端 redhat 账户的免密登录配置,提升远程连接的安全性与便捷性。
- 熟悉 Linux 防火墙、系统服务、权限管理等基础运维操作,解决配置过程中的常见问题。
三、实验步骤
准备工作:
前往阿里源NTP镜像_NTP下载地址_NTP安装教程-阿里巴巴开源镜像站,找到如下配置,并复制。
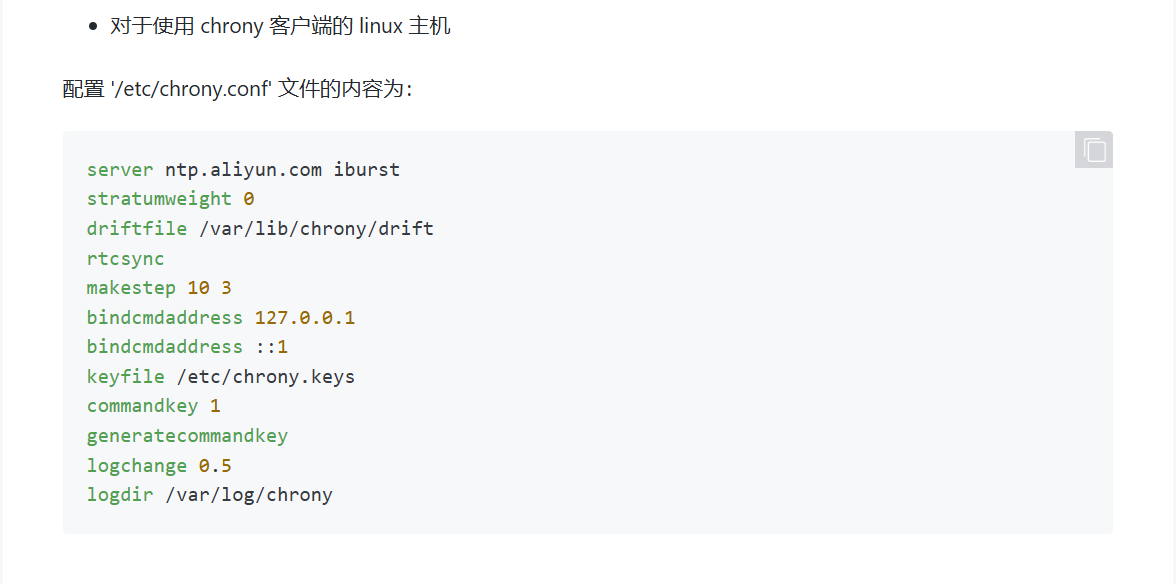
链接可点击上文,也可点击下方链接:
阿里源镜像站 https://developer.aliyun.com/mirror/NTP?spm=a2c6h.13651102.0.0.d2321b11KM0GZn
3.1 配置NTP时间服务器,确保客户端主机与服务端主机同步时间
3.11 服务端配置
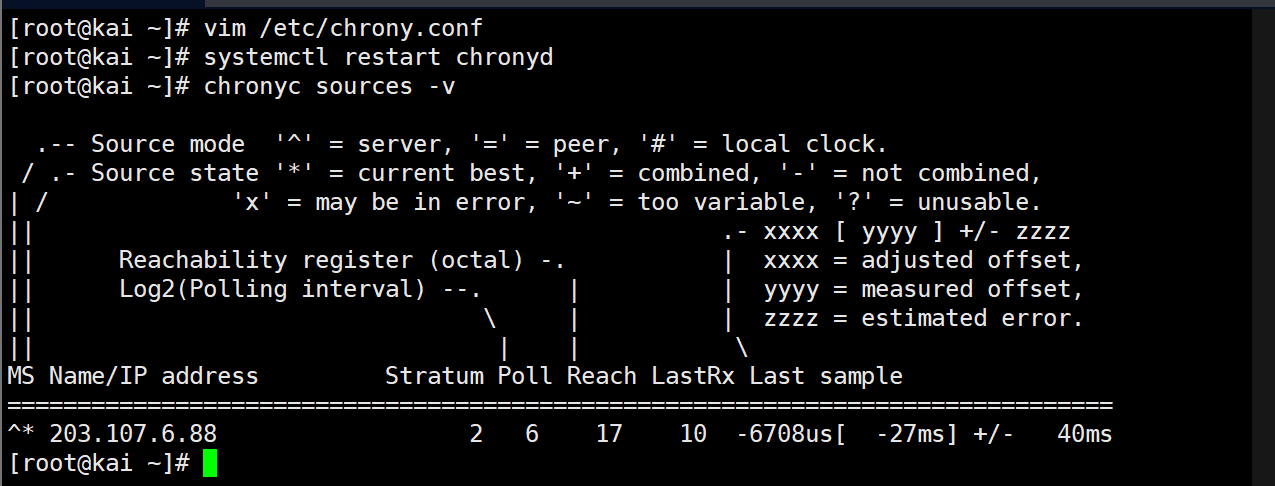
# 安装软件
[root@server ~]# yum install chrony -y   # 默认已安装

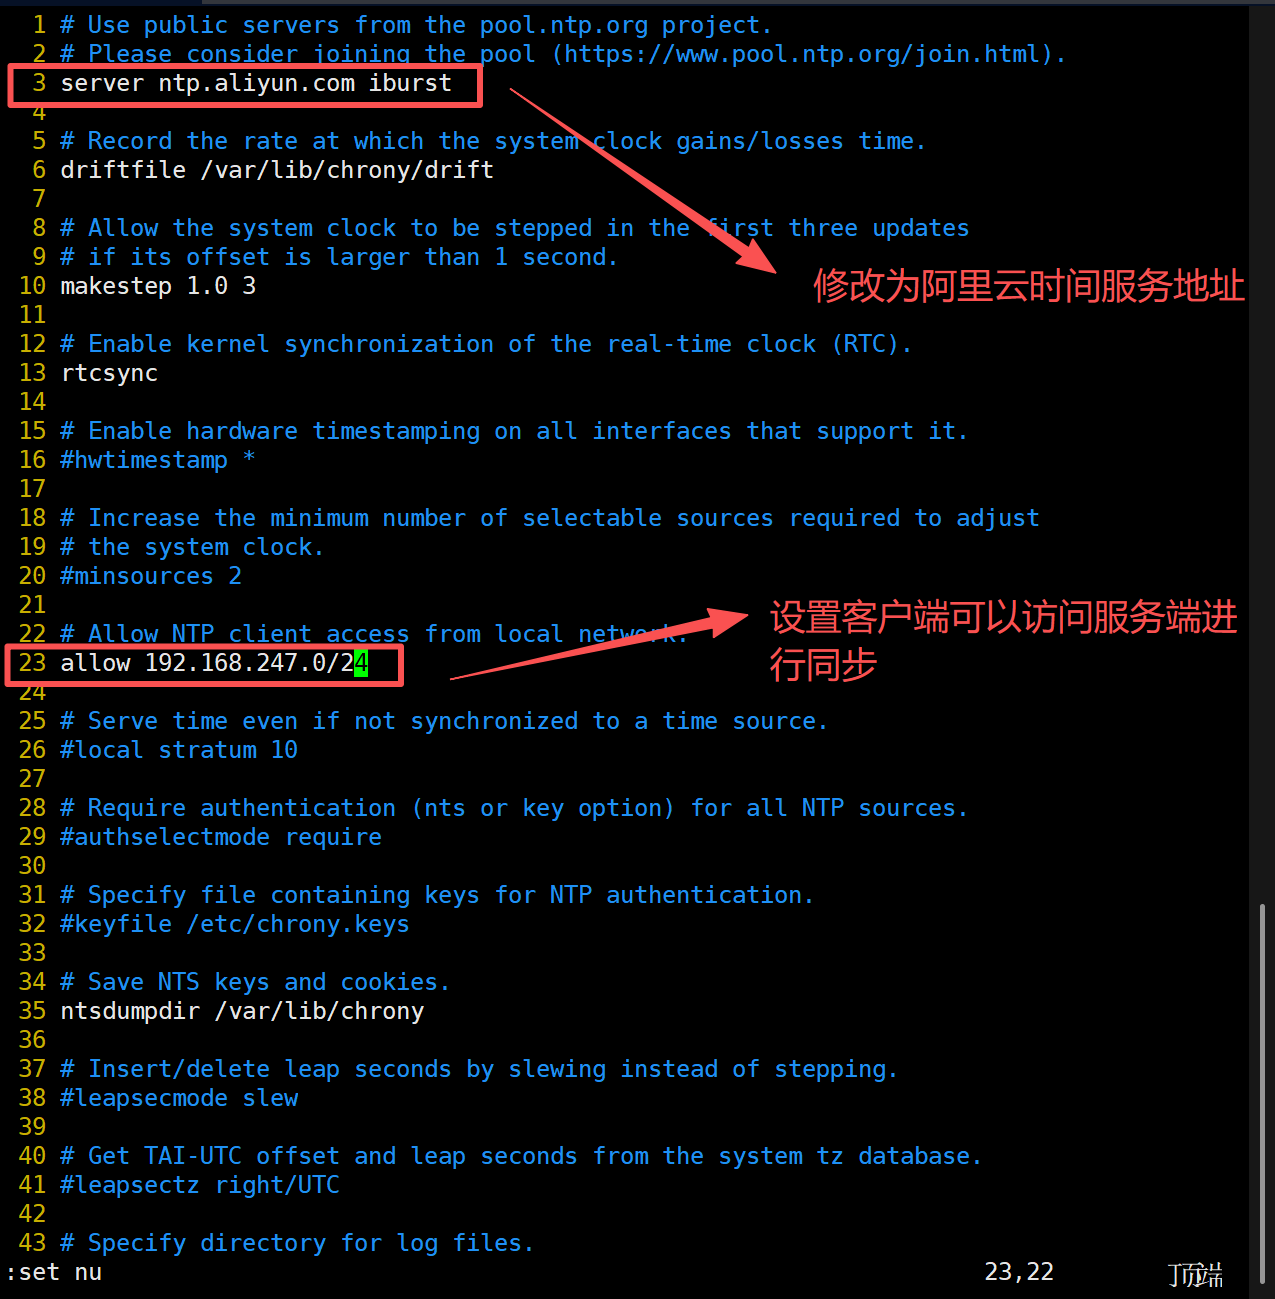
# 编辑配置文件,定位第3行,修改为阿里时间服务地址
[root@kai ~]# vim /etc/chrony.conf
server ntp.aliyun.com iburst
allow 192.168.247.0/24  # 定位第26行,设置谁可以访问本机进行同步

# 重启服务
[root@kai ~]# systemctl restart chronyd

#查看是否同步
[root@kai ~]# chronyc sources -v

  .-- Source mode  '^' = server, '=' = peer, '#' = local clock.
 / .- Source state '*' = current best, '+' = combined, '-' = not combined,
| /             'x' = may be in error, '~' = too variable, '?' = unusable.
||                                                 .- xxxx [ yyyy ] +/- zzzz
||      Reachability register (octal) -.           |  xxxx = adjusted offset,
||      Log2(Polling interval) --.      |          |  yyyy = measured offset,
||                                \     |          |  zzzz = estimated error.
||                                 |    |           \
MS Name/IP address         Stratum Poll Reach LastRx Last sample
===============================================================================
^* 203.107.6.88                  2   6    17     4   -891us[-1150us] +/-   30ms
[root@kai ~]# timedatectl
               Local time: 四 2026-04-23 15:55:14 CST
           Universal time: 四 2026-04-23 07:55:14 UTC
                 RTC time: 四 2026-04-23 07:55:14
                Time zone: Asia/Shanghai (CST, +0800)
System clock synchronized: yes
              NTP service: active
          RTC in local TZ: no
[root@kai ~]#
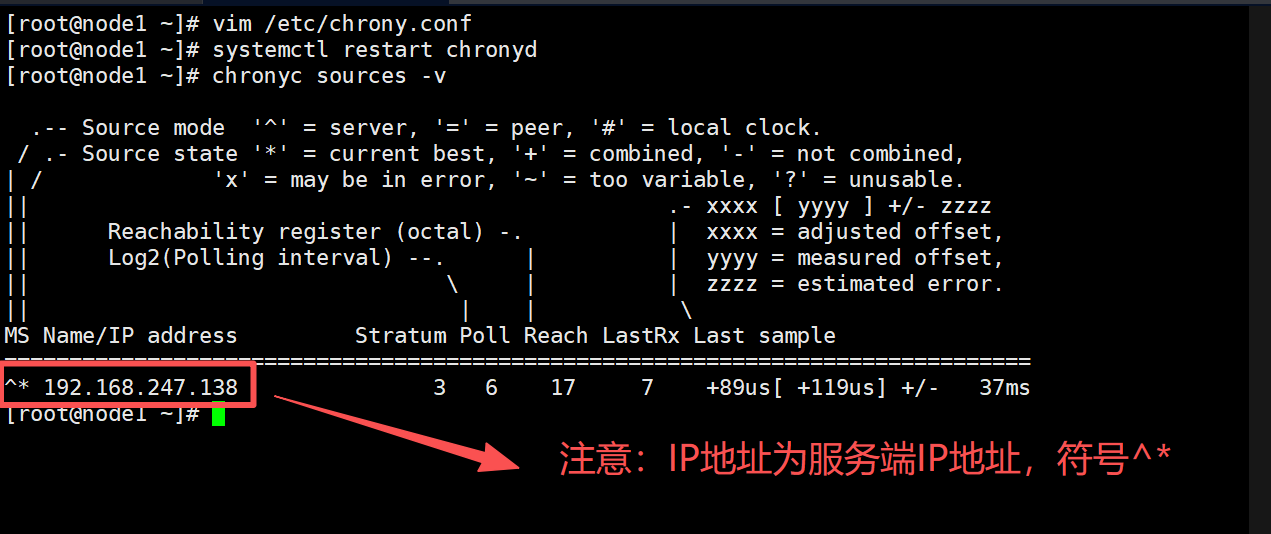
注:最后一行第二个字符为*则说明同步已经成功,如果是?则说明同步失败。
3.12 客户端配置
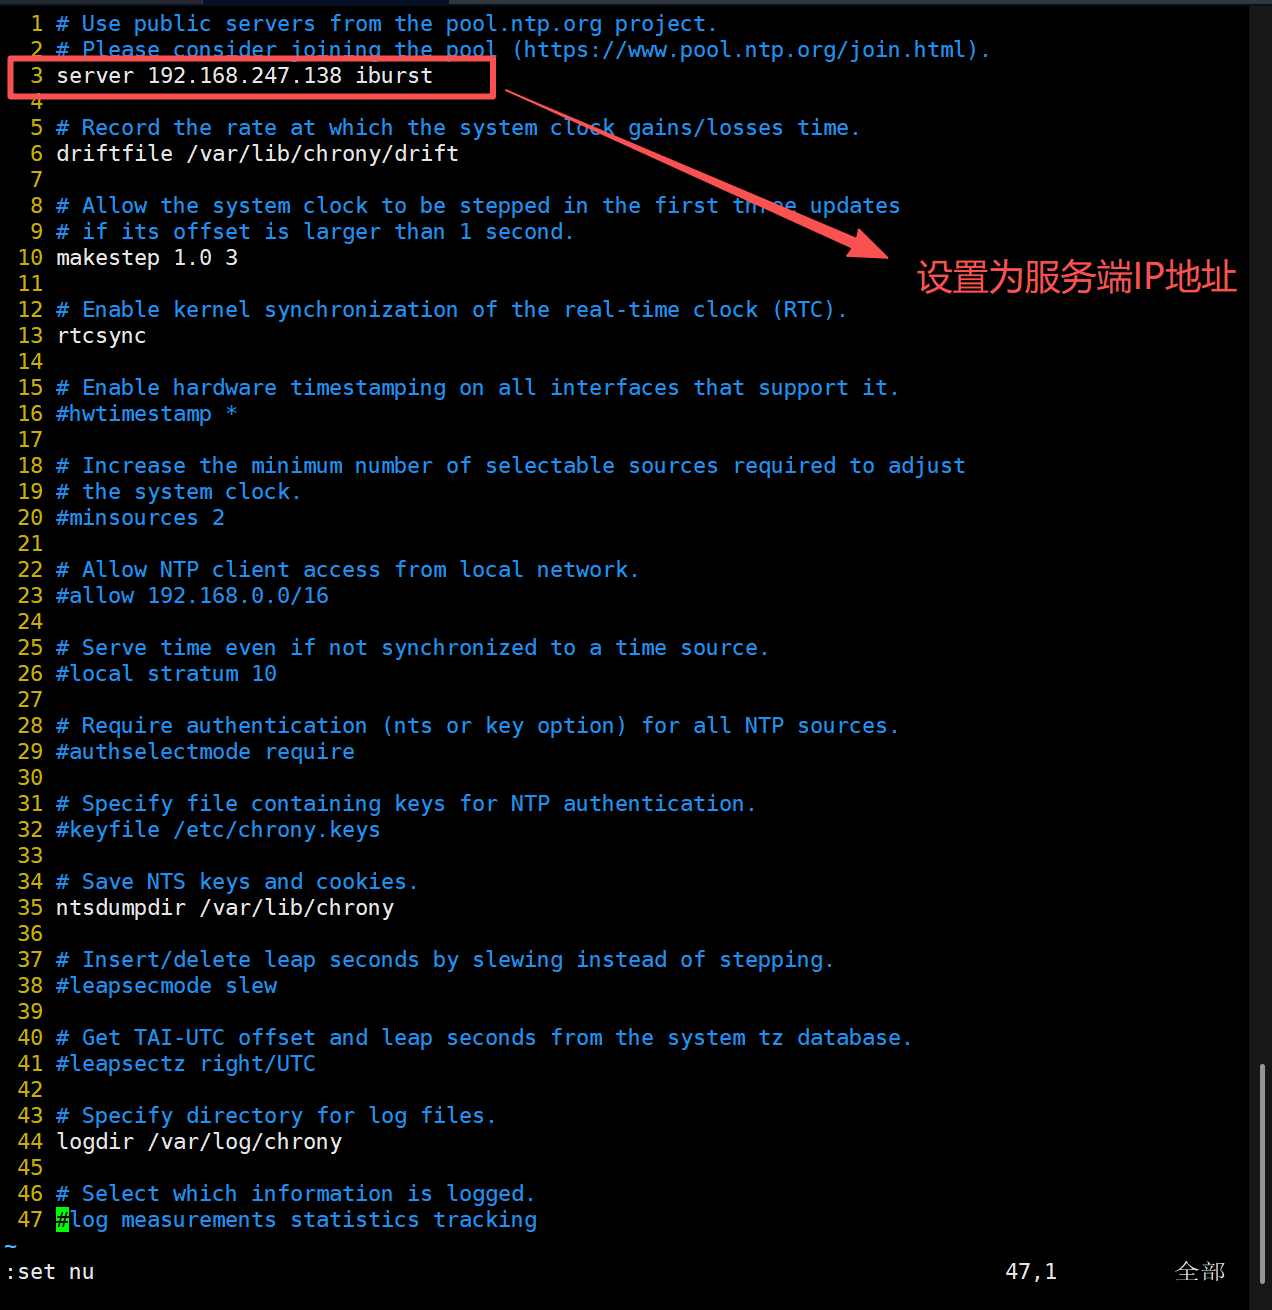
# 安装软件
[root@node1 ~]# yum install chrony -y

# 编辑配置文件
[root@node1 ~]# vim /etc/chrony.conf
server 192.168.247.138 iburst

# 重启服务
[root@node1 ~]# systemctl restart chronyd
[root@node1 ~]# chronyc sources -v

  .-- Source mode  '^' = server, '=' = peer, '#' = local clock.
 / .- Source state '*' = current best, '+' = combined, '-' = not combined,
| /             'x' = may be in error, '~' = too variable, '?' = unusable.
||                                                 .- xxxx [ yyyy ] +/- zzzz
||      Reachability register (octal) -.           |  xxxx = adjusted offset,
||      Log2(Polling interval) --.      |          |  yyyy = measured offset,
||                                \     |          |  zzzz = estimated error.
||                                 |    |           \
MS Name/IP address         Stratum Poll Reach LastRx Last sample
===============================================================================
^* 192.168.247.138               3   6    17     3    +22us[  -34us] +/-   33ms
[root@node1 ~]# timedatectl
               Local time: 四 2026-04-23 16:00:40 CST
           Universal time: 四 2026-04-23 08:00:40 UTC
                 RTC time: 四 2026-04-23 08:00:40
                Time zone: Asia/Shanghai (CST, +0800)
System clock synchronized: yes
              NTP service: active
          RTC
3.2 配置SSH免密登录
3.21 准备实验环境
检查 /root/.ssh/authorized_keys 是否存在。若不存在,需手动创建目录和文件

[root@kai ~]# cd /root
[root@kai ~]# ls -a
.  ..  anaconda-ks.cfg  .bash_history  .bash_logout  .bash_profile  .bashrc  .cshrc  .lesshst  .tcshrc  .viminfo
[root@kai ~]# mkdir /root/.ssh
[root@kai ~]# touch /root/.ssh/authorized_keys
3.22 生成密钥对(Windows客户端)
- 打开Xshell,点击菜单栏工具→用户密钥管理者。
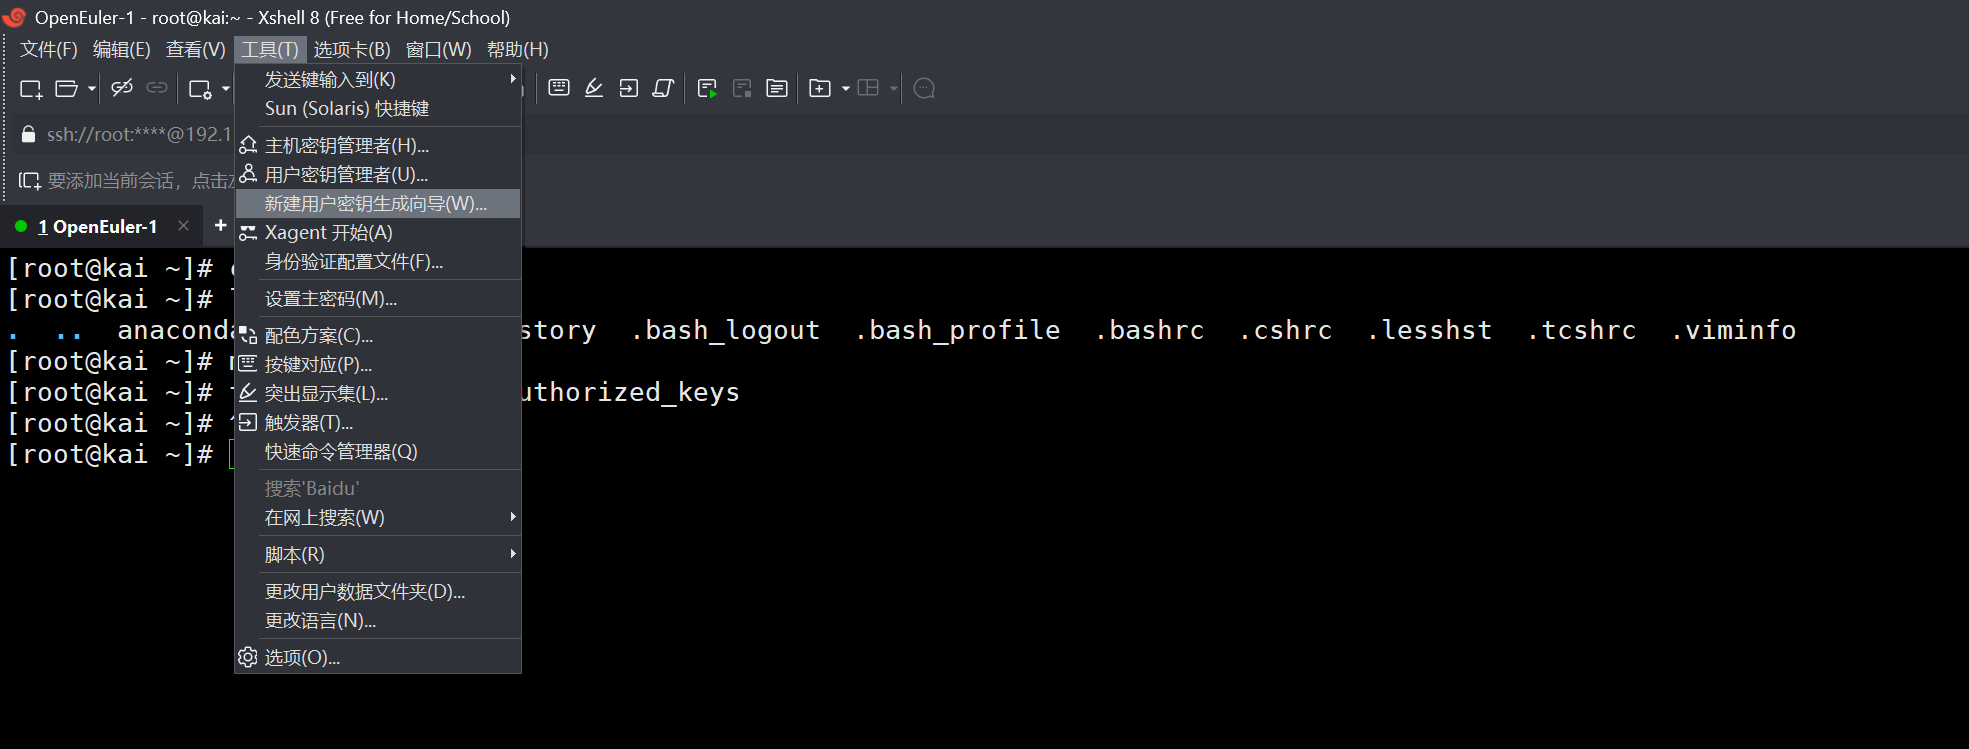
- 点击生成,选择密钥类型(推荐RSA,长度2048位),设置密钥名称(如my_ssh_key),无需设置密码(若需更高安全可设置密码短语)。
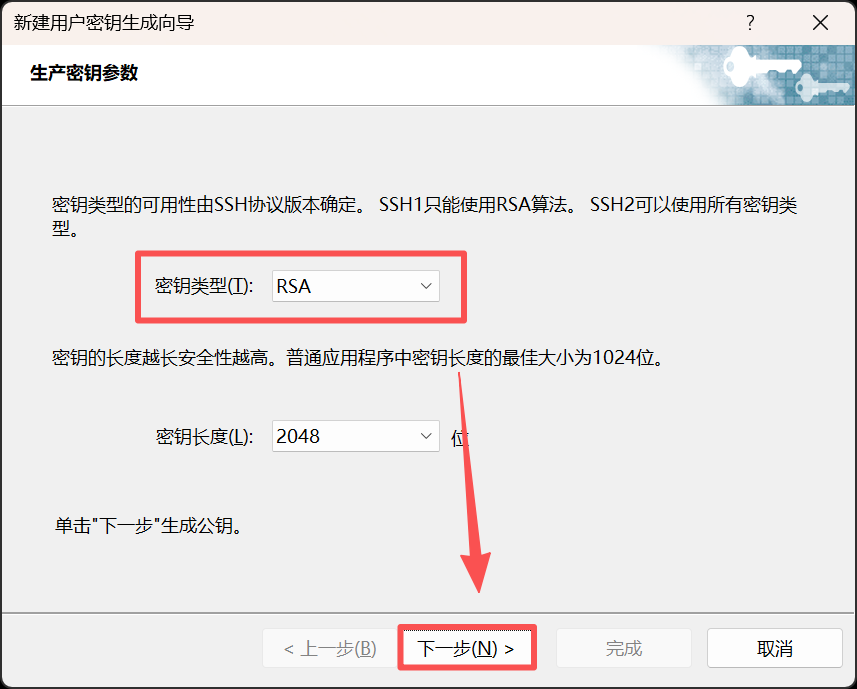
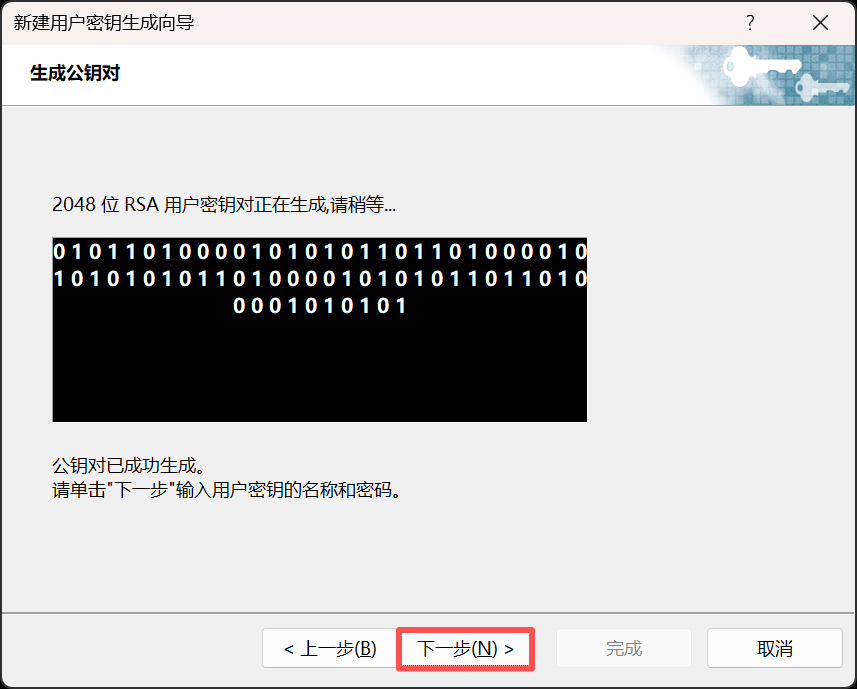
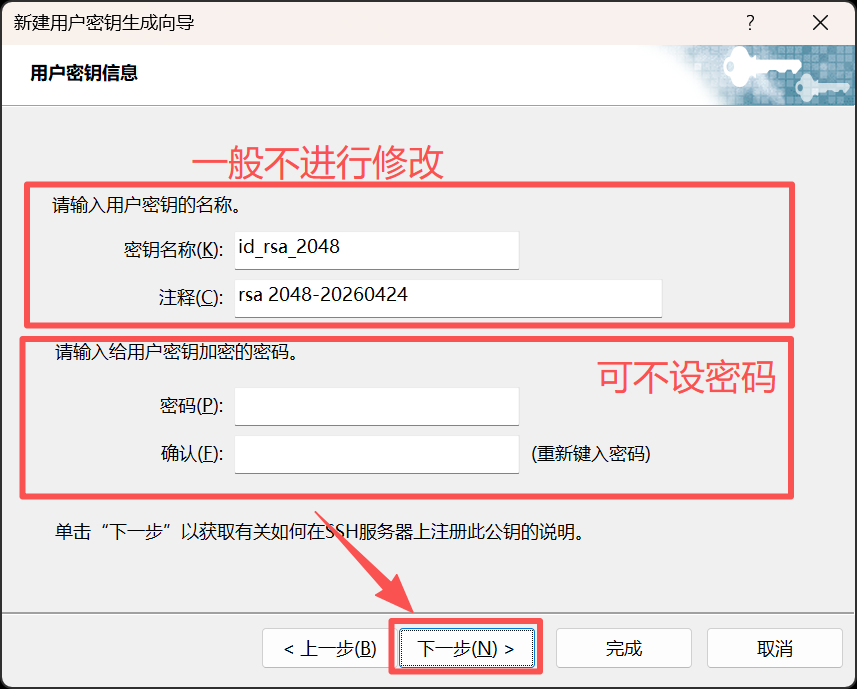
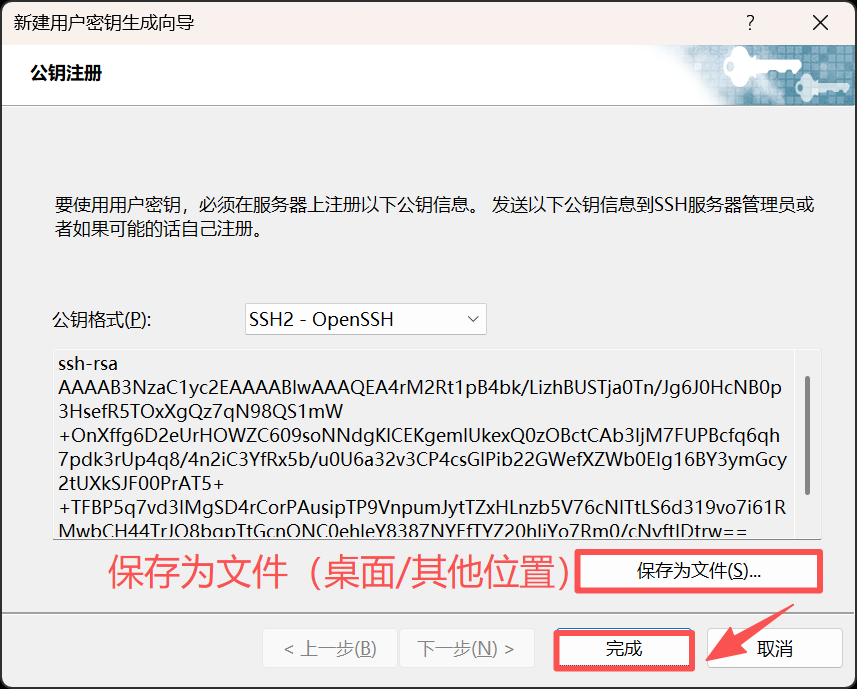
- 生成完成后,在密钥管理器中选中该密钥,点击属性,复制公钥内容(以ssh-rsa开头的字符串)。
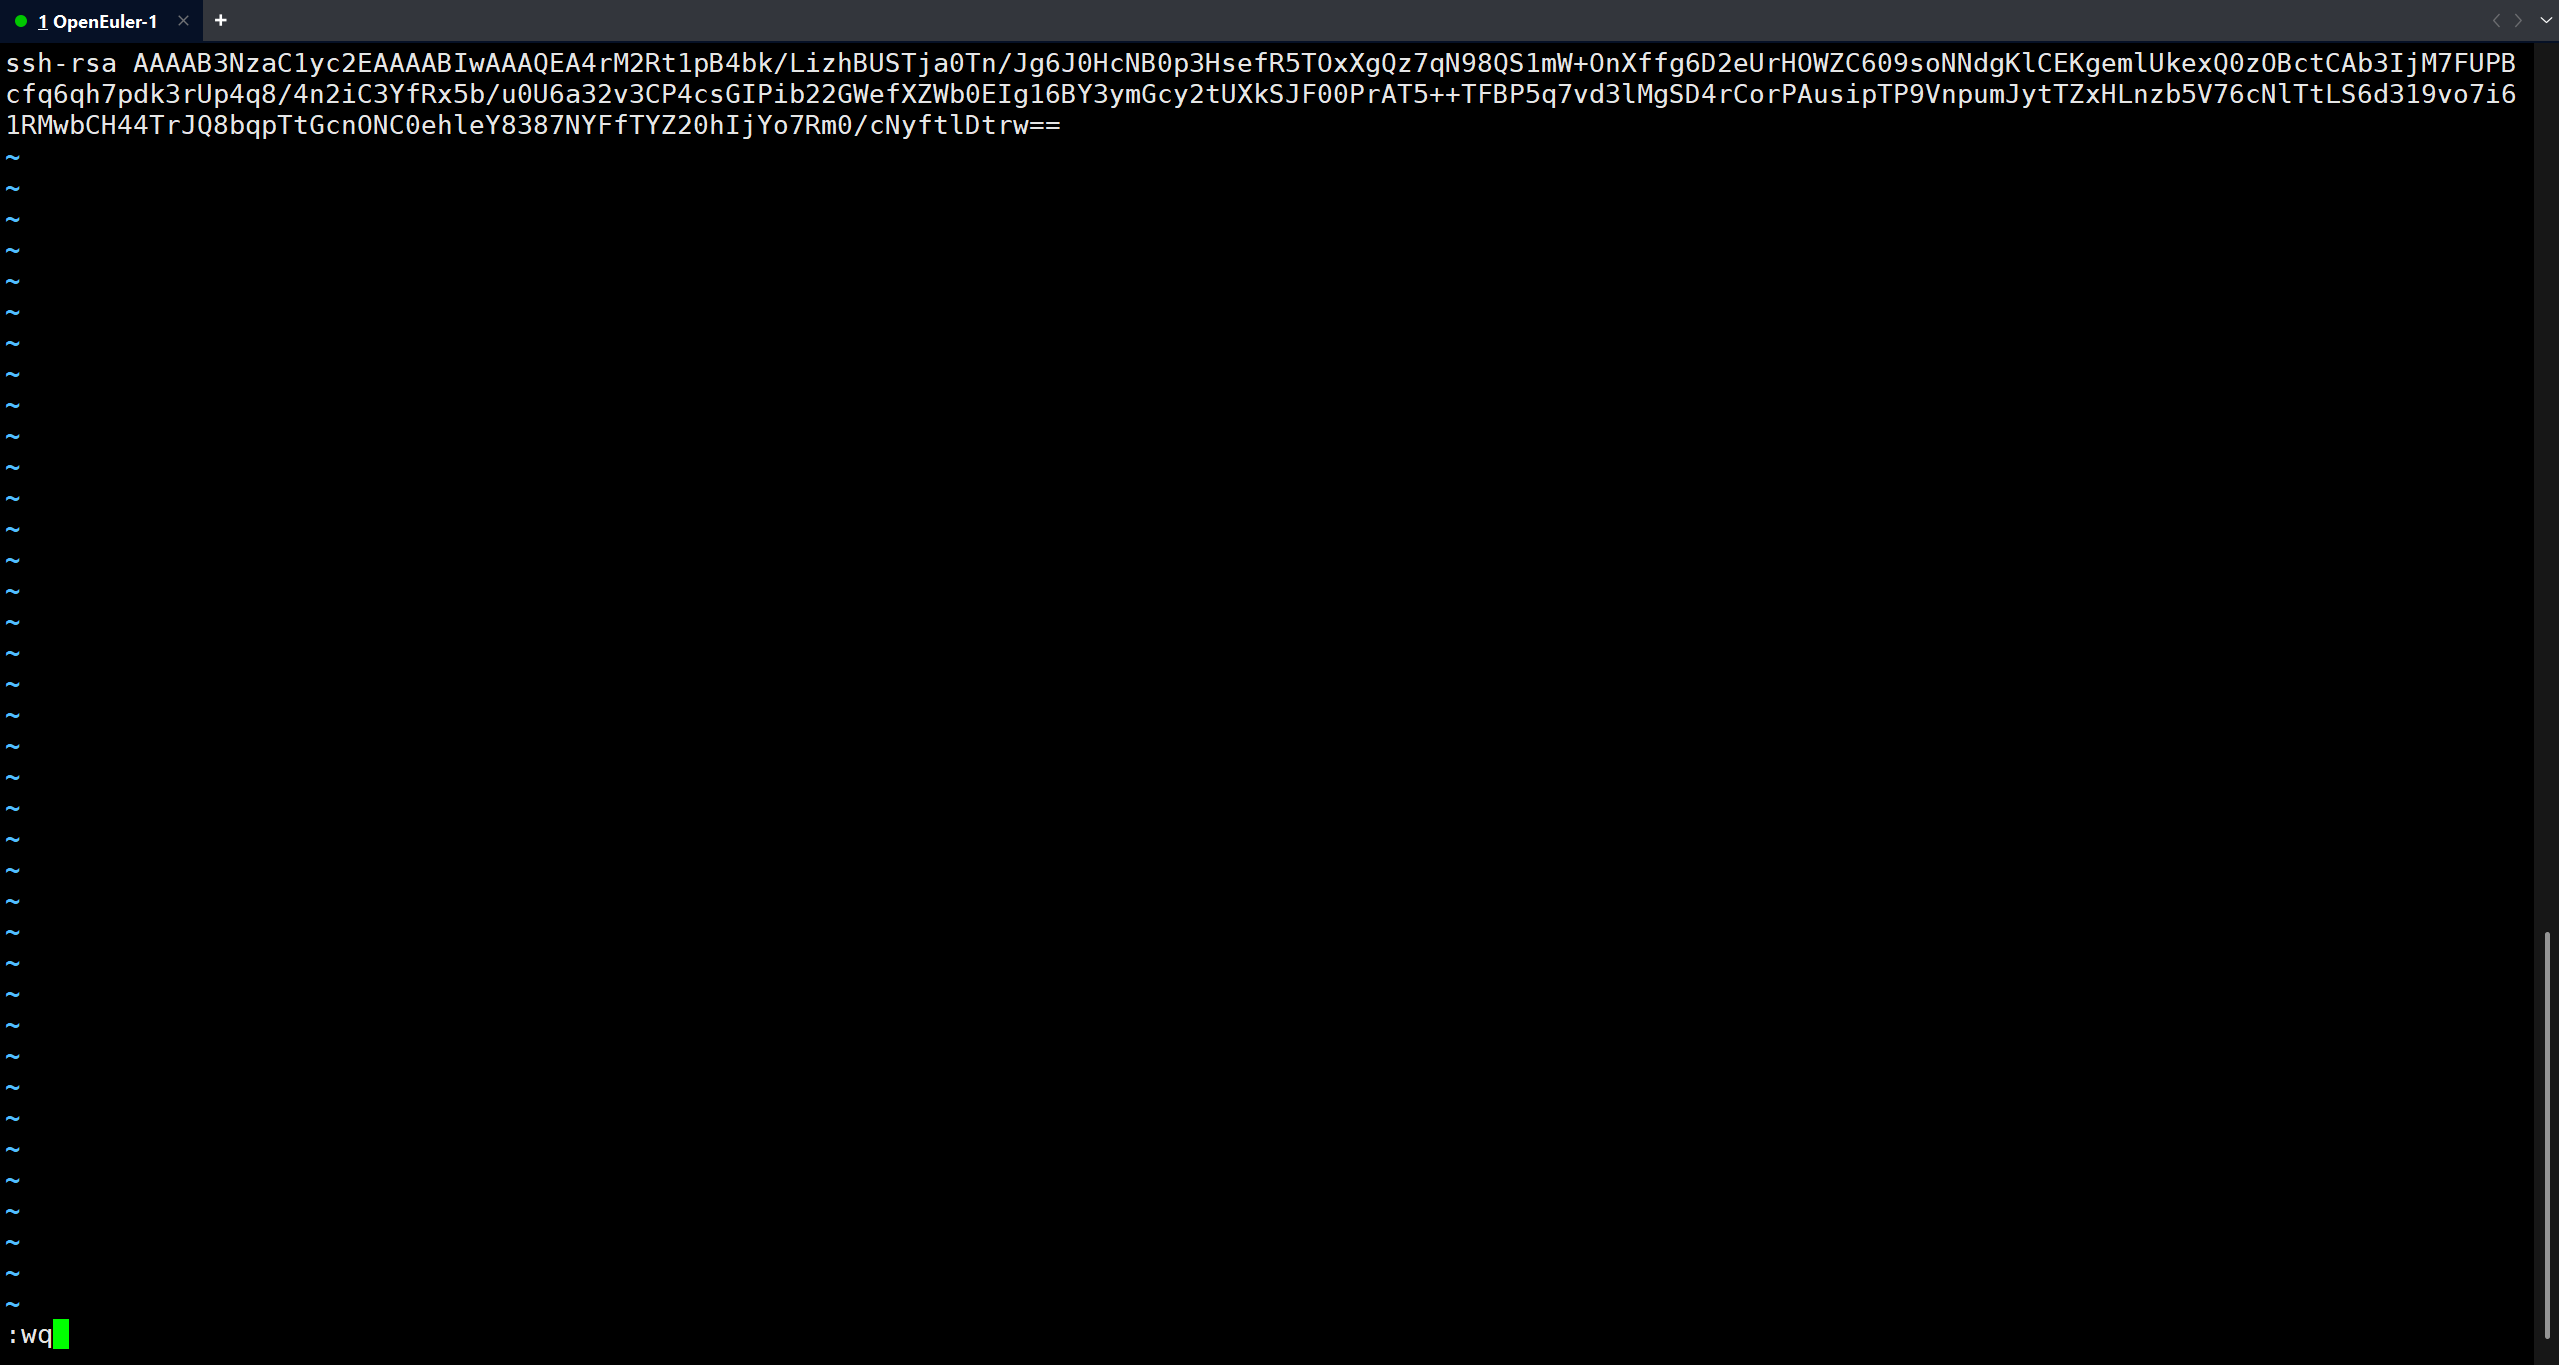
[root@kai ~]# vim /root/.ssh/authorized_keys     #将拷贝的公钥粘贴
[root@kai ~]# systemctl restart sshd    #重启服务
3.23 配置Xshell会话使用密钥登录
- 在Xshell中打开目标会话的属性(或新建会话)。
- 进入连接→用户身份验证,设置:
方法:选择Public Key。
用户名:输入Linux服务器的登录用户名(如root或普通用户)。
用户密钥:选择之前生成的密钥(如my_ssh_key)。 - 点击确定保存配置,重新连接会话。
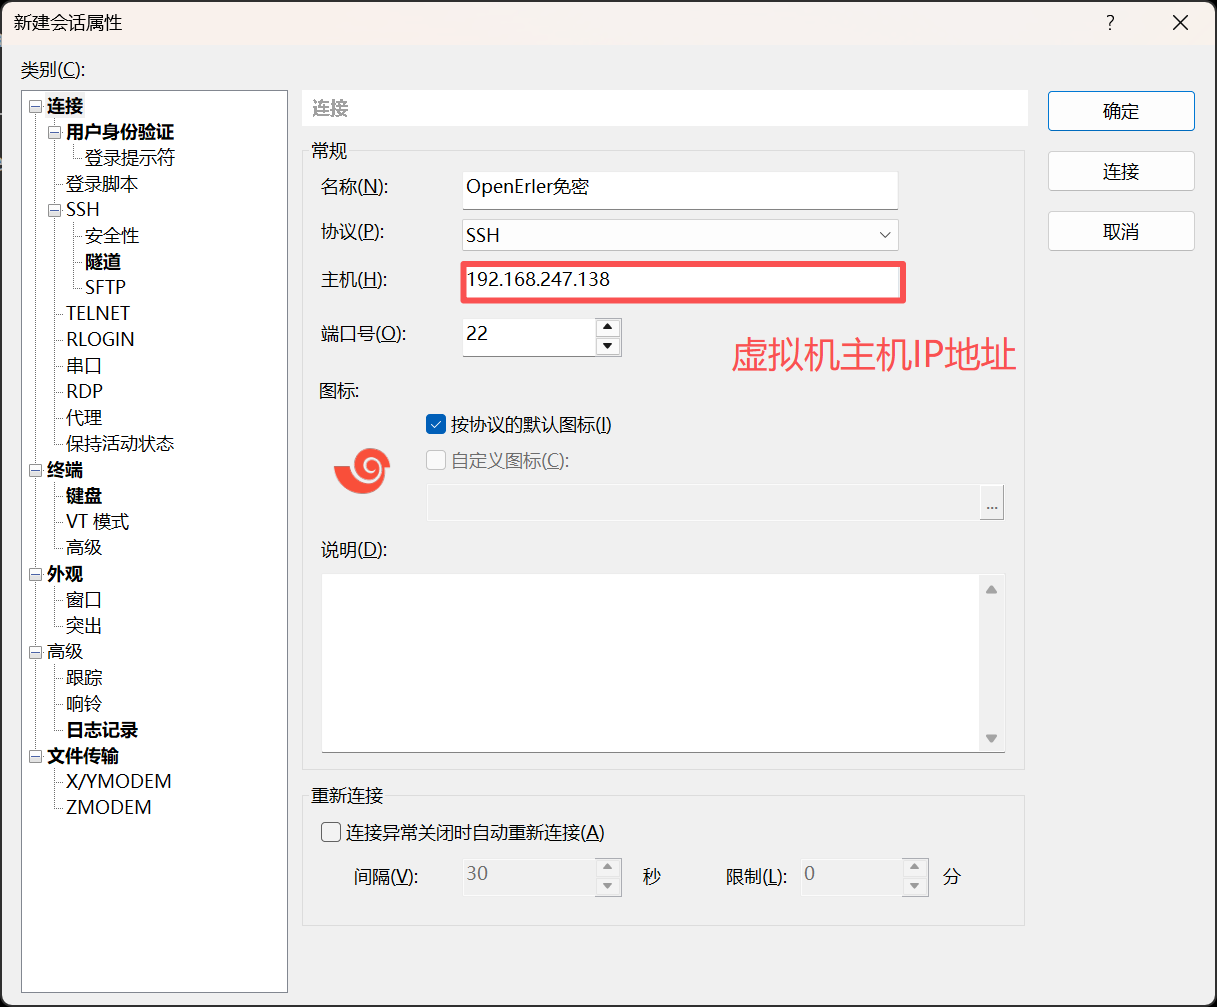
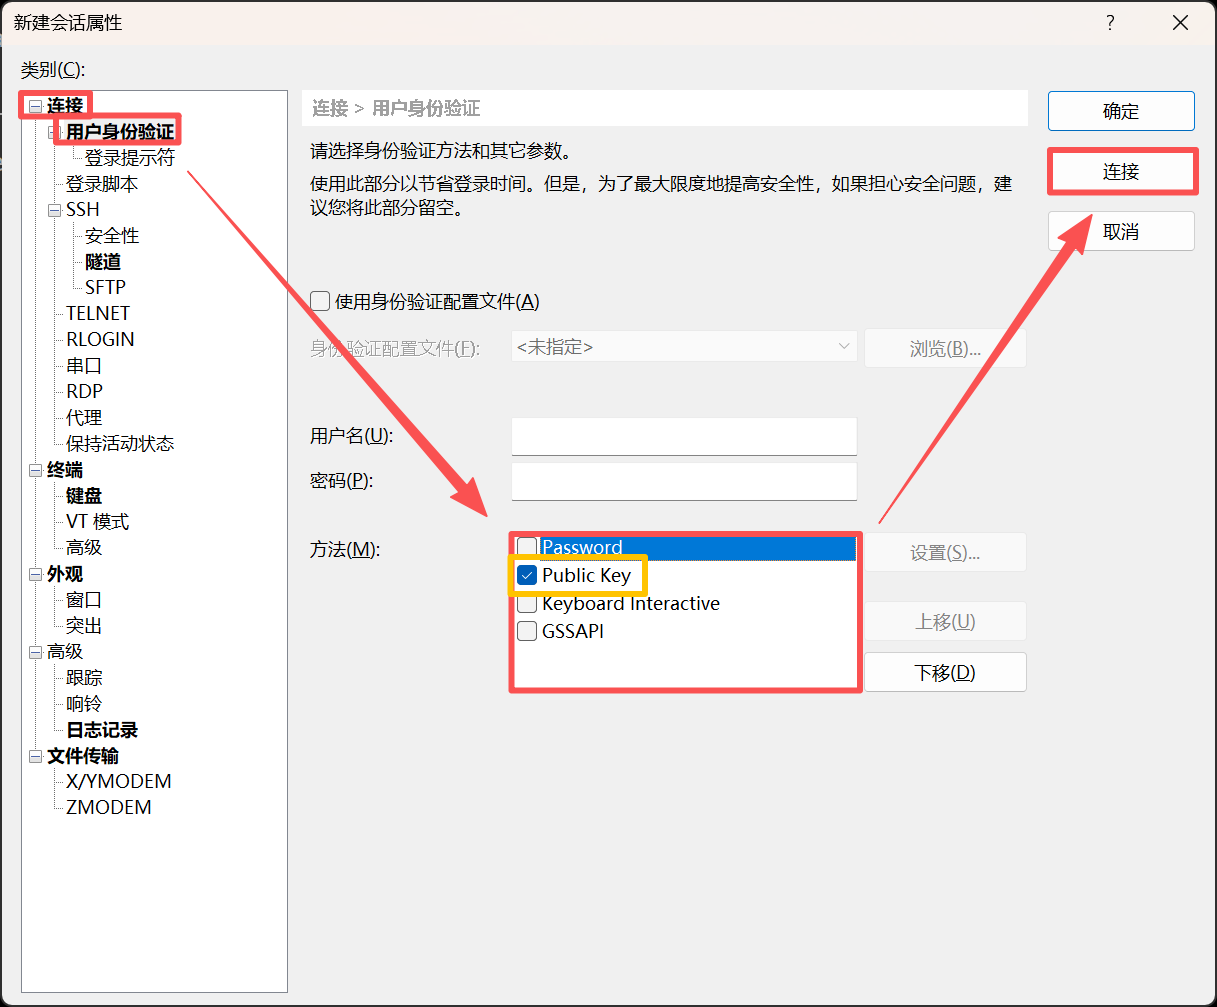
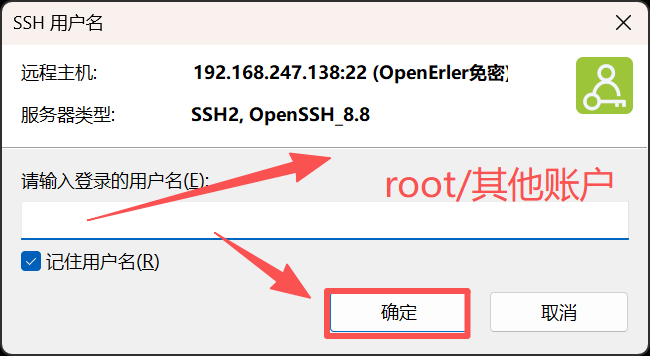
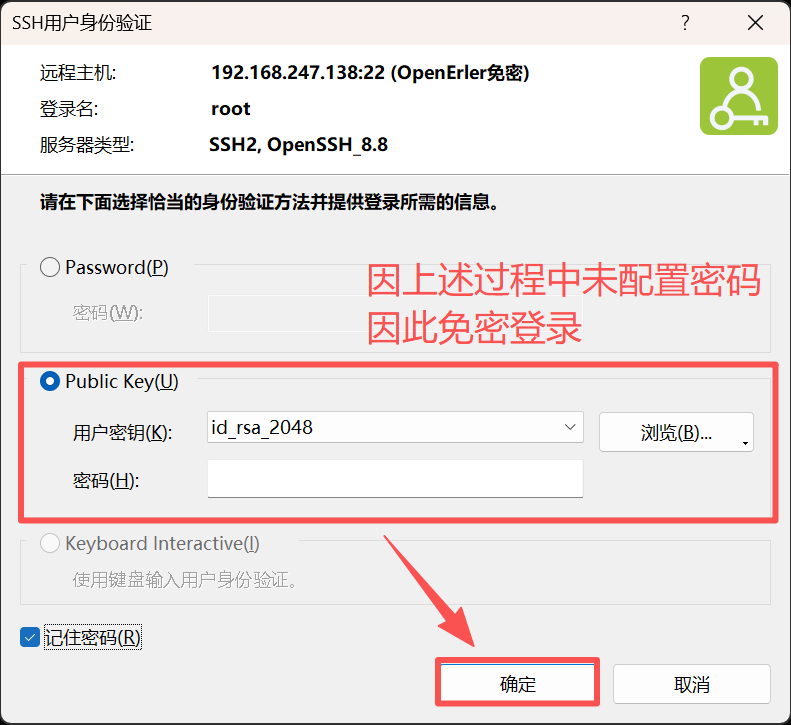
详细步骤可参考过往博客:Linux SSH免密登录实验:基于Xshell的公钥认证机制
四、实验结果
- NTP 时间同步结果
服务端成功连接上游时间源,本地时间校准为标准时间;
客户端通过ntpq -p命令可看到服务端 IP 已被列为时间源,date命令显示客户端与服务端时间误差小于 1 秒,同步成功。 - SSH 免密登录结果
客户端执行ssh redhat@192.168.10.100命令,直接登录服务端 redhat 账户,无需输入密码;
服务端/var/log/secure日志显示公钥认证成功,无密码登录失败记录。
五、实验总结
本次实验成功完成了 NTP 时间服务器的部署与客户端同步,以及基于公钥认证的 SSH 免密登录配置。通过实验,我理解了 NTP 协议和 SSH 非对称加密的工作原理,掌握了 Linux 系统服务配置、防火墙管理、权限控制等基础运维技能。同时也认识到,权限配置和网络策略是 Linux 服务安全运行的关键,错误的权限设置会直接导致免密登录等功能失效。后续可以进一步学习 chrony 时间同步服务和 SSH 安全加固(如禁用密码登录、修改默认端口),提升系统的安全性与稳定性。

openEuler 是由开放原子开源基金会孵化的全场景开源操作系统项目,面向数字基础设施四大核心场景(服务器、云计算、边缘计算、嵌入式),全面支持 ARM、x86、RISC-V、loongArch、PowerPC、SW-64 等多样性计算架构
更多推荐

 20
20 0
0- 0


 已为社区贡献4条内容

所有评论(0)