OpenResty代理Minio集群
·
1. 概述
- 搭建一套Minio集群并提供服务。集群采用6台服务器,每台8块7.2K 2T机械硬盘,EC:4,容量64T。
- 集群代理使用Openresty和Keepalived,配置了双活代理和基于IP或sessionid的一致性hash负载均衡。
- Linux下安装Minio集群,请参见 Linux部署Minio集群
- Minio集群的配置与使用,请参见 Minio简单配置及使用说明
2. 参考
官方文档: OpenResty
3. 环境
3.1 服务器
- DELL 730 12C/64G/600G,2台服务器组成代理集群
- 172.29.111.2 Centos7.9、Keepalive VIP 172.29.100.102(Master)
- 172.29.112.1 Centos7.9、Keepalive VIP 172.29.100.101(Master)
3.2 系统
- Centos7.9,操作系统安装略
- Keepalived
- OpenResty
3.3 网络
- 千兆网络
4. 部署OpenResty
4.1 安装OpenResty
参见:官方预编译包: OpenResty® Linux 包
1. 安装官方仓库
# add the yum repo:
wget https://openresty.org/package/centos/openresty.repo
sudo mv openresty.repo /etc/yum.repos.d/openresty.repo
# update the yum index:
sudo yum check-update
2. 查看仓库软件包
- 列出所有 openresty 仓库里头的软件包:
sudo yum --disablerepo="*" --enablerepo="openresty" list available
3. 安装openresty
sudo yum install -y openresty
4. 安装openresty-resty
如果你想安装命令行工具 resty,那么可以像下面这样安装 openresty-resty 包:
sudo yum install -y openresty-resty
5. 安装openresty-opm
命令行工具 opm 在 openresty-opm 包里,而 restydoc 工具在 openresty-doc 包里头。
sudo yum install -y openresty-opm
6. 查看openresty-opm
systemctl status openresty
4.2 配置OpenResty
- OpenResty通过对URL中sessionid等参数进行一致性hash,保证每次请求固定转发至同一台后端Minio服务器上,从而保证S3 API中分片上传时能够上传到同一台服务器
- 如果请求URL中没有包含sessionid等参数,OpenResty会使用请求的源IP自动计算一个sessionid
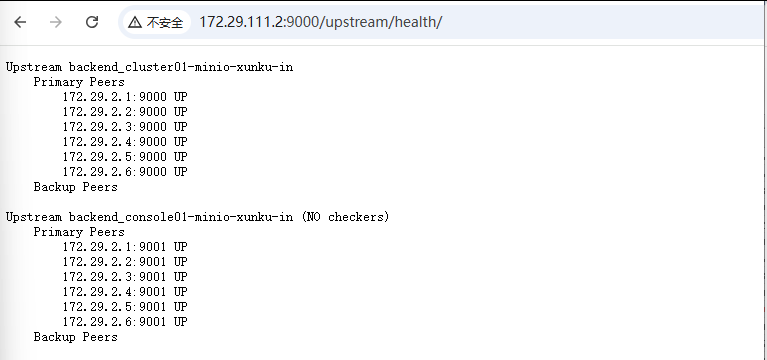
- OpenResty配置了Minio的健康检查页,当Minio后端服务器发生故障,能够自动从Upstream中剔除掉
1. 创建服务目录
# lua代码存储目录
mkdir -p /usr/local/openresty/nginx/conf/lua/
# 站点配置存储目录
mkdir -p /usr/local/openresty/nginx/conf/sites
# 域名证书存储目录
mkdir -p /usr/local/openresty/nginx/conf/ssl
2. 创建lua代码目录
cd /usr/local/openresty/nginx/conf/lua/
mkdir init_scripts
mkdir utils
3. 创建lua代码–通用初始化脚本
cd /usr/local/openresty/nginx/conf/lua/utils
vim init_loader.lua
local _M = {}

-- 获取所有站点初始化脚本(按文件名匹配)
function _M.get_site_init_scripts()
    ngx.log(ngx.ERR, "init_loader")

    local site_files = {}
    local handle = io.popen("ls /usr/local/openresty/nginx/conf/lua/init_scripts/*.lua 2>/dev/null")
    if handle then
        for file in handle:lines() do
            local name = file:match("([^/]+)%.lua$")
            table.insert(site_files, "init_scripts." .. name)
        end
        handle:close()
    end
    return site_files
end

-- 执行所有站点的初始化逻辑
function _M.run()
    local site_scripts = _M.get_site_init_scripts()

    for _, script_name in ipairs(site_scripts) do
        local ok, err = pcall(function()
            local script = require(script_name)

            if type(script.init) == "function" then
                ngx.log(ngx.INFO, "Running init for: ", script_name)
                script.init()  -- 调用站点的init函数
            end
        end)

        if not ok then
            ngx.log(ngx.ERR, "Failed to init ", script_name, ": ", err)
        end
    end
end

return _M
- 创建lua代码–集群代理站点专用
cd /usr/local/openresty/nginx/conf/lua/init_scripts
vim cluster01-minio-xunku-in.lua
local _M = {}
local healthcheck = require "resty.upstream.healthcheck"
local ngx = ngx

-- 健康检查配置(可扩展为多upstream)
local config = {
        shm = "cluster01-minio-xunku-in_shm",       -- 共享内存名称,站点配置文件会用
        upstream = "backend_cluster01-minio-xunku-in", -- upstream名称,站点配置文件会用

        type = "http",                    -- 检查类型
        http_req = "GET /minio/health/ready HTTP/1.1\r\nHost: minio\r\n\r\n",
        interval = 3000,                  -- 检查间隔(ms)
        timeout = 1000,                   -- 超时时间(ms)
        fall = 3,                         -- 失败阈值
        rise = 3,                         -- 恢复阈值
        valid_statuses = {200},           -- 有效状态码,这里取消了301
        concurrency = 10                  -- 并发数

}

-- 初始化健康检查
function _M.init()
    -- 站点的初始化逻辑-健康检查
    ngx.log(ngx.INFO, config.upstream, ": initializing health check...")

    -- 启动一个健康检查器,使用传入的配置文件。每个站点使用不同的配置
    local ok, err = healthcheck.spawn_checker(config)
    if not ok then
        ngx.log(ngx.ERR, "failed to spawn health checker for upstream [", config.upstream, "]: ", err)

    else
        ngx.log(ngx.INFO, "successfully spawned health checker for upstream [", config.upstream, "]")
    end

end

return _M
- 创建站点配置文件–集群服务代理站点专用
-
参考官方文档 Nginx服务器反向代理MinIO配置
-
参考官方文档健康检查 API
cd /usr/local/openresty/nginx/conf/sites
- 配置集群服务代理站点文件,监听9000端口,并定义了健康检查。
vim cluster01-minio-xunku-in.conf
    # 定义lua日志
    error_log /var/log/nginx/lua.log info;  # 单独 Lua 日志

    # 定义共享内存,名称在init_script目录的lua初始化脚本中使用
    lua_shared_dict cluster01-minio-xunku-in_shm 10m;

    # 定义upstream,名称在init_script目录的lua初始化脚本中使用
    upstream backend_cluster01-minio-xunku-in {

        # 使用URL中的sessionid作为哈希键
        hash $arg_sessionid consistent;

        server cluster01-1.minio.xunku.in:9000;
        server cluster01-2.minio.xunku.in:9000;
        server cluster01-3.minio.xunku.in:9000;
        server cluster01-4.minio.xunku.in:9000;
        server cluster01-5.minio.xunku.in:9000;
        server cluster01-6.minio.xunku.in:9000;

        keepalive 32;
    }

    server {
        listen       9000;
        listen  [::]:9000;
        server_name _;

        # Allow special characters in headers
        ignore_invalid_headers off;
        # Allow any size file to be uploaded.
        # Set to a value such as 1000m; to restrict file size to a specific value
        client_max_body_size 0;
        # Disable buffering
        proxy_buffering off;
        proxy_request_buffering off;

        # 确保sessionid或sessionid存在,否则生成一个
        set_by_lua_block $sessionid {
            -- local args = ngx.req.get_uri_args()

            -- 如果URL中已有sessionid则直接使用
            -- if args.sessionid then
            --     return args.sessionid
            -- end

            if ngx.var.arg_sessionid then  -- 直接使用 $arg_sessionid 的 Lua 表示
               return ngx.var.arg_sessionid    -- 判断是否存在sessionid
            elseif ngx.var.arg_sessionId then
               return ngx.var.arg_sessionId    -- 判断是否存在sessionId
            end

            if ngx.var.arg_uploadid then  -- 直接使用 $arg_uploadid, 为了分片上传同一服务器
               return ngx.var.arg_uploadid    -- 判断是否存在uploadid
            elseif ngx.var.arg_uploadId then
               return ngx.var.arg_uploadId    -- 判断是否存在uploadId
            end

            -- 否则生成新的sessionid (基于客户端特征MD5)
            local resty_md5 = require "resty.md5"
            local str = require "resty.string"

            -- 建议不同站点配置文件使用不同的salt_key
            local salt_key = "ZRVdfTSDRTvadFAd"
            local client_ip = ngx.var.remote_addr or ""
            local user_agent = ngx.var.http_user_agent or ""
            local accept_language = ngx.var.http_accept_language or ""

            -- 生成稳定指纹(不含时间戳)
            local client_fingerprint = ngx.md5(client_ip .. user_agent .. accept_language .. salt_key)

            local md5 = resty_md5:new()
            md5:update(client_fingerprint)
            local digest = md5:final()

            return str.to_hex(digest)
        }

        # 重写URL添加sessionid(如果不存在)
        rewrite_by_lua_block {
            local args = ngx.req.get_uri_args()
            if not args.sessionid then

                local new_args = ngx.req.get_uri_args() or {}
                new_args.sessionid = ngx.var.sessionid

                ngx.req.set_uri_args(new_args)

            end
        }

        # 主处理location
        location / {
            # 读取sessionid参数,写入lua.log日志
            #access_by_lua_block {
            #    local new_args = ngx.req.get_uri_args() or {}
            #    ngx.log(ngx.INFO, "new_args: ", new_args.sessionid)
            #}

            # 使用nginx内置变量arg_sessionid存入自定义变量,需要配合日志增加参数
            set $log_sessionid $arg_sessionid;

            # 响应头中返回(调试用)
            add_header X-Session-ID $arg_sessionid;

            # 修改upstrem名称,必须与 upstream 参数一致
            proxy_pass http://backend_cluster01-minio-xunku-in$request_uri;

            # 故障切换
            proxy_next_upstream error timeout http_500 http_502 http_503 http_504;
            #proxy_connect_timeout 2s;
            #proxy_read_timeout 5s;

            proxy_set_header Host $http_host;
            proxy_set_header X-Real-IP $remote_addr;
            proxy_set_header X-Forwarded-For $proxy_add_x_forwarded_for;
            proxy_set_header X-Forwarded-Proto $scheme;

            proxy_connect_timeout 300;
            # Default is HTTP/1, keepalive is only enabled in HTTP/1.1
            proxy_http_version 1.1;
            proxy_set_header Connection "";
            chunked_transfer_encoding off;

        }

        # 健康状态可视化页面-minio自带健康检查页,在集群代理站点lua文件中定义的
        location /upstream/health/ {
            allow 10.10.0.0/16;  #只允许该网段访问
            allow 172.31.0.0/16;  #只允许该网段访问
            deny  all;    #默认拒绝所有IP

            access_log off;
            default_type text/plain;
            content_by_lua_block {
                local hc = require "resty.upstream.healthcheck"
                ngx.say(hc.status_page())
            }
        }

    }
- 配置集群管理代理站点文件,监听9001端口。
vim console01-minio-xunku-in.conf
    upstream backend_console01-minio-xunku-in {

        # 参照官方推荐
        # https://www.minio.org.cn/docs/minio/linux/integrations/setup-nginx-proxy-with-minio.html#integrations-nginx-proxy

        least_conn;

        server cluster01-1.minio.xunku.in:9001 max_fails=3 fail_timeout=30s;
        server cluster01-2.minio.xunku.in:9001 max_fails=3 fail_timeout=30s;
        server cluster01-3.minio.xunku.in:9001 max_fails=3 fail_timeout=30s;
        server cluster01-4.minio.xunku.in:9001 max_fails=3 fail_timeout=30s;
        server cluster01-5.minio.xunku.in:9001 max_fails=3 fail_timeout=30s;
        server cluster01-6.minio.xunku.in:9001 max_fails=3 fail_timeout=30s;

    }

    server {

       listen       9001;
       listen  [::]:9001;
       server_name  _;

       # Allow special characters in headers
       ignore_invalid_headers off;
       # Allow any size file to be uploaded.
       # Set to a value such as 1000m; to restrict file size to a specific value
       client_max_body_size 0;
       # Disable buffering
       proxy_buffering off;
       proxy_request_buffering off;

       location / {
          proxy_set_header Host $http_host;
          proxy_set_header X-Real-IP $remote_addr;
          proxy_set_header X-Forwarded-For $proxy_add_x_forwarded_for;
          proxy_set_header X-Forwarded-Proto $scheme;
          proxy_set_header X-NginX-Proxy true;

          # This is necessary to pass the correct IP to be hashed
          real_ip_header X-Real-IP;

          proxy_connect_timeout 300;

          # To support websocket
          proxy_http_version 1.1;
          proxy_set_header Upgrade $http_upgrade;
          proxy_set_header Connection "upgrade";

          chunked_transfer_encoding off;

          proxy_pass http://backend_console01-minio-xunku-in/; # This uses the upstream directive definition to load balance
       }
    }
- 创建OpenResty主配置文件–nginx.conf
cd /usr/local/openresty/nginx/conf/
- 因为服务器只有12核,所以强制设置了worker_processes 8
worker_processes    8;
# https://nginx.org/en/docs/ngx_core_module.html#worker_cpu_affinity
#worker_cpu_affinity 00000001 00000010 00000100 00001000 00010000 00100000 01000000 10000000;
worker_cpu_affinity auto;

worker_rlimit_nofile 65535;

error_log  /var/log/nginx/error.log info;
#error_log  logs/error.log  notice;
#error_log  logs/error.log  info;

#pid        /var/run/nginx/nginx.pid;
#pid        logs/nginx.pid;

events {
    use epoll;
    worker_connections  10240;
}

http {
    include mime.types;
    default_type application/octet-stream;
#    log_format main  '$remote_addr - $remote_user [$time_local] "$request" '
#                '$status $body_bytes_sent "$http_referer" '
#                '"$http_user_agent" $http_x_forwarded_for';

    log_format main   '{"@timestamp":"$time_iso8601",'
                        '"@msec":"$msec",'
                        '"@source":"$server_addr",'
                        '"hostname":"$hostname",'
                        '"ip":"$http_x_forwarded_for",'
                        '"client":"$remote_addr",'
                        '"request_method":"$request_method",'
                        '"scheme":"$scheme",'
                        '"domain":"$server_name",'
                        '"referer":"$http_referer",'
                        '"request":"$request_uri",'
                        '"args":"$args",'
                        '"request_body":"$request_body",'
                        '"size":$body_bytes_sent,'
                        '"status": $status,'
                        '"responsetime":$request_time,'
                        '"upstreamtime":"$upstream_response_time",'
                        '"upstreamaddr":"$upstream_addr",'
                        '"http_user_agent":"$http_user_agent",'
                        '"https":"$https",'
                        #'"http_cookie: $http_cookie",'
                        #'"cookie_login_token: $cookie_login_token",'
                       '}';

   log_format json   '{"@timestamp":"$time_iso8601",'
                        '"@source":"$server_addr",'
                        '"hostname":"$hostname",'
                        '"ip":"$http_x_forwarded_for",'
                        '"client":"$remote_addr",'
                        '"request_method":"$request_method",'
                        '"scheme":"$scheme",'
                        '"domain":"$server_name",'
                        '"referer":"$http_referer",'
                        '"request":"$request_uri",'
                        '"args":"$args",'
                        #'"request_body":"$request_body",'
                        '"size":$body_bytes_sent,'
                        '"status": $status,'
                        '"responsetime":$request_time,'
                        '"upstreamtime":"$upstream_response_time",'
                        '"upstreamaddr":"$upstream_addr",'
                        '"http_user_agent":"$http_user_agent",'
                        '"https":"$https"'
                        '}';

    access_log  /var/log/nginx/access.log  main;
    #access_log  logs/access.log  main;

    map $http_upgrade $connection_upgrade {
        default upgrade;
        ''   close;
    }

    charset UTF-8;
    server_tokens off;
    server_names_hash_bucket_size 256;
    client_header_buffer_size 32k;
    large_client_header_buffers 8 32k;

    client_max_body_size 1024m;

    sendfile on;
    tcp_nopush on;
    keepalive_timeout 60;
    tcp_nodelay on;
    fastcgi_connect_timeout 300;
    fastcgi_send_timeout 300;
    fastcgi_read_timeout 300;
    fastcgi_buffer_size 64k;
    fastcgi_buffers 4 64k;
    fastcgi_busy_buffers_size 128k;
    fastcgi_temp_file_write_size 128k;
    gzip on;
    gzip_min_length 1k;
    gzip_buffers 4 16k;
    gzip_http_version 1.0;
    gzip_comp_level 2;
    gzip_types text/plain application/x-javascript text/css application/xml;
    gzip_vary on;

    # OpenResty的lua包搜索路径,多个路径使用;分隔。包含了/usr/local/openresty/nginx/conf/lua/
    lua_package_path "/usr/local/openresty/lualib/?.lua;/usr/local/openresty/nginx/conf/lua/?.lua;;";

    # 全局初始化逻辑
    init_worker_by_lua_block {
        ngx.log(ngx.STDERR, "Worker process starting...")

        ngx.log(ngx.STDERR, "init_worker log message - STDERR")
        ngx.log(ngx.ERR, "init_worker_by_lua_block: ")
        -- 加载通用初始化脚本
        local loader = require "utils.init_loader"
        loader.run()
    }

    # 管理虚拟主机。维护单个服务时可以注释掉,然后重新加载配置文件禁用服务!
    include /usr/local/openresty/nginx/conf/sites/cluster01-minio-xunku-in.conf;
    include /usr/local/openresty/nginx/conf/sites/console01-minio-xunku-in.conf;
}
4.3 启动OpenResty
# 验证命令
openresty -t -c /usr/local/openresty/nginx/conf/nginx.conf

# 验证结果
nginx: the configuration file /usr/local/openresty/nginx/conf/nginx.conf syntax is ok
nginx: configuration file /usr/local/openresty/nginx/conf/nginx.conf test is successful
# 启动和查看命令
systemctl start openresty && systemctl status openresty

# 查看结果
● openresty.service - The OpenResty Application Platform
   Loaded: loaded (/usr/lib/systemd/system/openresty.service; enabled; vendor preset: disabled)
   Active: active (running) since 四 2025-07-17 09:35:57 CST; 1h 45min ago
  Process: 7095 ExecStop=/bin/kill -s QUIT $MAINPID (code=exited, status=0/SUCCESS)
  Process: 7113 ExecStartPost=/bin/sleep 1 (code=exited, status=0/SUCCESS)
  Process: 7103 ExecStart=/usr/local/openresty/nginx/sbin/nginx (code=exited, status=0/SUCCESS)
  Process: 7100 ExecStartPre=/usr/local/openresty/nginx/sbin/nginx -t (code=exited, status=0/SUCCESS)
 Main PID: 7104 (nginx)
   CGroup: /system.slice/openresty.service
           ├─7104 nginx: master process /usr/local/openresty/nginx/sbin/nginx
           ├─7105 nginx: worker process
           ├─7106 nginx: worker process
           ├─7107 nginx: worker process
           ├─7108 nginx: worker process
           ├─7109 nginx: worker process
           ├─7110 nginx: worker process
           ├─7111 nginx: worker process
           └─7112 nginx: worker process
......
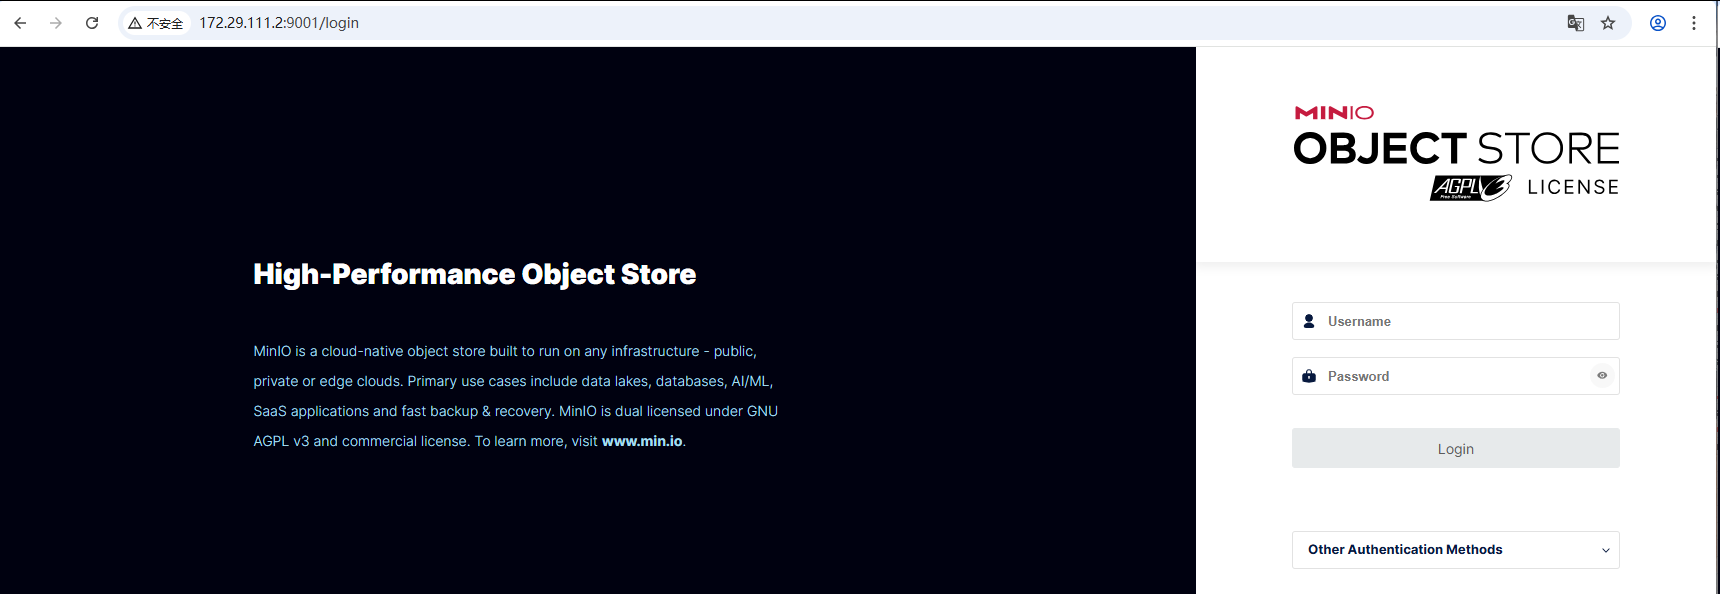
4.4 验证OpenResty
-
访问http://172.29.111.2:9001/ 或 http://172.29.112.1:9001/
-
访问http://172.29.111.2:9000/upstream/health/ 或 http://172.29.112.1:9000/upstream/health/
5 部署Keepalived
- 两台服务器配置两个VIP,每台绑定一个Master VIP和一个Backup VIP
- 然后使用一个域名解析两个VIP(DNS轮询)
- 如果后续增加代理服务器,建议环状增加VIP。例如:3台代理服务器,3个VIP,每台绑定一个Master VIP,同时绑定前一台服务器的Backup VIP
5.1 安装Keepalived
yum install -y epel-release
yum install keepalived
5.2 配置Keepalived
两台服务器配置两个VIP
- 172.29.111.2 绑定 VIP 172.29.100.102(Master),VIP 172.29.100.101(Backup)
- 172.29.112.1 绑定 VIP 172.29.100.101(Master),VIP 172.29.100.102(Backup)
cp /etc/keepalived/keepalived.conf /etc/keepalived/keepalived.conf.bak
vim /etc/keepalived/keepalived.conf
- 172.29.111.2服务器配置
! Configuration File for keepalived

global_defs {
   router_id Master02
   vrrp_version 2
   vrrp_garp_master_delay 1
   script_user root
   enable_script_security
}

# 检查nginx进程的脚本
vrrp_script chk_nginx {
    script       "/usr/bin/killall -0 nginx"
    timeout 3
    interval 3   # check every 1 second
    fall 2       # require 2 failures for KO
    rise 2       # require 2 successes for OK
}

# BACKUP 节点,权重50,配置nopreempt,VIP 172.29.100.101
vrrp_instance lb-minio_1 {
    state BACKUP
    interface em1
    virtual_router_id 51
    priority 50
    advert_int 1
    nopreempt

    authentication {
        auth_type PASS
        auth_pass kx00*00xk
    }

    virtual_ipaddress {
        172.29.100.101
    }

    track_script {
        chk_nginx
    }
}

# MASTER节点,权重100,禁用nopreempt,VIP 172.29.100.102
vrrp_instance lb-minio_2 {
    state MASTER
    interface em1
    virtual_router_id 52
    priority 100
    advert_int 1
    #nopreempt

    authentication {
        auth_type PASS
        auth_pass kx00*00xk
    }

    virtual_ipaddress {
        172.29.100.102
    }

    track_script {
        chk_nginx
    }
}
- 172.29.112.1服务器配置
! Configuration File for keepalived

global_defs {
   router_id Master01
   vrrp_version 2
   vrrp_garp_master_delay 1
   script_user root
   enable_script_security
}

vrrp_script chk_nginx {
    script       "/usr/bin/killall -0 nginx"
    timeout 3
    interval 3   # check every 1 second
    fall 2       # require 2 failures for KO
    rise 2       # require 2 successes for OK
}

vrrp_instance lb-minio_1 {
    state MASTER
    interface em1
    virtual_router_id 51
    priority 100
    advert_int 1
    #nopreempt

    authentication {
        auth_type PASS
        auth_pass kx00*00xk
    }

    virtual_ipaddress {
        172.29.100.101
    }

    track_script {
        chk_nginx
    }
}

vrrp_instance lb-minio_2 {
    state BACKUP
    interface em1
    virtual_router_id 52
    priority 50
    advert_int 1
    nopreempt

    authentication {
        auth_type PASS
        auth_pass kx00*00xk
    }

    virtual_ipaddress {
        172.29.100.102
    }

    track_script {
        chk_nginx
    }
}
5.3 启动Keepalived
systemctl start keepalived && systemctl enable keepalived
# 查看服务命令
systemctl status keepalived
# 显示结果
● keepalived.service - LVS and VRRP High Availability Monitor
   Loaded: loaded (/usr/lib/systemd/system/keepalived.service; enabled; vendor preset: disabled)
   Active: active (running) since 五 2025-06-13 14:16:31 CST; 1 months 4 days ago
 Main PID: 1603 (keepalived)
   CGroup: /system.slice/keepalived.service
           ├─1603 /usr/sbin/keepalived -D
           ├─1604 /usr/sbin/keepalived -D
           └─1605 /usr/sbin/keepalived -D

......
5.4 验证Keepalived
# 查看IP命令,显示本机IP和绑定的Master VIP 172.29.100.102
ip a | grep em1
# 显示结果`在这里插入代码片`
2: em1: <BROADCAST,MULTICAST,UP,LOWER_UP> mtu 1500 qdisc mq state UP group default qlen 1000
    inet 172.29.111.2/16 brd 172.29.255.255 scope global noprefixroute em1
    inet 172.29.100.102/32 scope global em1
# 查看IP命令,显示本机IP和绑定的Master VIP 172.29.100.101
ip a |grep em1
# 显示结果
2: em1: <BROADCAST,MULTICAST,UP,LOWER_UP> mtu 1500 qdisc mq state UP group default qlen 1000
    inet 172.29.112.1/16 brd 172.29.255.255 scope global noprefixroute em1
    inet 172.29.100.101/32 scope global em1
6 配置内部域名解析
内部DNS使用1个域名轮询方式解析两台OpenResty代理服务器的VIP。
6.1 增加域名A记录
; openresty
cluster01.minio.xunku.in.               IN      A       172.29.100.101
cluster01.minio.xunku.in.               IN      A       172.29.100.102
; 分片上传时使用,保证每次请求都固定发送到同一后端minio服务器上
cluster01-gw01.minio.xunku.in.          IN      A       172.29.100.101
cluster01-gw02.minio.xunku.in.          IN      A       172.29.100.102
6.1 增加域名A记录
# 查看域名解析命令
nslookup cluster01.minio.xunku.in
# 显示结果
Server:         172.26.112.2
Address:        172.26.112.2#53

Name:   cluster01.minio.xunku.in
Address: 172.29.100.101
Name:   cluster01.minio.xunku.in
Address: 172.29.100.102

openEuler 是由开放原子开源基金会孵化的全场景开源操作系统项目,面向数字基础设施四大核心场景(服务器、云计算、边缘计算、嵌入式),全面支持 ARM、x86、RISC-V、loongArch、PowerPC、SW-64 等多样性计算架构
更多推荐


 10
10 0
0- 0


 已为社区贡献6条内容

所有评论(0)