NGINX服务(六)
nginx 服务
nginx 定位
web 服务器、反向代理服务器、缓存服务器、邮件服务器
架构:master【程序管理】-worker【处理请求的】
安装方式:二进制包、源码包【注意编译环境】
配置结构:全局、event、http [server【location】]
server 重要属性:listen(指定监听端口)、root(设定网站根目录)、index(设定默认首页)、alias(别名,映射)
location 重要属性:root(拼接访问路径与本地目录)、index(指定默认访问文件)、alias(精准匹配替换访问路径)
访问流量逻辑:客户端请求→监听端口匹配 server 虚拟主机→匹配对应 location→按规则转发 / 反向代理 / 返回静态资源→响应数据回传给客户端。
nginx 功能
多网站(配置多虚拟主机,也就是多server块)、
alias 和 root (实现网站目录路径映射)、
日志(访问日志,错误日志记录)、
状态页面(stub_status查看运行状态)、
身份认证(账号密码,登录校验)、
https(SSL证书加密传输 )
[rewrite(URL地址重写跳转)]、
防盗链(通过Referer拦截非法盗链)
nginx实践
nginx动静分离
注:client(客户端) 12主机
proxy Server代理 Ubuntu13
API server动态 ubuntu 16
Static server静态 openuler
1.OpenEuler实现静态分离服务配置环境
echo "Static Web Server" > /usr/share/nginx/html/index.html
cat /etc/nginx/default.d/simple.conf
location / {
add_header X-Host $host;
}
![]()

启动nginx服务
systemctl start nginx
关闭防火墙
systemctl stop firewalld
测试效果
curl localhost

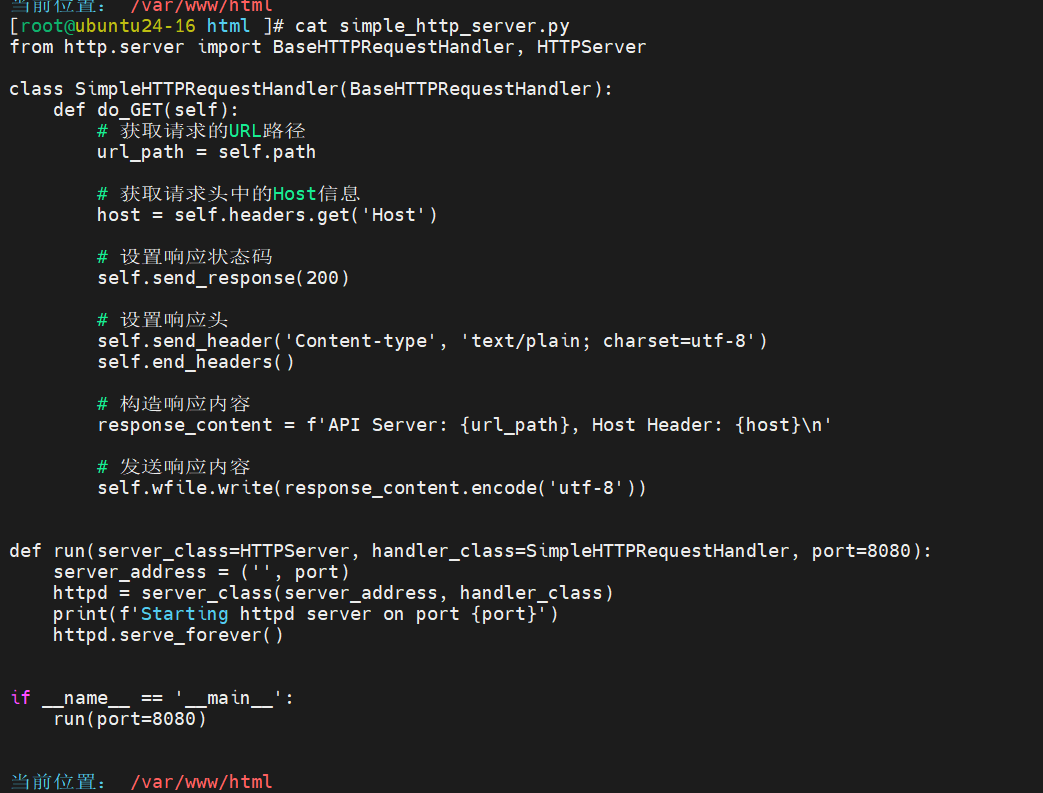
2.ubuntu16动态配置,定制python的web服务
from http.server import BaseHTTPRequestHandler, HTTPServer

class SimpleHTTPRequestHandler(BaseHTTPRequestHandler):
    def do_GET(self):
        # 获取请求的URL路径
        url_path = self.path

        # 获取请求头中的Host信息
        host = self.headers.get('Host')

        # 设置响应状态码
        self.send_response(200)

        # 设置响应头
        self.send_header('Content-type', 'text/plain; charset=utf-8')
        self.end_headers()

        # 构造响应内容
        response_content = f'API Server: {url_path}, Host Header: {host}\n'

        # 发送响应内容
        self.wfile.write(response_content.encode('utf-8'))


def run(server_class=HTTPServer, handler_class=SimpleHTTPRequestHandler, port=8080):
    server_address = ('', port)
    httpd = server_class(server_address, handler_class)
    print(f'Starting httpd server on port {port}')
    httpd.serve_forever()


if __name__ == '__main__':
    run(port=8080)
启动python服务
python3 simple_http_server.py > /dev/null 2&1 &
测试
curl 10.0.0.16:8080/nihao


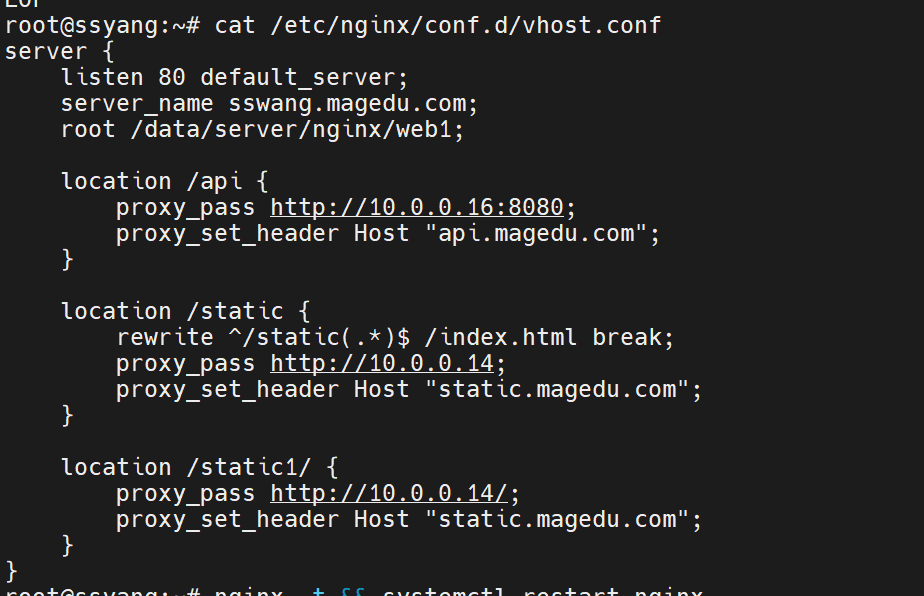
实现代理配置ubuntu13
server {
    listen 80 default_server;
    server_name sswang.magedu.com;
    root /data/server/nginx/web1;

    location /api {
        proxy_pass http://10.0.0.16:8080;
        proxy_set_header Host "api.magedu.com";
    }

    location /static {
        rewrite ^/static(.*)$ /index.html break;
        proxy_pass http://10.0.0.14;
        proxy_set_header Host "static.magedu.com";
    }

    location /static1/ {
        proxy_pass http://10.0.0.14/;
        proxy_set_header Host "static.magedu.com";
    }
}
重启服务
systemctl restart nginx
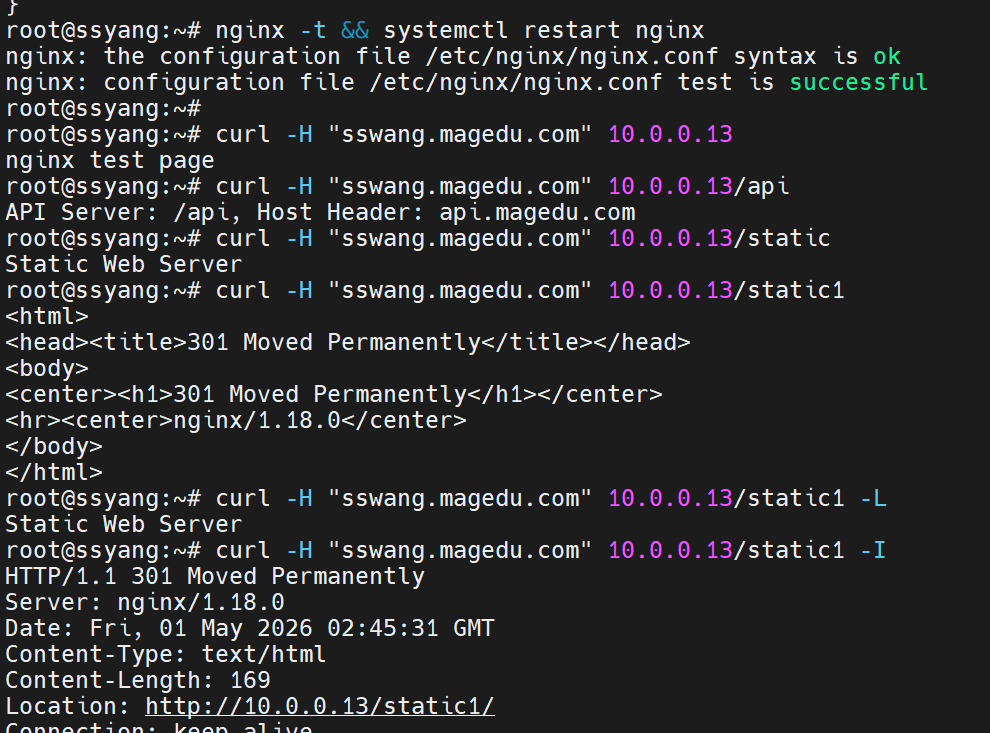
测试效果
nginx -t && systemctl restart nginx
curl -H "sswang.magedu.com" 10.0.0.13
curl -H "sswang.magedu.com" 10.0.0.13/api
curl -H "sswang.magedu.com" 10.0.0.13/static
curl -H "sswang.magedu.com" 10.0.0.13/static1
curl -H "sswang.magedu.com" 10.0.0.13/static1 -L
curl -H "sswang.magedu.com" 10.0.0.13/static1 -I
 1
1
客户端测试rocky12
curl -H "sswang.magedu.com" 10.0.0.13/static1 -L
curl -H "sswang.magedu.com" 10.0.0.13/static1 -I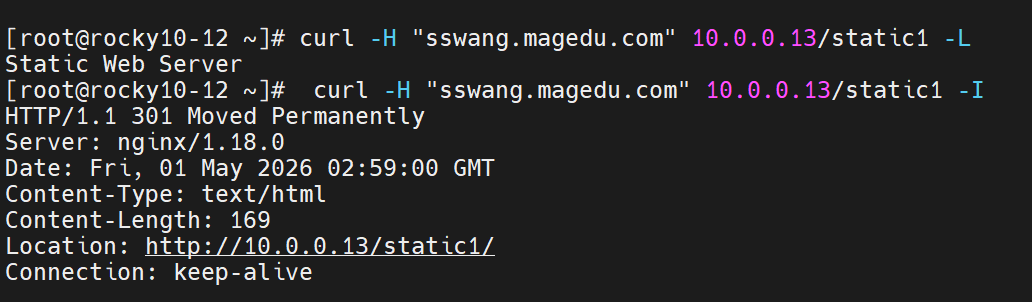
Nginx+Node+NPM 实验
实验名称:Nginx 反向代理对接 Node.js NPM 项目综合演示 实验主机:
- 代理端:Rocky 10-15(IP 10.0.0.15,部署 Nginx)
- 服务端:Rocky 10-12(IP 10.0.0.12,部署 Node+NPM)
二、后端 10.0.0.12 Node 服务端
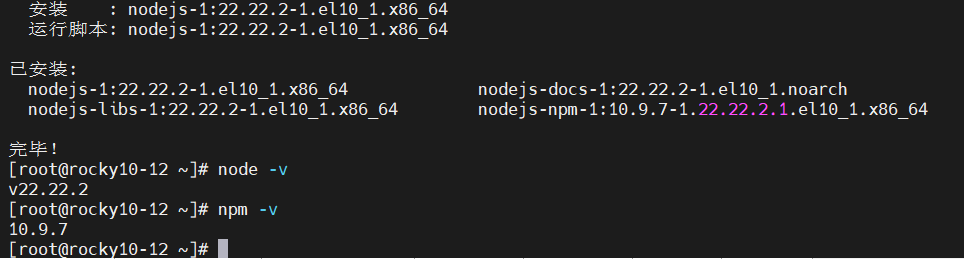
安装 Node.js 和 NPM 环境 执行命令:
dnf install nodejs npm -y
node -v
npm -v
创建实验项目目录并初始化 NPM 项目 执行命令:
mkdir -p /opt/nginx-node-demo
cd /opt/nginx-node-demo npm init -y

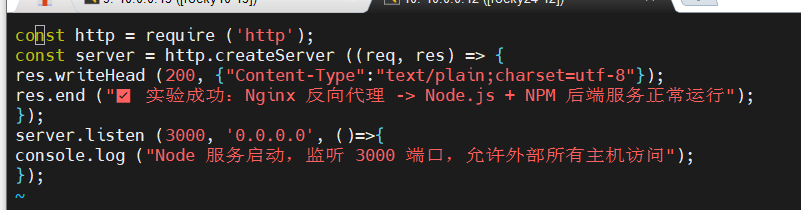
编写 Node 演示 Web 服务 执行命令创建服务文件:
vim index.js
放行端口、关闭安全拦截 执行命令:
firewall-cmd --add-port=3000/tcp --permanent
firewall-cmd --reload
setenforce 0

启动 Node 后端服务 执行命令:
node index.js

三、前端 10.0.0.15 Nginx 代理端
安装 Nginx 服务 执行命令:
dnf install nginx -y
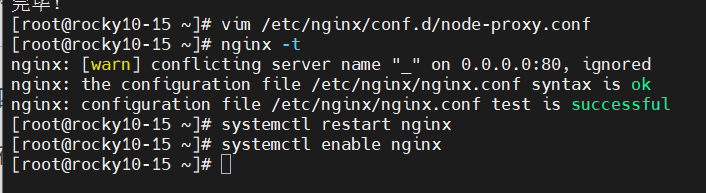
创建反向代理配置文件 执行命令:
vim /etc/nginx/conf.d/node-proxy.conf
server {
    listen 80;
    server_name _;

    location / {
        proxy_pass http://10.0.0.12:3000;
        proxy_set_header Host $host;
        proxy_set_header X-Real-IP $remote_addr;
        proxy_set_header X-Forwarded-For $proxy_add_x_forwarded_for;
    }
}
校验配置并重启 Nginx 执行命令:
nginx -t
systemctl restart nginx
systemctl enable nginx
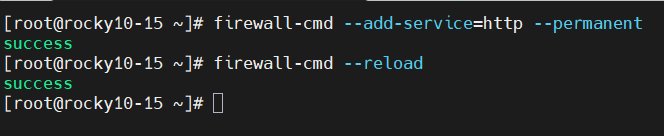
放行 Nginx 80 端口 执行命令:
firewall-cmd --add-service=http --permanent
firewall-cmd --reload
四、连通验证步骤
在 10.0.0.15 代理主机执行测试访问 curl localhost
浏览器直接访问 http://10.0.0.15 成功看到 Node 后端返回文字,代表整个实验全部完成


五、NPM 演示
在后端项目目录执行 NPM 包管理操作: npm install express --save 实现 Express 框架的 Node Web 项目部署演示

nginx反向代理实验
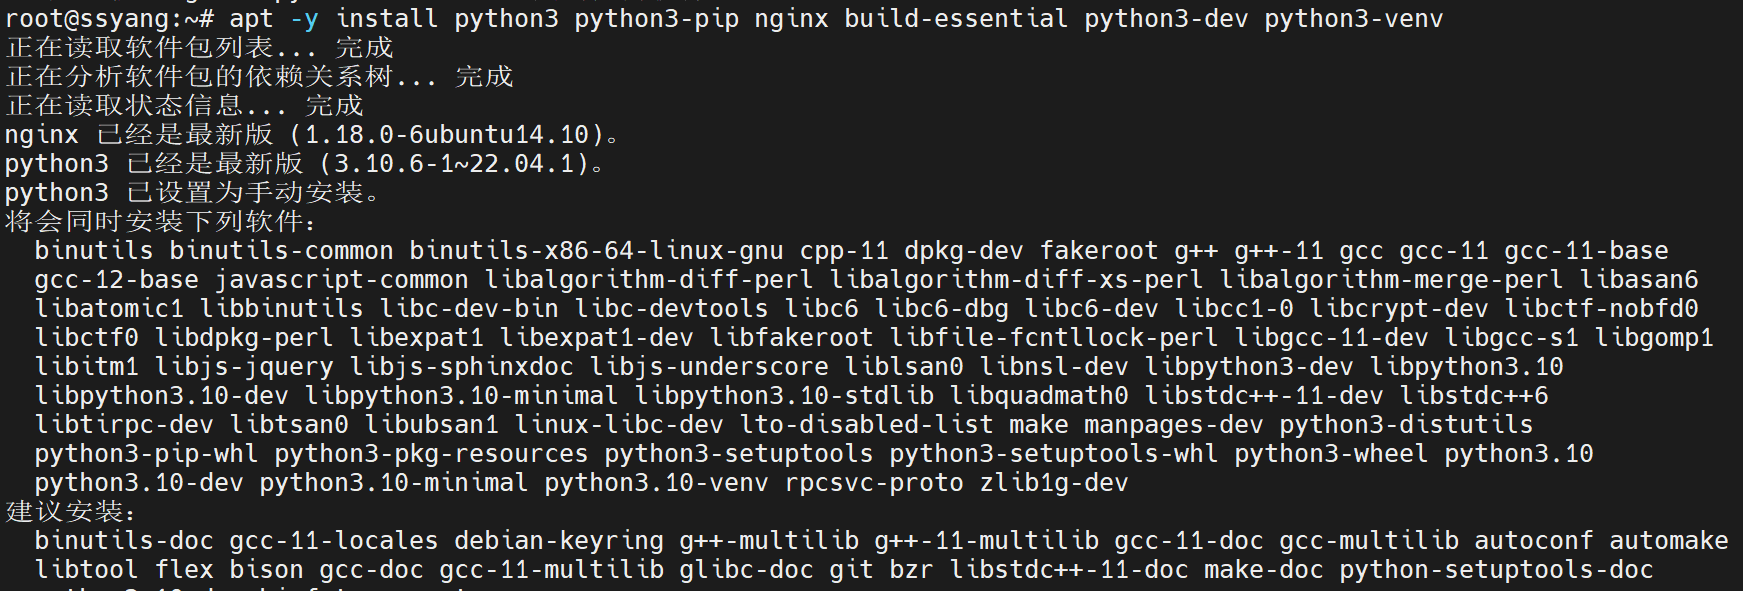
部署python环境
apt -y install python3 python3-pip nginx build-essential python3-dev python3-venv
创建python虚拟环境
cd /data/
ls
python3 -m venv myprojectenv
source myprojectenv/bin/activate
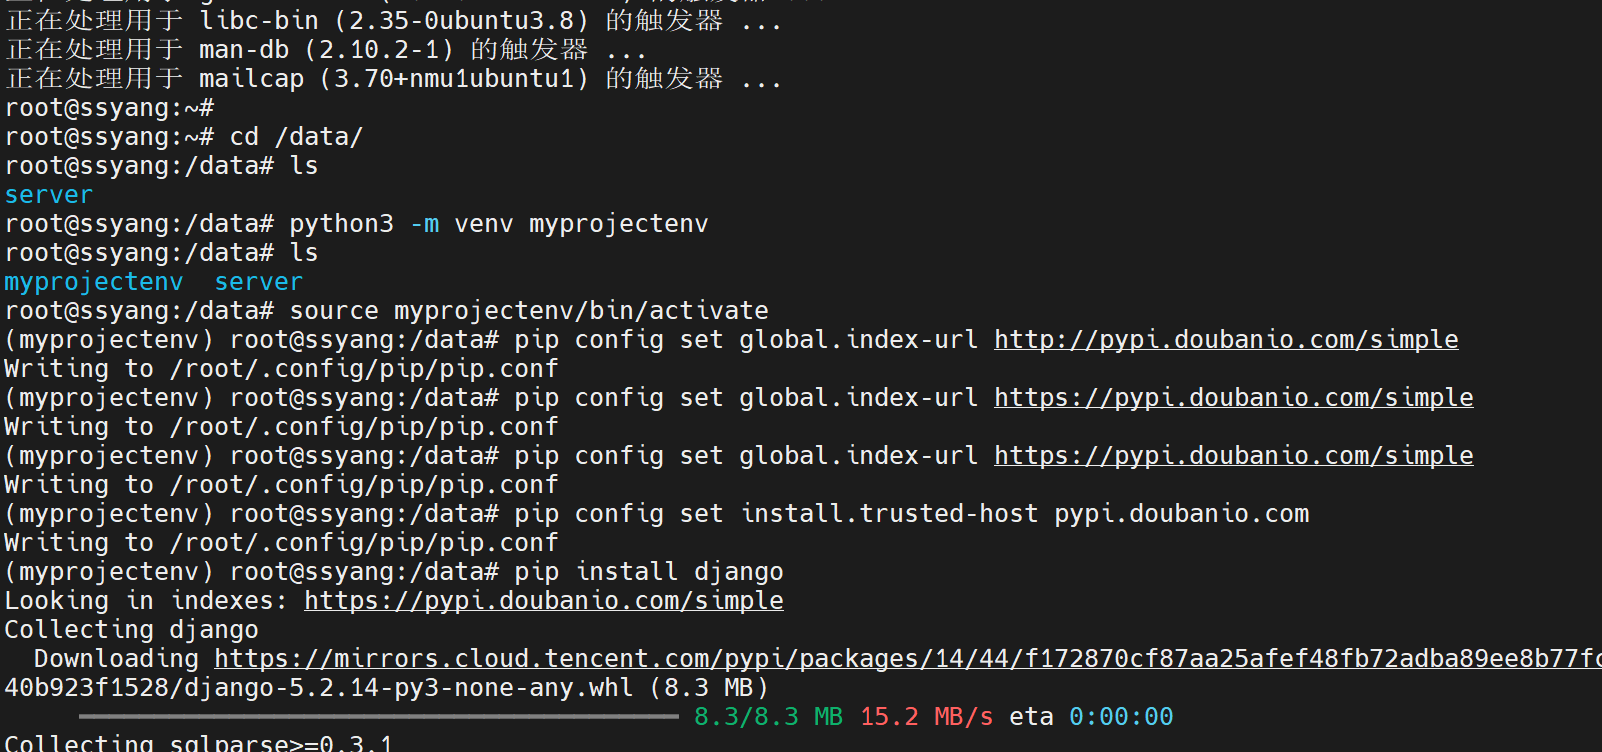
安装django环境
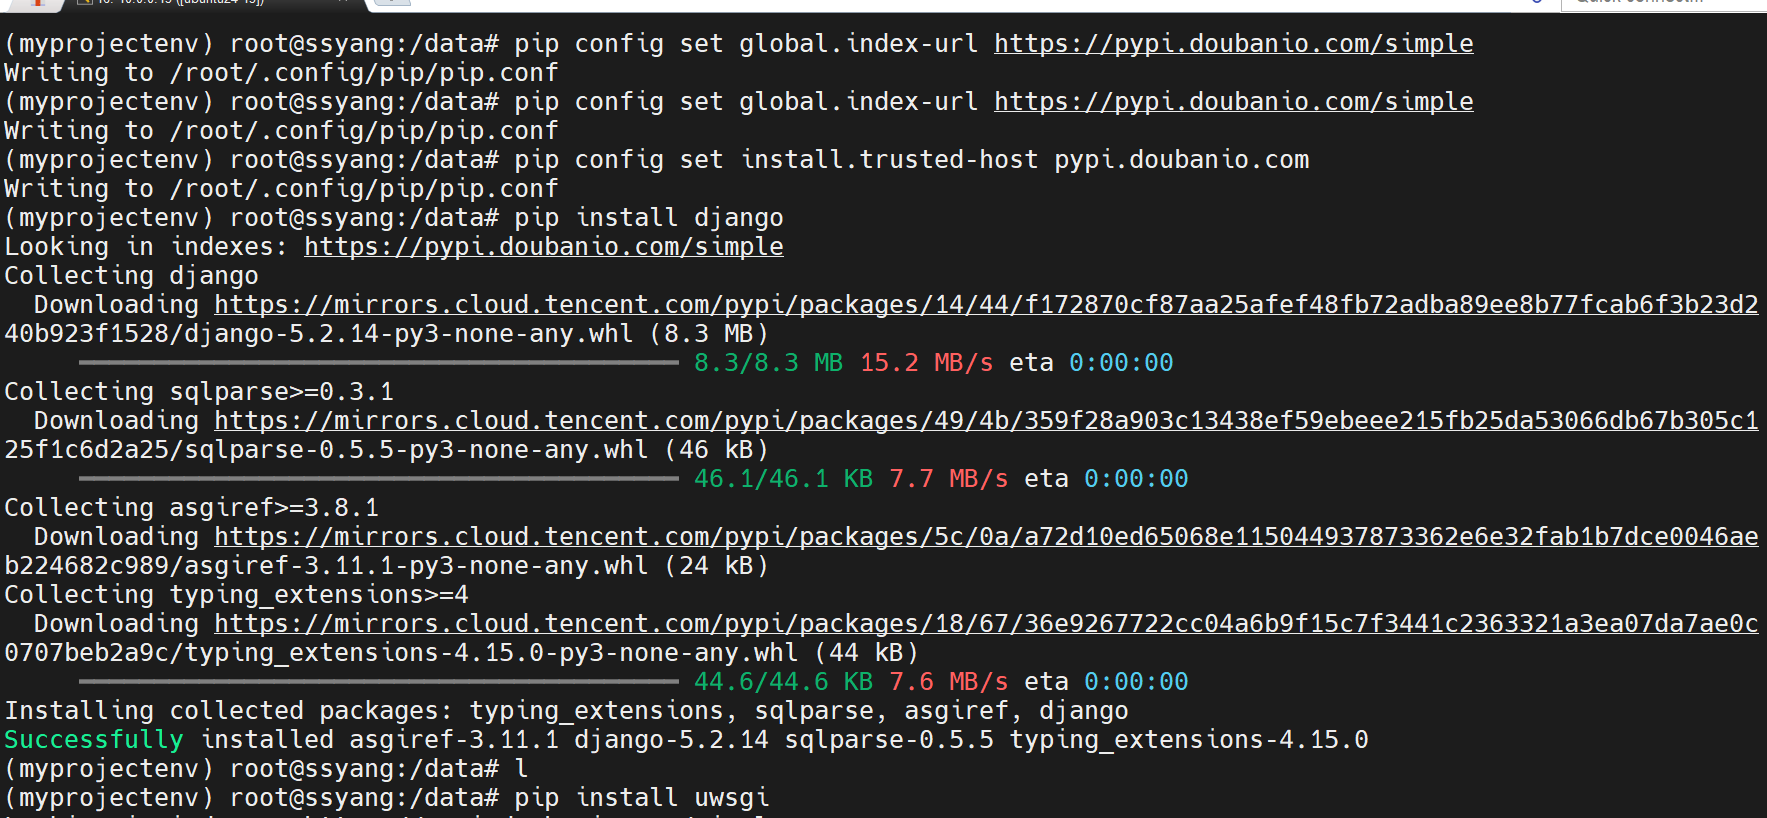
pip config set global.index-url https://pypi.doubanio.com/simple
pip config set install.trusted-host pypi.doubanio.com
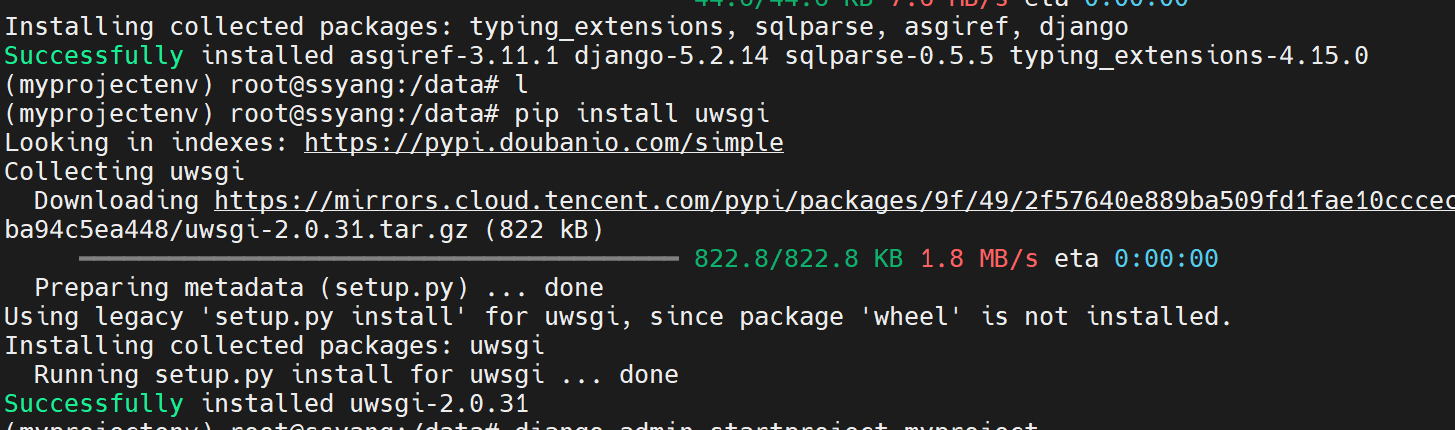
pip install django
pip install uwsgi
安装django项目
django-admin startproject myproject
配置django项目
cd myproject
ls

vim myproject/settings.py

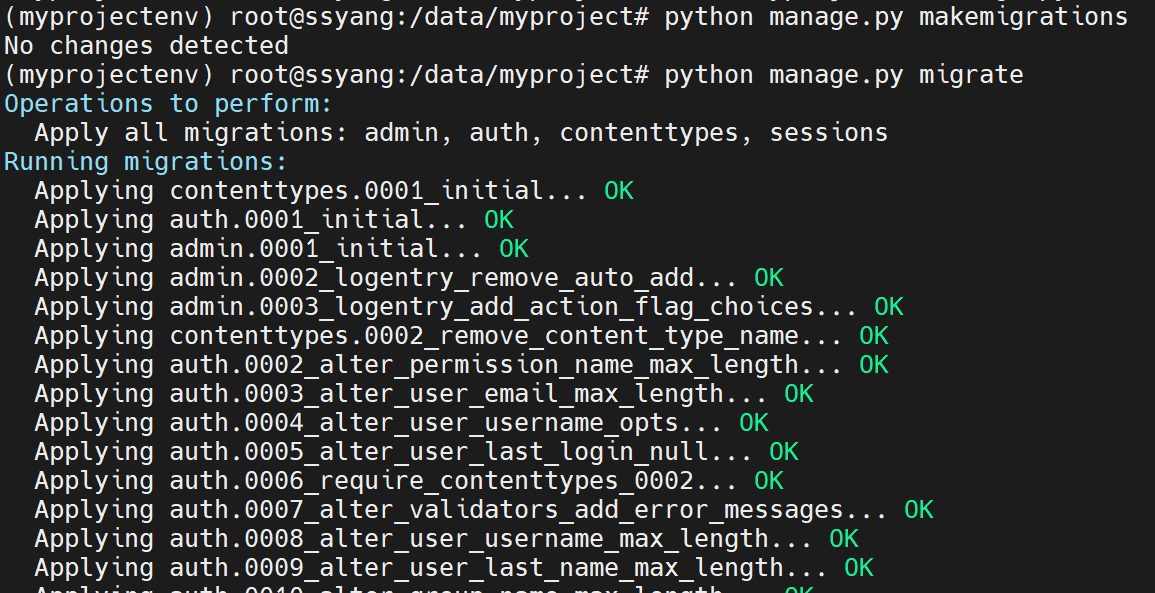
数据库环境初始化
python manage.py makemigrations
python manage.py migrate
创建登录用户
python manage.py createsuperuser
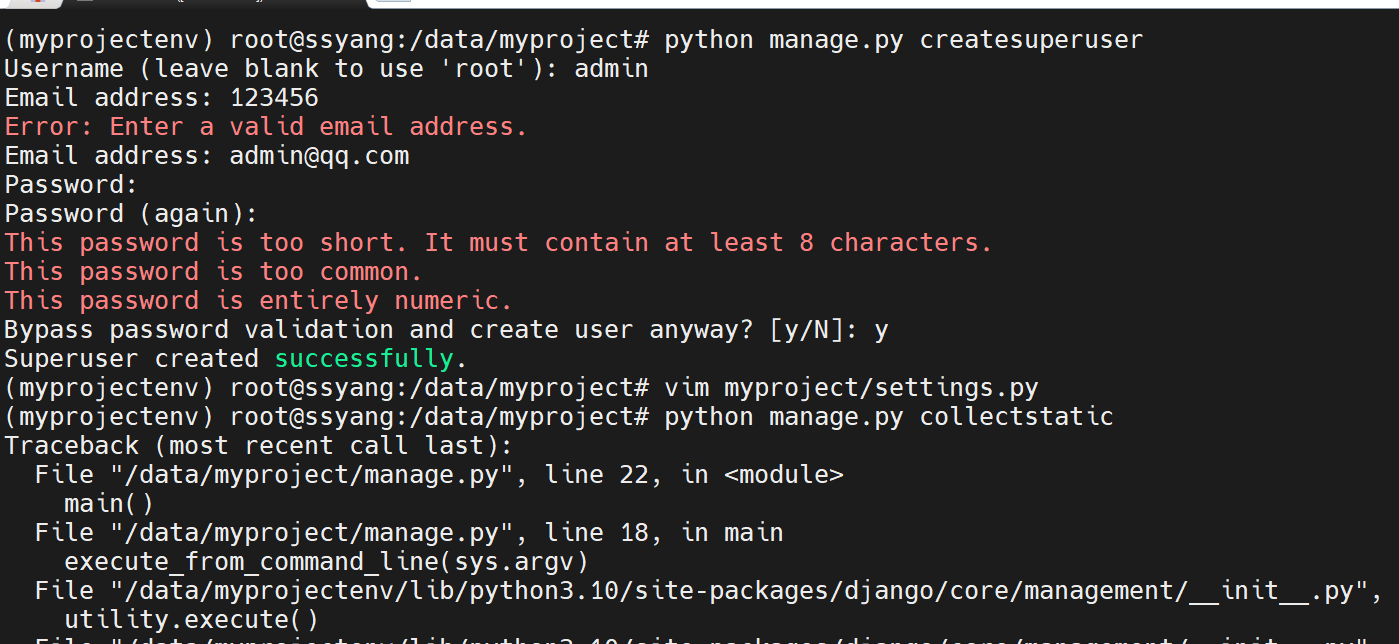
定制配置
vim myproject/settings.py

收集静态文件
python manage.py collectstatic

在项目根目录下创建一个uwsgi.ini文件
vim uwsgi.ini
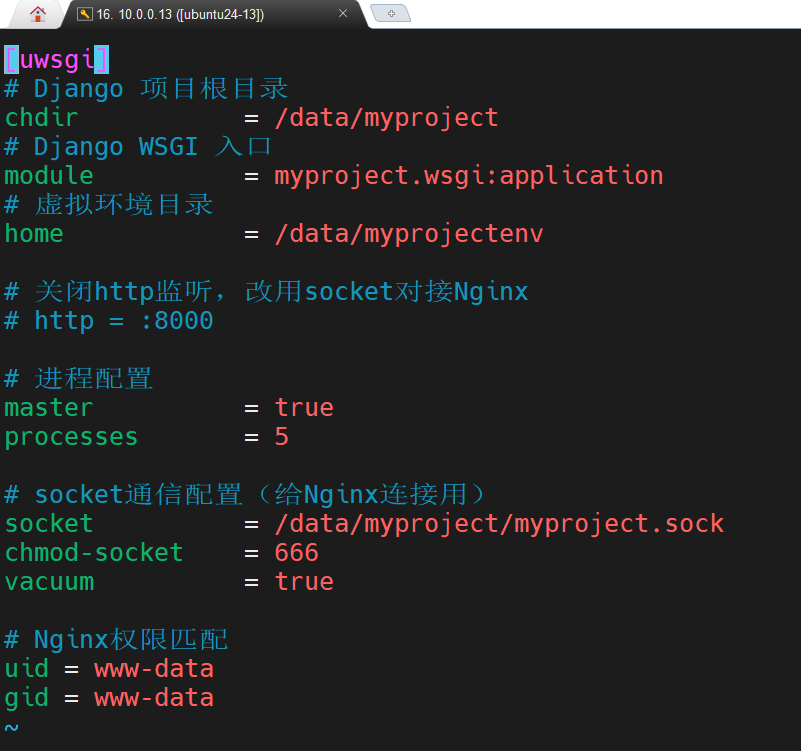
赋予权限
chown -R www-data:www-data /data/myproject
chmod -R 755 /data/myproject
![]()
创建一个名为uwsgi.service文件
vim /etc/systemd/system/uwsgi.service
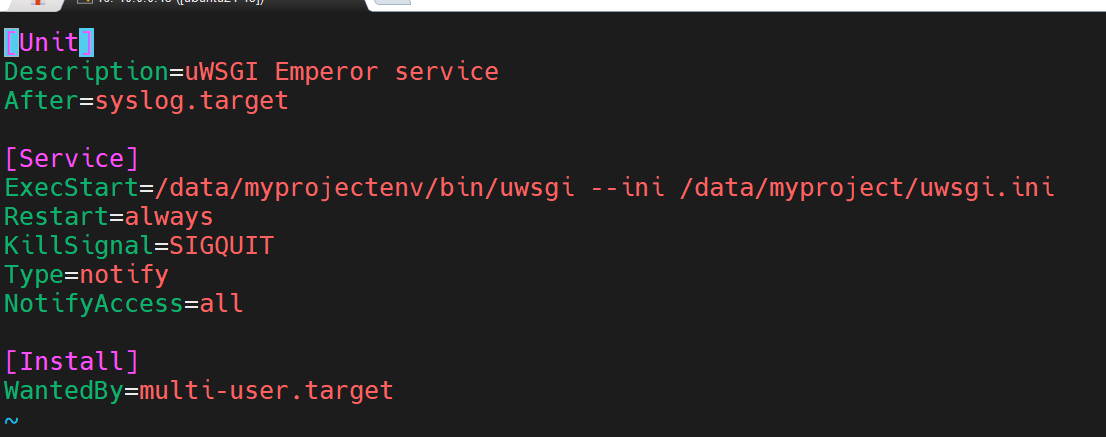
启动服务
systemctl daemon-reload
systemctl start uwsgi.service
systemctl is-active uwsgi.service


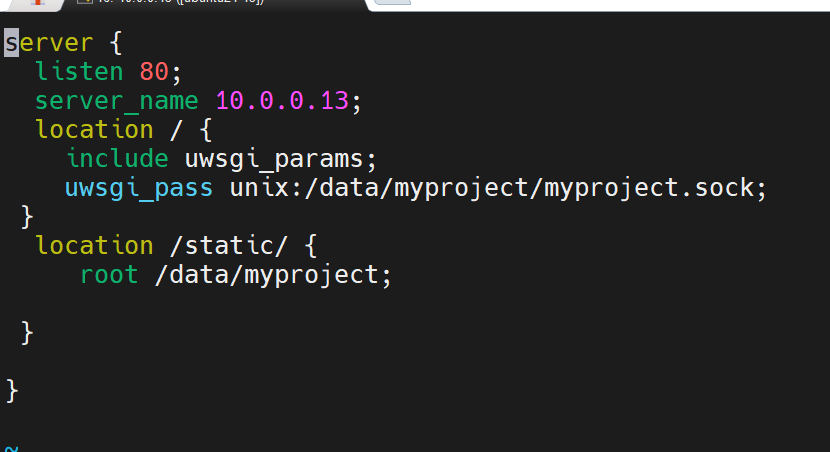
定制nginx配置
vim /etc/nginx/conf.d/myproject.conf
检测配置文件
nginx -t

启动项目
systemctl start nginx.service

systemctl is-active nginx.service

测试效果

openEuler 是由开放原子开源基金会孵化的全场景开源操作系统项目,面向数字基础设施四大核心场景(服务器、云计算、边缘计算、嵌入式),全面支持 ARM、x86、RISC-V、loongArch、PowerPC、SW-64 等多样性计算架构
更多推荐


 6
6 0
0- 0


 已为社区贡献2条内容

所有评论(0)