02-静态Web项目的发布
本文介绍了通过Gitlab和Jenkins实现前端静态页面自动化部署的完整流程。首先在Gitlab创建项目并上传HTML文件,然后在Jenkins配置任务拉取代码,通过SSH密钥对实现Jenkins到Web服务器的免密登录,使用SCP命令推送代码文件。最后在Web服务器配置Nginx代理,将代码目录映射到81端口。整个过程实现了从代码提交到自动化部署的完整链路,为前端项目提供了高效的CI/CD解决
服务器资源与角色
| 身份 | 角色 | ip | 版本 |
|---|---|---|---|
| 服务器 | Gitlab | 10.0.0.133 | Rocky Linux 9 |
| 服务器 | Jenkins | 10.0.0.134 | Rocky Linux 9 |
| 服务器 | Web | 10.0.0.135 | Rocky Linux 9 |
| 中间件 | Nginx | - | 1.20.1 |
| 中间件 | Git | - | 2.47.3 |
在Gitlab和Jenkins部署好后,我们就可以通过在Gitlab上传项目代码,然后通过配置Jenkins拉取并发布
先从最简单的前端静态页面开始。
首先我们理一下思路与步骤:
1、 Gitlab创建项目仓库与代码文件
2、 Jenkins拉取代码文件到服务器本地
3、 Jenkins将拉取到本地的代码文件推送到web服务器指定目录
4、 web服务器通过nginx代理代码文件所在目录
一、Gitlab配置仓库
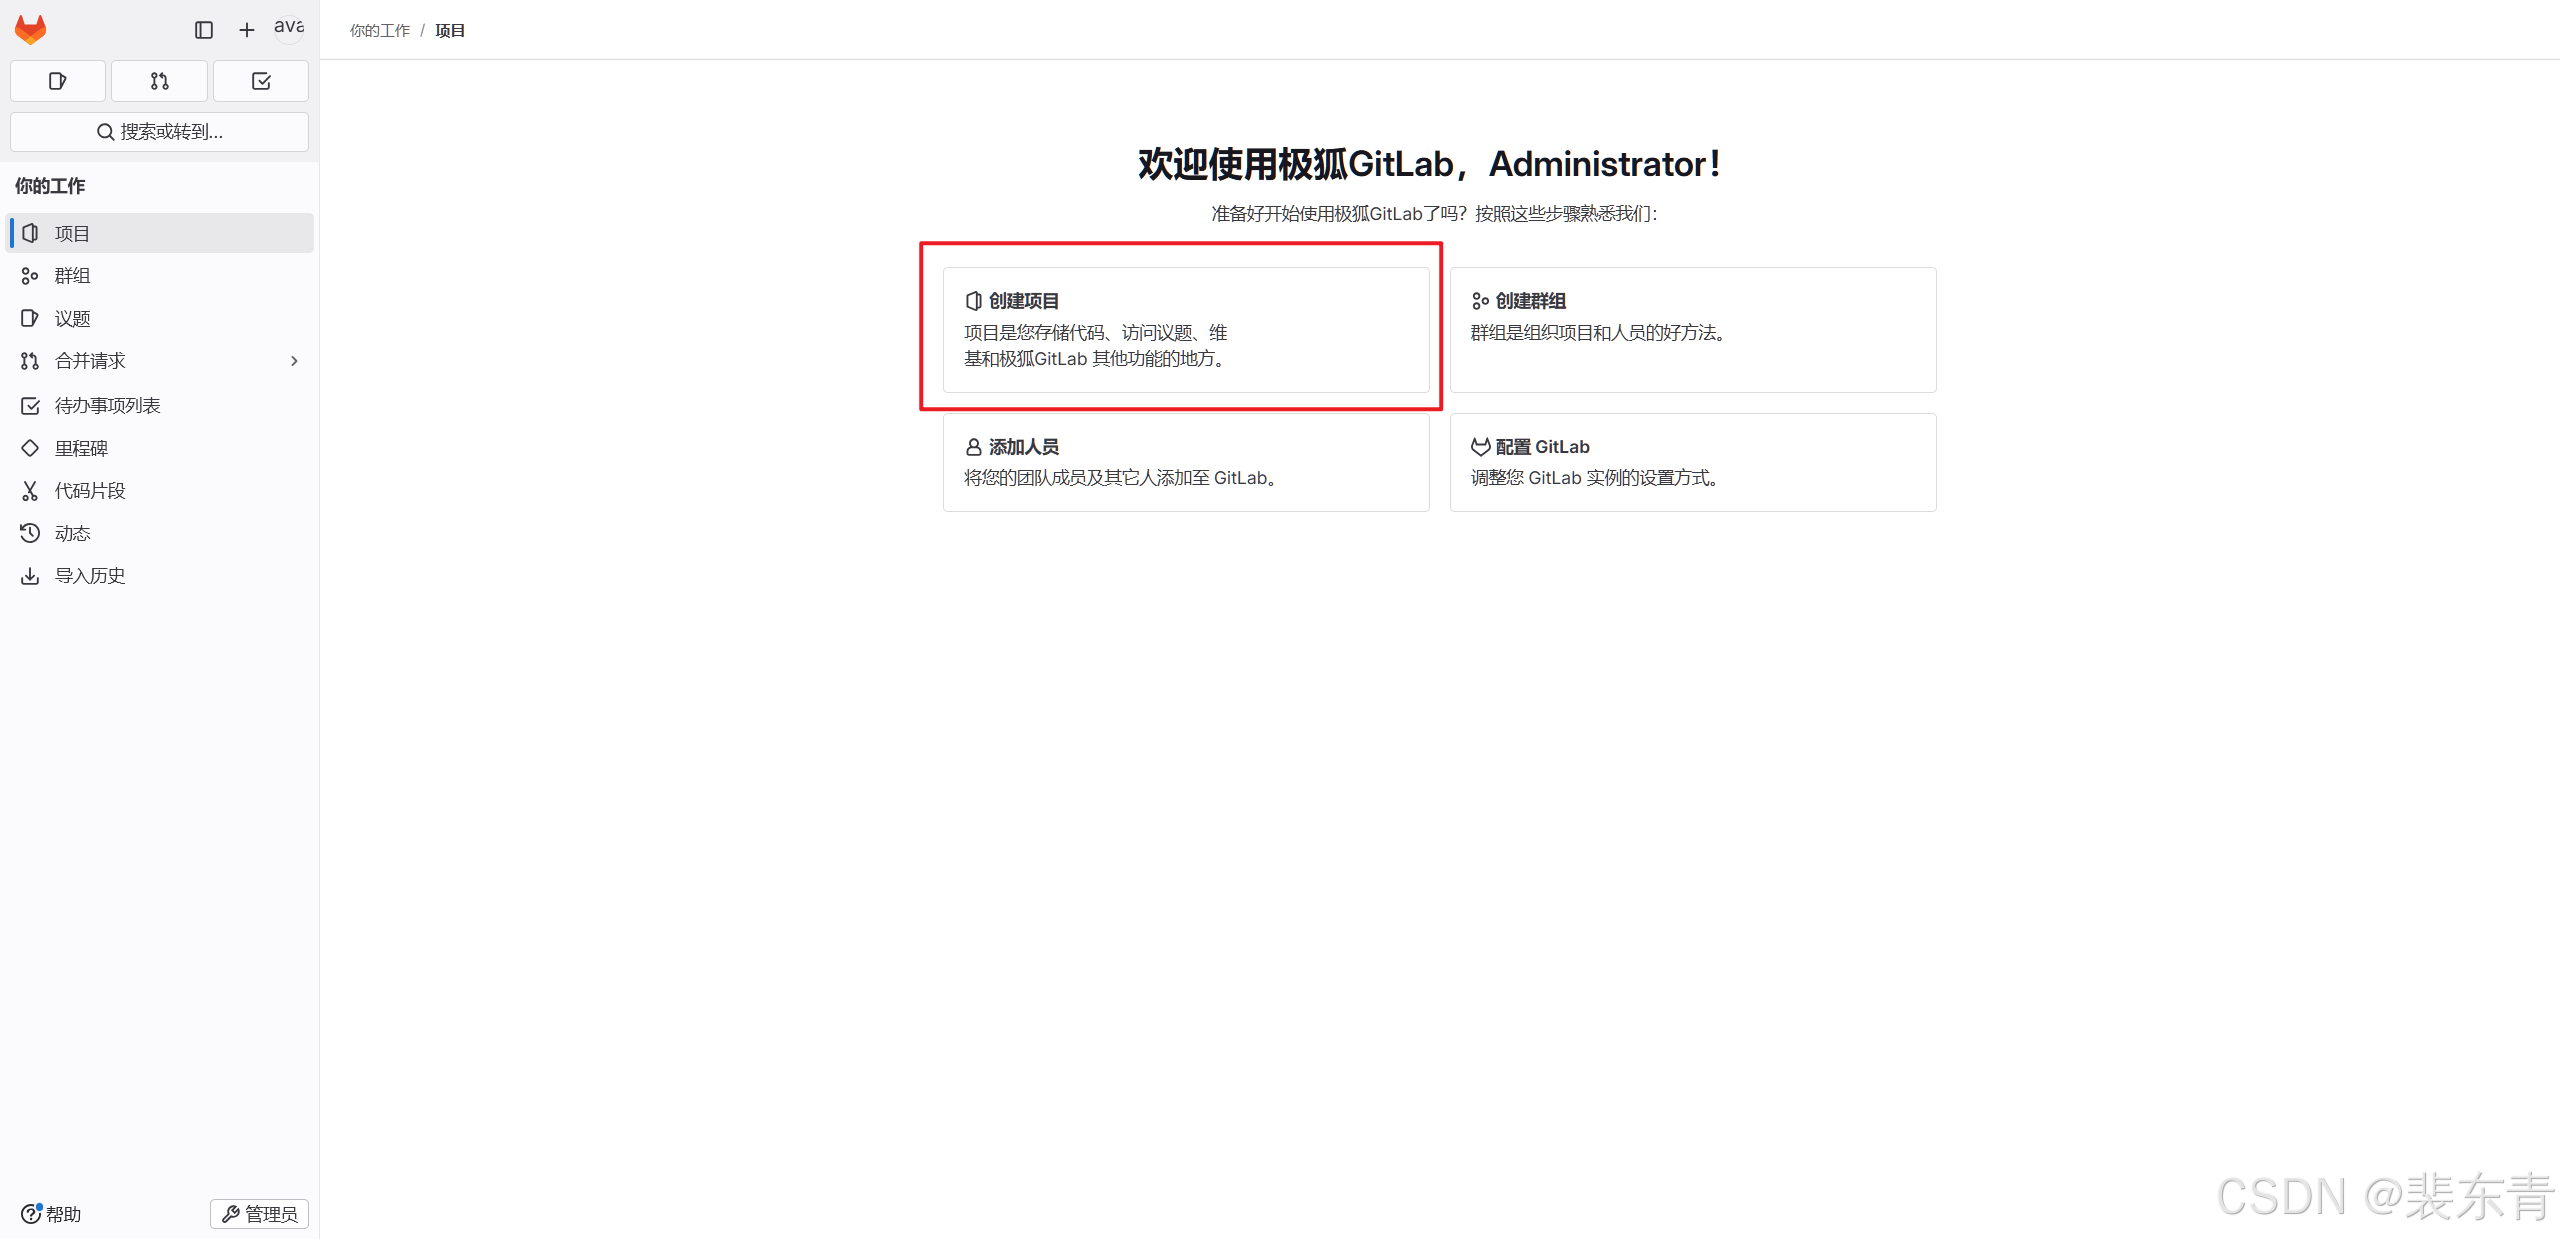
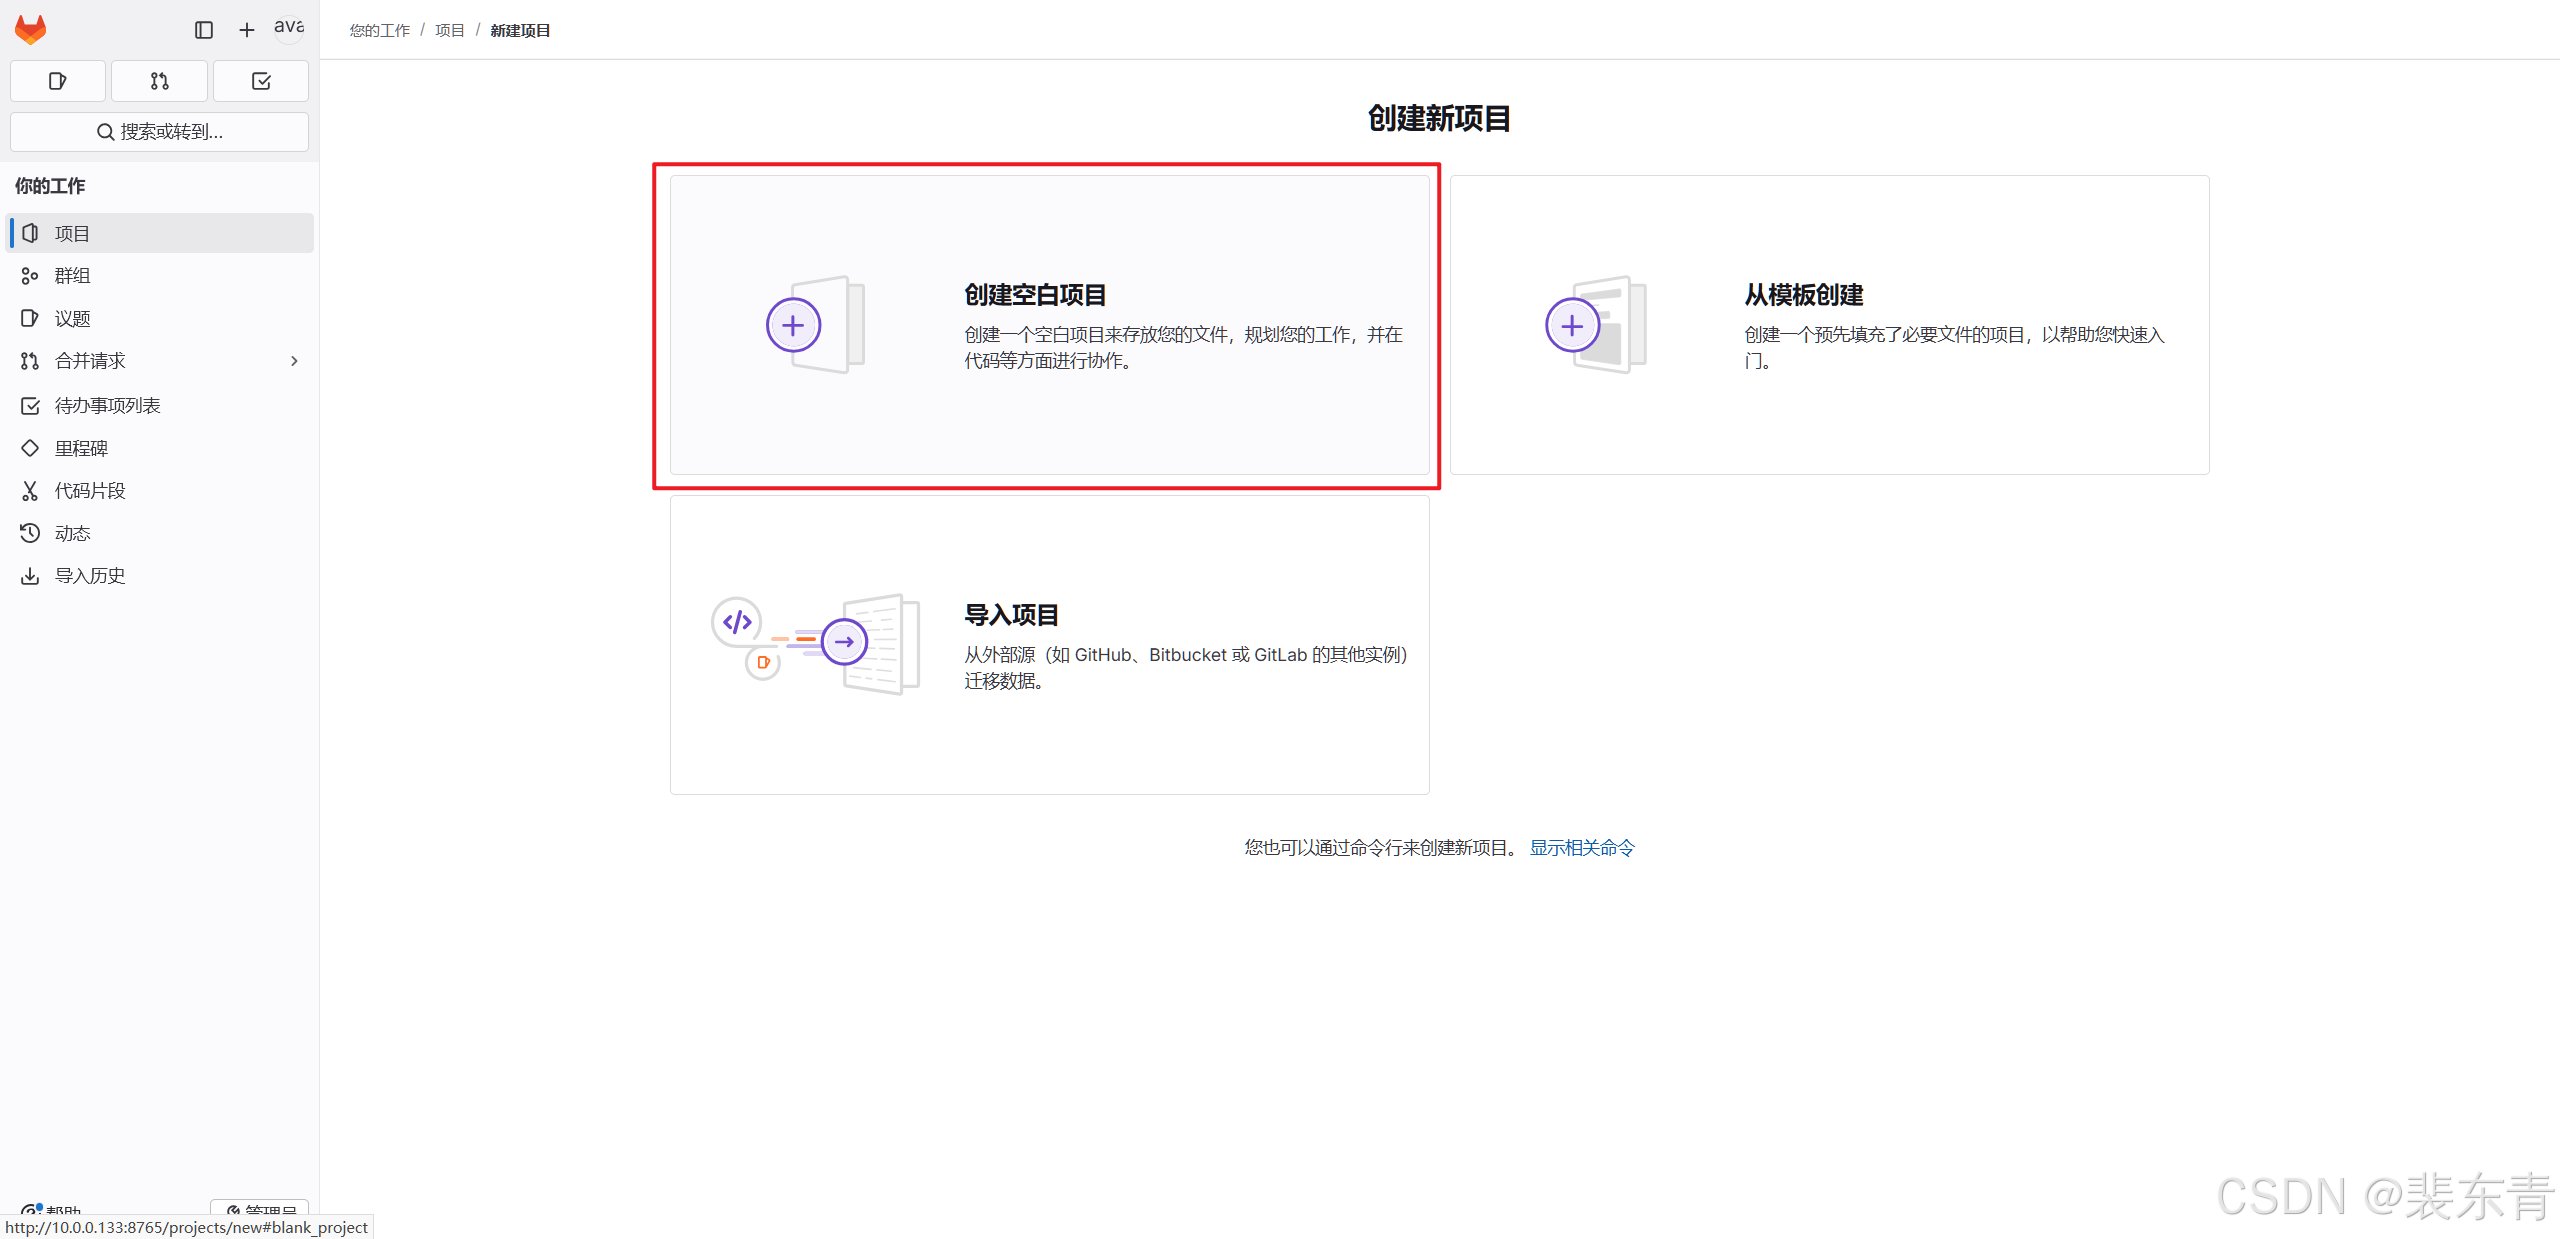
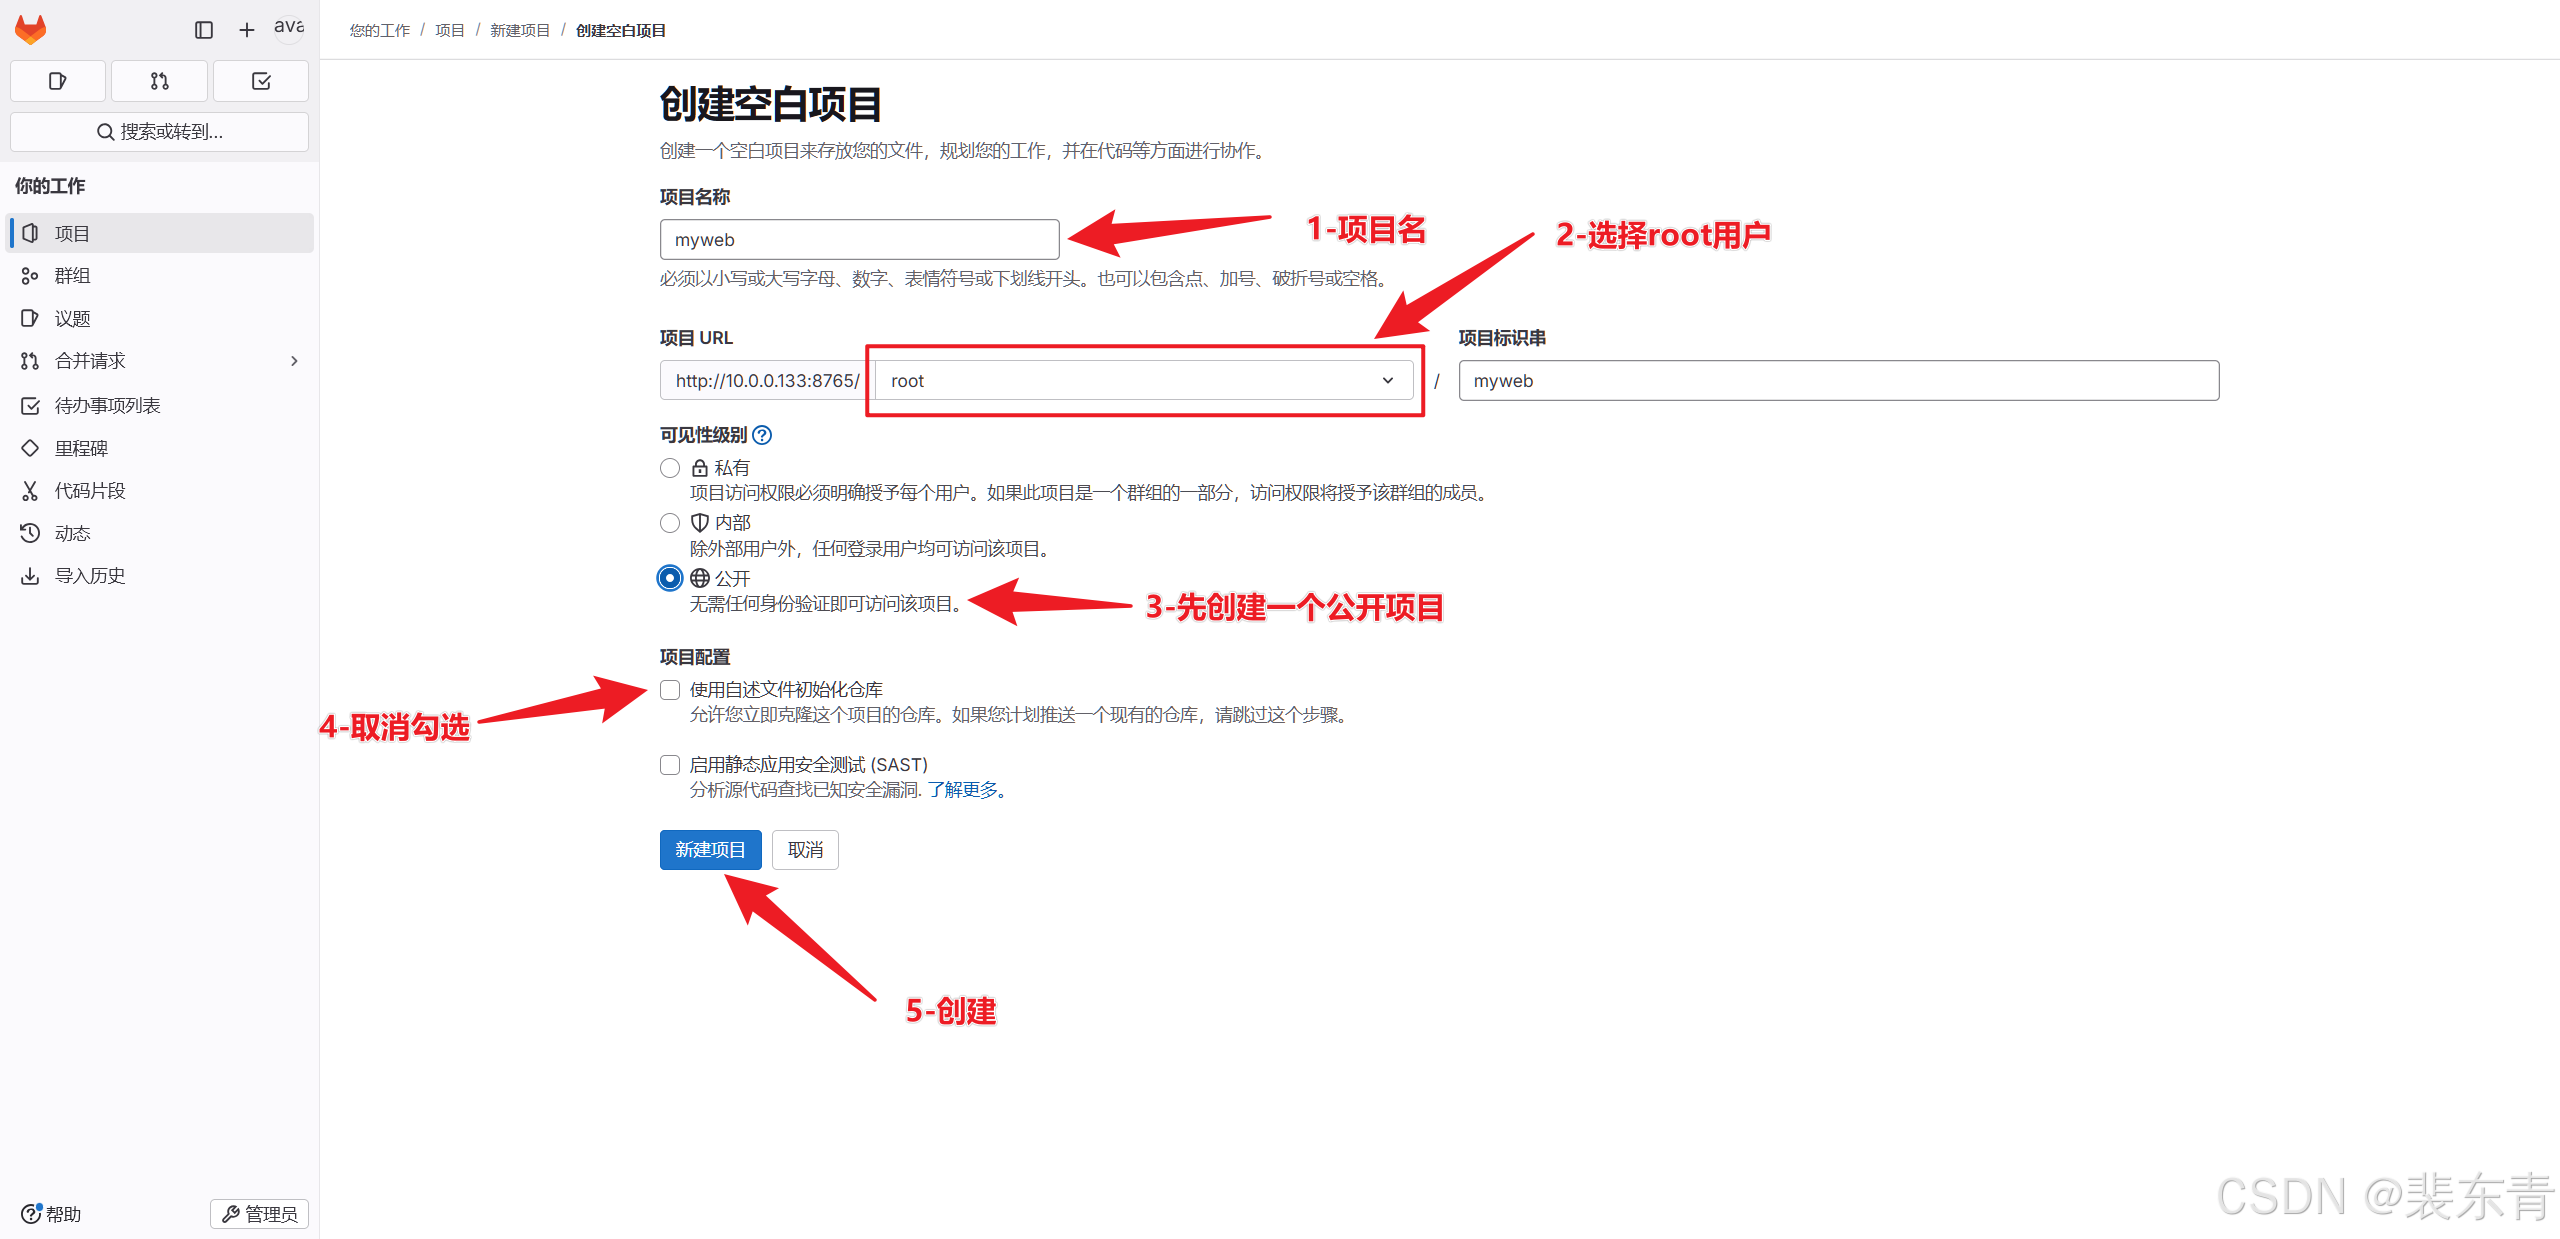
1.创建项目
| Gitlab创建项目 |
|---|
 |
 |
 |
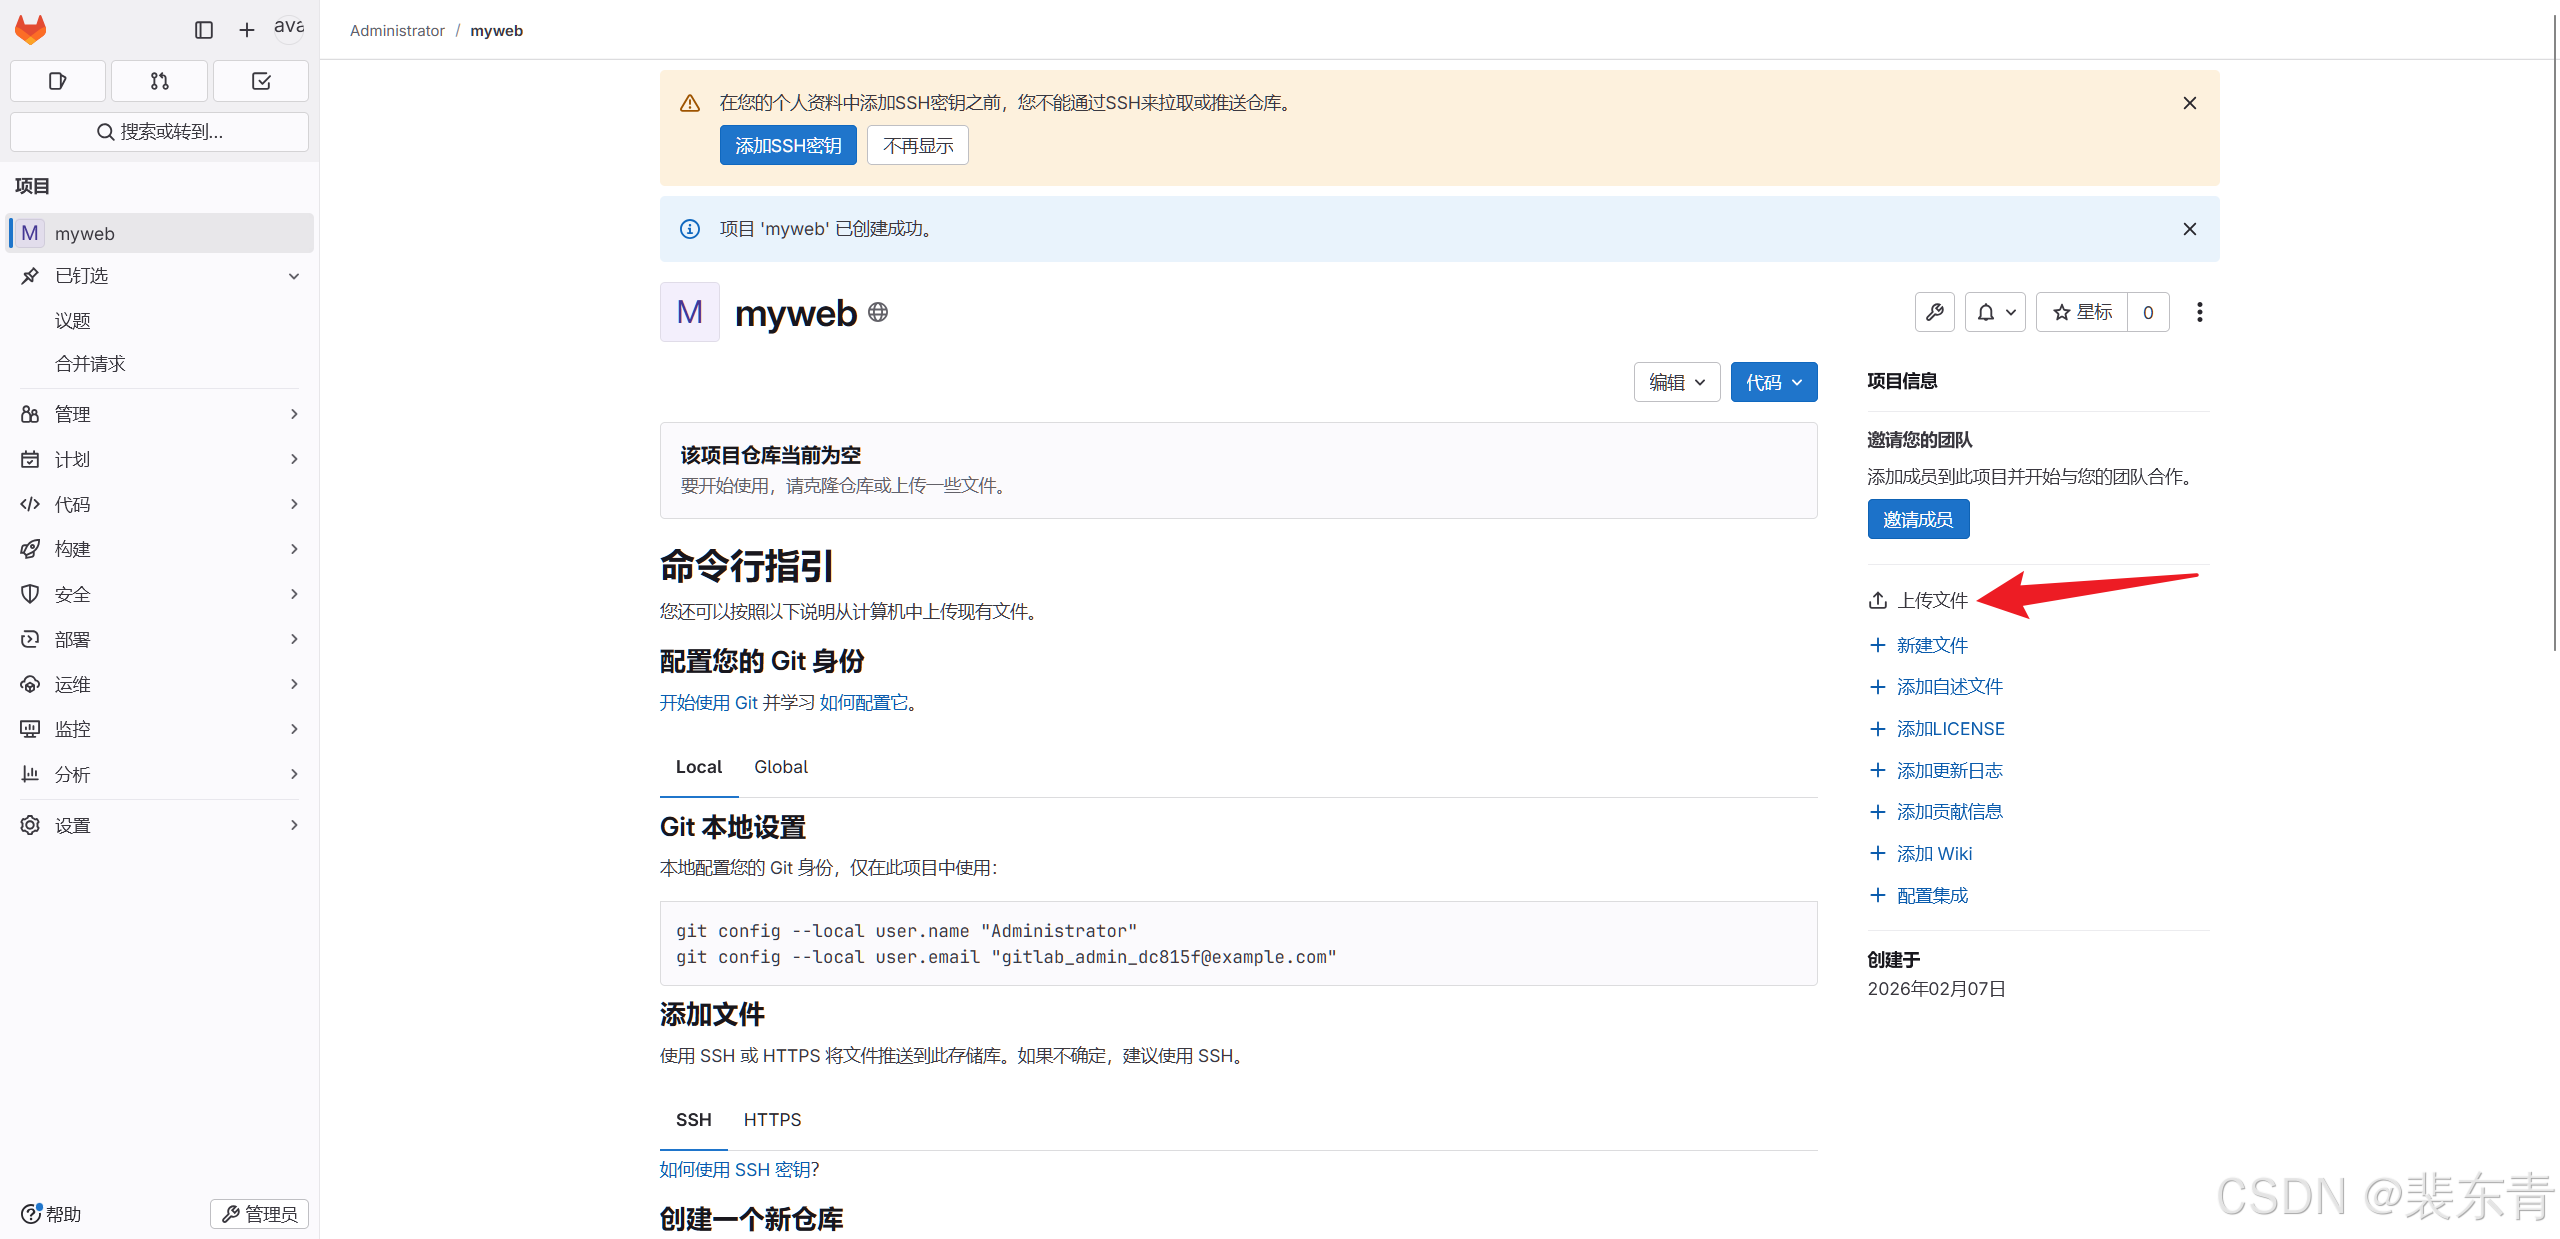
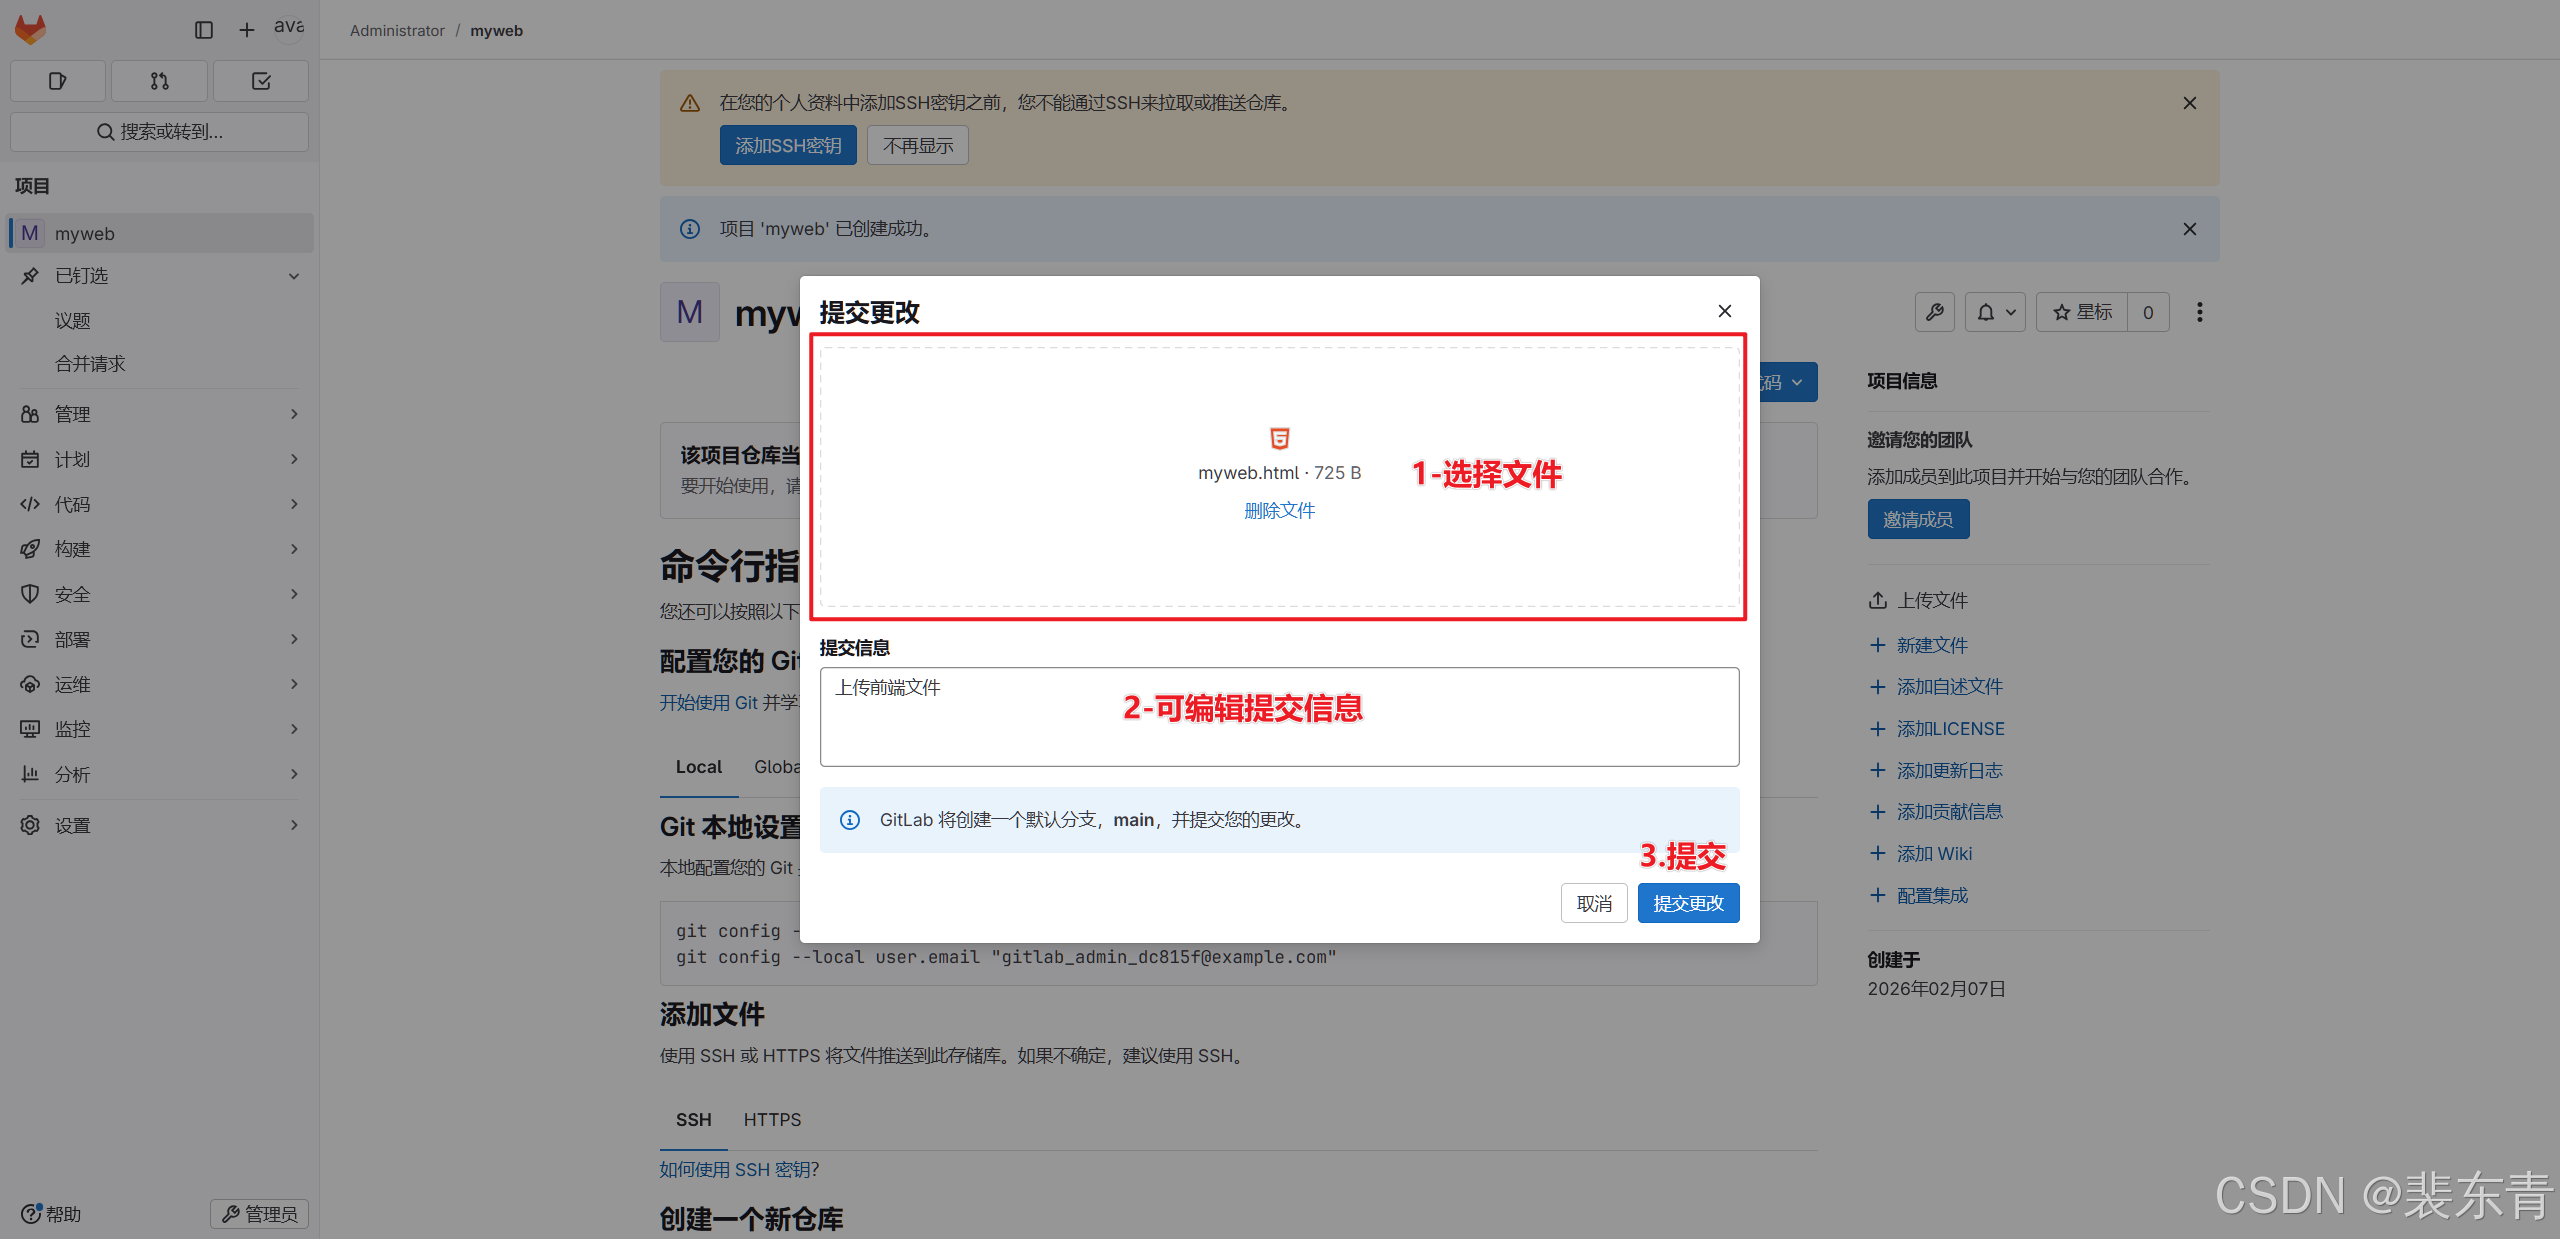
2.上传前端文件
-
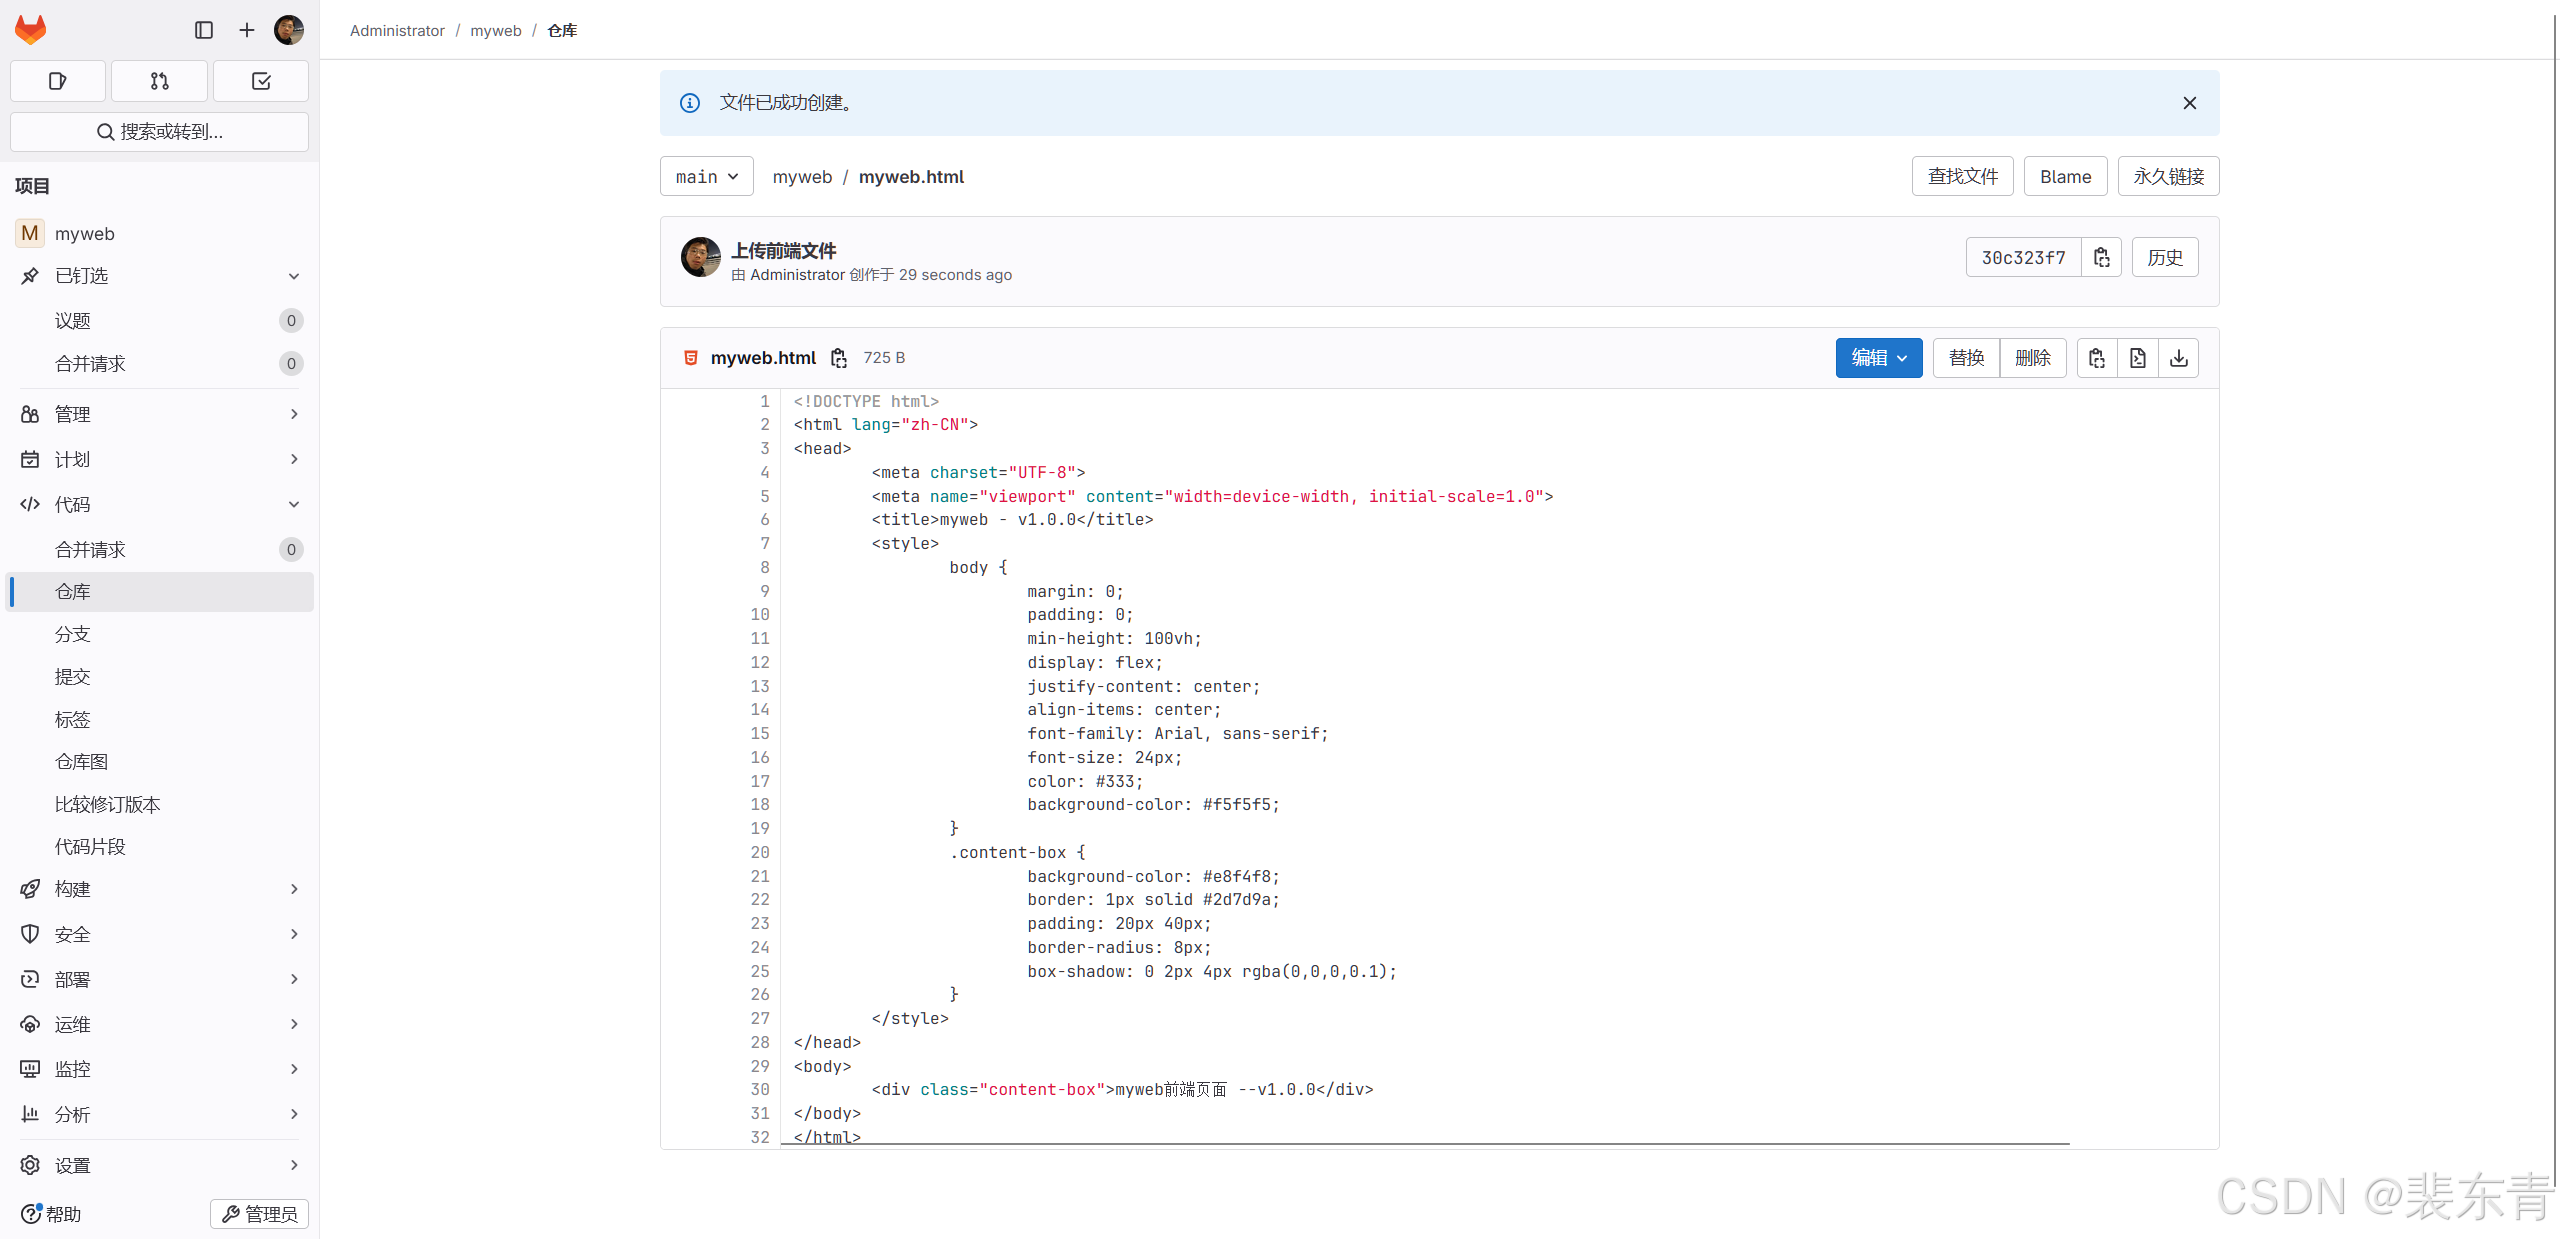
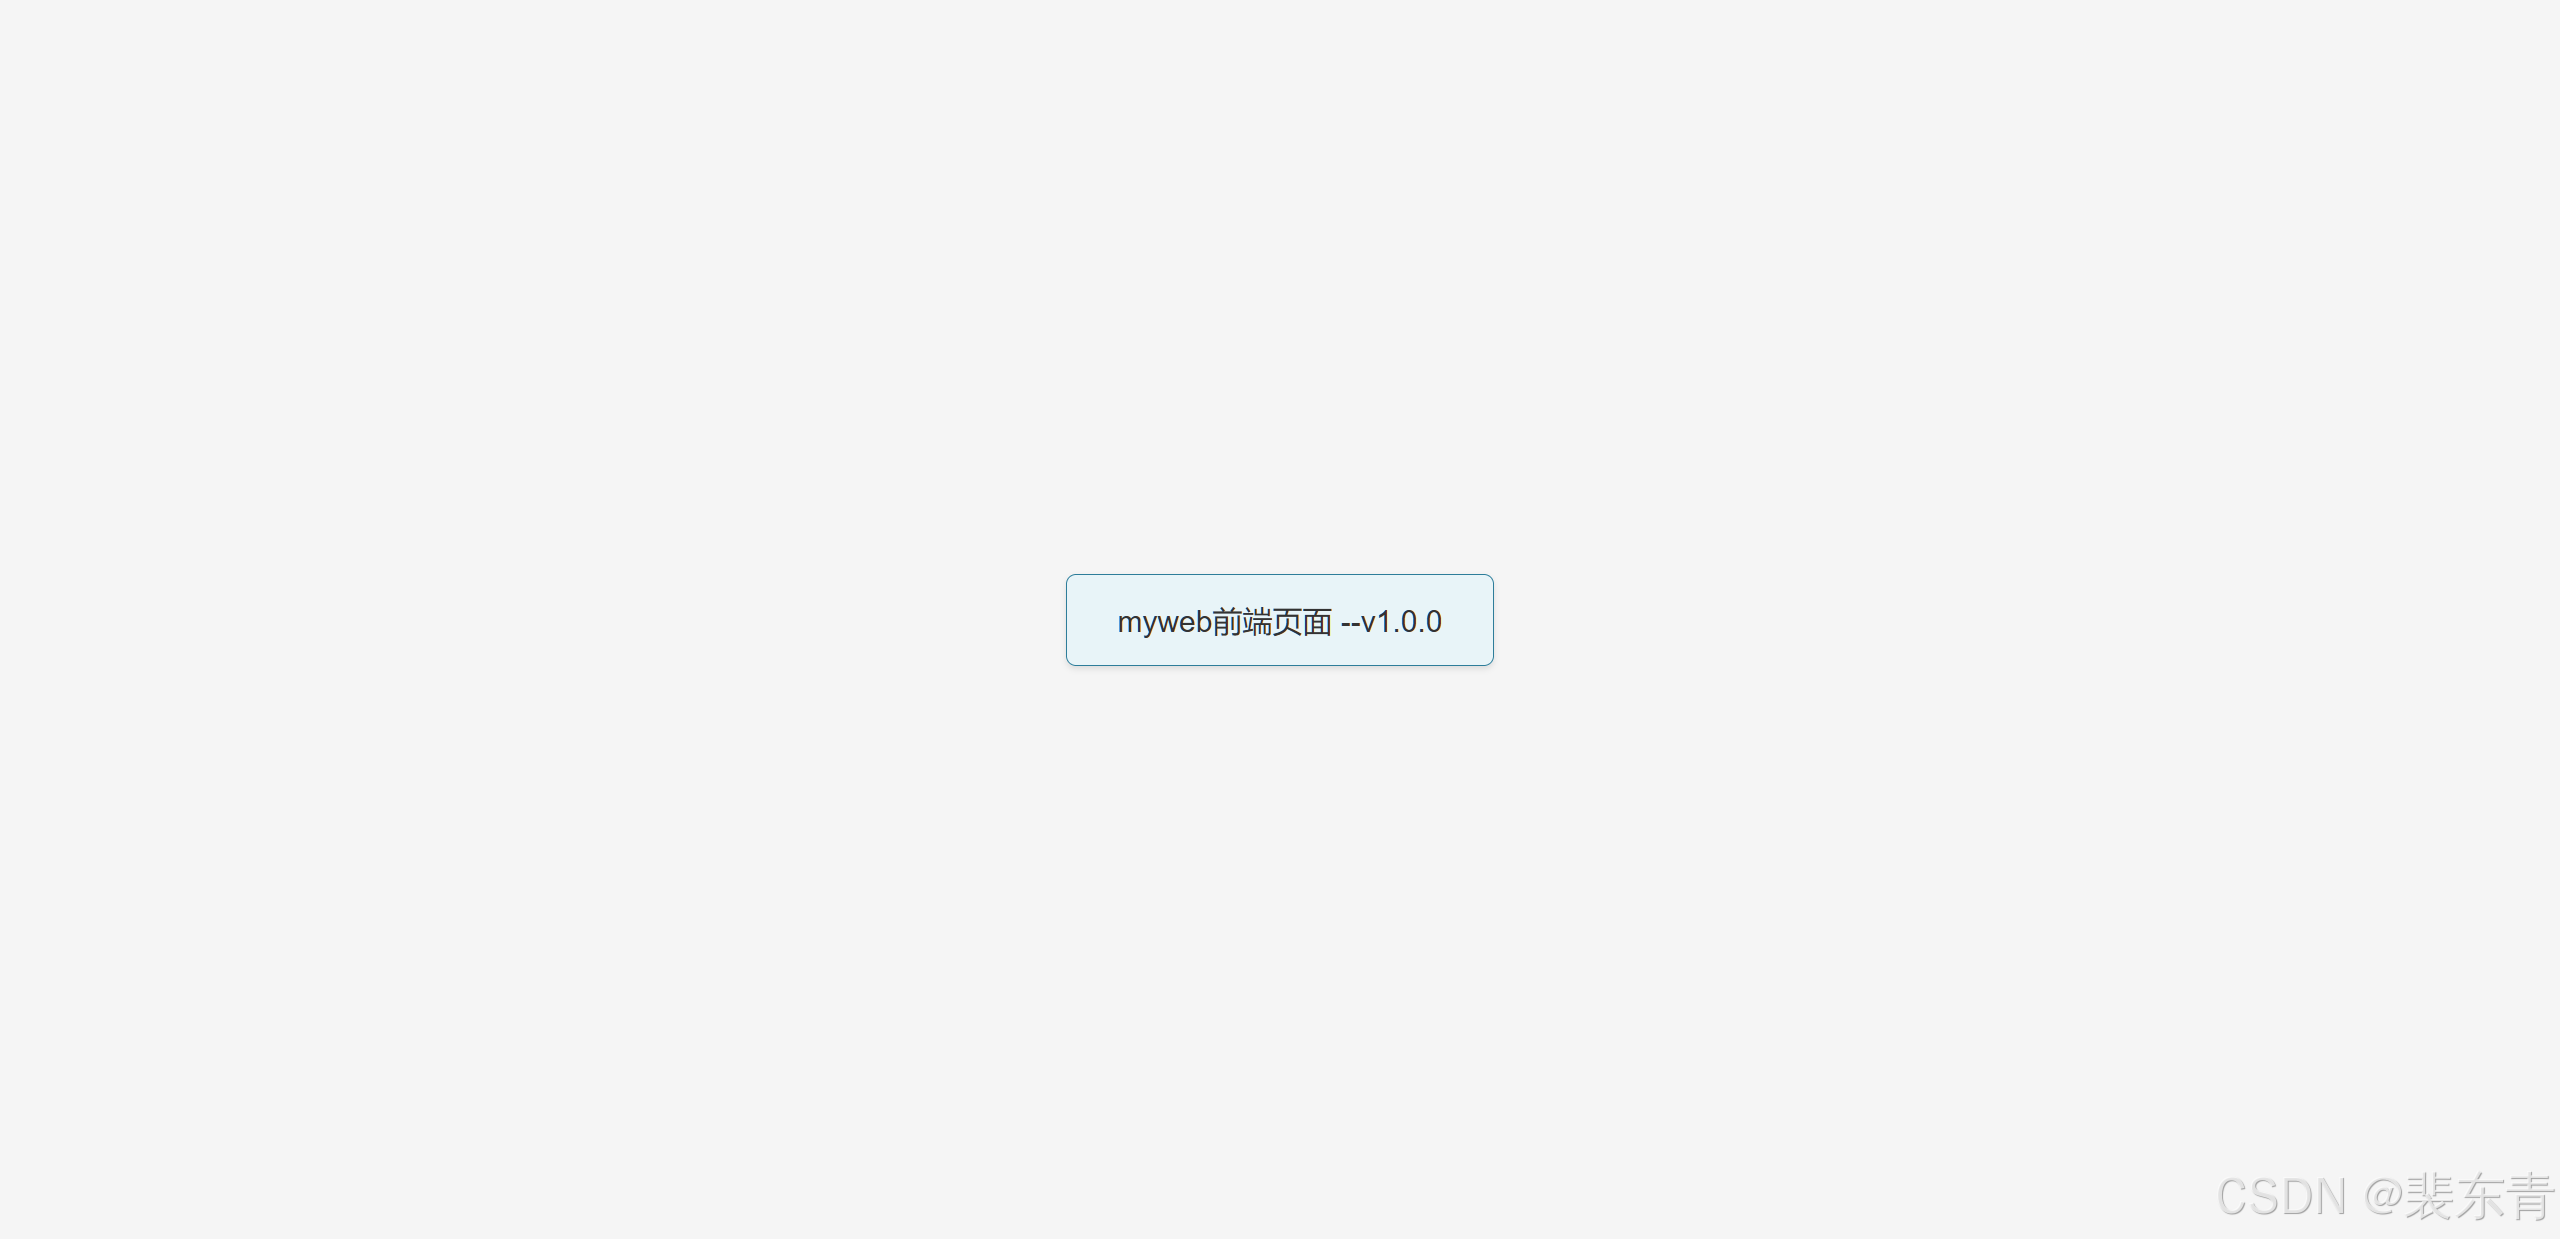
在项目创建好后,我们添加一个简单的前端页面文件
myweb.html
<!DOCTYPE html>
<html lang="zh-CN">
<head>
    <meta charset="UTF-8">
    <meta name="viewport" content="width=device-width, initial-scale=1.0">
    <title>myweb - v1.0.0</title>
    <style>
        body {
            margin: 0;
            padding: 0;
            min-height: 100vh;
            display: flex;
            justify-content: center;
            align-items: center;
            font-family: Arial, sans-serif;
            font-size: 24px;
            color: #333;
            background-color: #f5f5f5;
        }
        .content-box {
            background-color: #e8f4f8;
            border: 1px solid #2d7d9a;
            padding: 20px 40px;
            border-radius: 8px;
            box-shadow: 0 2px 4px rgba(0,0,0,0.1);
        }
    </style>
</head>
<body>
    <div class="content-box">myweb前端页面 --v1.0.0</div>
</body>
</html>-
然后我们点击上传文件到Gitlab
| 上传文件 |
|---|
 |
 |
 |
二、Jenkins配置任务
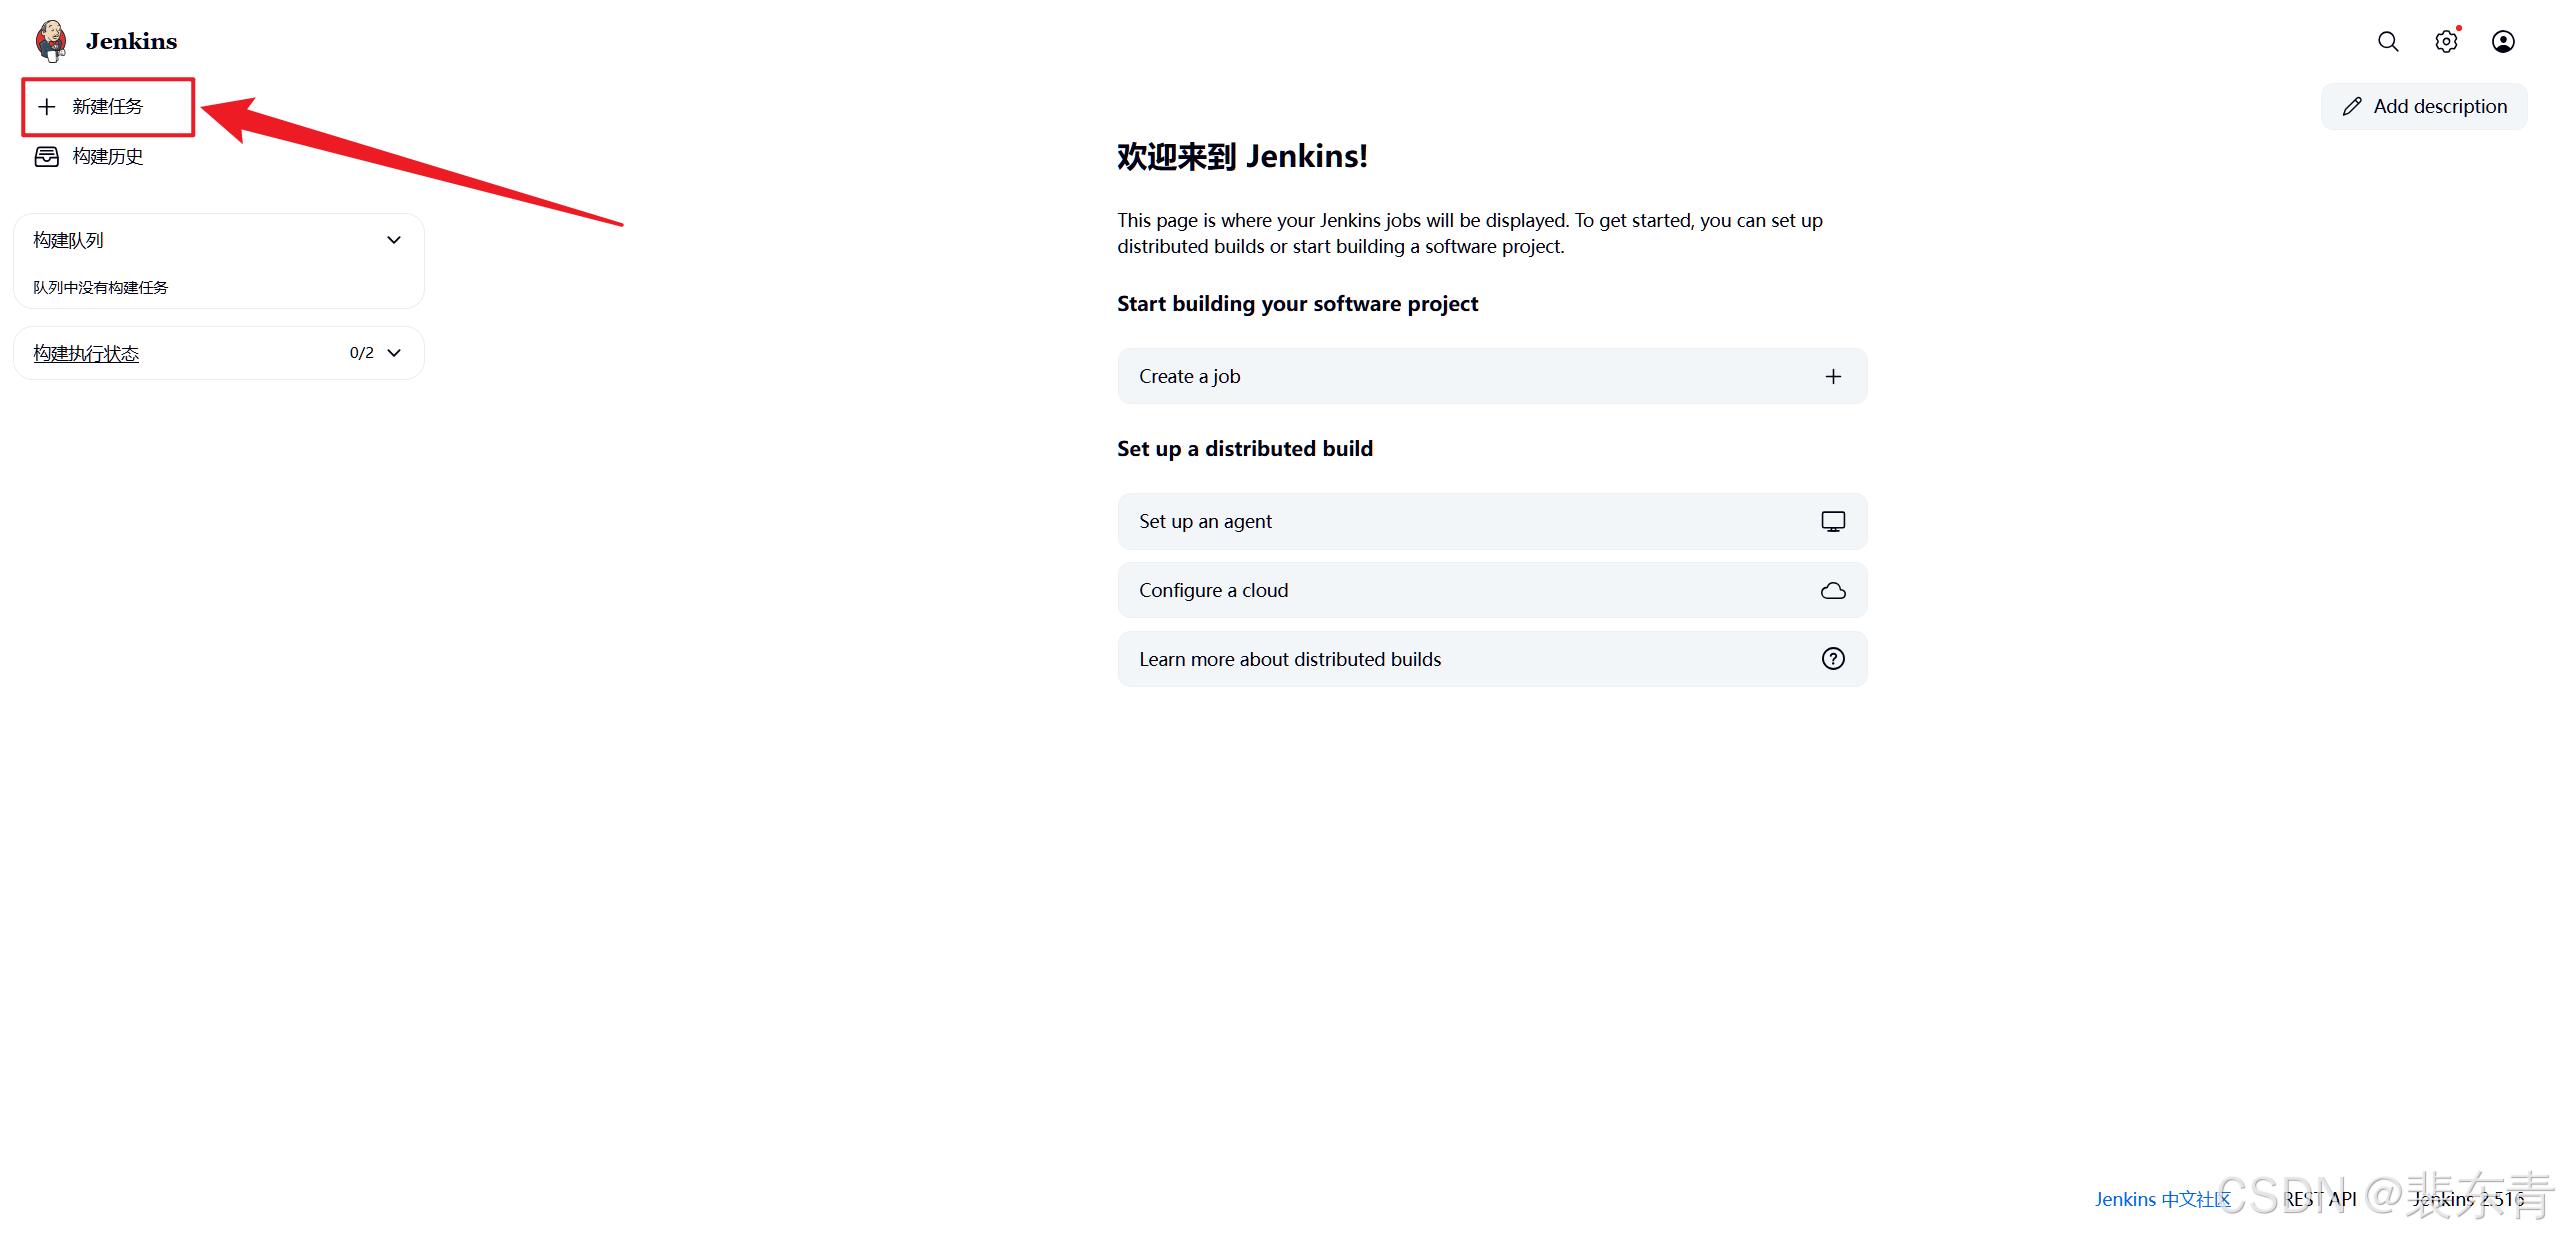
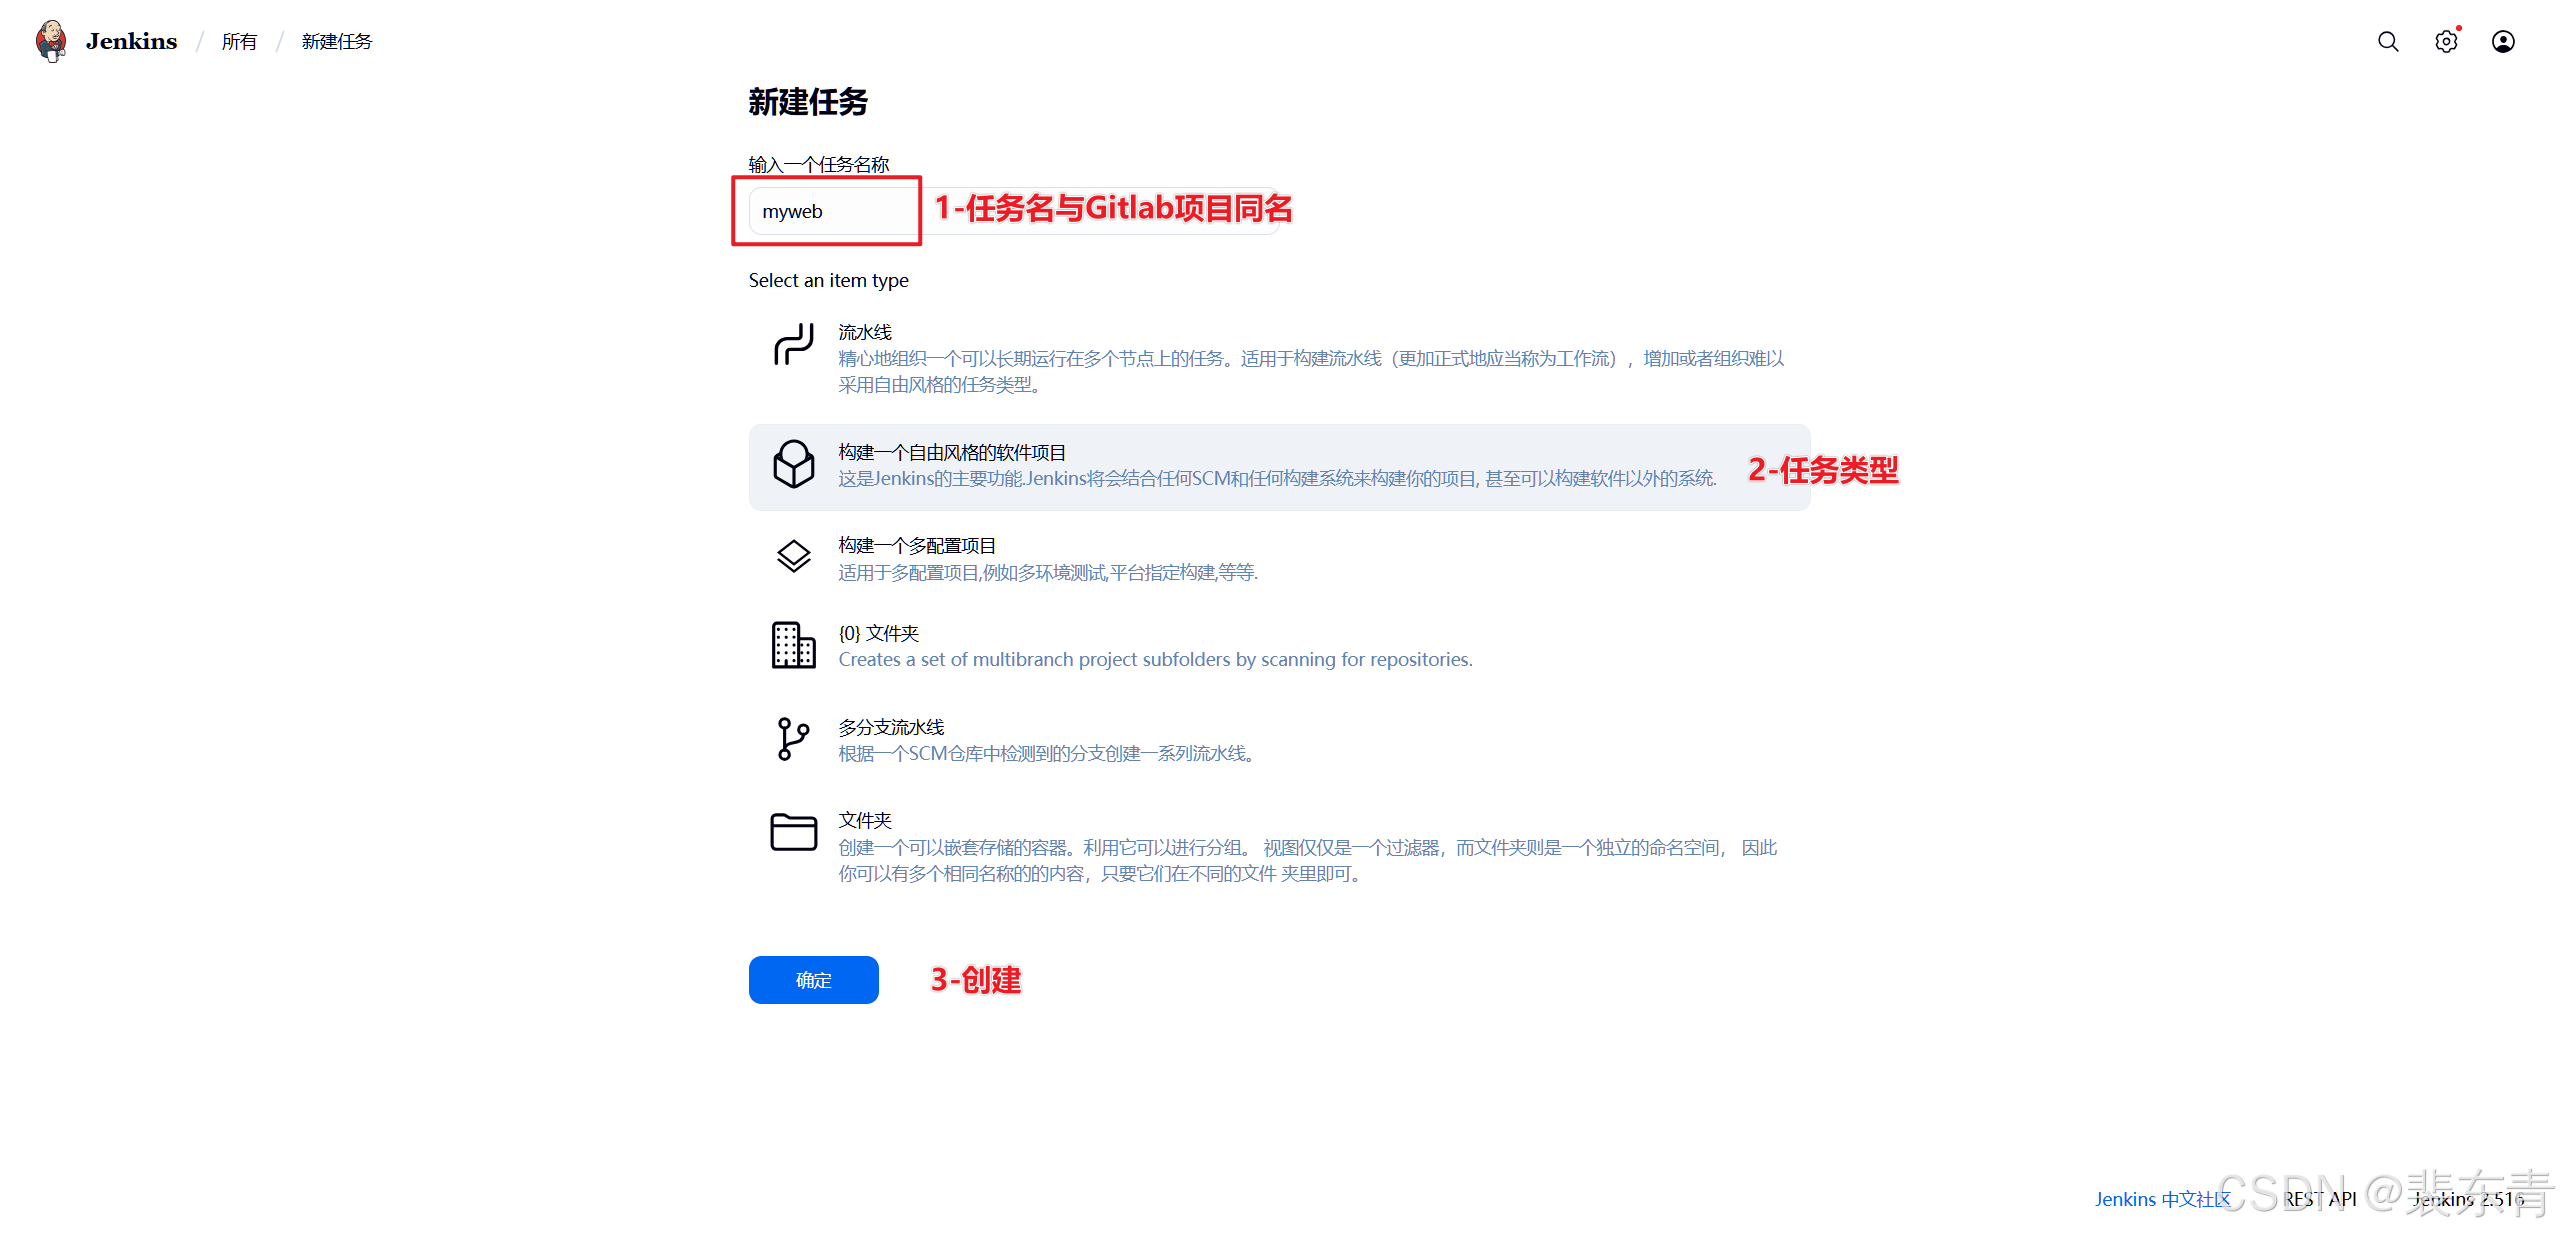
1.创建任务
在Jenkins主页点击新建任务,创建一个自由风格的项目
| Jenkins创建任务 |
|---|
 |
 |
2.拉取代码文件
-
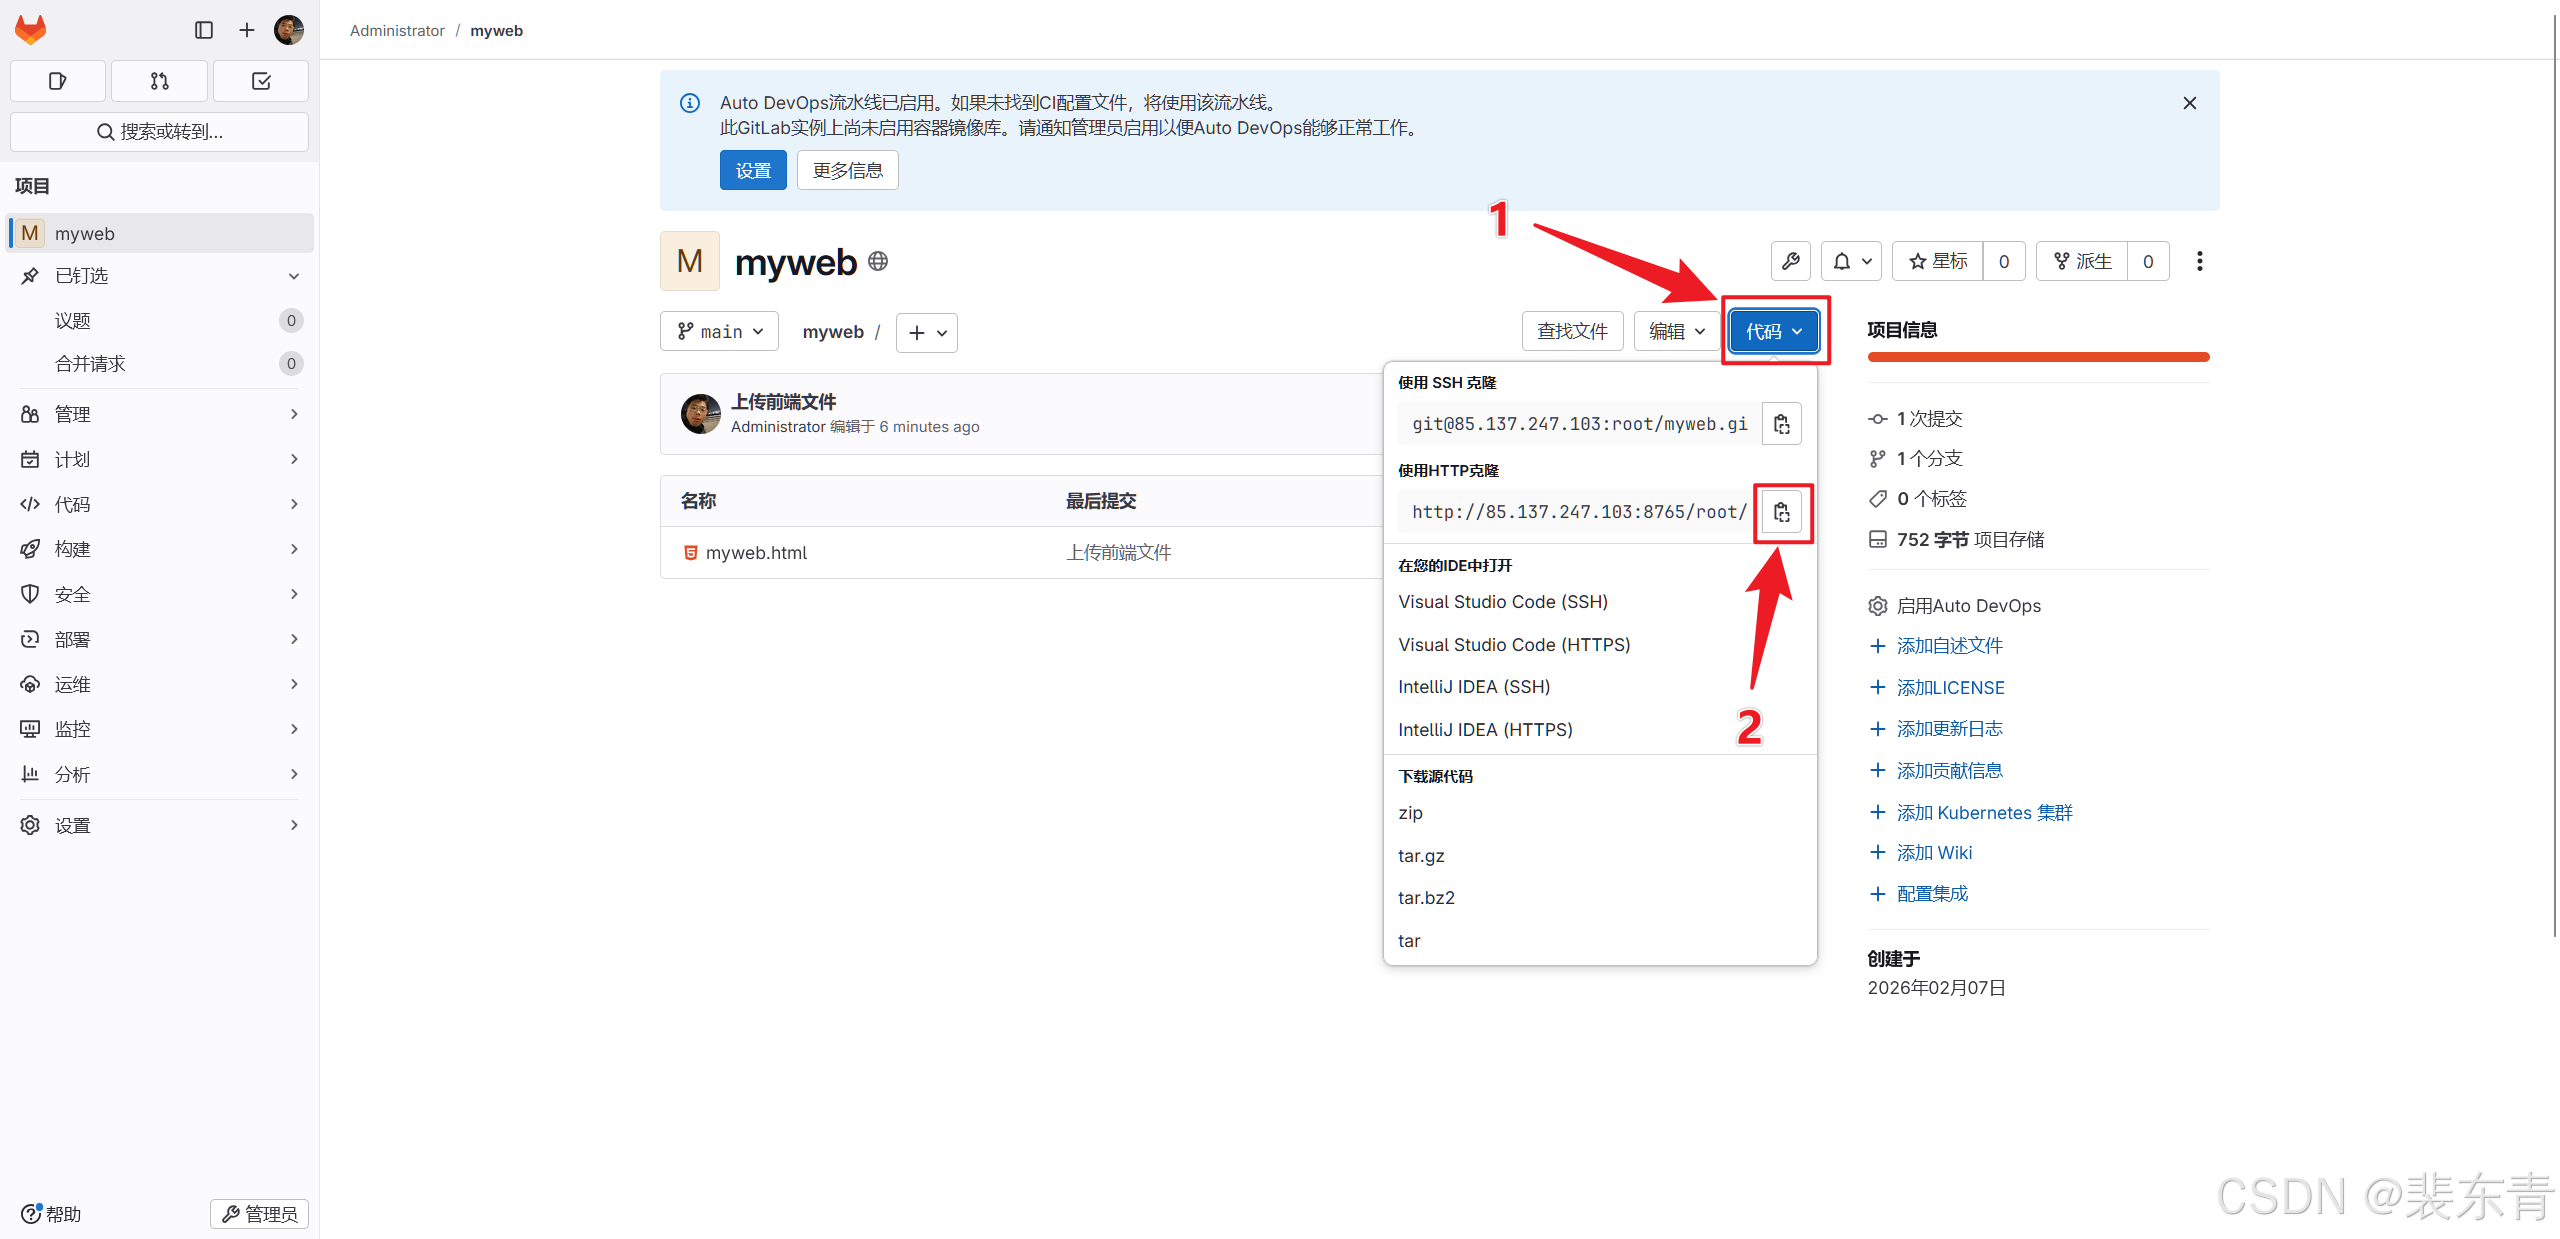
当任务创建完成后,我们需要配置任务从Gitlab拉取我们的代码,所以我们需要配置Gitlab仓库的项目地址
-
首先打开Gitlab主页复制项目的http地址,这里因为10.0.0.133虚拟机部署的Gitlab卡顿,用我服务器上已经按以上步骤配置好的仓库
| 配置任务 |
|---|
 |
-
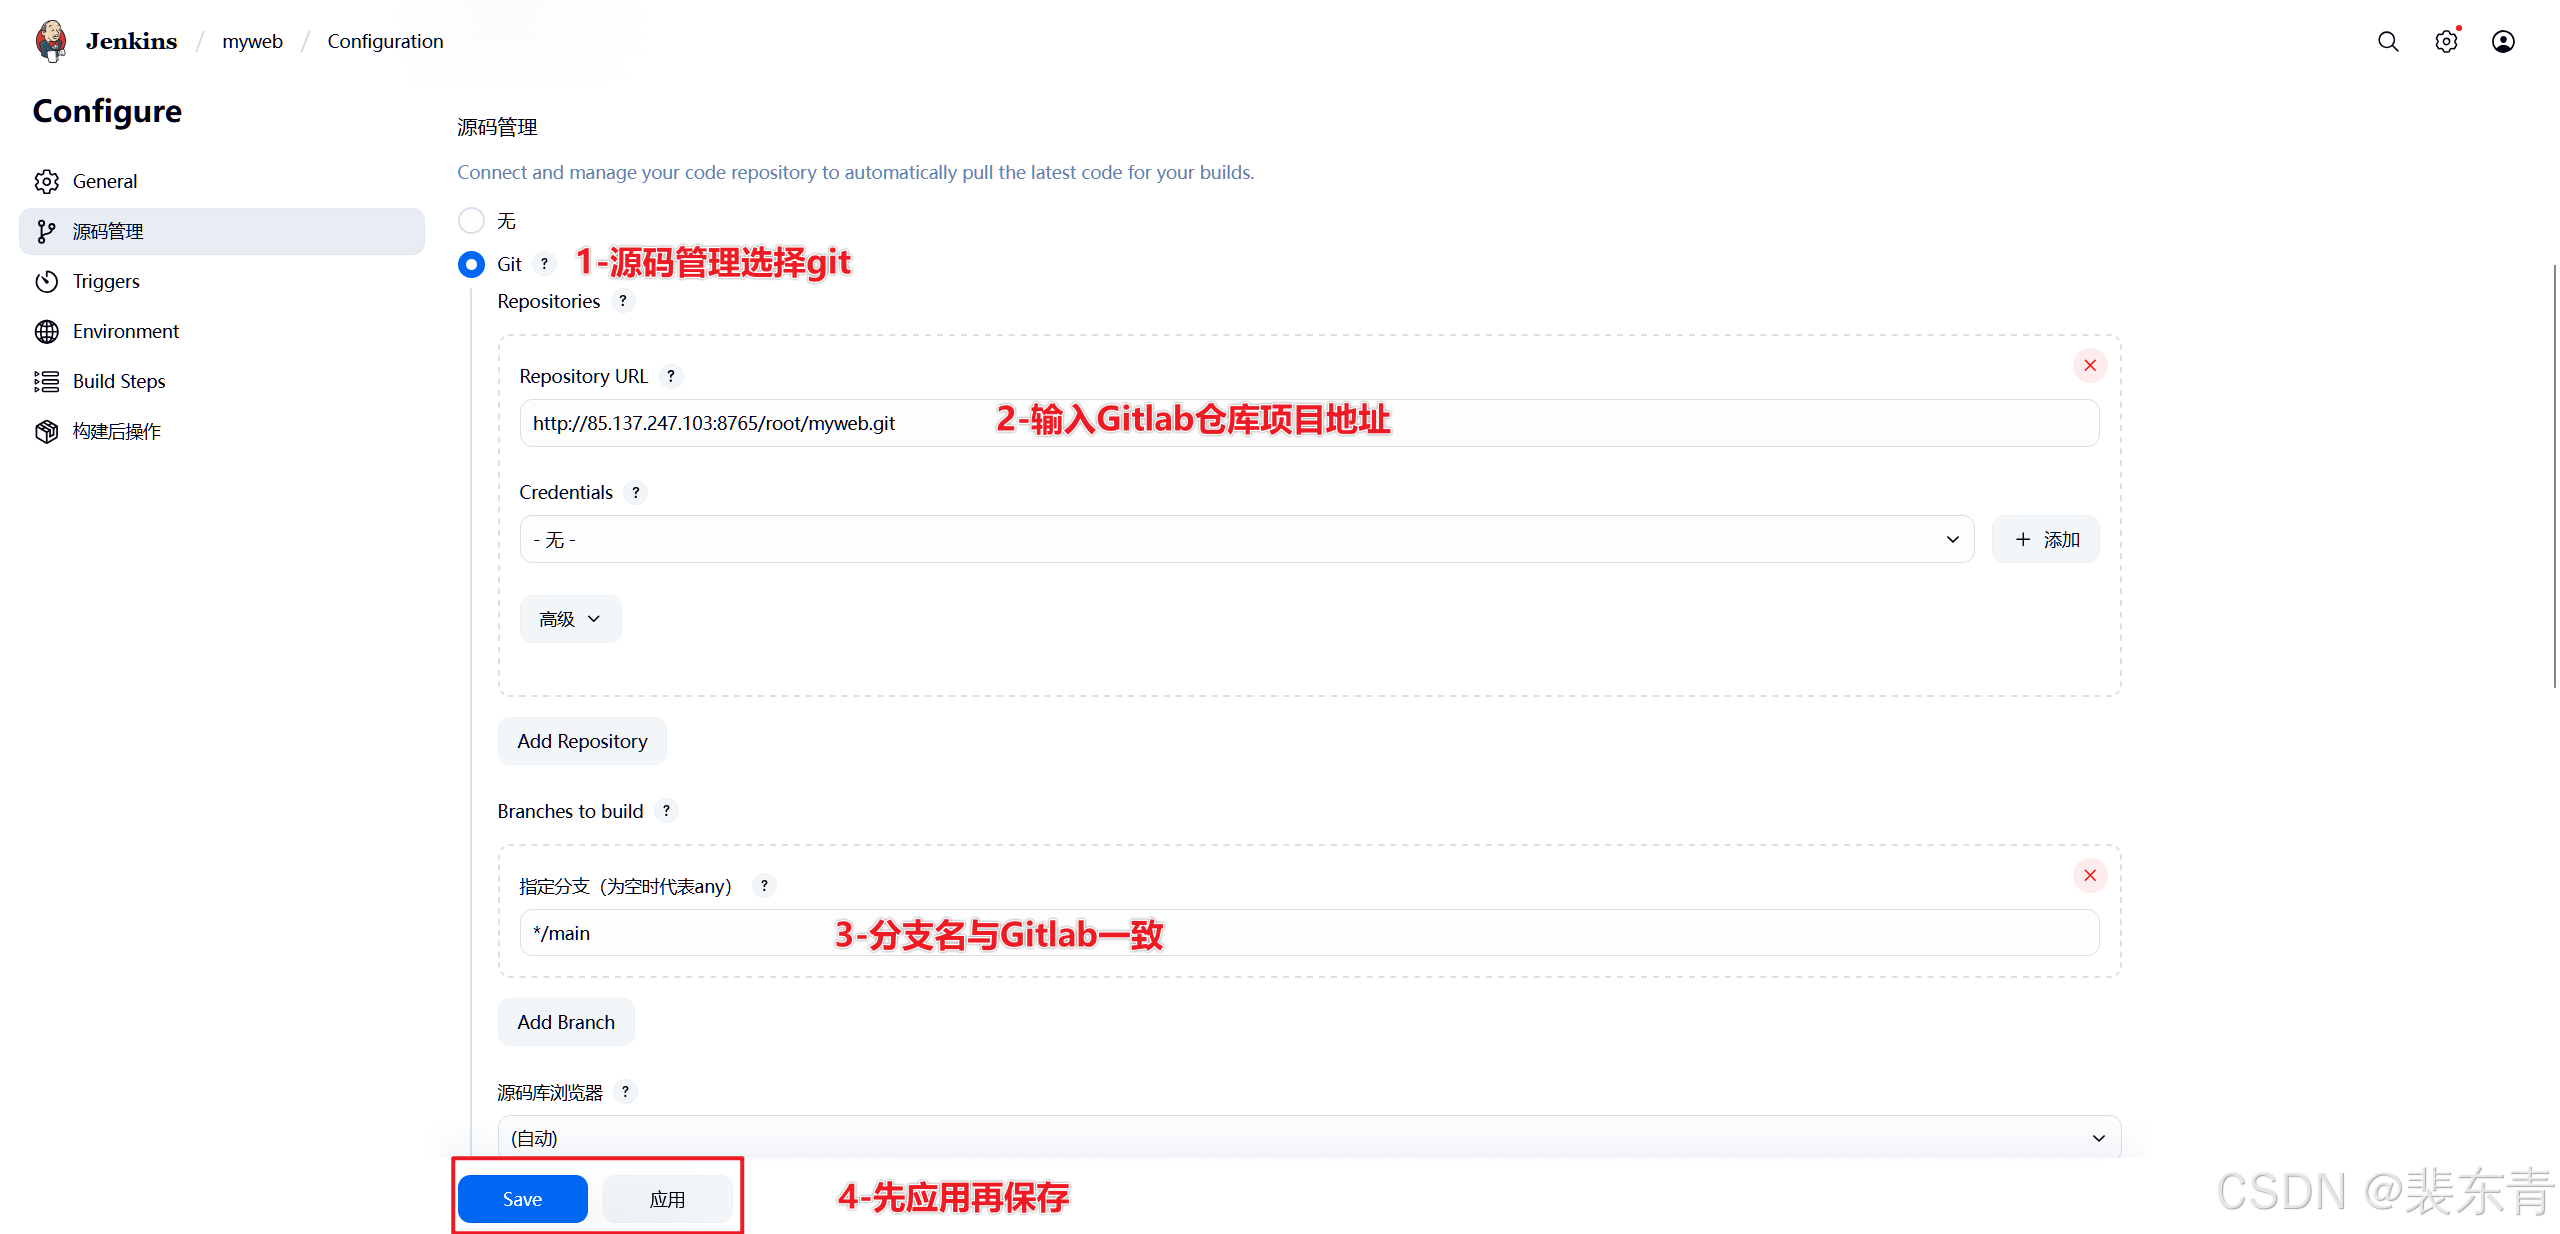
然后在Jenkins的myweb任务配置中进行源码管理
-
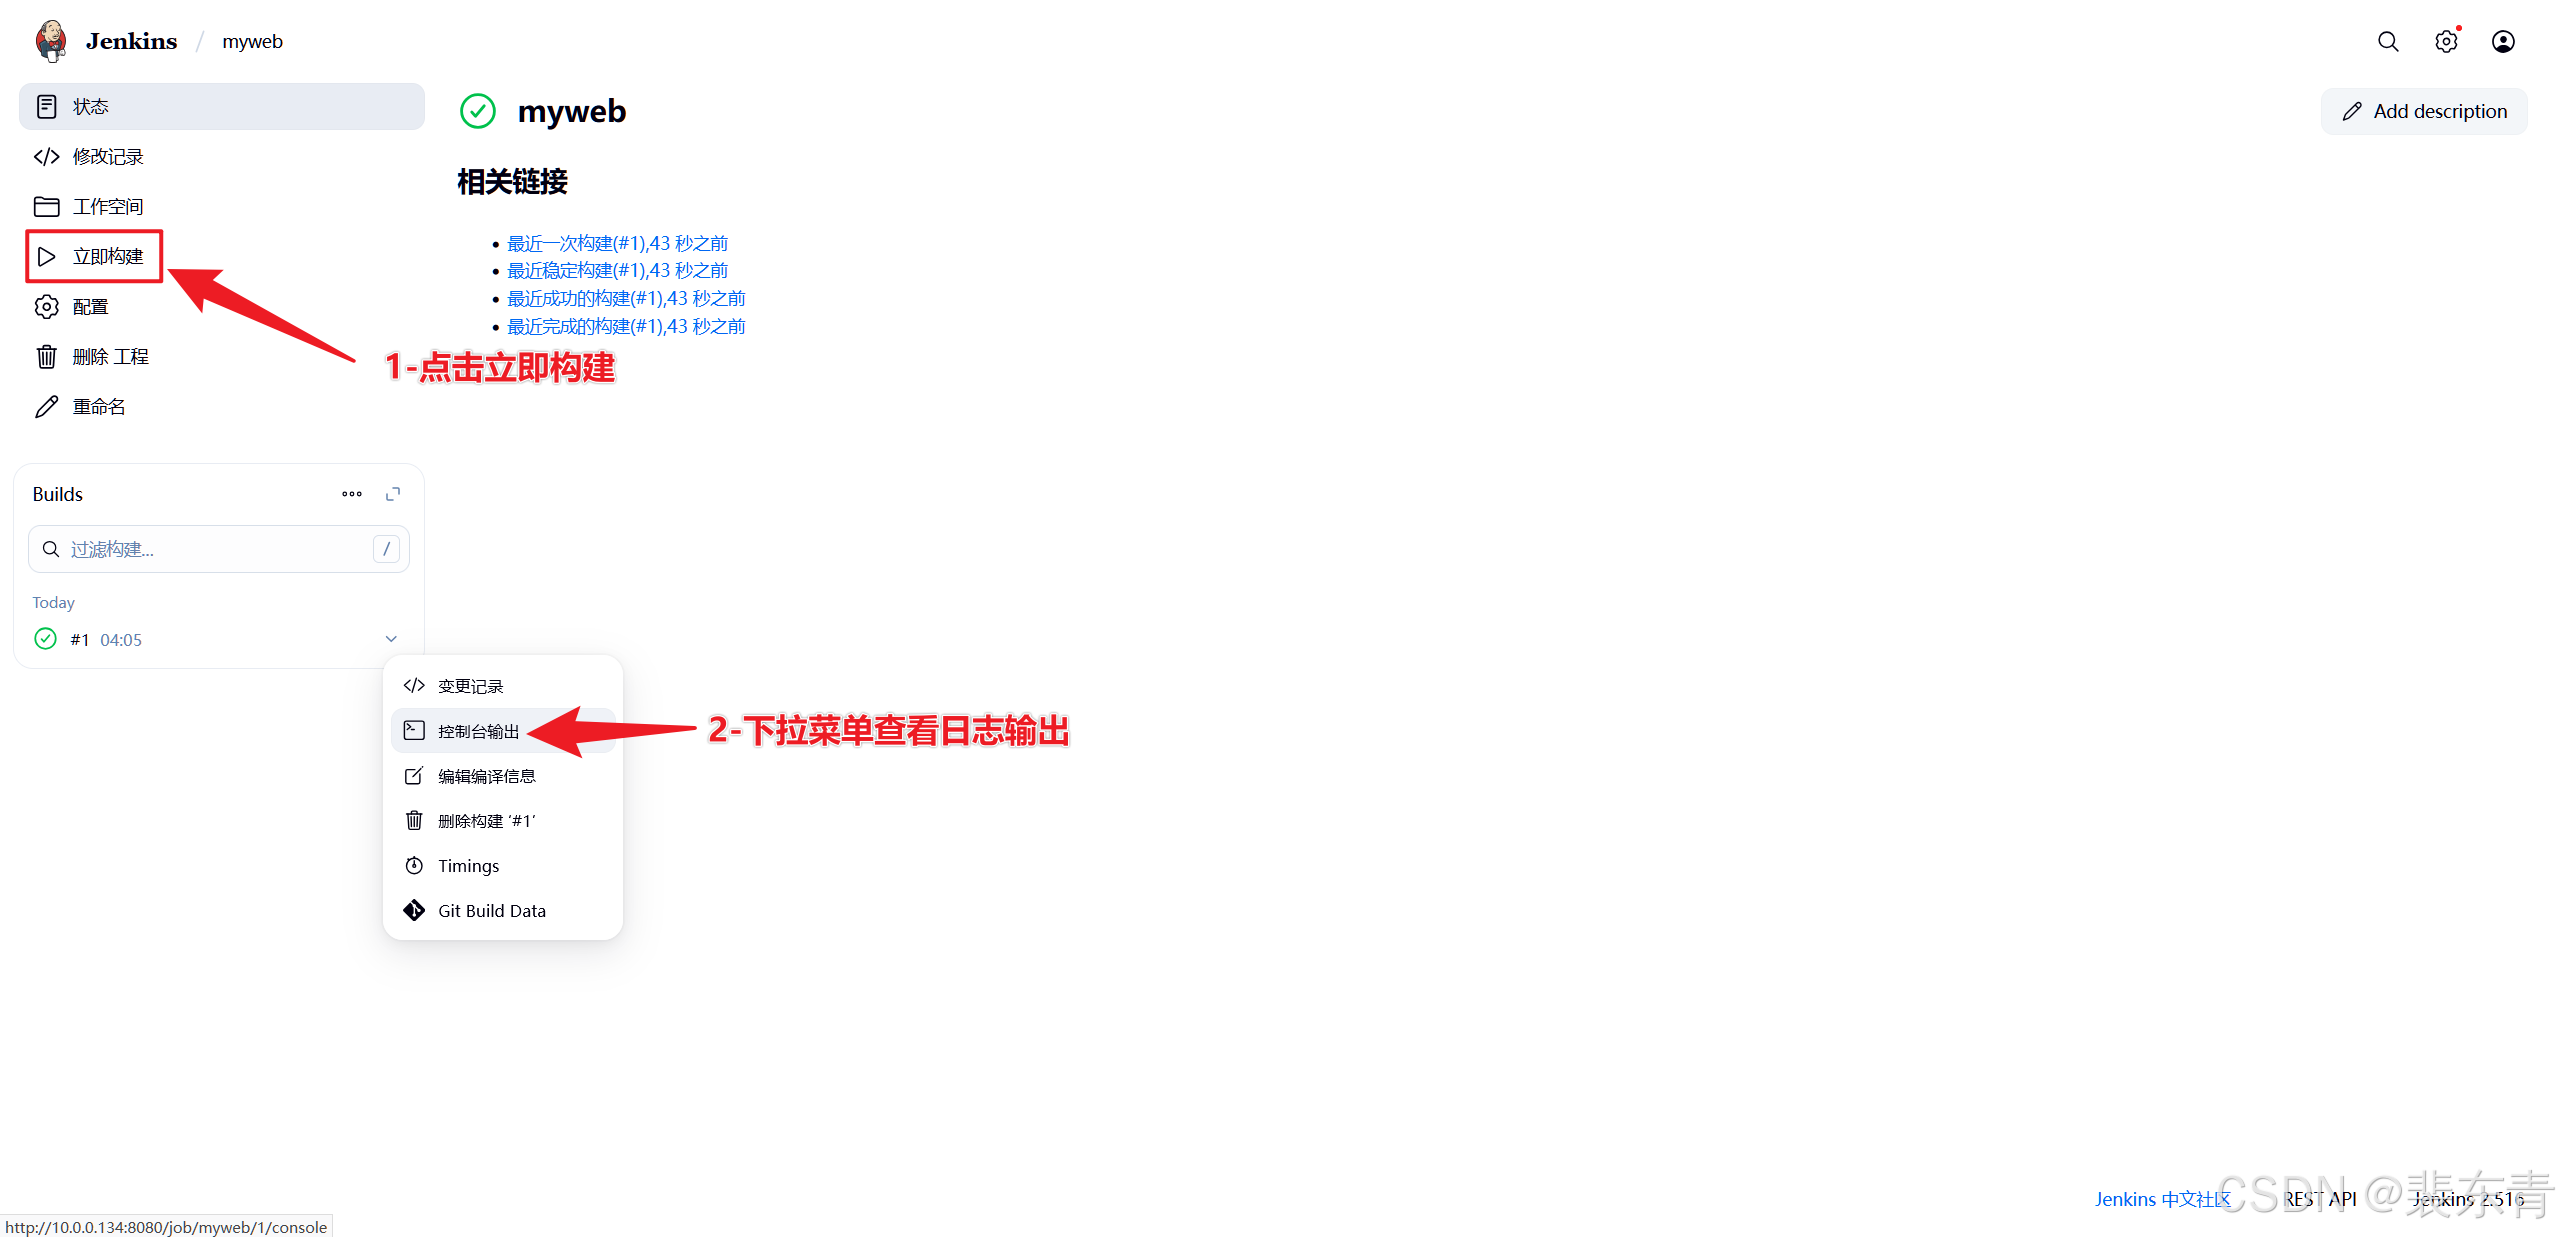
我们添加好仓库信息并应用保存后,可以先构建一下验证配置,以及Jenkins是否能成功拉取到代码
-
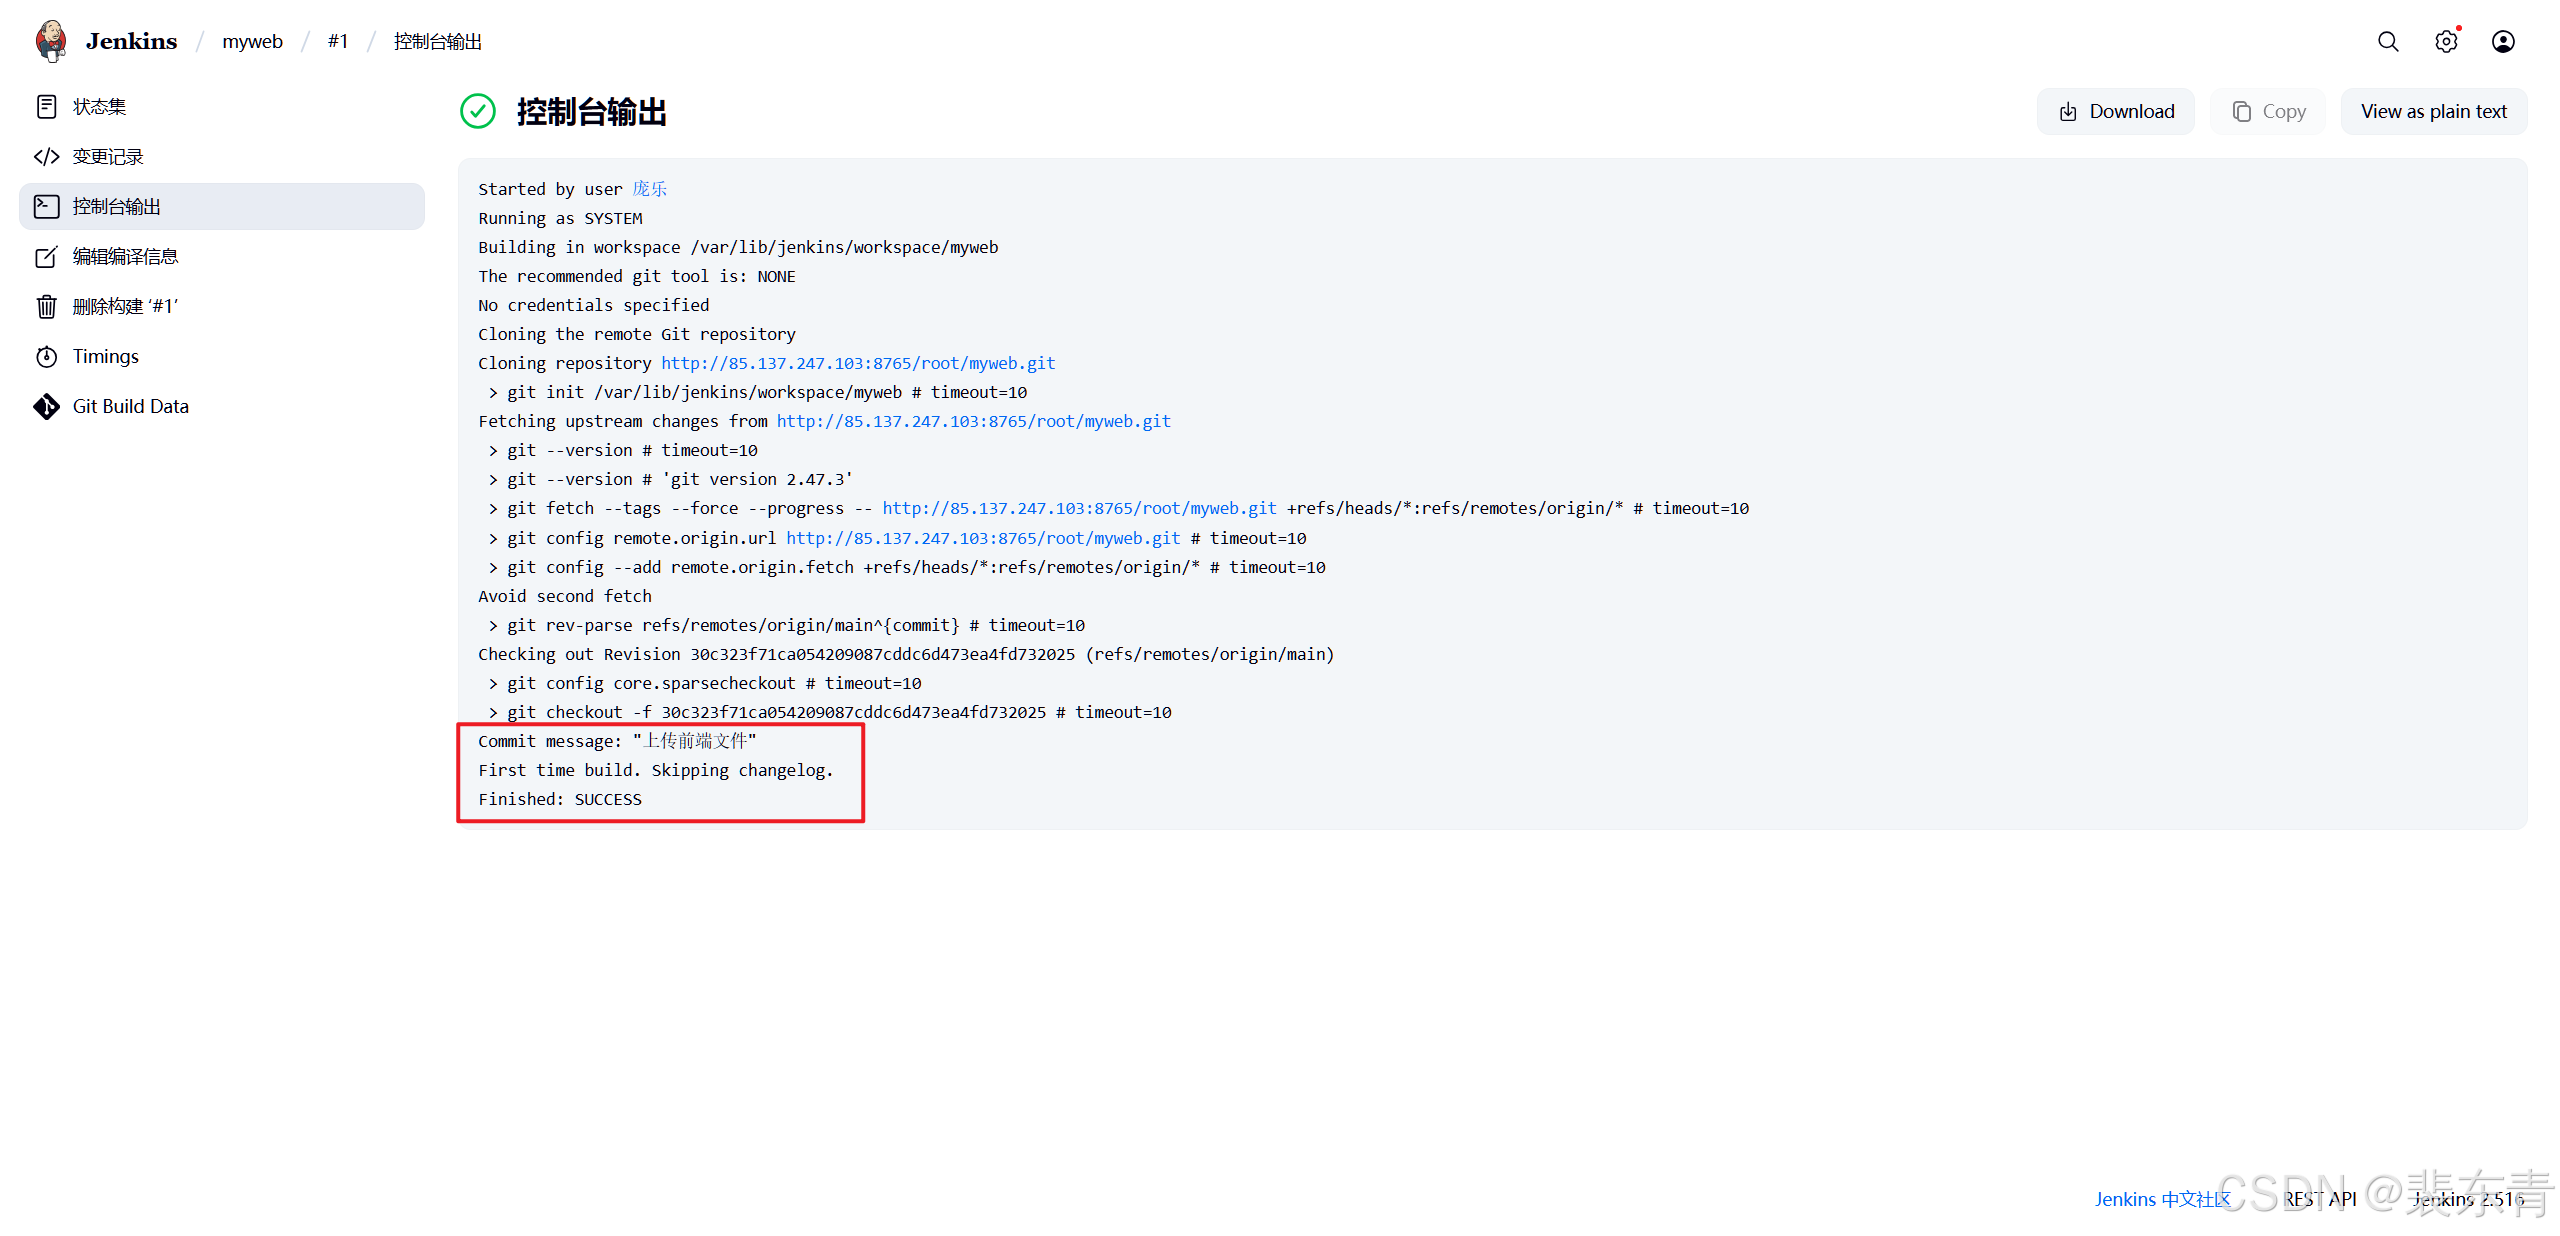
通过点击构建后控制台输出可以看到在Gitlab提交文件时编辑的信息,以及最后该次构建的成功信息
| 源码管理 |
|---|
 |
 |
 |
3.推送前配置
-
Jenkins推送代码到web服务器时,本质是先ssh到指定服务器后通过scp命令传输相关文件,所以,我们在推送代码之前先要让Jenkins服务器可以免密登录web服务器
- Jenkins服务器生成密钥对
# 切换Jenkins用户
sudo -u jenkins bash
# 生成 RSA 密钥对
ssh-keygen -t rsa -b 2048
# 一直回车,直到:
Generating public/private rsa key pair.
Enter file in which to save the key (/root/.ssh/id_rsa):
Enter passphrase (empty for no passphrase):
Enter same passphrase again:
Your identification has been saved in /root/.ssh/id_rsa
Your public key has been saved in /root/.ssh/id_rsa.pub
The key fingerprint is:
SHA256:KHQt8LS6OVrHdf97MuMB6Hj9lfKzJwELaob2GOJjA0w root@Jenkins
The key's randomart image is:
+---[RSA 2048]----+
| . . |
| + o |
| . = . |
| E. o o ... |
| o o ..S.o..o |
| o .=+.++ o... .|
| o=oo*. o o..o.|
| o=o. .. oB+o|
| .. o .=X+|
+----[SHA256]-----+-
执行后会生成公私钥密钥对
私钥:
/root/.ssh/id_rsa(Jenkins 服务器本地保留) 公钥:/root/.ssh/id_rsa.pub(Web 服务器保留)
- 发送公钥到web服务器
# 发送公钥到web服务器
ssh-copy-id root@10.0.0.135
# 先输入yes后输入web服务器10.0.0.135的root密码
/bin/ssh-copy-id: INFO: Source of key(s) to be installed: "/var/lib/jenkins/.ssh/id_rsa.pub"
The authenticity of host '10.0.0.135 (10.0.0.135)' can't be established.
ED25519 key fingerprint is SHA256:Ycnw5RwWOYG+9NgeAhlOOQfVhmTbTiKzlg6rs8Kx/BQ.
This key is not known by any other names
Are you sure you want to continue connecting (yes/no/[fingerprint])? yes # 输入yes
/bin/ssh-copy-id: INFO: attempting to log in with the new key(s), to filter out any that are already installed
/bin/ssh-copy-id: INFO: 1 key(s) remain to be installed -- if you are prompted now it is to install the new keys
root@10.0.0.135's password: # 输入root密码
Number of key(s) added: 1
Now try logging into the machine, with: "ssh 'root@10.0.0.135'"
and check to make sure that only the key(s) you wanted were added.
# 验证是否可免密登录
ssh root@10.0.0.135
# 不需要输入密码即可进入
Last login: Sun Feb 8 02:27:37 2026 from 10.0.0.1
[root@Web-~]# - Jenkins推送配置
-
通过之前的配置,已经将Gitlab仓库的代码文件拉取到了Jenkins服务器本地,Jenkins也有权限推送,然后就可以将本地文件推送到web服务器
-
首先我们需要知道代码文件拉取到本地的那个位置
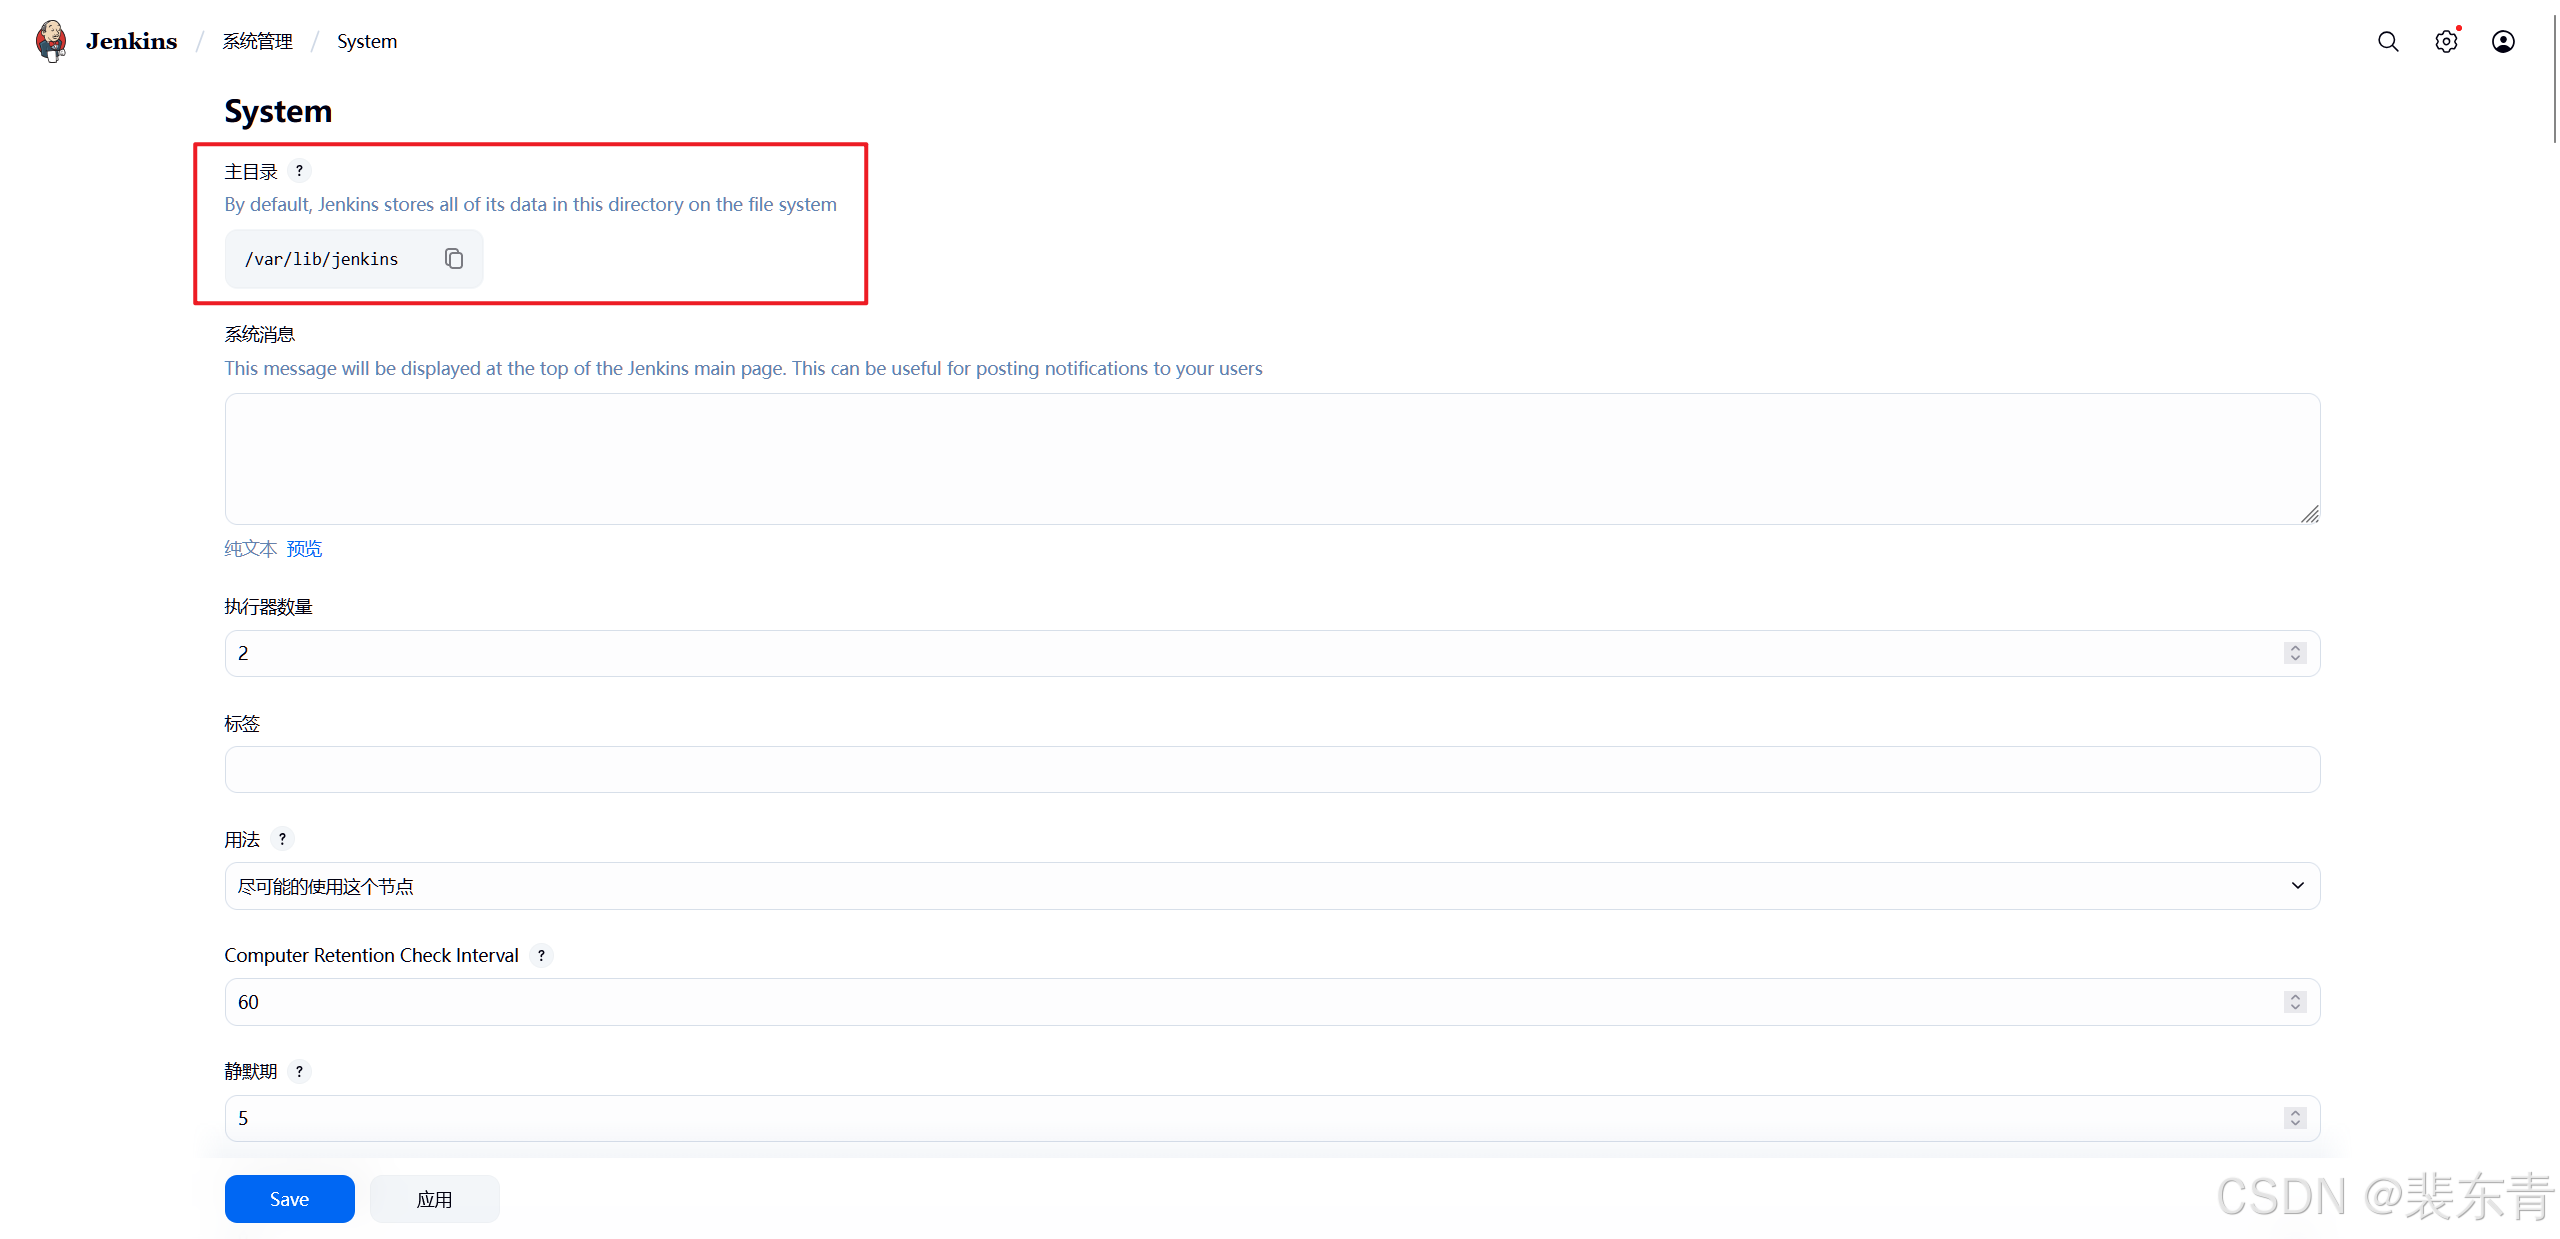
因为部署方式的不同,Jenkins工作目录便不同,我们可以通过点击
Jenkins主页右上角系统管理->系统配置->主目录得到具体工作目录然后在服务器上进入该目录,可以在
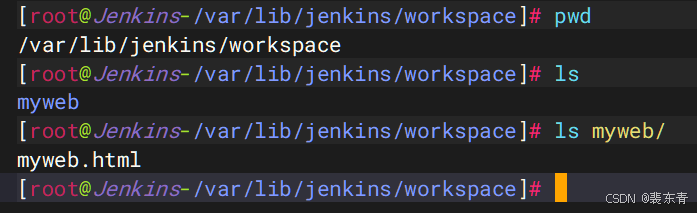
workspace目录中找到与Gitlab仓库项目同名的目录myweb,这就是从Gitlab拉取到的项目代码文件所在地址,之后只需要将myweb这个目录整个推送到web服务器即可
| 推送前配置 |
|---|
 |
 |
-
Jenkins在拉取推送代码时,都是在主目录中
workspace下Gitlab仓库同名目录进行的,所以我们在Jenkins中./就代表/var/lib/jenkins/workspace/myweb这一串绝对路径 -
Jenkins有内置变量
WORKSPACE,也代表的是当前任务所在目录
4.推送代码文件
-
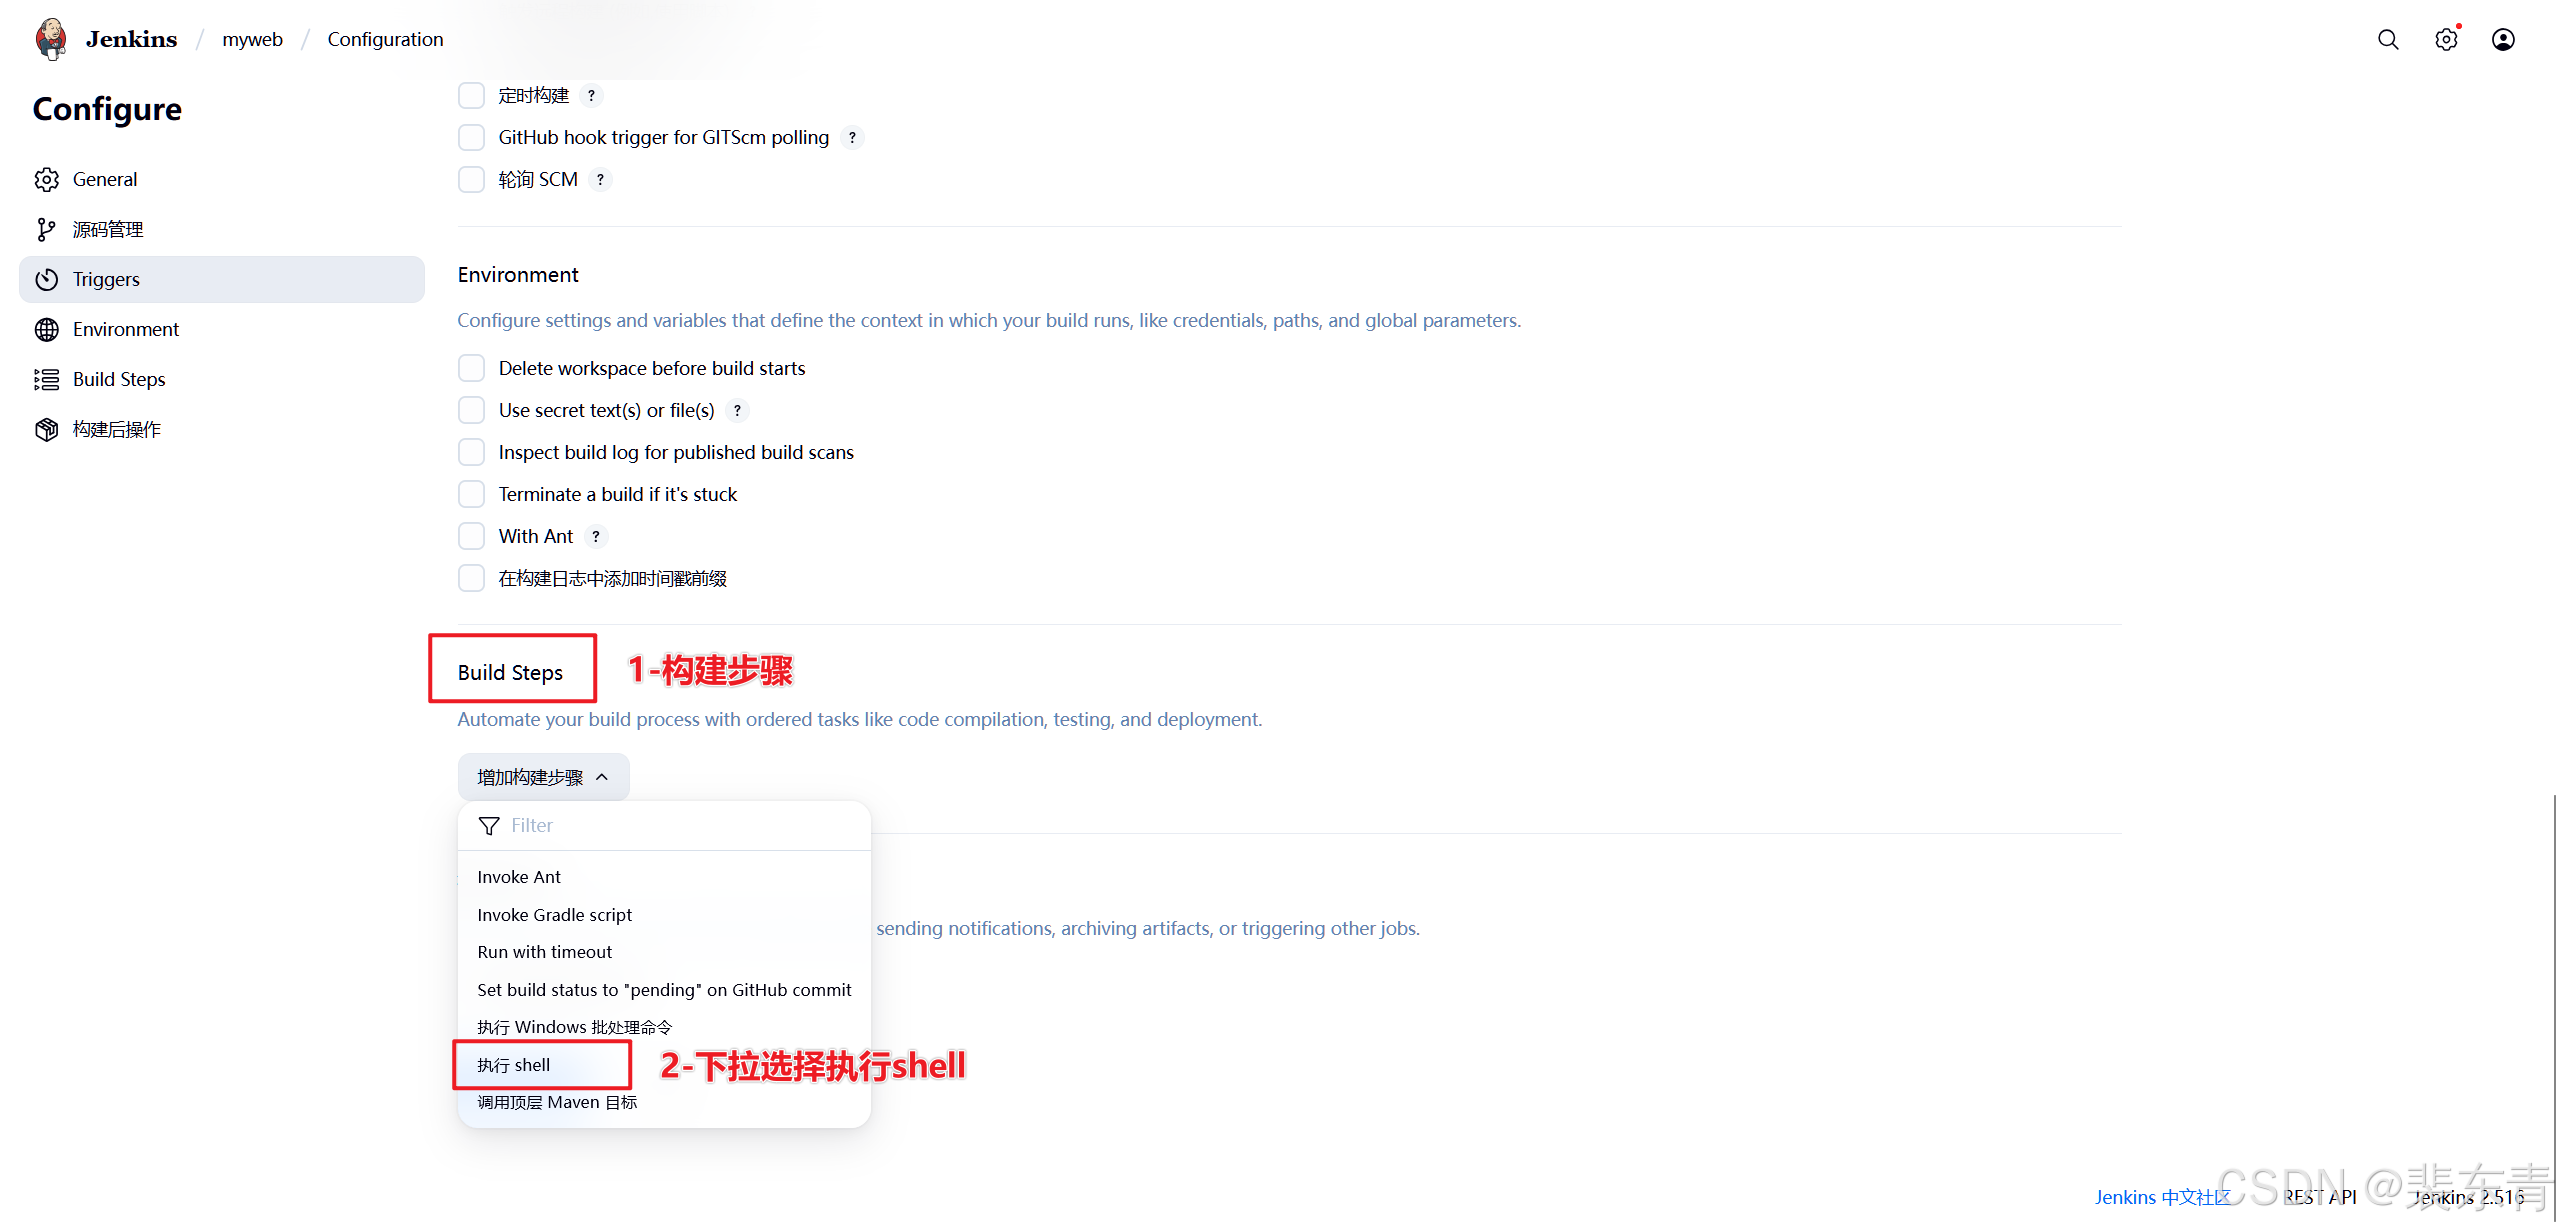
点击任务中配置选项,找到
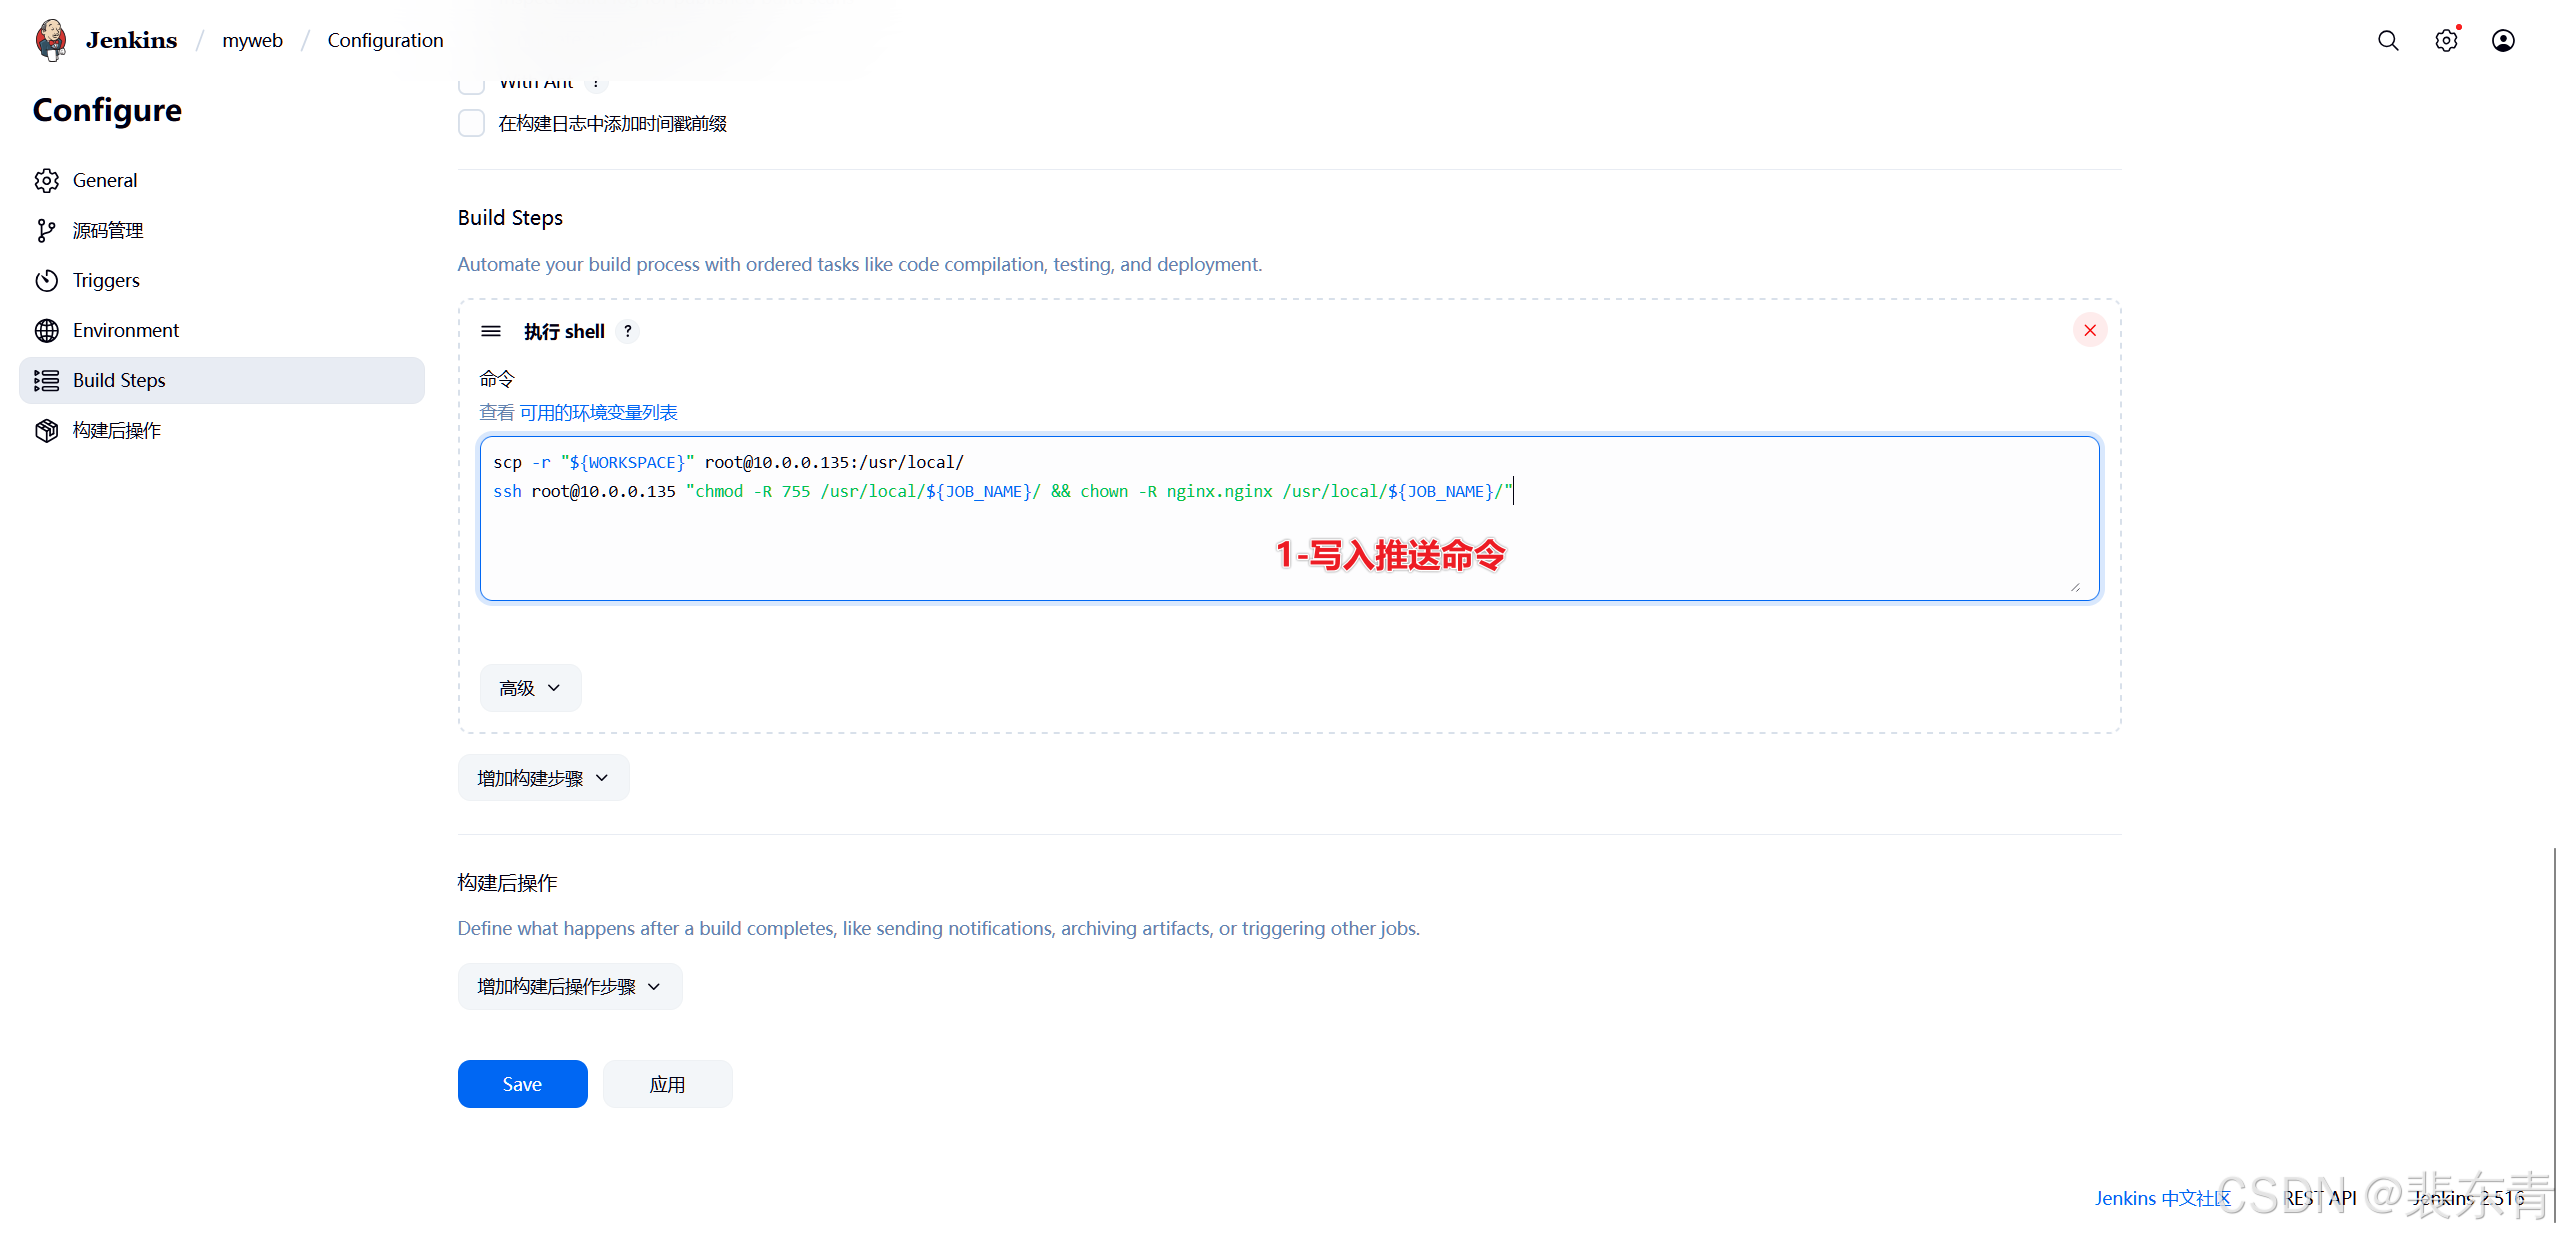
Build Steps,增加构建步骤选择执行shell -
然后填入推送命令
scp -r "${WORKSPACE}" root@10.0.0.135:/usr/local/
# 将WORKSPACE目录及内容发送到web服务器10.0.0.135的/usr/local/目录下
ssh root@10.0.0.135 "chmod -R 755 /usr/local/${JOB_NAME}/ && chown -R nginx.nginx /usr/local/${JOB_NAME}/"
# 防止访问错误,修改目录权限、属主属组 ${JOB_NAME}为Jenkins内置变量,值为当前任务名,因为Jenkins任务名与Gitlab项目名一直,所以可直接用变量代替-
在web服务器验证推送
| Jenkins推送文件 |
|---|
 |
 |
 |
三、web服务器配置
1.在web服务器安装nginx
# 安装
yum install -y nginx
# 启动
nginx
# 修改配置文件,添加代理指定目录
vim /etc/nginx/conf.d/myweb.conf
-----------------------------------------------------------------------------------------------------------
server {
listen 81;
server_name _;
root /usr/local/myweb;
index myweb.html index.html;
charset utf-8;
}
-----------------------------------------------------------------------------------------------------------
# 验证配置正确性
[root@Web-~]# nginx -t
nginx: the configuration file /etc/nginx/nginx.conf syntax is ok
nginx: configuration file /etc/nginx/nginx.conf test is successful
# nginx重新加载配置文件
nginx -s reload2.浏览器前端页面
-
浏览器地址栏输入:
http://10.0.0.135:81/
| 浏览器访问 |
|---|
 |

openEuler 是由开放原子开源基金会孵化的全场景开源操作系统项目,面向数字基础设施四大核心场景(服务器、云计算、边缘计算、嵌入式),全面支持 ARM、x86、RISC-V、loongArch、PowerPC、SW-64 等多样性计算架构
更多推荐


 12
12 0
0- 0


 已为社区贡献4条内容

所有评论(0)