Web——httpd服务的访问控制及基于域名的虚拟主机
本文详细介绍了如何配置Apache HTTP服务器实现单一IP访问控制和基于域名的虚拟主机设置。主要内容包括:1)通过备份、精简和修改httpd.conf配置文件,使用Requireip指令限制特定IP访问;2)配置基于域名的虚拟主机,包括域名绑定、目录创建、权限设置和测试页面部署;3)解决常见问题如403错误和favicon.ico缺失问题。配置完成后需重启Apache服务并测试访问效果,同时提
httpd服务的访问控制
实现单一IP控制访问
1.备份配置文件
在修改任何配置文件之前,创建备份是一个关键步骤。使用以下命令备份 httpd.conf 文件,备份文件保存在 /opt 目录下:
cp -av /usr/local/httpd2467/conf/httpd.conf /opt/httpd.conf_bf

2.精简配置文件
生产环境中,建议删除非必要的配置或注释,仅保留核心配置。使用以下命令生成精简版配置文件:
grep -Ev "^$|#" /usr/local/httpd2467/conf/httpd.conf > /opt/ori.httpd.conf

生成的 ori.httpd.conf 文件将不包含空行和注释。
3.更新主配置文件
将精简后的配置文件内容写入主配置文件:
cat /opt/ori.httpd.conf > /usr/local/httpd2467/conf/httpd.conf

4.添加注释和核心配置
在配置文件中适当添加注释,便于维护。整体代码如下:
vim /usr/local/httpd2467/conf/httpd.conf# http 服务器的主目录
ServerRoot "/usr/local/httpd2467"
# 监听端口
Listen 80
# 加载的模块.so动态模块
LoadModule authn_file_module modules/mod_authn_file.so
LoadModule authn_core_module modules/mod_authn_core.so
LoadModule authz_host_module modules/mod_authz_host.so
LoadModule authz_groupfile_module modules/mod_authz_groupfile.so
LoadModule authz_user_module modules/mod_authz_user.so
LoadModule authz_core_module modules/mod_authz_core.so
LoadModule access_compat_module modules/mod_access_compat.so
LoadModule auth_basic_module modules/mod_auth_basic.so
LoadModule reqtimeout_module modules/mod_reqtimeout.so
LoadModule filter_module modules/mod_filter.so
LoadModule mime_module modules/mod_mime.so
LoadModule log_config_module modules/mod_log_config.so
LoadModule env_module modules/mod_env.so
LoadModule headers_module modules/mod_headers.so
LoadModule setenvif_module modules/mod_setenvif.so
LoadModule version_module modules/mod_version.so
LoadModule unixd_module modules/mod_unixd.so
LoadModule status_module modules/mod_status.so
LoadModule autoindex_module modules/mod_autoindex.so
LoadModule dir_module modules/mod_dir.so
LoadModule alias_module modules/mod_alias.so
include /usr/local/httpd2467/conf/extra/httpd-vhosts.conf
# 运行httpd服务所需的用户和组
<IfModule unixd_module>
User daemon
Group daemon
</IfModule>
# 维护该网站管理员的邮箱
ServerAdmin you@example.com
# 根的权限设置
<Directory />
AllowOverride none
Require all denied
</Directory>
# 网站资源的属性配置
<Directory "/usr/local/httpd2467/htdocs">
Options Indexes FollowSymLinks
AllowOverride None
# Require all granted
Require ip 192.168.2.15
</Directory>
# 网站的默认首页配置信息
<IfModule dir_module>
DirectoryIndex index.html
</IfModule>
# 权限相关的配置
<Files ".ht*">
Require all denied
</Files>
# 日志相关的配置
ErrorLog "logs/error_log"
LogLevel warn
<IfModule log_config_module>
LogFormat "%h %l %u %t \"%r\" %>s %b \"%{Referer}i\" \"%{User-Agent}i\"" combined
LogFormat "%h %l %u %t \"%r\" %>s %b" common
<IfModule logio_module>
LogFormat "%h %l %u %t \"%r\" %>s %b \"%{Referer}i\" \"%{User-Agent}i\" %I %O" combinedio
</IfModule>
CustomLog "logs/access_log" common
</IfModule>
# CGI别名
<IfModule alias_module>
ScriptAlias /cgi-bin/ "/usr/local/httpd2467/cgi-bin/"
</IfModule>
<IfModule cgid_module>
</IfModule>
<Directory "/usr/local/httpd2467/cgi-bin">
AllowOverride None
Options None
Require all granted
</Directory>
# http协议信息等配置
<IfModule headers_module>
RequestHeader unset Proxy early
</IfModule>
# http协议相关配置
<IfModule mime_module>
TypesConfig conf/mime.types
AddType application/x-compress .Z
AddType application/x-gzip .gz .tgz
</IfModule>
# 代理模块相关的
<IfModule proxy_html_module>
Include conf/extra/proxy-html.conf
</IfModule>
# https = http + ssl 443
<IfModule ssl_module>
SSLRandomSeed startup builtin
SSLRandomSeed connect builtin
</IfModule>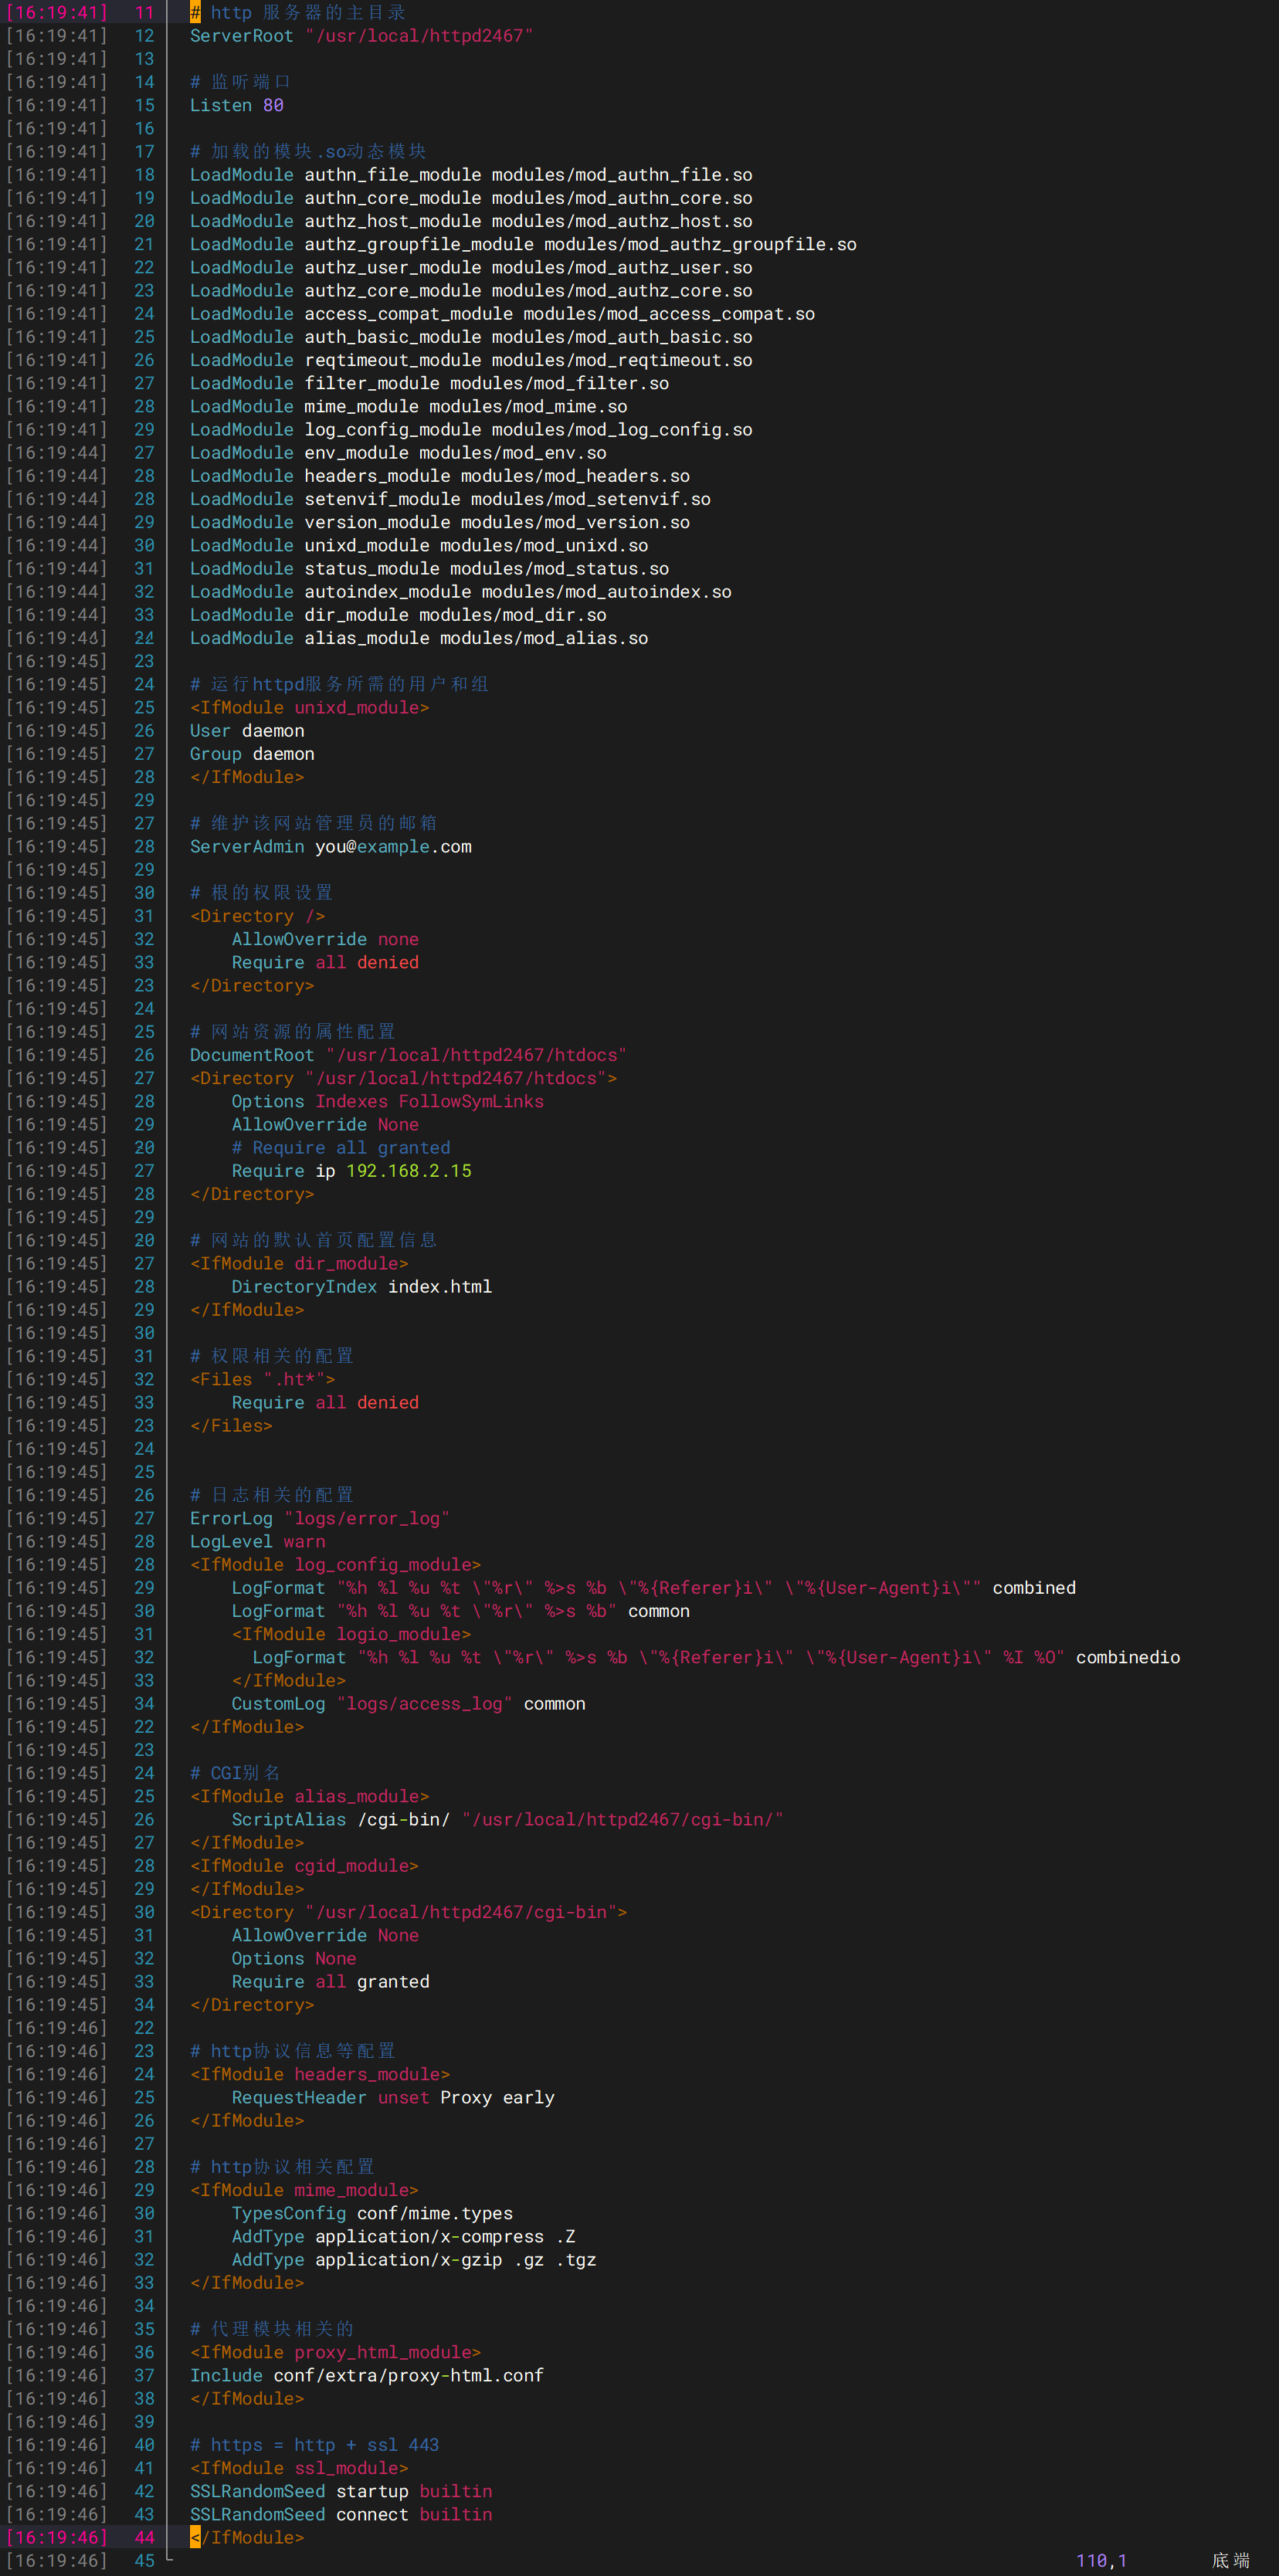
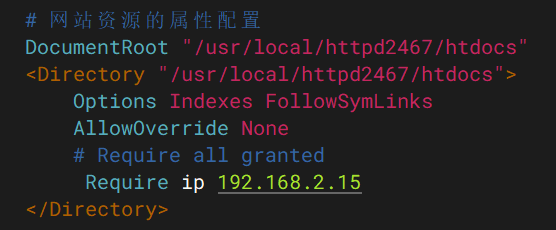
5.配置IP访问限制
通过 Require ip 指令限制特定IP访问:
<Directory "/path/to/directory">
    Require ip 192.168.2.15  # 只允许ip 192.168.2.15访问
</Directory>
6.检查配置文件语法
使用以下命令验证配置文件语法是否正确:
/usr/local/httpd2467/bin/apachectl -t

7.重启HTTP服务
应用配置更改后,重启服务使配置生效:
/usr/local/httpd2467/bin/apachectl -k restart

8.测试访问效果
通过以下方式测试访问控制是否生效:
-
本地访问测试:
curl localhost
预期返回
403表示访问被拒绝。 -
指定IP访问测试:
curl 192.168.2.15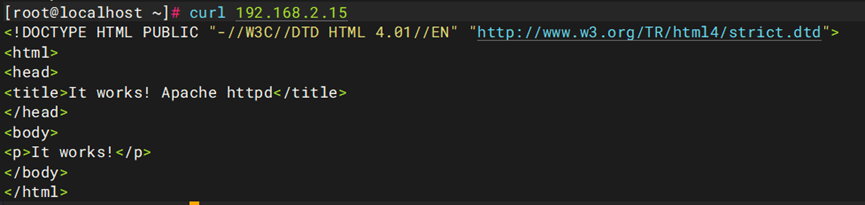
预期返回默认首页内容。
-
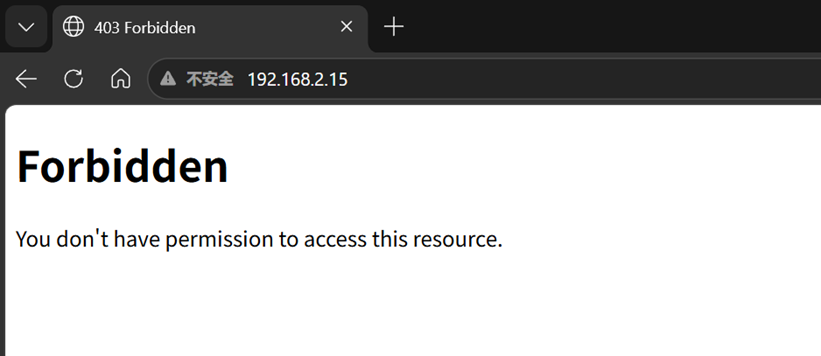
浏览器访问测试:非服务器IP访问应返回
403。
9.关于http服务403错误
若出现 403 Forbidden 错误,可能原因包括:
- 目录或文件权限不足。
- 缺少默认首页文件(如
index.html)。 - IP未在
Require ip列表中允许。
检查目录权限和默认首页文件是否存在:
ls -l /usr/local/httpd2467/htdocs/index.html

虚拟主机(基于域名)
虚拟主机基本规划与配置
1.IP地址确认
使用命令ip -4 a查看当前系统的IPv4地址。示例输出显示eth0接口的IP为192.168.2.15,这是后续域名绑定的基础。
[root@localhost ~]# ip -4 a
1: lo: <LOOPBACK,UP,LOWER_UP> mtu 65536 qdisc noqueue state UNKNOWN group default qlen 1000
    inet 127.0.0.1/8 scope host lo
       valid_lft forever preferred_lft forever
2: eth0: <BROADCAST,MULTICAST,UP,LOWER_UP> mtu 1500 qdisc pfifo_fast state UP group default qlen 1000
    inet 192.168.2.15/24 brd 192.168.2.255 scope global noprefixroute eth0
       valid_lft forever preferred_lft forever

2.域名与IP绑定
编辑/etc/hosts文件,格式为IP 域名,支持多域名绑定同一IP:
192.168.2.15 web1.lengmx.com
192.168.2.15 web2.lengmx.com

域名解析测试
通过ping命令验证域名解析是否生效:
ping -c 2 web1.lengmx.com
ping -c 2 web2.lengmx.com
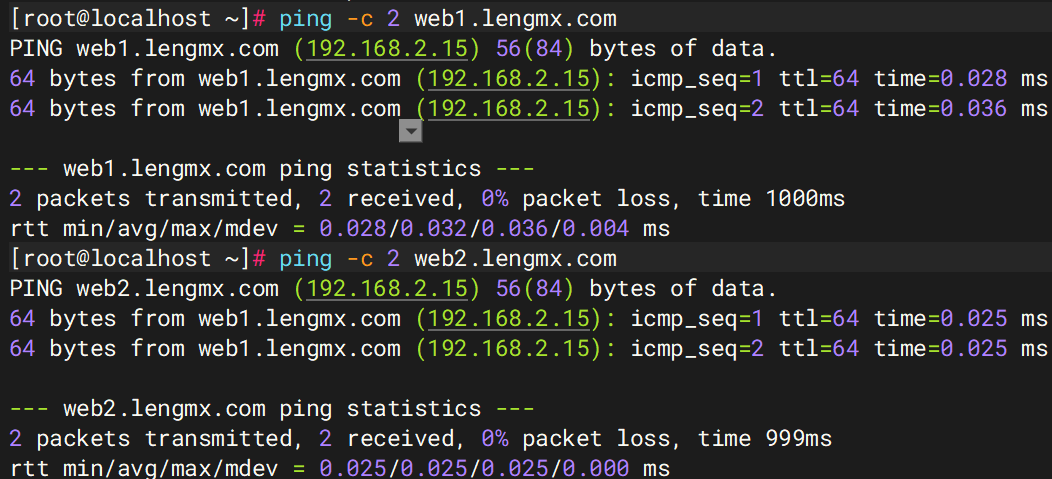
需确认返回的IP与绑定一致,且TTL值存在。
3.Windows客户端配置
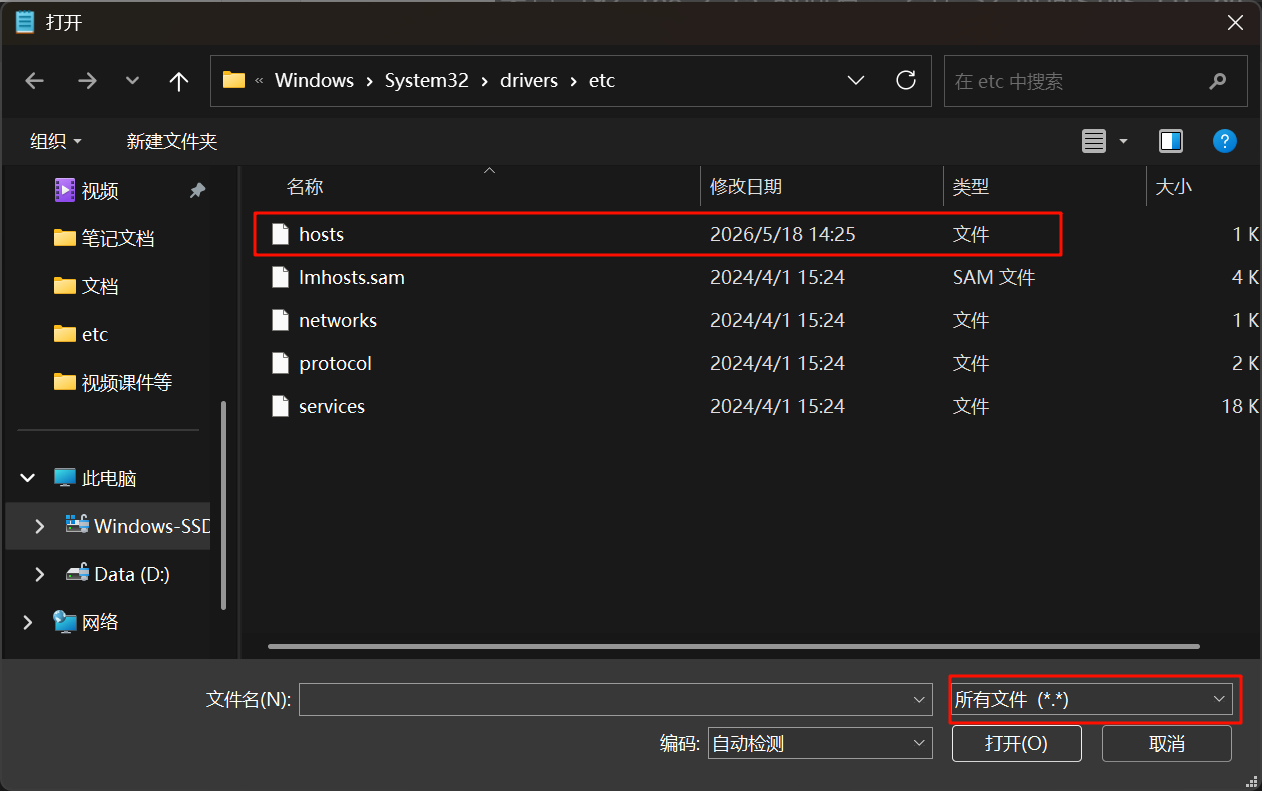
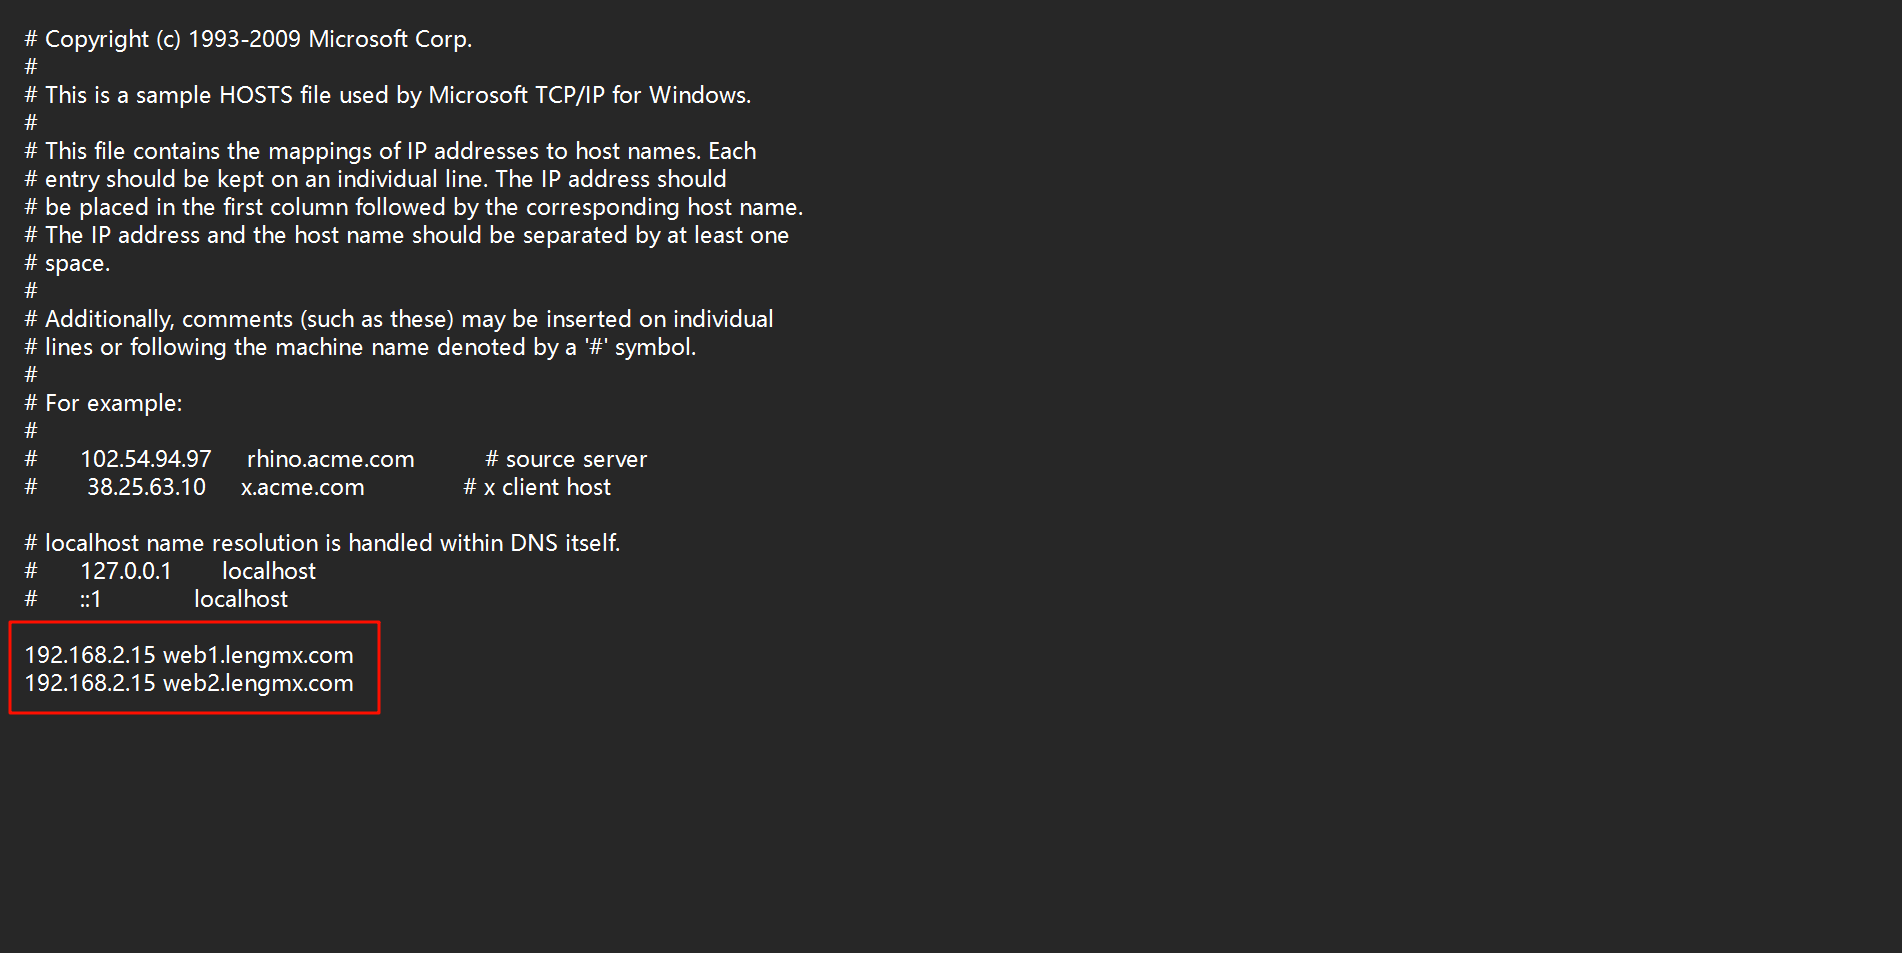
修改C:\Windows\System32\drivers\etc\hosts文件。
以管理员身份运行记事本,C:\Windows\System32\drivers\etc\hosts,添加相同的域名绑定。通过CMD执行ping测试,确保返回结果与Linux端一致。
4.虚拟主机配置文件
编辑httpd-vhosts.conf(路径:/usr/local/httpd2467/conf/extra/),配置示例:
vim /usr/local/httpd2467/conf/extra/httpd-vhosts.conf# Virtual Hosts
#
# Required modules: mod_log_config
# If you want to maintain multiple domains/hostnames on your
# machine you can setup VirtualHost containers for them. Most configurations
# use only name-based virtual hosts so the server doesn't need to worry about
# IP addresses. This is indicated by the asterisks in the directives below.
#
# Please see the documentation at
# <URL:http://httpd.apache.org/docs/2.4/vhosts/>
# for further details before you try to setup virtual hosts.
#
# You may use the command line option '-S' to verify your virtual host
# configuration.
#
# VirtualHost example:
# Almost any Apache directive may go into a VirtualHost container.
# The first VirtualHost section is used for all requests that do not
# match a ServerName or ServerAlias in any <VirtualHost> block.
#
<VirtualHost *:80>
ServerAdmin webmaster@web1.lengmx.com
DocumentRoot "/usr/local/httpd2467/docs/web1.lengmx.com"
ServerName web1.lengmx.com
ServerAlias www.web1.lengmx.com
ErrorLog "logs/web1.lengmx.com-error_log"
CustomLog "logs/web1.lengmx.com-access_log" common
<Directory "/usr/local/httpd2467/docs/web1.lengmx.com">
Options FollowSymLinks
AllowOverride All
Require all granted
</Directory>
</VirtualHost>
<VirtualHost *:80>
ServerAdmin webmaster@web2.lengmx.com
DocumentRoot "/usr/local/httpd2467/docs/web2.lengmx.com"
ServerName web2.lengmx.com
ErrorLog "logs/web2.lengmx.com-error_log"
CustomLog "logs/web2.lengmx.com-access_log" common
<Directory "/usr/local/httpd2467/docs/web2.lengmx.com">
Options FollowSymLinks
AllowOverride All
Require all granted
</Directory>
</VirtualHost>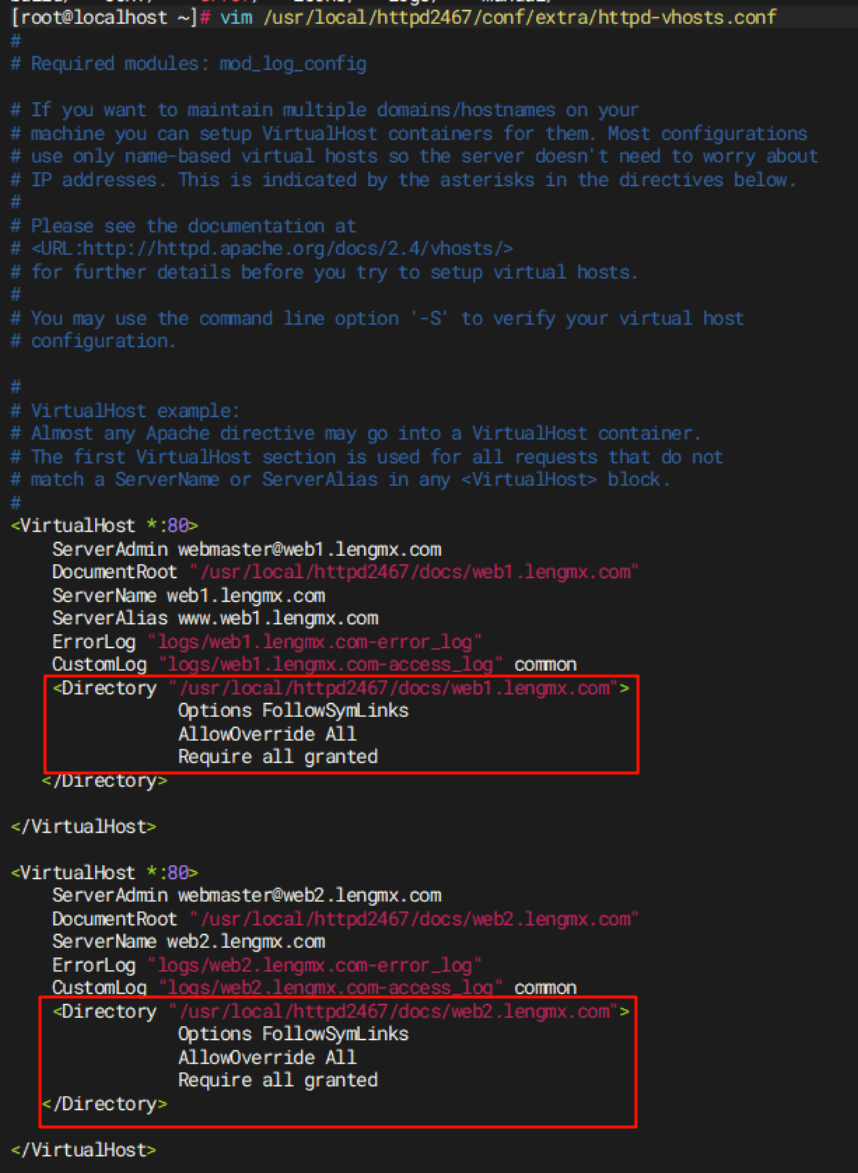
5.创建网站目录与权限设置
创建网站根目录并设置所有权给Apache运行用户(如daemon):
mkdir -pv /usr/local/httpd2467/docs/web{1..2}.lengmx.com
chown -R daemon.daemon /usr/local/httpd2467/docs/web{1..2}.lengmx.com


6.默认网页配置
为每个虚拟主机创建测试页面:
echo '<h1>web1.lengmx.com</h1>' > /usr/local/httpd2467/docs/web1.lengmx.com/index.html
echo '<h1>web2.lengmx.com</h1>' > /usr/local/httpd2467/docs/web2.lengmx.com/index.html

7.主配置文件调整
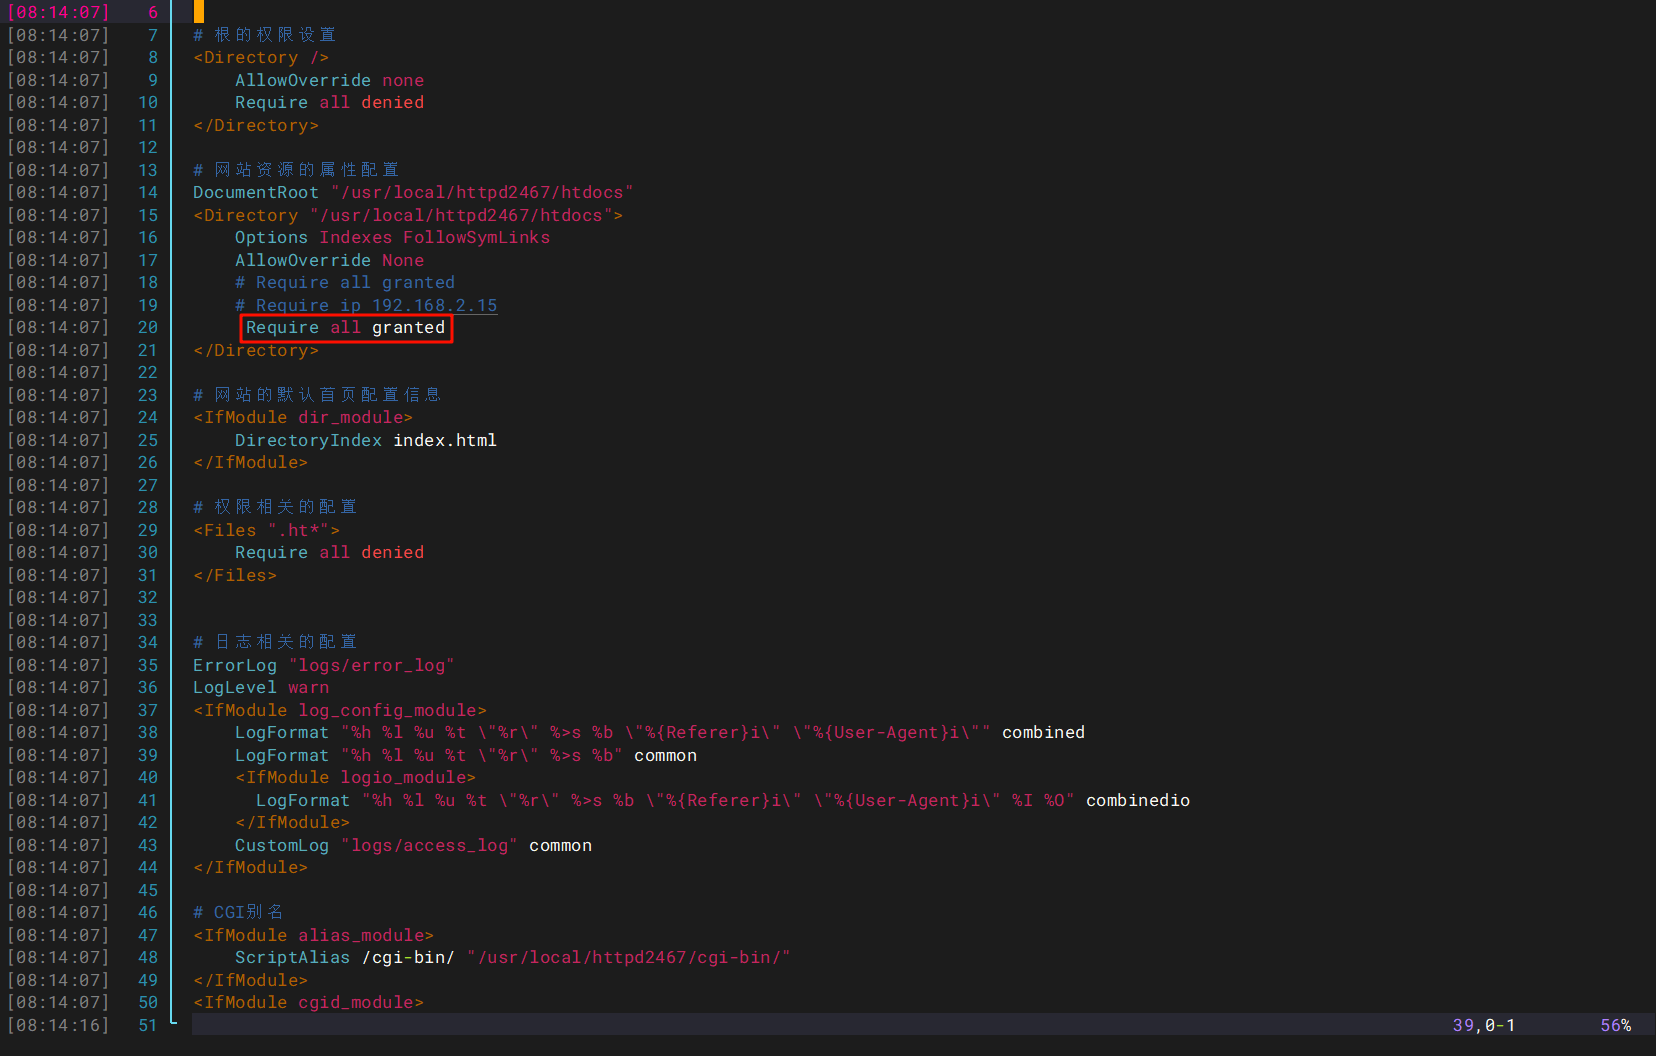
确保httpd.conf包含虚拟主机配置并开放目录访问权限:
vim /usr/local/httpd2467/conf/httpd.conf# http 服务器的主目录
ServerRoot "/usr/local/httpd2467"
# 监听端口
Listen 80
# 加载的模块.so动态模块
LoadModule authn_file_module modules/mod_authn_file.so
LoadModule authn_core_module modules/mod_authn_core.so
LoadModule authz_host_module modules/mod_authz_host.so
LoadModule authz_groupfile_module modules/mod_authz_groupfile.so
LoadModule authz_user_module modules/mod_authz_user.so
LoadModule authz_core_module modules/mod_authz_core.so
LoadModule access_compat_module modules/mod_access_compat.so
LoadModule auth_basic_module modules/mod_auth_basic.so
LoadModule reqtimeout_module modules/mod_reqtimeout.so
LoadModule filter_module modules/mod_filter.so
LoadModule mime_module modules/mod_mime.so
LoadModule log_config_module modules/mod_log_config.so
LoadModule env_module modules/mod_env.so
LoadModule headers_module modules/mod_headers.so
LoadModule setenvif_module modules/mod_setenvif.so
LoadModule version_module modules/mod_version.so
LoadModule unixd_module modules/mod_unixd.so
LoadModule status_module modules/mod_status.so
LoadModule autoindex_module modules/mod_autoindex.so
LoadModule dir_module modules/mod_dir.so
LoadModule alias_module modules/mod_alias.so
include /usr/local/httpd2467/conf/extra/httpd-vhosts.conf
# 运行httpd服务所需的用户和组
<IfModule unixd_module>
User daemon
Group daemon
</IfModule>
# 维护该网站管理员的邮箱
ServerAdmin you@example.com
# 根的权限设置
<Directory />
AllowOverride none
Require all denied
</Directory>
# 网站资源的属性配置
DocumentRoot "/usr/local/httpd2467/htdocs"
<Directory "/usr/local/httpd2467/htdocs">
Options Indexes FollowSymLinks
AllowOverride None
# Require all granted
# Require ip 192.168.2.15
Require all granted
</Directory>
# 网站的默认首页配置信息
<IfModule dir_module>
DirectoryIndex index.html
</IfModule>
# 权限相关的配置
<Files ".ht*">
Require all denied
</Files>
# 日志相关的配置
ErrorLog "logs/error_log"
LogLevel warn
<IfModule log_config_module>
LogFormat "%h %l %u %t \"%r\" %>s %b \"%{Referer}i\" \"%{User-Agent}i\"" combined
LogFormat "%h %l %u %t \"%r\" %>s %b" common
<IfModule logio_module>
LogFormat "%h %l %u %t \"%r\" %>s %b \"%{Referer}i\" \"%{User-Agent}i\" %I %O" combinedio
</IfModule>
CustomLog "logs/access_log" common
</IfModule>
# CGI别名
<IfModule alias_module>
ScriptAlias /cgi-bin/ "/usr/local/httpd2467/cgi-bin/"
</IfModule>
<IfModule cgid_module>
</IfModule>
<Directory "/usr/local/httpd2467/cgi-bin">
AllowOverride None
Options None
Require all granted
</Directory>
# http协议信息等配置
<IfModule headers_module>
RequestHeader unset Proxy early
</IfModule>
# http协议相关配置
<IfModule mime_module>
TypesConfig conf/mime.types
AddType application/x-compress .Z
AddType application/x-gzip .gz .tgz
</IfModule>
# 代理模块相关的
<IfModule proxy_html_module>
Include conf/extra/proxy-html.conf
</IfModule>
# https = http + ssl 443
<IfModule ssl_module>
SSLRandomSeed startup builtin
SSLRandomSeed connect builtin
</IfModule>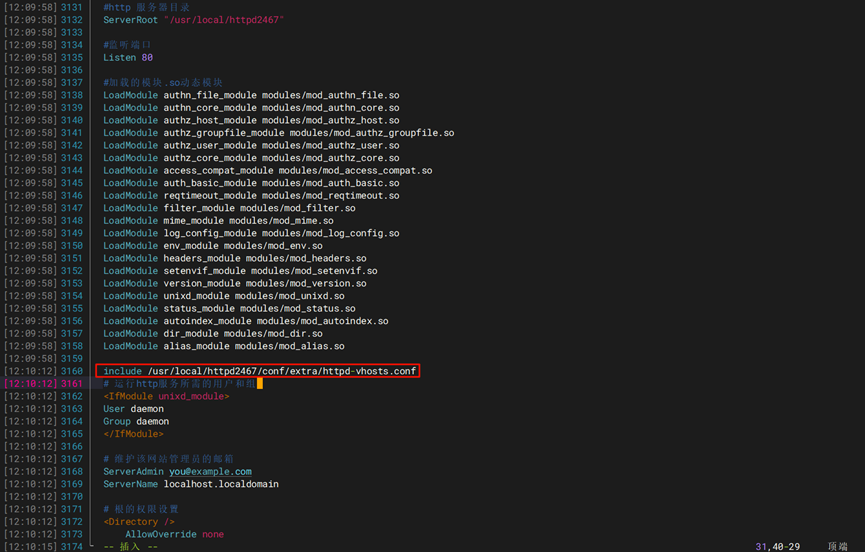
8.重启Apache服务
完成配置后重启Apache使变更生效:
/usr/local/httpd2467/bin/apachectl -t && /usr/local/httpd2467/bin/apachectl -k restart
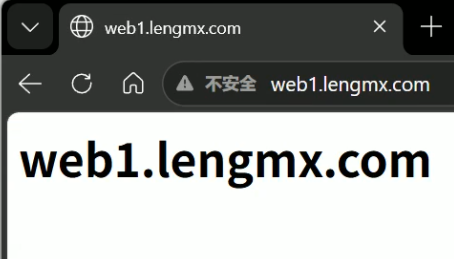
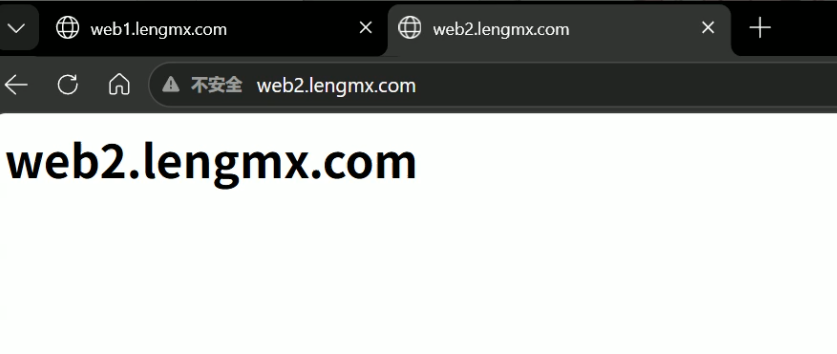
9.浏览器测试
在页面输入web1.lengmx.com
在页面输入web2.lengmx.com
10.观察日志
web1.lengmx.com访问日志信息
tail -f /usr/local/httpd2467/logs/web1.lengmx.com-access_log
web2.lengmx.com访问日志信息
tail -f /usr/local/httpd2467/logs/web2.lengmx.com-access_log
解决favicon.ico 404的问题
错误原因
web服务器在网站加载时都会请求favicon.ico这个文件,如果不存在就会报404错误,并且会记录到错误日志中。
解决方法
制作一个ico图标,放在index.html网页同级目录下,如上述实操中的
/usr/local/httpd2467/docs/web1.lengmx.com

和
/usr/local/httpd2467/docs/web2.lengmx.com,这两个目录

推荐网址:ico图标在线制作:https://www.mayicms.com/ico/
然后刷新网页,在查看日志就不会显示404而会显示200了
tail -f /usr/local/httpd2467/logs/web1.lengmx.com-access_logtail -f /usr/local/httpd2467/logs/web2.lengmx.com-access_log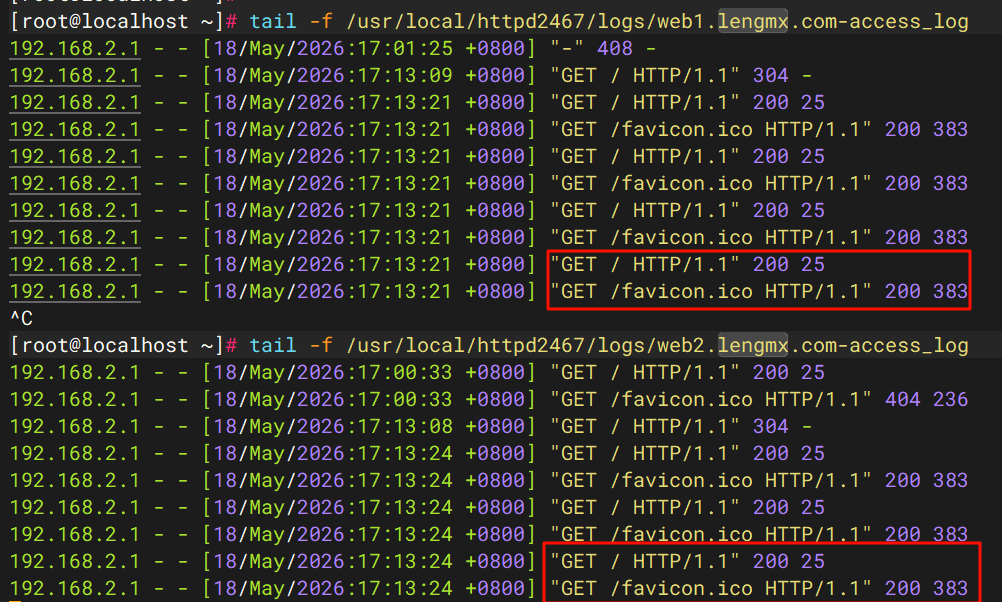

openEuler 是由开放原子开源基金会孵化的全场景开源操作系统项目,面向数字基础设施四大核心场景(服务器、云计算、边缘计算、嵌入式),全面支持 ARM、x86、RISC-V、loongArch、PowerPC、SW-64 等多样性计算架构
更多推荐

 18
18 0
0- 0


 已为社区贡献4条内容

所有评论(0)