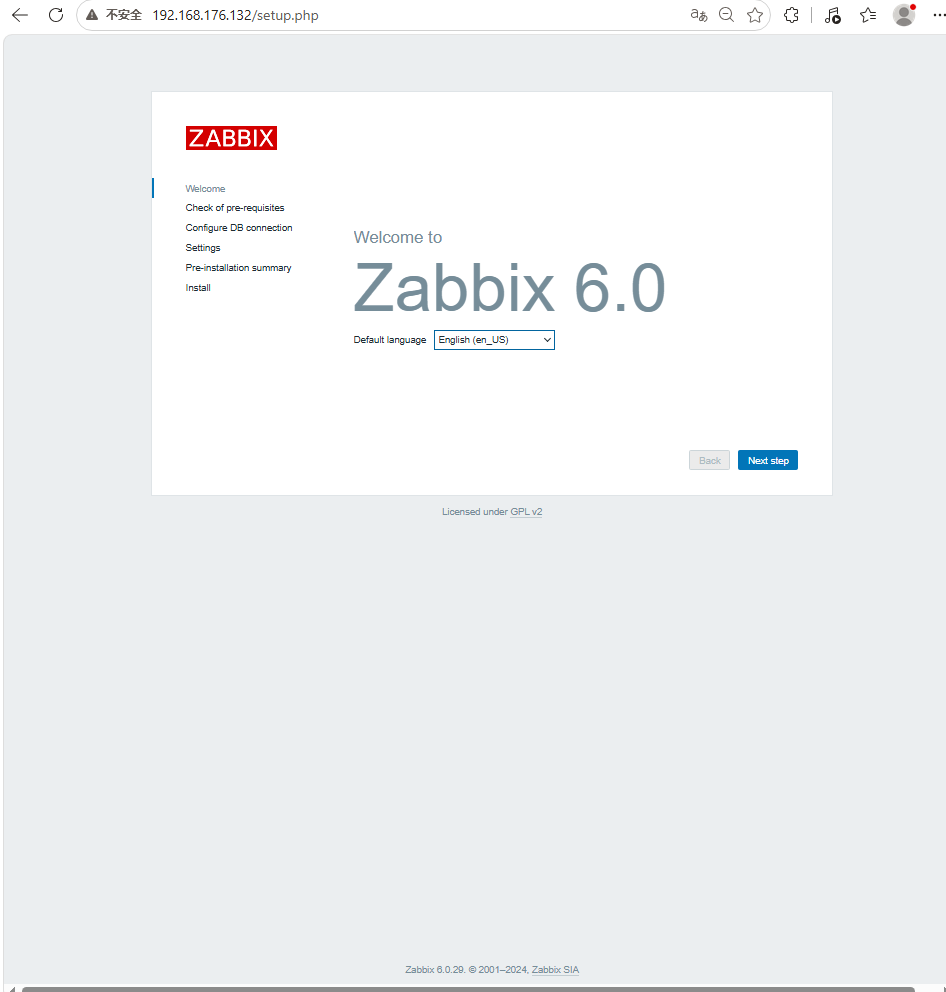
Zabbix 6.0 LTS 企业级监控系统搭建
·
一、项目概述
本项目将搭建一套基于 Zabbix 6.0 LTS(长期支持版)的企业级监控系统,实现对 Linux 服务器、Nginx 反向代理、Tomcat 应用服务器的全方位监控。通过自动发现、自定义监控项、触发器告警和可视化仪表盘,让你能够实时掌握系统运行状态,在故障发生前提前预警。
项目架构图:
被监控对象                数据采集                数据存储                可视化                告警
┌─────────────┐         ┌─────────────┐         ┌─────────────┐         ┌─────────┐         ┌─────────────┐
│ Linux服务器 │ ──────> │ Zabbix Agent│ ──────> │             │         │         │         │             │
├─────────────┤         ├─────────────┤         │             │         │         │         │             │
│ Nginx       │ ──────> │ Zabbix Agent│ ──────> │ Zabbix Server│ ──────> │ Zabbix Web│ ──────> │ 邮件/钉钉告警│
├─────────────┤         ├─────────────┤         │             │         │         │         │             │
│ Tomcat      │ ──────> │ Zabbix Agent│ ──────> │             │         │         │         │             │
└─────────────┘         └─────────────┘         └─────────────┘         └─────────┘         └─────────────┘
项目亮点:
- 支持自动发现主机和服务,批量添加监控
- 内置丰富的监控模板,开箱即用
- 配置灵活的告警规则和升级策略
二、服务器规划(复用现有环境)
表格
| 服务器 IP | 角色 | 安装组件 |
|---|---|---|
| 192.168.176.143 | Zabbix 服务器 | Zabbix Server、Zabbix Web、MySQL 5.7 |
| 192.168.176.137 | 被监控节点 1 | Zabbix Agent 6.0 |
| 192.168.176.141 | 被监控节点 2 | Zabbix Agent 6.0 |
第一部分:所有服务器通用初始化(必须先做)
在 143、137、141 三台服务器上分别执行
1. 关闭防火墙和 SELinux(生产环境可后续按需开放端口)
# 临时关闭防火墙
systemctl stop firewalld
# 永久禁用防火墙
systemctl disable firewalld

# 临时关闭SELinux
setenforce 0
# 永久关闭SELinux
sed -i 's/^SELINUX=enforcing/SELINUX=disabled/' /etc/selinux/config
2. 配置主机名(区分不同服务器)
在 143 服务器执行:
hostnamectl set-hostname zabbix-server
在 137 服务器执行:
hostnamectl set-hostname node1
在 141 服务器执行:
hostnamectl set-hostname node2
3. 配置 hosts 文件(所有服务器都要加)
cat >> /etc/hosts << EOF
192.168.176.143 zabbix-server
192.168.176.137 node1
192.168.176.141 node2
EOF
4. 更新系统并安装常用工具
# 更新系统
yum update -y

# 安装必备工具
yum install -y wget vim net-tools lsof chrony yum-utils.noarch

# 配置时间同步
systemctl enable --now chronyd
chronyc sources
第二部分:部署 Zabbix Server(仅在 192.168.176.143 执行)
1. 安装 Zabbix 6.0 LTS 官方源
# 安装Zabbix源
rpm -Uvh https://repo.zabbix.com/zabbix/6.0/rhel/7/x86_64/zabbix-release-6.0-4.el7.noarch.rpm

# 清理yum缓存
yum clean all
2. 安装 MariaDB 10.6
# 创建10.6版本源
cat > /etc/yum.repos.d/mariadb.repo << EOF
[mariadb]
name = MariaDB 10.6
baseurl = https://mirrors.aliyun.com/mariadb/yum/10.6/centos7-amd64/
gpgkey = https://mirrors.aliyun.com/mariadb/yum/RPM-GPG-KEY-MariaDB
gpgcheck = 1
enabled = 1
module_hotfixes = 1
EOF

# 清理并重新生成yum缓存
yum clean all && yum makecache

# 安装MariaDB服务器和客户端
yum install -y MariaDB-server MariaDB-client

# 启动服务并设置开机自启
systemctl enable --now mariadb
3. 初始化数据库并创建 Zabbix 数据库
# 初始化数据库(设置root密码,建议设为 zabbix123)
mysql_secure_installation
# 按提示操作:回车 → 输入新密码 zabbix123 → 确认密码 → 全部选y

# 登录数据库
mysql -uroot -pzabbix123

# 创建Zabbix数据库和用户(执行以下SQL语句)
create database zabbix character set utf8mb4 collate utf8mb4_bin;
create user zabbix@localhost identified by 'zabbix123';
grant all privileges on zabbix.* to zabbix@localhost;
flush privileges;
exit;
4. 安装 Zabbix Server
yum install -y zabbix-server-mysql zabbix-web-mysql
5. 导入 Zabbix 初始数据库结构
# 下载Zabbix 6.0.28源码包(包含数据库文件)
wget https://cdn.zabbix.com/zabbix/sources/stable/6.0/zabbix-6.0.28.tar.gz

# 解压
tar zxf zabbix-6.0.28.tar.gz

# 按顺序导入三个SQL文件(顺序不能错!)
mysql -uzabbix -pzabbix123 zabbix < zabbix-6.0.28/database/mysql/schema.sql
mysql -uzabbix -pzabbix123 zabbix < zabbix-6.0.28/database/mysql/images.sql
mysql -uzabbix -pzabbix123 zabbix < zabbix-6.0.28/database/mysql/data.sql
6. 配置 Zabbix Server
# 编辑Zabbix Server配置文件
vim /etc/zabbix_server.conf
修改以下配置(找到对应行,取消注释并修改值):
DBHost=localhost
DBName=zabbix
DBUser=zabbix
DBPassword=zabbix123
7. 配置 Zabbix Web 时区
# 修改系统时区
[root@localhost ~]# tzselect
Please identify a location so that time zone rules can be set correctly.
Please select a continent or ocean.
 1) Africa
 2) Americas
 3) Antarctica
 4) Arctic Ocean
 5) Asia
 6) Atlantic Ocean
 7) Australia
 8) Europe
 9) Indian Ocean
10) Pacific Ocean
11) none - I want to specify the time zone using the Posix TZ format.
#? 5
Please select a country.
 1) Afghanistan           18) Israel                35) Palestine
 2) Armenia               19) Japan                 36) Philippines
 3) Azerbaijan            20) Jordan                37) Qatar
 4) Bahrain               21) Kazakhstan            38) Russia
 5) Bangladesh            22) Korea (North)         39) Saudi Arabia
 6) Bhutan                23) Korea (South)         40) Singapore
 7) Brunei                24) Kuwait                41) Sri Lanka
 8) Cambodia              25) Kyrgyzstan            42) Syria
 9) China                 26) Laos                  43) Taiwan
10) Cyprus                27) Lebanon               44) Tajikistan
11) East Timor            28) Macau                 45) Thailand
12) Georgia               29) Malaysia              46) Turkmenistan
13) Hong Kong             30) Mongolia              47) United Arab Emirates
14) India                 31) Myanmar (Burma)       48) Uzbekistan
15) Indonesia             32) Nepal                 49) Vietnam
16) Iran                  33) Oman                  50) Yemen
17) Iraq                  34) Pakistan
#? 9
Please select one of the following time zone regions.
1) Beijing Time
2) Xinjiang Time
#? 1

The following information has been given:

        China
        Beijing Time

Therefore TZ='Asia/Shanghai' will be used.
Local time is now:      Wed May 20 13:49:04 CST 2026.
Universal Time is now:  Wed May 20 05:49:04 UTC 2026.
Is the above information OK?
1) Yes
2) No
#? 1

You can make this change permanent for yourself by appending the line
        TZ='Asia/Shanghai'; export TZ
to the file '.profile' in your home directory; then log out and log in again.

Here is that TZ value again, this time on standard output so that you
can use the /usr/bin/tzselect command in shell scripts:
Asia/Shanghai
8.安装 Remi 源
# 安装EPEL源
yum install -y epel-release

# 安装Remi源
yum install -y https://rpms.remirepo.net/enterprise/remi-release-7.rpm

# 启用PHP 7.4模块
yum-config-manager --enable remi-php74
9.卸载所有旧版本 PHP
# 卸载所有PHP相关包
yum remove -y php* php-fpm*

# 删除残留的配置文件
rm -rf /etc/php-fpm.d/
rm -rf /etc/php.ini
10.安装 PHP 7.4 和 Zabbix 所需的所有扩展
yum install -y php php-fpm php-mysqlnd php-gd php-bcmath php-mbstring php-xml php-ldap php-json
11.安装 Zabbix Web 包(自动生成正确的配置文件)
yum install -y zabbix6.0-web-mysql
配置 PHP 时区
# 编辑Zabbix的PHP-FPM配置文件
vim /etc/php-fpm.d/zabbix.conf
找到以下行,取消注释并修改为中国时区:
php_value[date.timezone] = Asia/Shanghai安装nginx并配置文件
# 安装nginx
yum install -y nginx
cat > /etc/nginx/conf.d/zabbix.conf << 'EOF'
server {
listen 80 default_server;
server_name _;
root /usr/share/zabbix;
index index.php;
location / {
try_files $uri $uri/ /index.php?$args;
}
location ~ \.php$ {
fastcgi_pass unix:/run/php-fpm/zabbix.sock;
fastcgi_index index.php;
fastcgi_param SCRIPT_FILENAME $document_root$fastcgi_script_name;
include fastcgi_params;
}
}
EOF12.在 Zabbix Server 上安装 Zabbix Agent
# 安装Zabbix Agent 6.0
yum install -y zabbix-agent
配置 Agent
# 编辑Agent配置文件
vim /etc/zabbix/zabbix_agentd.conf
# 允许Zabbix Server连接
Server=127.0.0.1,192.168.176.143

# 主动模式上报地址
ServerActive=127.0.0.1,192.168.176.143

# 主机名,必须和Web界面中Zabbix server的主机名完全一致
Hostname=Zabbix server
启动 Agent 并设置开机自启
# 启动服务
systemctl start zabbix-agent
# 设置开机自启
systemctl enable zabbix-agent
# 验证状态
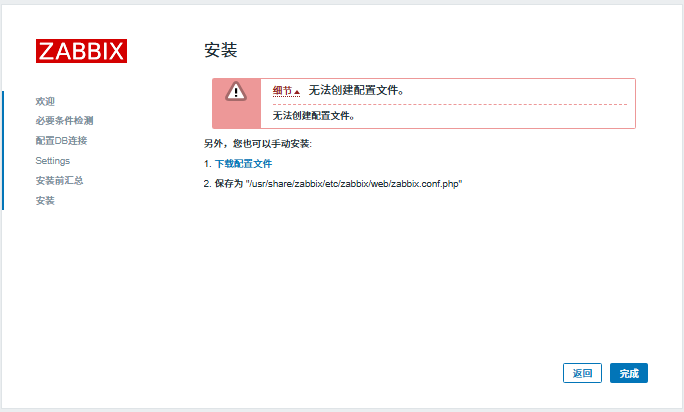
systemctl status zabbix-agent13.启动所有服务并使用浏览器访问
systemctl start zabbix-server-mysql.service nginx php-fpm
systemctl enable zabbix-server-mysql.service nginx php-fpm
浏览器访问
注意如果最后一步报错,需要手动创建文件
第三部分:部署被监控节点(node1 和 node2)
在 192.168.176.137(node1)和 192.168.176.141(node2)上分别执行
1. 节点初始化(必须先做)
# 关闭防火墙和SELinux
systemctl stop firewalld
systemctl disable firewalld
setenforce 0
sed -i 's/^SELINUX=enforcing/SELINUX=disabled/' /etc/selinux/config

# 配置主机名
# 在node1执行:
hostnamectl set-hostname node1
# 在node2执行:
hostnamectl set-hostname node2

# 配置hosts文件
cat >> /etc/hosts << EOF
192.168.176.143 zabbix-server
192.168.176.137 node1
192.168.176.141 node2
EOF

# 配置阿里云源
mkdir -p /etc/yum.repos.d/backup
mv /etc/yum.repos.d/*.repo /etc/yum.repos.d/backup/
wget -O /etc/yum.repos.d/CentOS-Base.repo https://mirrors.aliyun.com/repo/Centos-7.repo
yum clean all && yum makecache
2. 安装 Zabbix Agent 6.0
# 安装Zabbix官方源
rpm -Uvh https://repo.zabbix.com/zabbix/6.0/rhel/7/x86_64/zabbix-release-6.0-4.el7.noarch.rpm
yum clean all && yum makecache

# 安装Agent
yum install -y zabbix-agent
3. 配置 Agent
# 编辑配置文件
vim /etc/zabbix/zabbix_agentd.conf
修改以下关键参数(大小写敏感):
# 允许Zabbix Server主动拉取数据
Server=192.168.176.143

# Agent主动上报数据的地址
ServerActive=192.168.176.143

# 主机名,必须和Web界面添加的完全一致
# node1填:Hostname=node1
# node2填:Hostname=node2
Hostname=node1
4. 启动 Agent 并设置开机自启
systemctl enable --now zabbix-agent
systemctl status zabbix-agent
必须显示 active (running)。
第四部分:在 Web 界面添加被监控主机
添加 node1(192.168.176.137)
- 点击左侧菜单 配置 → 主机
- 点击右上角 创建主机
- 填写基本信息:
- 主机名称:
node1(必须和 Agent 配置的 Hostname 完全一致) - 可见名称:
应用服务器1(可选,方便识别) - 群组:点击「选择」,勾选
Linux servers - 接口:点击「添加 → 客户端 (Agent)」
- IP 地址:
192.168.176.137 - 端口:
10050
- IP 地址:
- 主机名称:
- 点击 模板 标签
- 点击「选择」,搜索
Linux by Zabbix agent - 勾选该模板,点击「选择」
- 点击最下方 添加 按钮
添加 node2(192.168.176.141)
按照完全相同的步骤添加:
- 主机名称:
node2 - IP 地址:
192.168.176.141 - 其他配置和 node1 一致
第五部分:验证监控状态
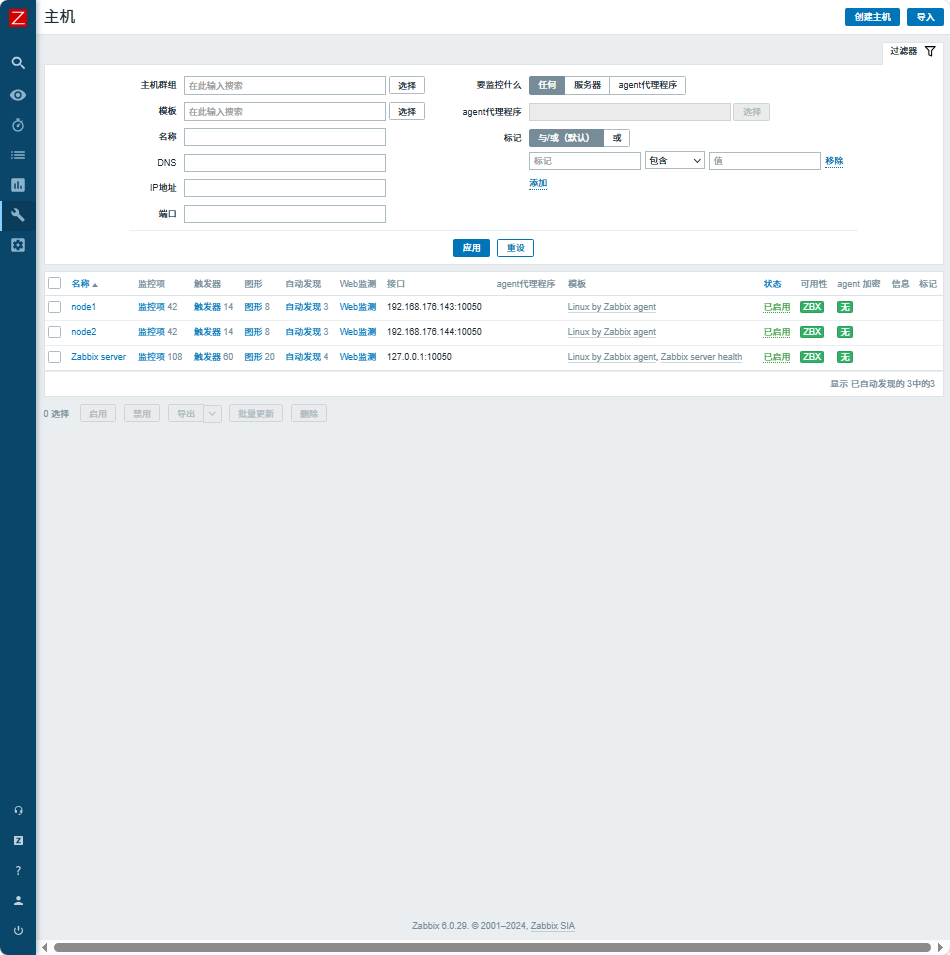
1. 检查主机可用性
等待 1-2 分钟,刷新 配置 → 主机 页面,三个主机(Zabbix server、node1、node2)的可用性列都会变成绿色 ZBX 图标,说明监控正常。
2. 查看监控数据
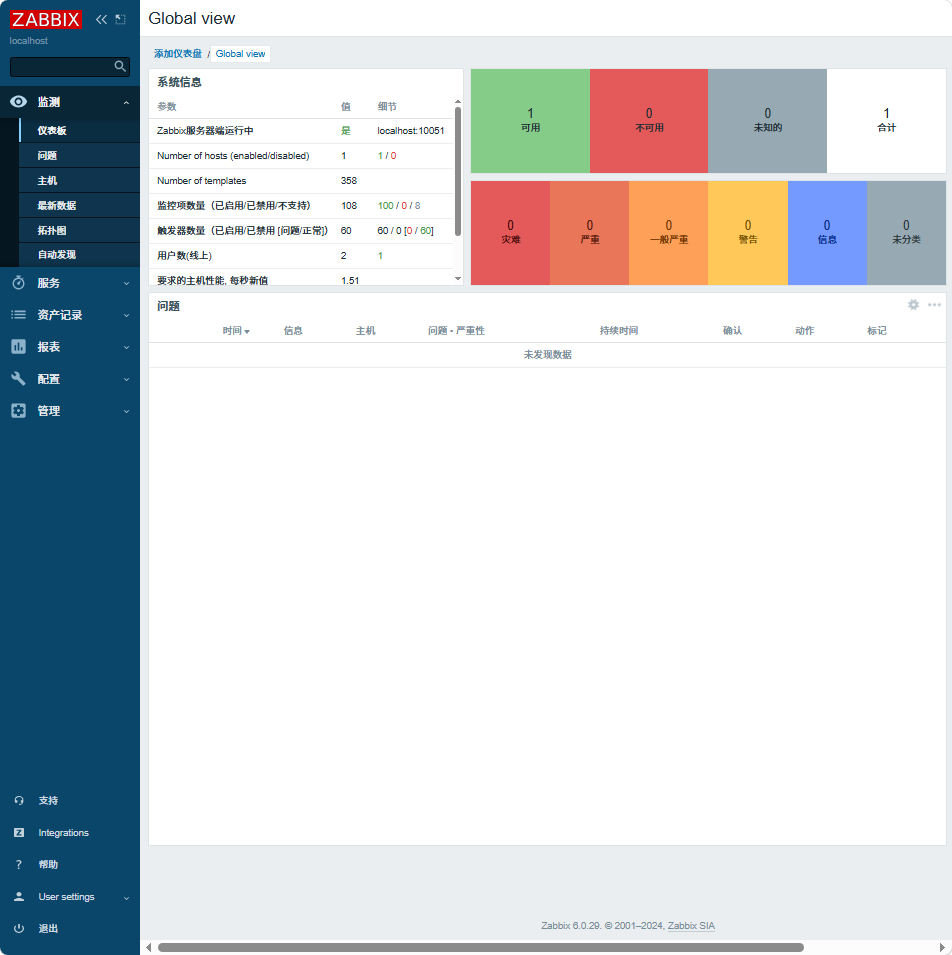
- 点击左侧菜单 监测 → 最新数据
- 选择任意主机,点击「应用」,可以看到所有监控项的实时值
- 点击 监测 → 图形,可以查看 CPU、内存、磁盘、网络等历史趋势图
- 点击 监测 → 仪表盘,可以查看整体监控概览
3. 常见问题排查
如果主机显示灰色 ZBX 图标:
- 检查被监控节点 Agent 服务状态:
systemctl status zabbix-agent - 在 Zabbix Server 上测试端口连通性:
telnet 192.168.176.137 10050 - 检查 Agent 配置的
Server和Hostname是否正确 - 查看 Zabbix Server 日志:
tail -f /var/log/zabbix/zabbix_server.log
第六部分:配置邮件告警
1. 配置邮件媒介类型
- 点击左侧菜单 管理 → 媒介类型
- 找到
Email,点击后面的「配置」 - 填写以下信息(以 QQ 邮箱为例):
- SMTP 服务器:
smtp.qq.com - SMTP 服务器端口:
587 - SMTP HELO:
qq.com - SMTP 电邮:
你的QQ邮箱地址 - 连接安全性:
STARTTLS - 认证方式:
用户名和密码 - 用户名:
你的QQ邮箱地址 - 密码:
QQ邮箱授权码(不是登录密码,需要在 QQ 邮箱设置中开启 SMTP 并生成)
- SMTP 服务器:
- 点击「更新」
- 点击「测试」,输入测试邮箱地址,点击「测试」,确认能收到测试邮件
2. 给用户添加邮件媒介
- 点击左侧菜单 管理 → 用户
- 找到
Admin用户,点击后面的「媒介」 - 点击「添加」
- 类型:
Email - 收件人:
你的接收告警的邮箱地址 - 启用时间:
1-7,00:00-24:00(全天接收) - 严重性:勾选所有级别
- 类型:
- 点击「添加」→ 点击「更新」
3. 创建告警动作
- 点击左侧菜单 配置 → 动作 → 触发器动作
- 点击右上角 创建动作
- 填写动作名称:
服务器告警通知 - 点击 操作 标签
- 点击「新的」
- 发送到用户:点击「添加」,选择
Admin - 仅送到:
Email
- 发送到用户:点击「添加」,选择
- 点击「添加」→ 点击「更新」
现在当有任何告警产生时,你都会收到邮件通知

openEuler 是由开放原子开源基金会孵化的全场景开源操作系统项目,面向数字基础设施四大核心场景(服务器、云计算、边缘计算、嵌入式),全面支持 ARM、x86、RISC-V、loongArch、PowerPC、SW-64 等多样性计算架构
更多推荐


 6
6 0
0- 0


 已为社区贡献2条内容

所有评论(0)