嵌入式安防监控项目———boa服务器的移植(包含Ubuntu和ARM板)
boa服务器的移植
Ubuntu端移植
1.源码下载:boa官网
2.解压文件,并进入./boa-0.94.13/src目录
tar -xvf boa-0.94.13.tar.gz
cd boa-0.94.13/src
3.执行./configure配置编译环境
./configure
4.修改两处源码,以防编译报错,然后make
第一处:
tong@tong-virtual-machine:~/linux/tool/boa_server/boa-0.94.13/src$ vi compat.h +120

将这一行改为:
#define TIMEZONE_OFFSET(foo) (foo)->tm_gmtoff
第二处:
tong@tong-virtual-machine:~/linux/tool/boa_server/boa-0.94.13/src$ vi boa.c +225
注释如图所示的区域代码: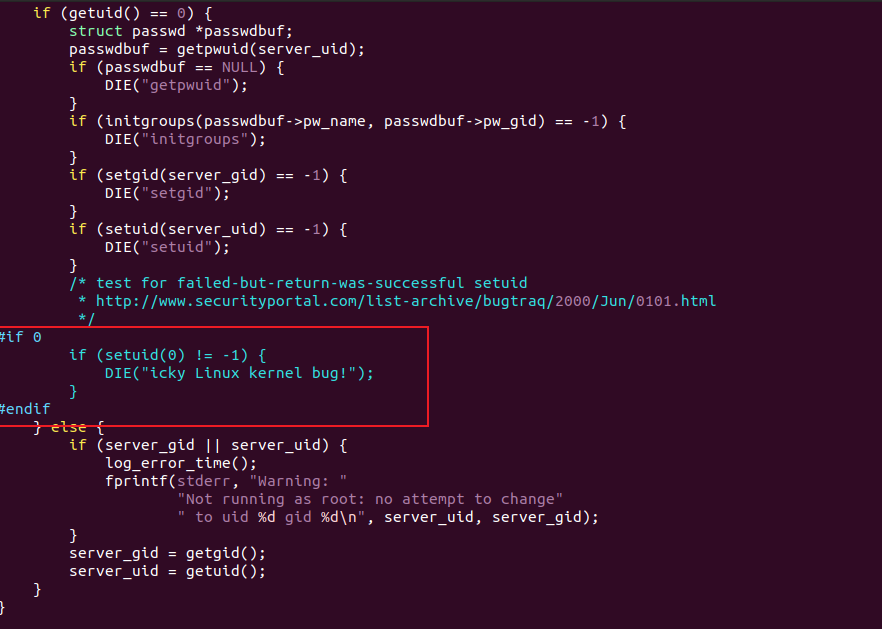
然后尝试下make
tong@tong-virtual-machine:~/linux/tool/boa_server/boa-0.94.13/src$ make
5.创建boa的目录
tong@tong-virtual-machine:~$ pwd
/home/tong
tong@tong-virtual-machine:~$ mkdir boa
tong@tong-virtual-machine:~$ cd boa/
tong@tong-virtual-machine:~/boa$ mkdir cgi-bin www log
6.修改boa.conf配置文件
tong@tong-virtual-machine:~/linux/tool/boa_server/boa-0.94.13$ vi boa.conf
需要修改的部分如下:
Port  80
User  0
Group 0
ErrorLog /home/tong/boa/log/error_log
AccessLog /home/tong/boa/log/access_log
DocumentRoot /home/tong/boa/www
UserDir public_html
DirectoryIndex index.html
DirectoryMaker /home/tong/boa/boa_indexer
KeepAliveMax 1000
KeepAliveTimeout 10
MimeTypes /home/tong/boa/mime.types
ScriptAlias /cgi-bin/ /home/tong/boa/cgi-bin/
7.修改defines.h配置文件
tong@tong-virtual-machine:~/linux/tool/boa_server/boa-0.94.13/src$ pwd
/home/tong/linux/tool/boa_server/boa-0.94.13/src
tong@tong-virtual-machine:~/linux/tool/boa_server/boa-0.94.13/src$ vi defines.h +30

箭头处改成:
#define SERVER_ROOT "/home/tong/boa"
8.编译
tong@tong-virtual-machine:~/linux/tool/boa_server/boa-0.94.13/src$ make clean
tong@tong-virtual-machine:~/linux/tool/boa_server/boa-0.94.13/src$ make
9.将编译得到的文件移动到你新创建的boa目录下
tong@tong-virtual-machine:~/linux/tool/boa_server/boa-0.94.13/src$ sudo cp /etc/mime.types /home/tong/boa/
tong@tong-virtual-machine:~/linux/tool/boa_server/boa-0.94.13/src$ cp boa /home/tong/boa
tong@tong-virtual-machine:~/linux/tool/boa_server/boa-0.94.13/src$ cp boa_indexer /home/tong/boa
tong@tong-virtual-machine:~/linux/tool/boa_server/boa-0.94.13/src$ cp ../boa.conf /home/tong/boa
10.实现CGI测试文件
tong@tong-virtual-machine:~/boa/cgi-bin$ pwd
/home/tong/boa/cgi-bin
tong@tong-virtual-machine:~/boa/cgi-bin$ touch test.c
tong@tong-virtual-machine:~/boa/cgi-bin$ vi test.c
tong@tong-virtual-machine:~/boa/cgi-bin$ gcc test.c -o test.cgi
test.c内容
#include <stdio.h>
int main()
{
  printf("Content-type:text/html\n\n"); //这句一定要加上
  printf("<html><body>");
  printf("<font style=\"color:red; font-size:30px;\">Hello, BOA server!</font><br/>");
  printf("<a href=\"/index.html\">return index.html</a>");
  printf("</body></html>");
  return 0;
}
11.实现HTML页面测试文件
tong@tong-virtual-machine:~/boa/www$ pwd
/home/tong/boa/www
tong@tong-virtual-machine:~/boa/www$ touch index.html
tong@tong-virtual-machine:~/boa/www$ vi index.html
index.html内容
<html>
	<body>
	    <h1>this is a boa server test!</h1><br/>
    	<img src="image.jpg"/>
        <h3>tree picture</h3><br/>
        <a href="/cgi-bin/test.cgi">to cgi page</a>
   	</body>
</html>
image.jpg 随便找一张图片,放在当前目录
注意image.jpg权限
tong@tong-virtual-machine:~/boa/www$ chmod 775 image.jpg
然后到此位置移植完成,开始测试
12.测试
sudo ./boa
tong@tong-virtual-machine:~/boa$ ps -ef | grep boa
tong        1645    1150  0 18:58 ?        00:00:00 /usr/libexec/gsd-keyboard
root        8375    1150  0 20:39 pts/0    00:00:00 ./boa
tong        8377    8027  0 20:39 pts/0    00:00:00 grep --color=auto boa
然后我们打开浏览器,输入127.0.0.1,然后测试网页.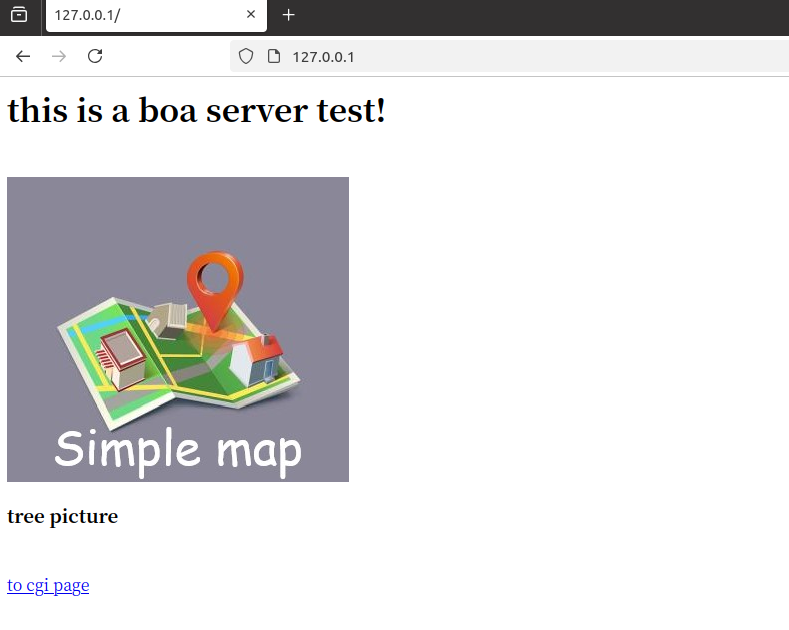
到此Ubuntu端移植结束。
ARM端移植
ARM板以IMX6ULL型号为例子。这部分参考博客是boa服务器的移植
其中前三步与Ubuntu一致。在第4步中,额外注释以下内容。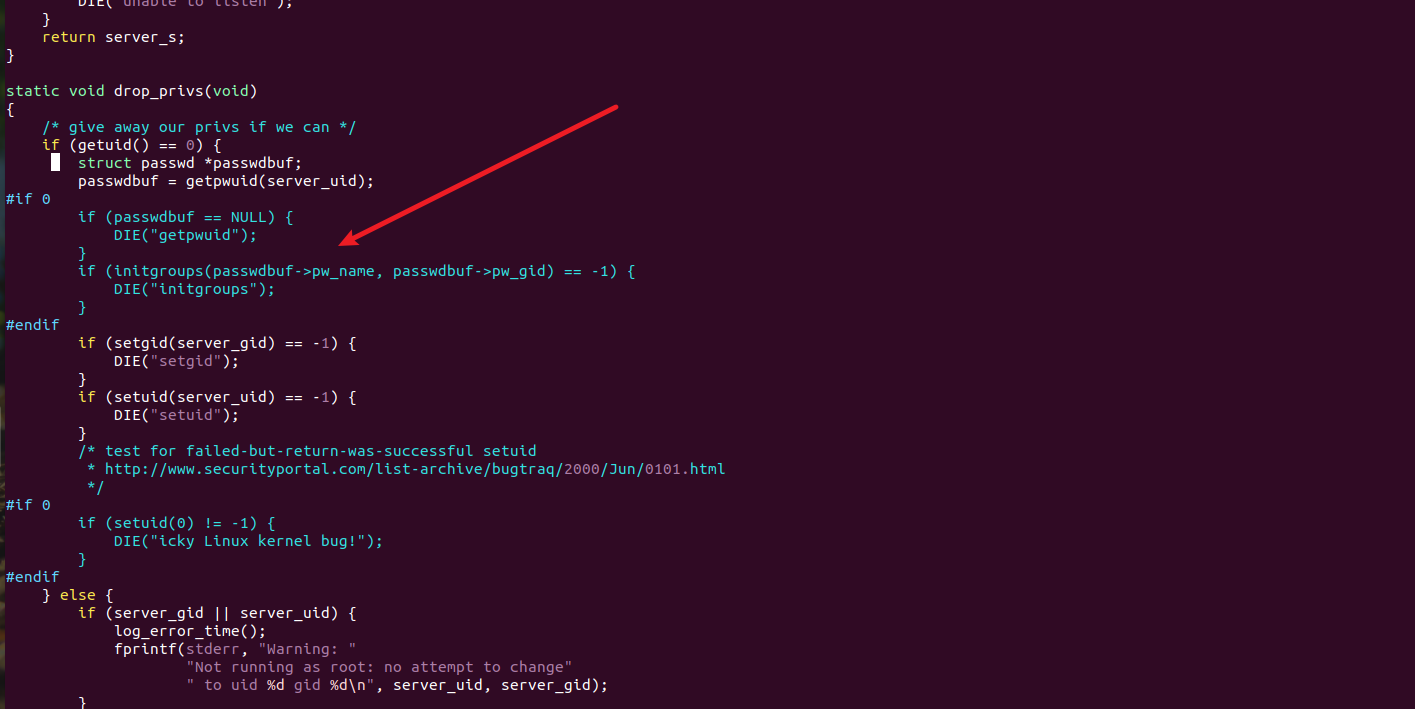
然后在板子的目录下创建与Ubuntu中相同的文件夹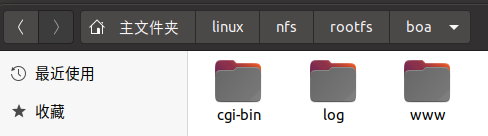
然后修改boa.conf配置文件,注意路径要和你板子boa路径一致。
需要修改的部分如下(基本与Ubuntu一样,只有一行新加):
ServerName 192.168.1.50板子IP地址,直接在最后一行加这行。
Port  80
User  0
Group 0
ErrorLog /home/tong/boa/log/error_log
AccessLog /home/tong/boa/log/access_log
DocumentRoot /home/tong/boa/www
UserDir public_html
DirectoryIndex index.html
DirectoryMaker /home/tong/boa/boa_indexer
KeepAliveMax 1000
KeepAliveTimeout 10
MimeTypes /home/tong/boa/mime.types
ScriptAlias /cgi-bin/ /home/tong/boa/cgi-bin/

ServerName 192.168.1.50
修改defines.h配置文件与Ubuntu步骤一样,注意地址要是板子实际文件地址。
然后修改MakeFile文件。
先查看交叉编译器是否存在:
tong@tong-virtual-machine:~/linux/tool/boa-0.94.13/src$ arm-linux-gnueabihf-gcc -v
然后打开Makefile
tong@tong-virtual-machine:~/linux/tool/boa-0.94.13/src$ vi Makefile
修改为如图所示: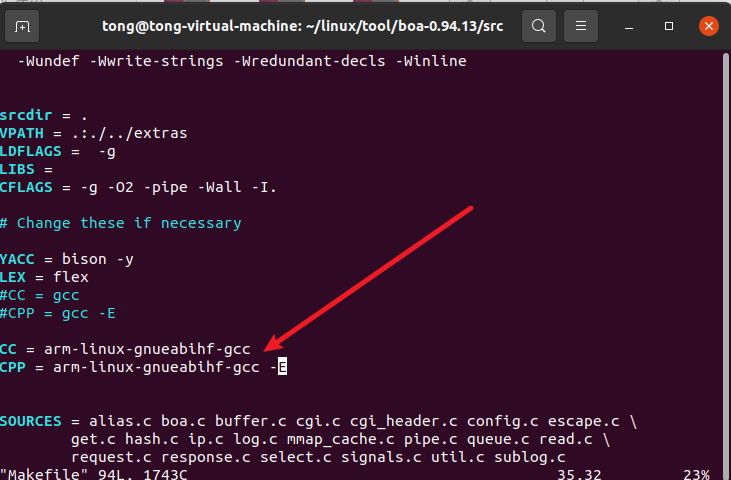
然后make编译,剩下的步骤和Ubuntu上一致。注意网页上输入的是板子IP地址。

openEuler 是由开放原子开源基金会孵化的全场景开源操作系统项目,面向数字基础设施四大核心场景(服务器、云计算、边缘计算、嵌入式),全面支持 ARM、x86、RISC-V、loongArch、PowerPC、SW-64 等多样性计算架构
更多推荐


 16
16 0
0- 0


 已为社区贡献3条内容

所有评论(0)