Keepalived——Keepalived双机热备
Keepalived 核心原理
Keepalived 本质是一个自动化的故障检测与切换工具。 它通过持续的健康检查,发现集群中哪台服务器出问题,然后自动把它踢出去、换上备用的;等故障机器恢复后,再自动把它加回来。整个过程无需人工干预,运维人员只需要修好坏掉的服务器就行。
Keepalived网站
https://keepalived.org/
Keepalived编译安装
存放软件包
cd /usr/local/src

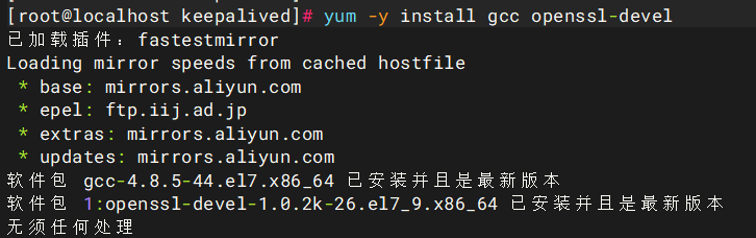
1.安装依赖
yum -y install gcc openssl-devel
yum -y install gcc gcc-c++ pcre-devel zlib-devel openssl-devel perl-devel
2.编译安装 Keepalived
./configure --prefix=/usr/local/keepalived ;echo $?

make -j$(nproc) && make install ;echo $?

3.启动前基础设置
keepalived 文件分为 4 种
1. 启动脚本文件
服务脚本文件,放在/etc/init.d 目录可通过 service 命令管理 keepalived
2. 启动参数文件
启动 keepalived 时命令后面跟的参数,因基本参数较多所以使用参 数文件方 式保存
3. keepalived.conf 文件
主配置文件,热备,健康检查等功能配置
4.主程序文件
主要支行程序文件,可执行程序
他们的执行关系
启动脚本文件 -> 找到启动参数文件 -> 启动参数文件里描述了 keepalived.conf 的路径和日志等指令 -> 然后交给主程序文件执行(真实启动)。
1)启动脚本(建议第二个)
#从源码包中 cp 启动脚本(Centos 6.x/Centos 7.x)
cp /usr/src/keepalived2.0.20/keepalived/etc/init.d/keepalived /etc/init.d/
#从源码包中 cp 启动脚本 Centos 7.x
cp -av /keepalived-2.0.20/keepalived/keepalived.service /usr/lib/systemd/system/

2)启动参数文件
#从编译安装后的目录 cp 启动参数文件
cp -av /usr/local/keepalived/etc/sysconfig/keepalived /etc/sysconfig/

3)keepalived.conf 文件
#在系统配置文件目录创建keepalived目录
mkdir -pv /etc/keepalived
#把配置文件移到文件夹中
cp -av /usr/local/keepalived/etc/keepalived/keepalived.conf /etc/keepalived/

4)主程序文件
#把主程序文件移动到/usr/sbin/ 或创建软链接
cp -av /usr/local/keepalived/sbin/keepalived /usr/sbin/

#适用(Centos 6.x/Centos 7.x)
chkconfig --add keepalived
chkconfig keepalived on
service keepalived start
#适用(Centos 7.x)
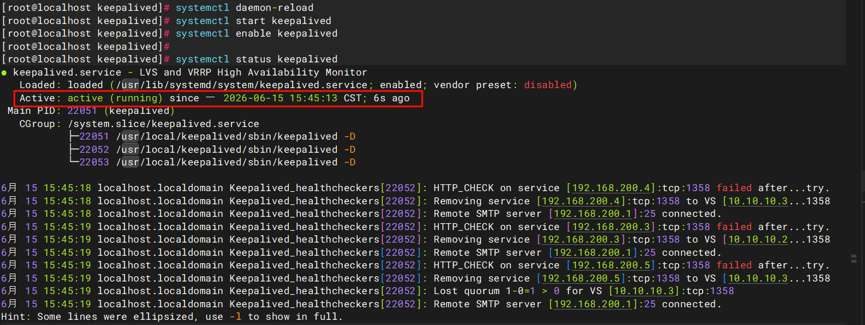
systemctl daemon-reload
systemctl start keepalived
systemctl enable keepalived
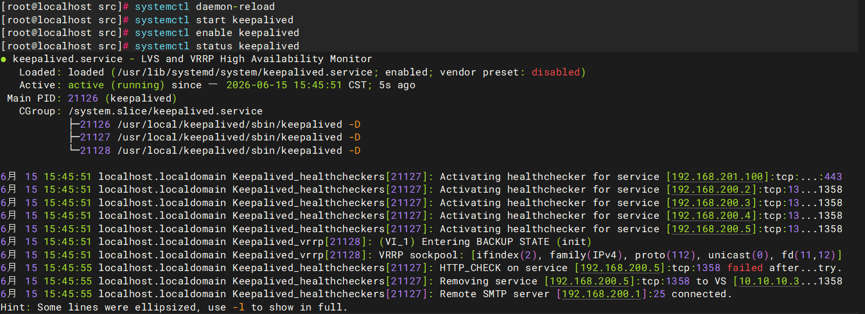
如果没有启动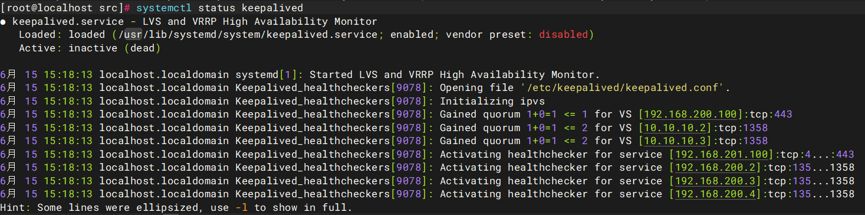
则编译/etc/keepalived/keepalived.conf配置文件修改网卡名称
vim /etc/keepalived/keepalived.conf
vrrp_instance VI_1 {
    state MASTER
    interface ens33   # 把这里改成自己的网卡名称
    virtual_router_id 51
    priority 100
    advert_int 1
    authentication {
        auth_type PASS
        auth_pass 1111
    }
    virtual_ipaddress {
        192.168.200.16
        192.168.200.17
        192.168.200.18
    }
}
keepalived 双机热备应用案例
环境规划
| 角色 | IP地址 | 说明 |
|---|---|---|
| 漂移地址(VIP) | 192.168.2.122 | 对外提供服务的虚拟 IP |
| Keepalived 主服务器(Master) | 192.168.2.123 | 调度器主节点 |
| Keepalived 备用服务器(Backup) | 192.168.2.124 | 调度器备节点 |
| Nginx Web 服务器 | 192.168.2.125 | 后端真实 Web 服务 |
前置
(防火墙、yum源见之前的文档)
根据前面步骤,给Keepalived 主服务器和Keepalived 备用服务器安装Keepalived服务,然后根据下面主从Keepalived服务器进行主从配置文件的调整
1.主 Keepalived 配置
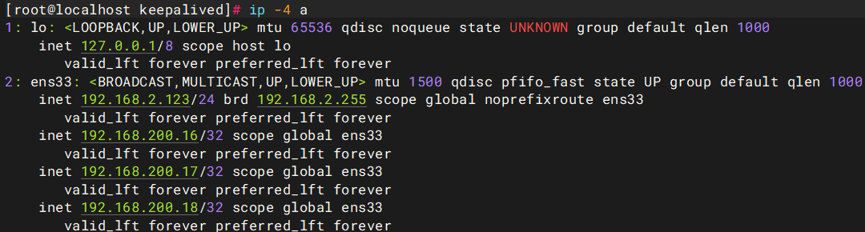
ens33 # 网卡名称
192.168.2.123 # IP
ethtool ens33 | grep -i 'link detected'

2. keepalived 的主配置文件 keepalived.conf
vim /etc/keepalived/keepalived.conf
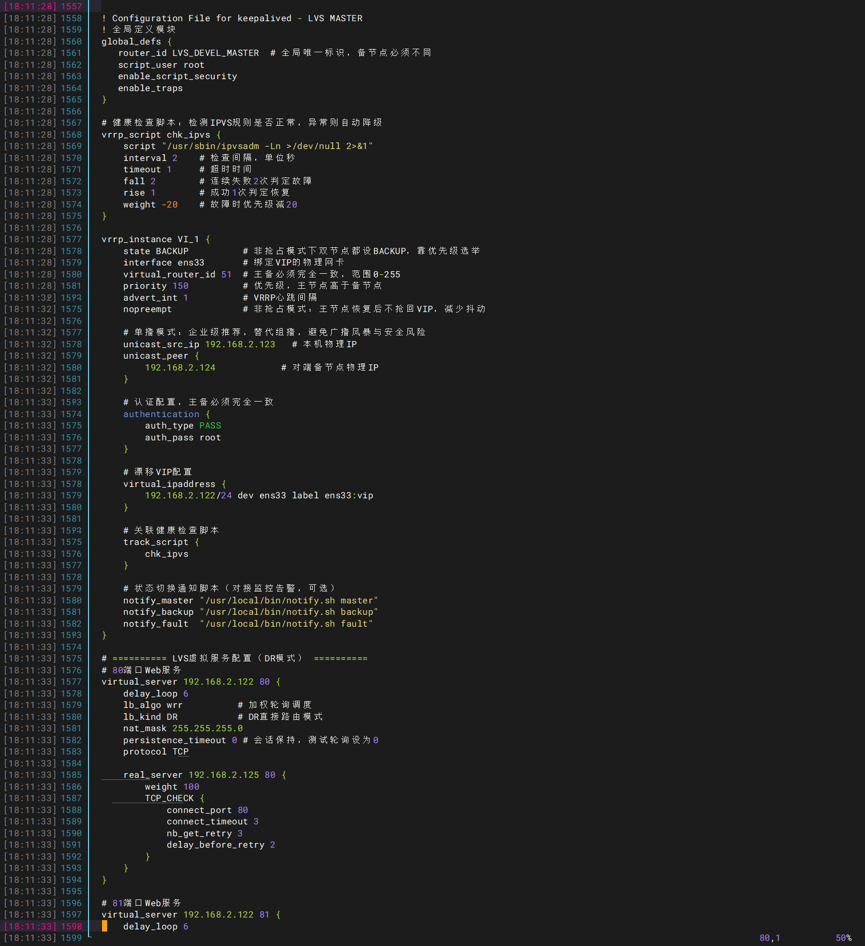
! Configuration File for keepalived - LVS MASTER
! 全局定义模块
global_defs {
   router_id LVS_DEVEL_MASTER  # 全局唯一标识,备节点必须不同
   script_user root
   enable_script_security
   enable_traps
}

# 健康检查脚本:检测IPVS规则是否正常,异常则自动降级
vrrp_script chk_ipvs {
    script "/usr/sbin/ipvsadm -Ln >/dev/null 2>&1"
    interval 2    # 检查间隔,单位秒
    timeout 1     # 超时时间
    fall 2        # 连续失败2次判定故障
    rise 1        # 成功1次判定恢复
    weight -20    # 故障时优先级减20
}

vrrp_instance VI_1 {
    state BACKUP          # 非抢占模式下双节点都设BACKUP,靠优先级选举
    interface ens33       # 绑定VIP的物理网卡
    virtual_router_id 51  # 主备必须完全一致,范围0-255
    priority 150          # 优先级,主节点高于备节点
    advert_int 1          # VRRP心跳间隔
    nopreempt             # 非抢占模式:主节点恢复后不抢回VIP,减少抖动

    # 单播模式:企业级推荐,替代组播,避免广播风暴与安全风险
    unicast_src_ip 192.168.2.123   # 本机物理IP
    unicast_peer {
        192.168.2.124            # 对端备节点物理IP
    }

    # 认证配置,主备必须完全一致
    authentication {
        auth_type PASS
        auth_pass root
    }

    # 漂移VIP配置
    virtual_ipaddress {
        192.168.2.122/24 dev ens33 label ens33:vip
    }

    # 关联健康检查脚本
    track_script {
        chk_ipvs
    }

    # 状态切换通知脚本(对接监控告警,可选)
    notify_master "/usr/local/bin/notify.sh master"
    notify_backup "/usr/local/bin/notify.sh backup"
    notify_fault  "/usr/local/bin/notify.sh fault"
}

# ========== LVS虚拟服务配置(DR模式) ==========
# 80端口Web服务
virtual_server 192.168.2.122 80 {
    delay_loop 6
    lb_algo wrr          # 加权轮询调度
    lb_kind DR           # DR直接路由模式
    nat_mask 255.255.255.0
    persistence_timeout 0 # 会话保持,测试轮询设为0
    protocol TCP

    real_server 192.168.2.125 80 {
        weight 100
        TCP_CHECK {
            connect_port 80
            connect_timeout 3
            nb_get_retry 3
            delay_before_retry 2
        }
    }
}

# 81端口Web服务
virtual_server 192.168.2.122 81 {
    delay_loop 6
    lb_algo wrr
    lb_kind DR
    nat_mask 255.255.255.0
    persistence_timeout 0
    protocol TCP

    real_server 192.168.2.125 81 {
        weight 100
        TCP_CHECK {
            connect_port 81
            connect_timeout 3
            nb_get_retry 3
            delay_before_retry 2
        }
    }
}

# 82端口Web服务
virtual_server 192.168.2.122 82 {
    delay_loop 6
    lb_algo wrr
    lb_kind DR
    nat_mask 255.255.255.0
    persistence_timeout 0
    protocol TCP

    real_server 192.168.2.125 82 {
        weight 100
        TCP_CHECK {
            connect_port 82
            connect_timeout 3
            nb_get_retry 3
            delay_before_retry 2
        }
    }
}
3.从 Keepalived 配置

ens33 # 网卡名称
192.168.2.124 # IP
ethtool ens33 | grep -i 'link detected'

4. keepalived 的从配置文件 keepalived.conf
vim /etc/keepalived/keepalived.conf
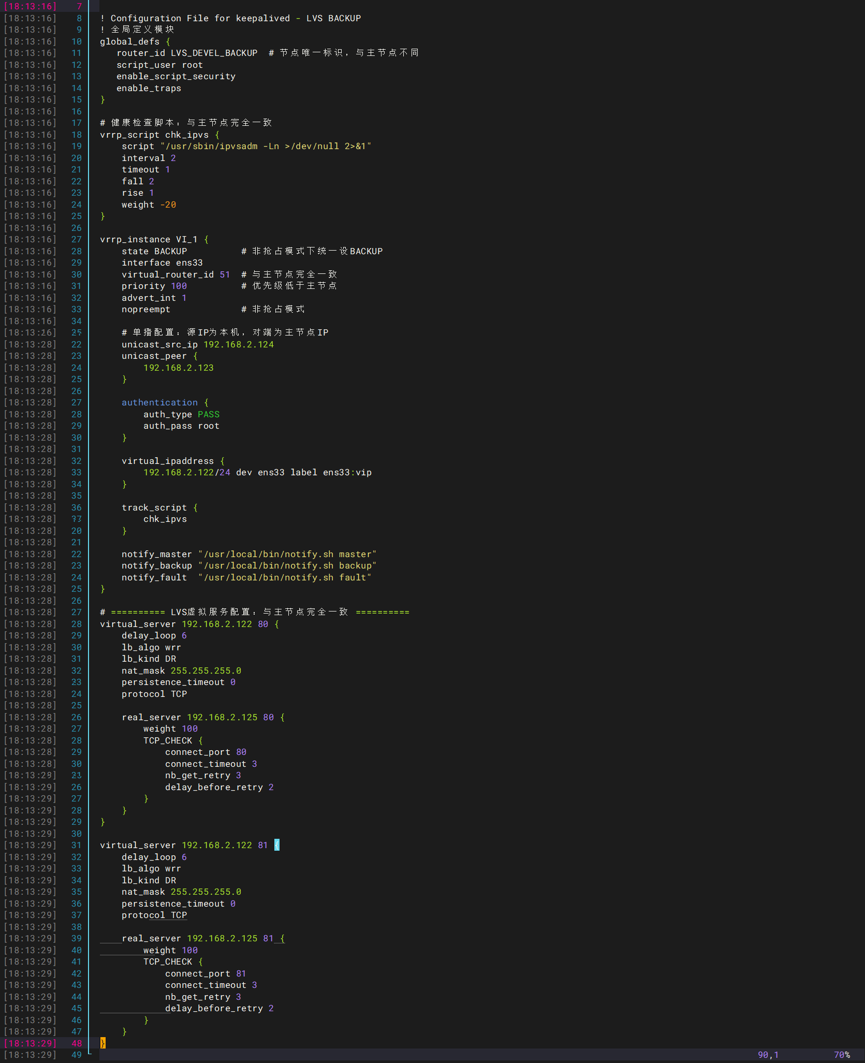
! Configuration File for keepalived - LVS BACKUP
! 全局定义模块
global_defs {
   router_id LVS_DEVEL_BACKUP  # 节点唯一标识,与主节点不同
   script_user root
   enable_script_security
   enable_traps
}

# 健康检查脚本:与主节点完全一致
vrrp_script chk_ipvs {
    script "/usr/sbin/ipvsadm -Ln >/dev/null 2>&1"
    interval 2
    timeout 1
    fall 2
    rise 1
    weight -20
}

vrrp_instance VI_1 {
    state BACKUP          # 非抢占模式下统一设BACKUP
    interface ens33
    virtual_router_id 51  # 与主节点完全一致
    priority 100          # 优先级低于主节点
    advert_int 1
    nopreempt             # 非抢占模式

    # 单播配置:源IP为本机,对端为主节点IP
    unicast_src_ip 192.168.2.124
    unicast_peer {
        192.168.2.123
    }

    authentication {
        auth_type PASS
        auth_pass root
    }

    virtual_ipaddress {
        192.168.2.122/24 dev ens33 label ens33:vip
    }

    track_script {
        chk_ipvs
    }

    notify_master "/usr/local/bin/notify.sh master"
    notify_backup "/usr/local/bin/notify.sh backup"
    notify_fault  "/usr/local/bin/notify.sh fault"
}

# ========== LVS虚拟服务配置:与主节点完全一致 ==========
virtual_server 192.168.2.122 80 {
    delay_loop 6
    lb_algo wrr
    lb_kind DR
    nat_mask 255.255.255.0
    persistence_timeout 0
    protocol TCP

    real_server 192.168.2.125 80 {
        weight 100
        TCP_CHECK {
            connect_port 80
            connect_timeout 3
            nb_get_retry 3
            delay_before_retry 2
        }
    }
}

virtual_server 192.168.2.122 81 {
    delay_loop 6
    lb_algo wrr
    lb_kind DR
    nat_mask 255.255.255.0
    persistence_timeout 0
    protocol TCP

    real_server 192.168.2.125 81 {
        weight 100
        TCP_CHECK {
            connect_port 81
            connect_timeout 3
            nb_get_retry 3
            delay_before_retry 2
        }
    }
}

virtual_server 192.168.2.122 82 {
    delay_loop 6
    lb_algo wrr
    lb_kind DR
    nat_mask 255.255.255.0
    persistence_timeout 0
    protocol TCP

    real_server 192.168.2.125 82 {
        weight 100
        TCP_CHECK {
            connect_port 82
            connect_timeout 3
            nb_get_retry 3
            delay_before_retry 2
        }
    }
}
5.RS 的配置
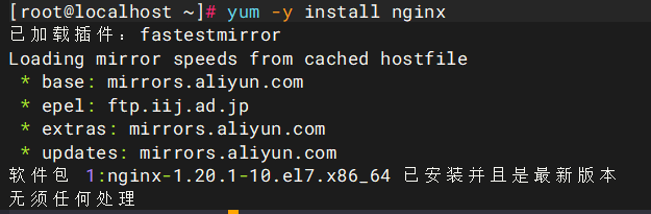
1)安装nginx
yum -y install nginx
2)配置基于 IP 的虚拟主机
基于 Nginx,配置 IP+Port 的虚拟主机。IP 地址和端口规划如下
192.168.2.125:80
192.168.2.125:81
192.168.2.125:82
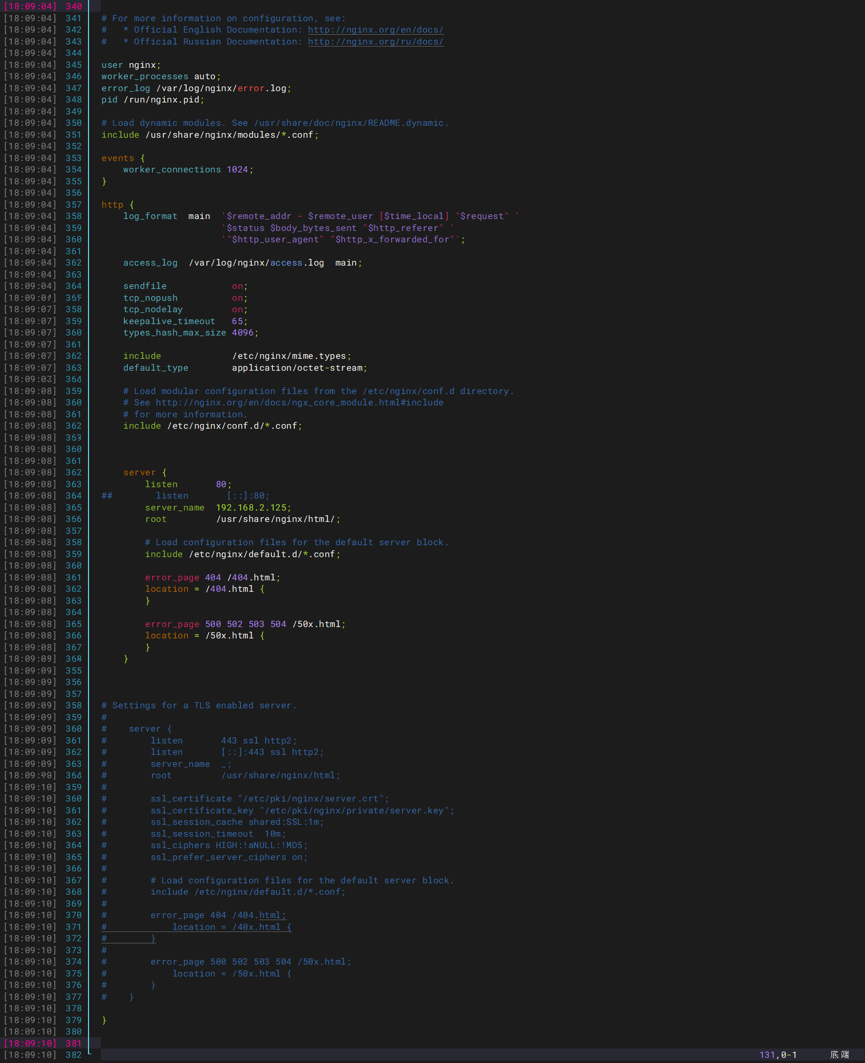
3)主 Nginx 配置虚拟主机
vim /etc/nginx/nginx.conf
# For more information on configuration, see:
#   * Official English Documentation: http://nginx.org/en/docs/
#   * Official Russian Documentation: http://nginx.org/ru/docs/

user nginx;
worker_processes auto;
error_log /var/log/nginx/error.log;
pid /run/nginx.pid;

# Load dynamic modules. See /usr/share/doc/nginx/README.dynamic.
include /usr/share/nginx/modules/*.conf;

events {
    worker_connections 1024;
}

http {
    log_format  main  '$remote_addr - $remote_user [$time_local] "$request" '
                      '$status $body_bytes_sent "$http_referer" '
                      '"$http_user_agent" "$http_x_forwarded_for"';

    access_log  /var/log/nginx/access.log  main;

    sendfile            on;
    tcp_nopush          on;
    tcp_nodelay         on;
    keepalive_timeout   65;
    types_hash_max_size 4096;

    include             /etc/nginx/mime.types;
    default_type        application/octet-stream;

    # Load modular configuration files from the /etc/nginx/conf.d directory.
    # See http://nginx.org/en/docs/ngx_core_module.html#include
    # for more information.
    include /etc/nginx/conf.d/*.conf;


    server {
        listen       80;
##        listen       [::]:80;
        server_name  192.168.2.125;
        root         /usr/share/nginx/html/;

        # Load configuration files for the default server block.
        include /etc/nginx/default.d/*.conf;

        error_page 404 /404.html;
        location = /404.html {
        }

        error_page 500 502 503 504 /50x.html;
        location = /50x.html {
        }
    }


    server {
        listen       81;
##        listen       [::]:80;
        server_name  192.168.2.125;
        root         /usr/share/nginx/html/ng1.com;

        # Load configuration files for the default server block.
        include /etc/nginx/default.d/*.conf;

        error_page 404 /404.html;
        location = /404.html {
        }

        error_page 500 502 503 504 /50x.html;
        location = /50x.html {
        }
    }


    server {
        listen       82;
        server_name  192.168.2.125;
        root         /usr/share/nginx/html/ng2.com;

        # Load configuration files for the default server block.
        include /etc/nginx/default.d/*.conf;

        error_page 404 /404.html;
        location = /404.html {
        }

        error_page 500 502 503 504 /50x.html;
        location = /50x.html {
        }
    }


# Settings for a TLS enabled server.
#
#    server {
#        listen       443 ssl http2;
#        listen       [::]:443 ssl http2;
#        server_name  _;
#        root         /usr/share/nginx/html;
#
#        ssl_certificate "/etc/pki/nginx/server.crt";
#        ssl_certificate_key "/etc/pki/nginx/private/server.key";
#        ssl_session_cache shared:SSL:1m;
#        ssl_session_timeout  10m;
#        ssl_ciphers HIGH:!aNULL:!MD5;
#        ssl_prefer_server_ciphers on;
#
#        # Load configuration files for the default server block.
#        include /etc/nginx/default.d/*.conf;
#
#        error_page 404 /404.html;
#            location = /40x.html {
#        }
#
#        error_page 500 502 503 504 /50x.html;
#            location = /50x.html {
#        }
#    }

}
4)配置虚拟主机的网站资源,默认首页
1、80 的虚拟主机资源配置【默认网站首页 index.html】
cat > /usr/share/nginx/html/index.html << 'EOF'
<h1> ng0.com -> 192.168.2.125:80 </h1>
EOF

cat /usr/share/nginx/html/index.html

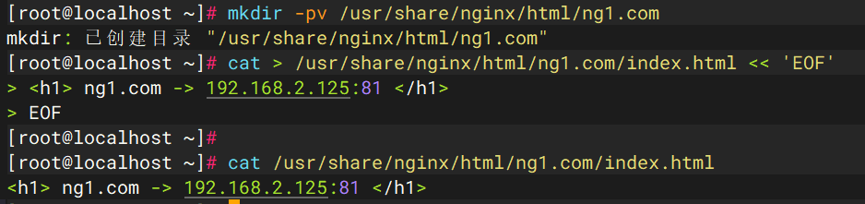
2、81 的虚拟主机资源配置【默认网站首页 index.html】
mkdir -pv /usr/share/nginx/html/ng1.com
cat > /usr/share/nginx/html/index.html << 'EOF'
<h1> ng0.com -> 192.168.2.125:81 </h1>
EOF

cat /usr/share/nginx/html/index.html
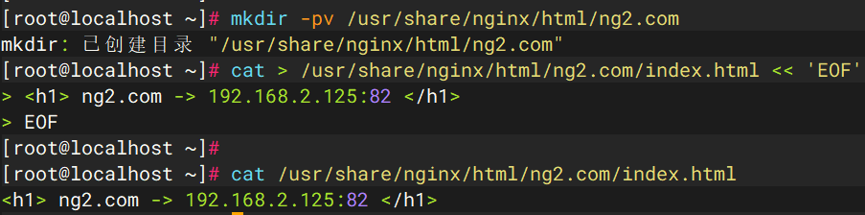
3、82 的虚拟主机资源配置【默认网站首页 index.html】
mkdir -pv /usr/share/nginx/html/ng2.com
cat > /usr/share/nginx/html/ng2.com/index.html << 'EOF'
<h1> ng2.com -> 192.168.2.125:82 </h1>
EOF

cat /usr/share/nginx/html/ng2.com/index.html
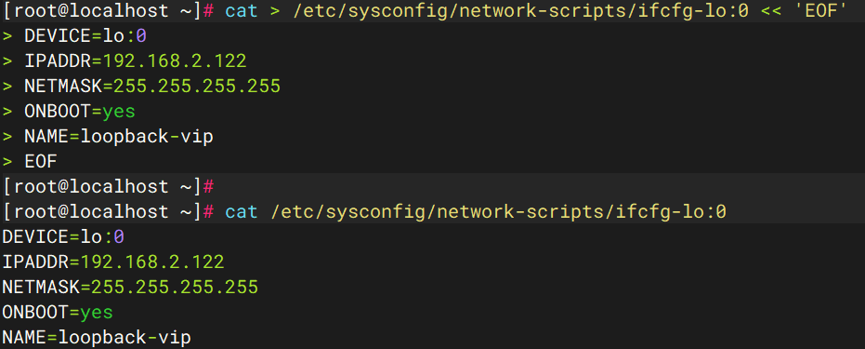
5)配置抑制 ARP 广播请求
1、lo:0 回环地址配置如下。
cat > /etc/sysconfig/network-scripts/ifcfg-lo:0 << 'EOF'
DEVICE=lo:0
IPADDR=192.168.2.122
NETMASK=255.255.255.255
ONBOOT=yes
NAME=loopback-vip
EOF

cat /etc/sysconfig/network-scripts/ifcfg-lo:0
2、启动 lo 虚拟回环地址
ifup lo:0

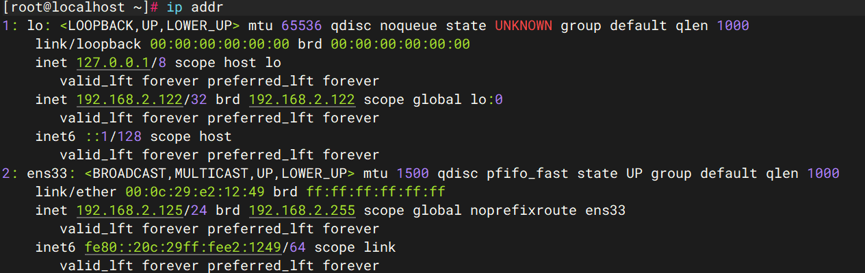
3、查看虚拟 IP 地址
ip addr
6.测试访问
访问192.168.2.122:81
访问192.168.2.122:82
访问192.168.2.122:83

openEuler 是由开放原子开源基金会孵化的全场景开源操作系统项目,面向数字基础设施四大核心场景(服务器、云计算、边缘计算、嵌入式),全面支持 ARM、x86、RISC-V、loongArch、PowerPC、SW-64 等多样性计算架构
更多推荐

 15
15 0
0- 0


 已为社区贡献8条内容

所有评论(0)