国产麒麟服务器V10离线安装Nginx(亲测有效整理)
由于是内网服务器,无法用yum安装,需要手工安装依赖包,网上也找了一堆资料,最后自己整理后亲自安装成功,把相关的离线依赖包也分享个大家,傻瓜式的操作安装。
我的服务器是麒麟V10版本的,安装nginx版本是nginx-1.26.3,有需要请确认服务器版本是否跟我一样。
[root@localhost ~]# uname -a
Linux localhost.localdomain 4.19.90-89.11.v2401.ky10.x86_64 #1 SMP Tue May 7 18:33:01 CST 2024 x86_64 x86_64 x86_64 GNU/Linux
非这个版本的,不保证是否跟我一样能够安装成功,大家可以自行验证。
网上说要安装GCC依赖的不用管,麒麟服务器这个版本已经自带有这些依赖包,只需要安装pcre2、zlib和openssl依赖即可。
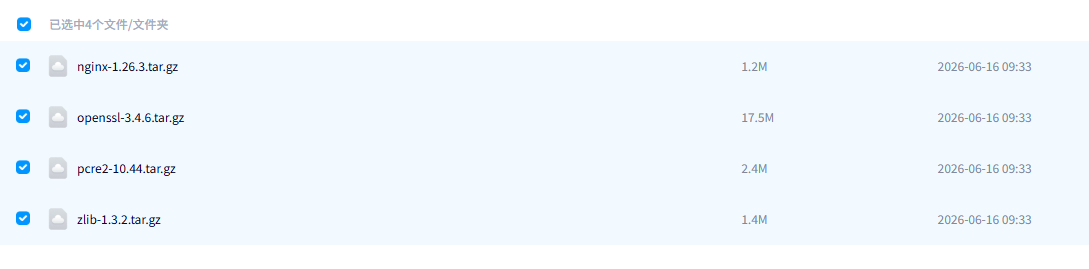
pcre2、zlib、openssl和nginx的安装包,百度网盘下载:
通过网盘分享的文件:国产麒麟V10离线Nginx
链接: https://pan.baidu.com/s/1DnoWE_rgugUcM4GyQ5OTJQ?pwd=ngin 提取码: ngin
安装步骤说明
一、网盘下载的文件上传到服务器/opt/nginx目录并解压
[root@localhost ~]# cd /opt/nginx/
[root@localhost nginx]# ls
nginx-1.26.3.tar.gz openssl-3.4.6.tar.gz pcre2-10.44.tar.gz zlib-1.3.2.tar.gz
[root@localhost nginx]# tar -zxvf pcre2-10.44.tar.gz
[root@localhost nginx]# tar -zxvf zlib-1.3.2.tar.gz
[root@localhost nginx]# tar -zxvf openssl-3.4.6.tar.gz
二、编译安装 PCRE
root@localhost nginx]# cd /opt/pcre2-10.44
[root@localhost pcre2-10.44]# ./configure
[root@localhost pcre2-10.44]# make
[root@localhost pcre2-10.44]# sudo make install
四、编译安装 Zlib
root@localhost nginx]# cd /opt/nginx/zlib-1.3.2
[root@localhost pcre2-10.44]# ./configure
[root@localhost pcre2-10.44]# make
[root@localhost pcre2-10.44]# sudo make install
五、编译安装 OpenSSL
root@localhost nginx]# cd /opt/nginx/openssl-3.4.6
[root@localhost pcre2-10.44]# ./configure
[root@localhost pcre2-10.44]# make
[root@localhost pcre2-10.44]# sudo make install
-----编译安装PCRE、Zlib和OpenSSL,有的耗时比较久,需要3-6分钟,需要耐心等待。
六、编译安装 Nginx
(1)解压 Nginx 源码包
[root@localhost openssl-3.4.6]# cd /opt/nginx/
[root@localhost nginx]# tar -zxvf nginx-1.26.3.tar.gz
(2)配置编译参数
[root@localhost nginx]# cd nginx-1.26.3
[root@localhost nginx-1.26.3]# ./configure --prefix=/usr/local/nginx --with-pcre=/opt/nginx/pcre2-10.44 --with-zlib=/opt/nginx/zlib-1.3.2 --with-openssl=/opt/nginx/openssl-3.4.6 --with-http_ssl_module
(3)编译并安装
[root@localhost nginx-1.26.3]# make
[root@localhost nginx-1.26.3]# sudo make install
七、配置 Nginx 服务
安装好的nginx目录/usr/local/nginx
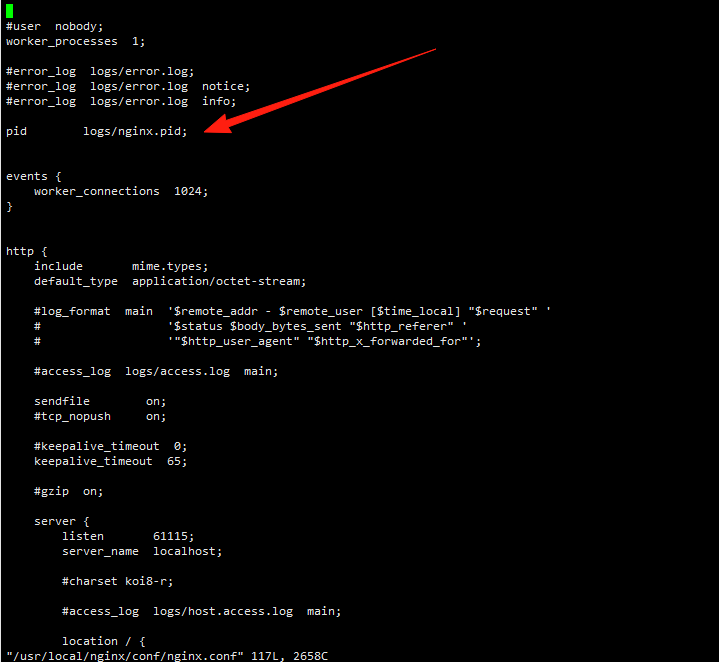
(1)修改nginx.conf:
vi /usr/local/nginx/conf/nginx.conf
去掉第8行pid的注释,如下图所示:
(2)配置 Systemd 服务
创建服务文件(服务器重启后自动启动nginx):
sudo vi /etc/systemd/system/nginx.service
- 添加以下内容:
[Unit]
Description=The NGINX HTTP and reverse proxy server
After=syslog.target network.target
[Service]
Type=forking
PIDFile=/usr/local/nginx/logs/nginx.pid
ExecStartPre=/usr/local/nginx/sbin/nginx -t
ExecStart=/usr/local/nginx/sbin/nginx
ExecReload=/usr/local/nginx/sbin/nginx -s reload
ExecStop=/bin/kill -s QUIT $MAINPID
PrivateTmp=true
[Install]
WantedBy=multi-user.target
(3)启用并启动服务:
sudo systemctl enable nginx
sudo systemctl start nginx
八、测试nginx是否启动
输入curl测试是否能输出nginx的欢迎页
[root@localhost conf]# curl http://127.0.0.1
<!DOCTYPE html>
<html>
<head>
<title>Welcome to nginx!</title>
<style>
html { color-scheme: light dark; }
body { width: 35em; margin: 0 auto;
font-family: Tahoma, Verdana, Arial, sans-serif; }
</style>
</head>
<body>
<h1>Welcome to nginx!</h1>
<p>If you see this page, the nginx web server is successfully installed and
working. Further configuration is required.</p>
<p>For online documentation and support please refer to
<a href="http://nginx.org/">nginx.org</a>.<br/>
Commercial support is available at
<a href="http://nginx.com/">nginx.com</a>.</p>
<p><em>Thank you for using nginx.</em></p>
</body>
</html>
九、外部访问异常处理
服务器nginx启动正常,curl http://127.0.0.1能输出nginx欢迎页,但是外部浏览器访问却无法访问,这是因为麒麟V10防火墙没有把默认的80端口打开的原因。
(1)检查服务器80端口监听是否正常
[root@localhost conf]# sudo netstat -tulnp |grep 80
tcp 0 0 0.0.0.0:80 0.0.0.0:* LISTEN 2330/nginx: master
(2)检查服务器防火墙是否正常
[root@localhost conf]# sudo systemctl status firewalld
● firewalld.service - firewalld - dynamic firewall daemon
Loaded: loaded (/usr/lib/systemd/system/firewalld.service; enabled; vendor preset: enabled)
Active: active (running) since Tue 2026-06-16 11:05:56 CST; 12min ago
Docs: man:firewalld(1)
Main PID: 1493 (firewalld)
Tasks: 2
Memory: 33.5M
CGroup: /system.slice/firewalld.service
└─1493 /usr/bin/python3 /usr/sbin/firewalld --nofork --nopid
6月 16 11:05:54 localhost systemd[1]: Starting firewalld - dynamic firewall daemon...
6月 16 11:05:56 localhost systemd[1]: Started firewalld - dynamic firewall daemon.
(3)开启防火墙的80端口
[root@localhost conf]# sudo firewall-cmd --add-port=80/tcp --permanent
success
(4)重新加载防火墙规则
[root@localhost conf]# sudo firewall-cmd --reload
success

openEuler 是由开放原子开源基金会孵化的全场景开源操作系统项目,面向数字基础设施四大核心场景(服务器、云计算、边缘计算、嵌入式),全面支持 ARM、x86、RISC-V、loongArch、PowerPC、SW-64 等多样性计算架构
更多推荐
 2
2 0
0- 0


 已为社区贡献1条内容

所有评论(0)