k8s集群部署的方法原理
一、Kubernetes 简介及部署方法
1.简介
Kubernetes(简称 K8s)是开源容器编排平台,主要用于自动化管理容器化应用,支持应用调度、故障自愈与弹性伸缩,是云原生架构的核心基础设施,可统一管理跨环境的业务集群。Kubernetes项目来源于Google 基于内部 Borg 系统, 取其精华,去其糟粕。Kubernetes对计算资源进行了更高层次的抽象,通过将容器进行细致的组合,把最终的应用服务交给用户。
******
容器编排工具服务于容器化部署
容器化部署与虚拟化相似,但其共享了操作系统。
容器化部署带来便利的同时也产生了一些问题,比如:
一个容器故障停机了,怎么样让另外一个容器立刻启动去替代停机的容器;
当并发访问量变大的时候,怎么样做到横向扩展容器数量。
为了解决这些问题,需要用到容器编排工具。
2.功能
| 自我修复 | 当某一个容器崩溃时,能够在1秒左右迅速启动新的容器 |
| 弹性伸缩 | 可根据需要,自动对集群中正在运行的容器的数量进行调整 |
| 服务发现 | 服务可通过自动发现的形式找到它所依赖的服务 |
| 负载均衡 | 如果一个服务启动了多个容器,能自动实现请求的负载均衡 |
| 版本回退 | 如果发现新发布的程序版本有问题,可立即回退到原来版本 |
| 存储编排 | 可以根据容器自身的需求自动创建存储卷 |
3.设计架构
3.1相关基本概念
| Master | 集群控制节点,每个集群都需要至少一个master节点负责集群的管控 |
| Node | 工作负载节点,由master分配容器到这些node工作节点 |
| Pod | kubernetes的最小控制单元,容器都运行在pod中,一个pod中可有1个或者多个容器 |
| Controller | 控制器,通过它来实现对pod的管理 |
| Service | pod对外服务的统一入口,在其下面可以维护同一类的多个pod |
| Label | 标签,用来对pod进行分类,同一类pod会拥有相同的标签 |
| NameSpace | 命名空间,用来隔离pod的运行环境 |
3.2各组件用途与调用关系
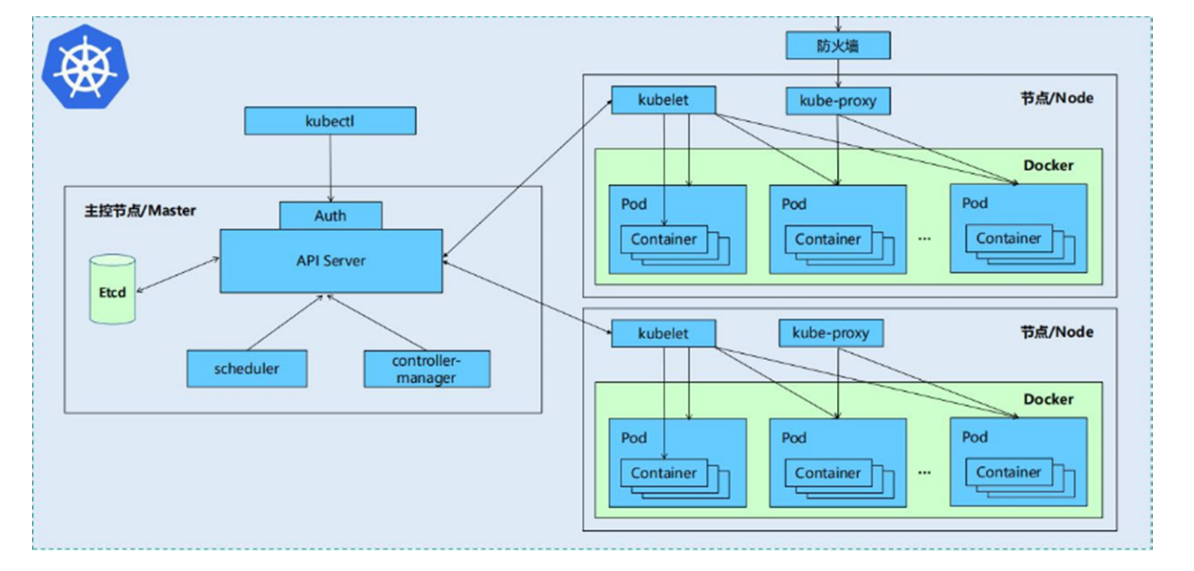
一个kubernetes集群主要由控制节点(master)和工作节点(node)构成,每个节点上都会安装不同的组件
| master | 控制平面,负责集群的决策 |
| ApiServer | 资源操作的唯一入口,接收用户输入的命令,提供认证、授权、API注册等机制 |
| Scheduler | 负责集群资源调度,按照预定的调度策略将Pod调度到相应的node节点上 |
| ControllerManager | 负责维护集群的状态,比如程序部署安排、故障检测、自动扩展等 |
| Etcd | 负责存储集群中各种资源对象的信息 |
| node | 数据平面,负责为容器提供运行环境 |
| kubelet | 负责维护容器的生命周期,同时也负责Volume(CVI)和网络(CNI)的管理 |
| Container runtime | 负责镜像管理以及Pod和容器的真正运行(CRI) |
| kube-proxy | 负责为Service提供cluster内部的服务发现和负载均衡 |
当我们运行一个web服务时:
1. kubernetes环境启动之后,master和node都会将自身的信息存储到etcd数据库里
2. web服务的安装请求会首先被发送给master节点的apiServer组件
3. apiServer组件会调用scheduler组件来决定到底应该把这个服务安装到哪个node节点上。此时,它会从etcd中读取各个node节点的信息,然后按一定的算法进行选择,并将结果告诉 apiServer
4. apiServer调用controller-manager去调度node节点安装web服务
5. kubelet接收apiServer 下发的指令后,会通知docker启动一个web服务的pod
6. 如果需要访问web服务,就需要通过kube-proxy来对pod产生访问的代理
二、k8s集群部署
1.k8s中容器的管理方式
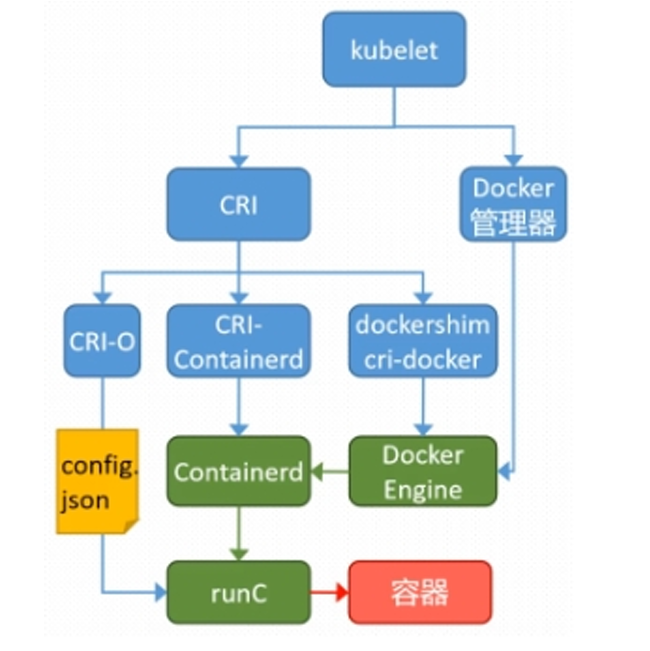
k8s有3种集群创建方式
| centainerd | 默认情况下,k8s创建集群时使用的方式 |
| docker | k8s创建集群使用率最高的方式,可以借助 cri-docker方式来实现集群创建,需要对kubelet程序的启动参数进行设置 |
| cri-o | 是k8s创建容器最直接的一种方式,在创建集群的时候,需要借助于cri-o插件的方式来实现集群的创建,还需要对kubelet程序的启动参数进行设置 |
2.k8s集群部署流程
2.1实验环境
| 主机名 | ip | 角色 |
| harbor | 172.25.254.250 | harbor仓库 |
| master | 172.25.254.100 | master,k8s集群控制节点 |
| node1 | 172.25.254.10 | worker,k8s集群工作节点 |
| node2 | 172.25.254.20 | worker,k8s集群工作节点 |
******
所有节点禁用selinux和防火墙
所有节点同步时间和解析
所有节点禁用swap
2.2构建harbor镜像仓库
2.2.1部署docker本地仓库
[root@harbor ~]# cat > /etc/yum.repos.d/docker.repo <<EOF
[docker]
name = docker
baseurl = https://mirrors.aliyun.com/docker-ce/linux/rhel/9.6/x86_64/stable/
gpgcheck = 0
EOF

[root@harbor ~]# dnf install httpd createrepo -y

[root@harbor ~]# mkdir  /var/www/html/docker/ -p

[root@harbor ~]# vim /etc/httpd/conf/httpd.conf
修改Listen 80 为 Listen 4444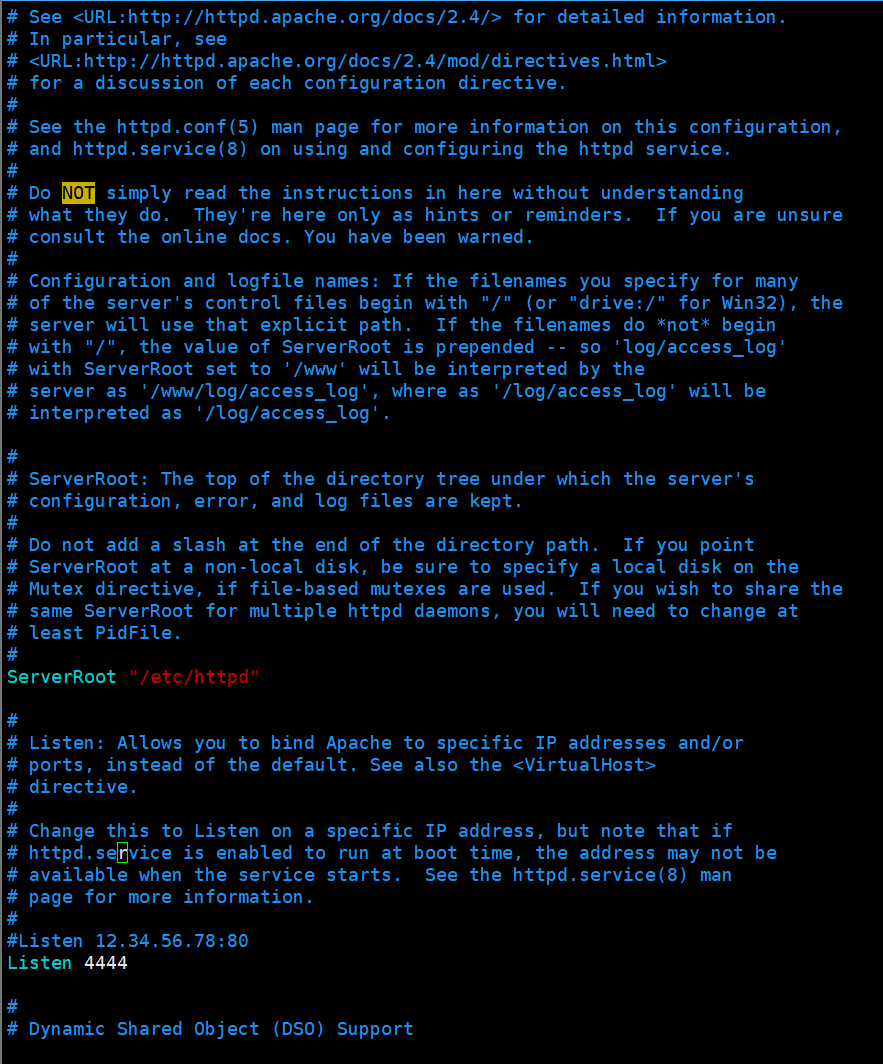
[root@harbor ~]# systemctl enable --now httpd
Created symlink /etc/systemd/system/multi-user.target.wants/httpd.service → /usr/lib/systemd/system/httpd.service.

[root@harbor ~]# dnf  install docker-ce --downloadonly  --destdir /mnt/ -y

[root@harbor ~]# mv /mnt/*.rpm /var/www/html/docker/

[root@harbor ~]# createrepo -v /var/www/html/docker/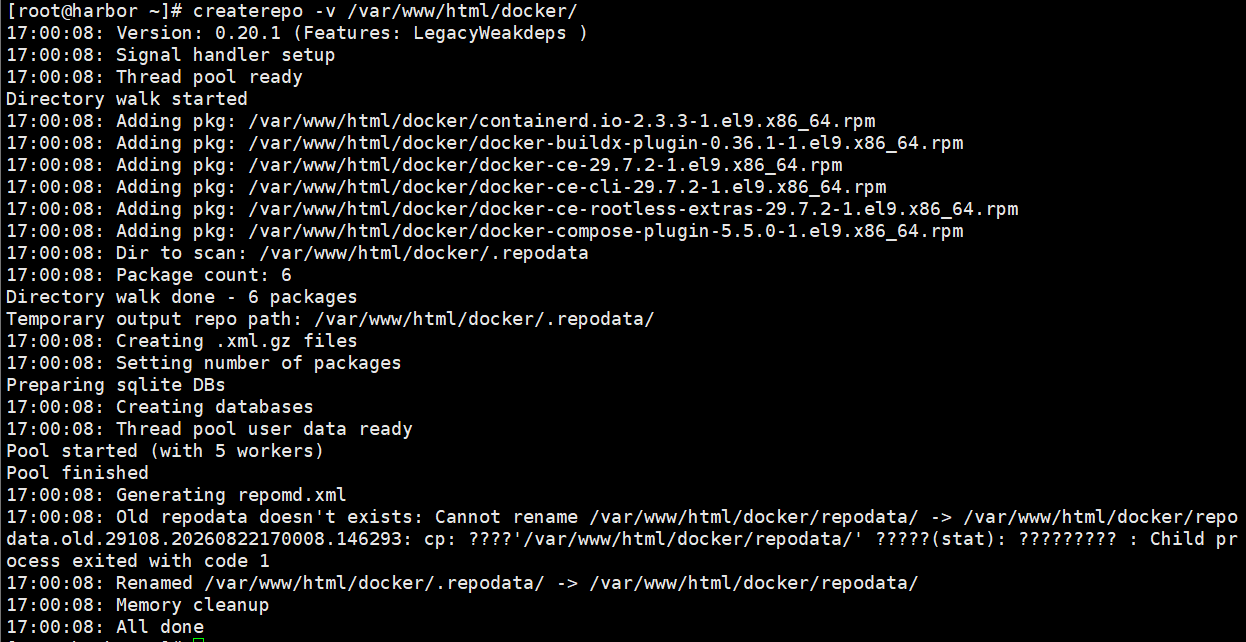
[root@harbor ~]# cat > /etc/yum.repos.d/docker.repo <<EOF
[docker]
name = docker
baseurl = http://172.25.254.250:4444/docker
gpgcheck = 0
EOF
2.2.2安装docker在harbor仓库节点
[root@harbor ~]# dnf install docker-ce -y

[root@harbor ~]# echo br_netfilter > /etc/modules-load.d/docker_mod.conf

[root@harbor ~]# modprobe -a br_netfilter

[root@harbor ~]# vim /etc/sysctl.d/docker.conf
net.bridge.bridge-nf-call-iptables = 1
net.bridge.bridge-nf-call-ip6tables = 1
net.ipv4.ip_forward = 1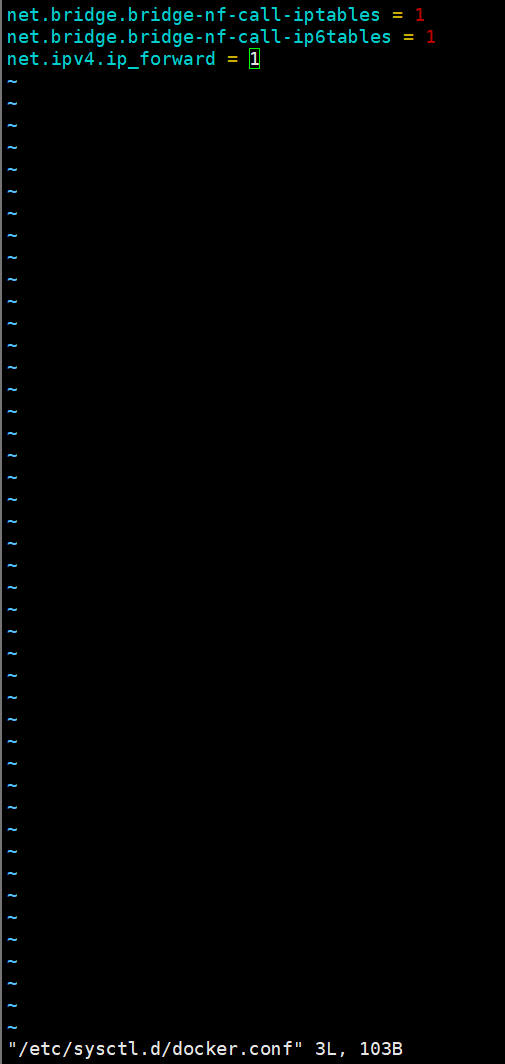
[root@harbor ~]# systemctl restart  systemd-modules-load.service

[root@harbor ~]# sysctl  --system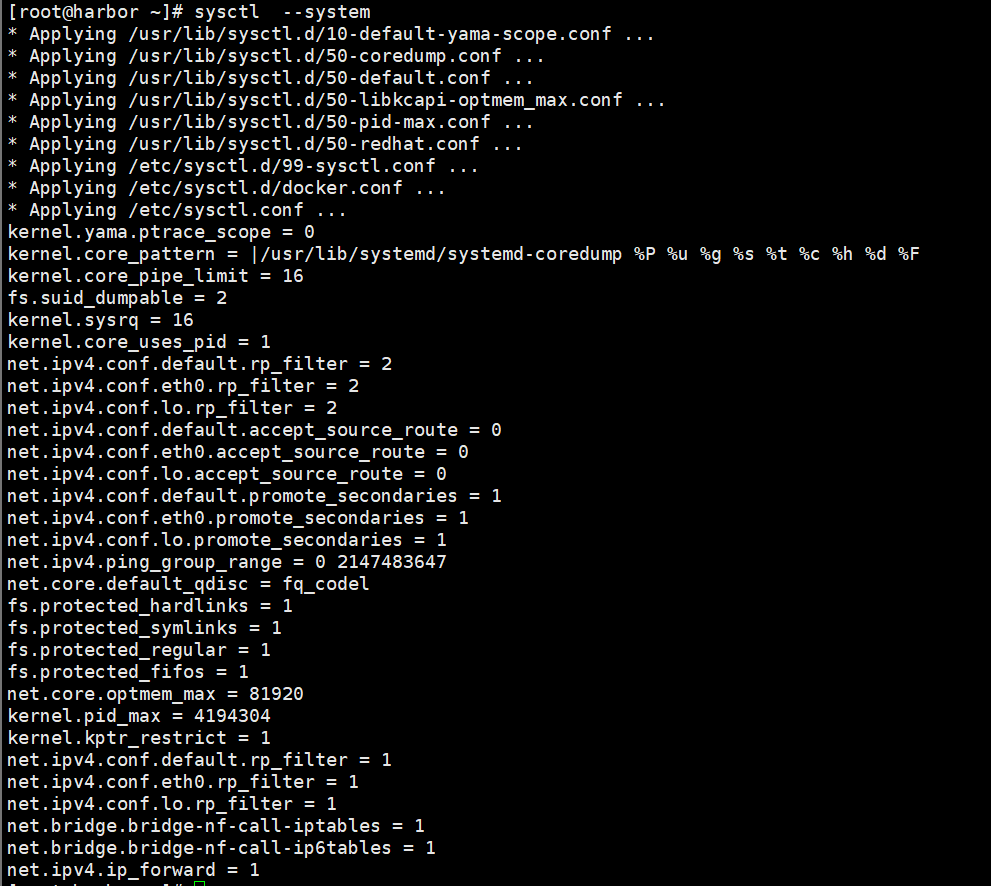
[root@harbor ~]# vim /lib/systemd/system/docker.service
修改
ExecStart=/usr/bin/dockerd -H fd:// --containerd=/run/containerd/containerd.sock --iptables=true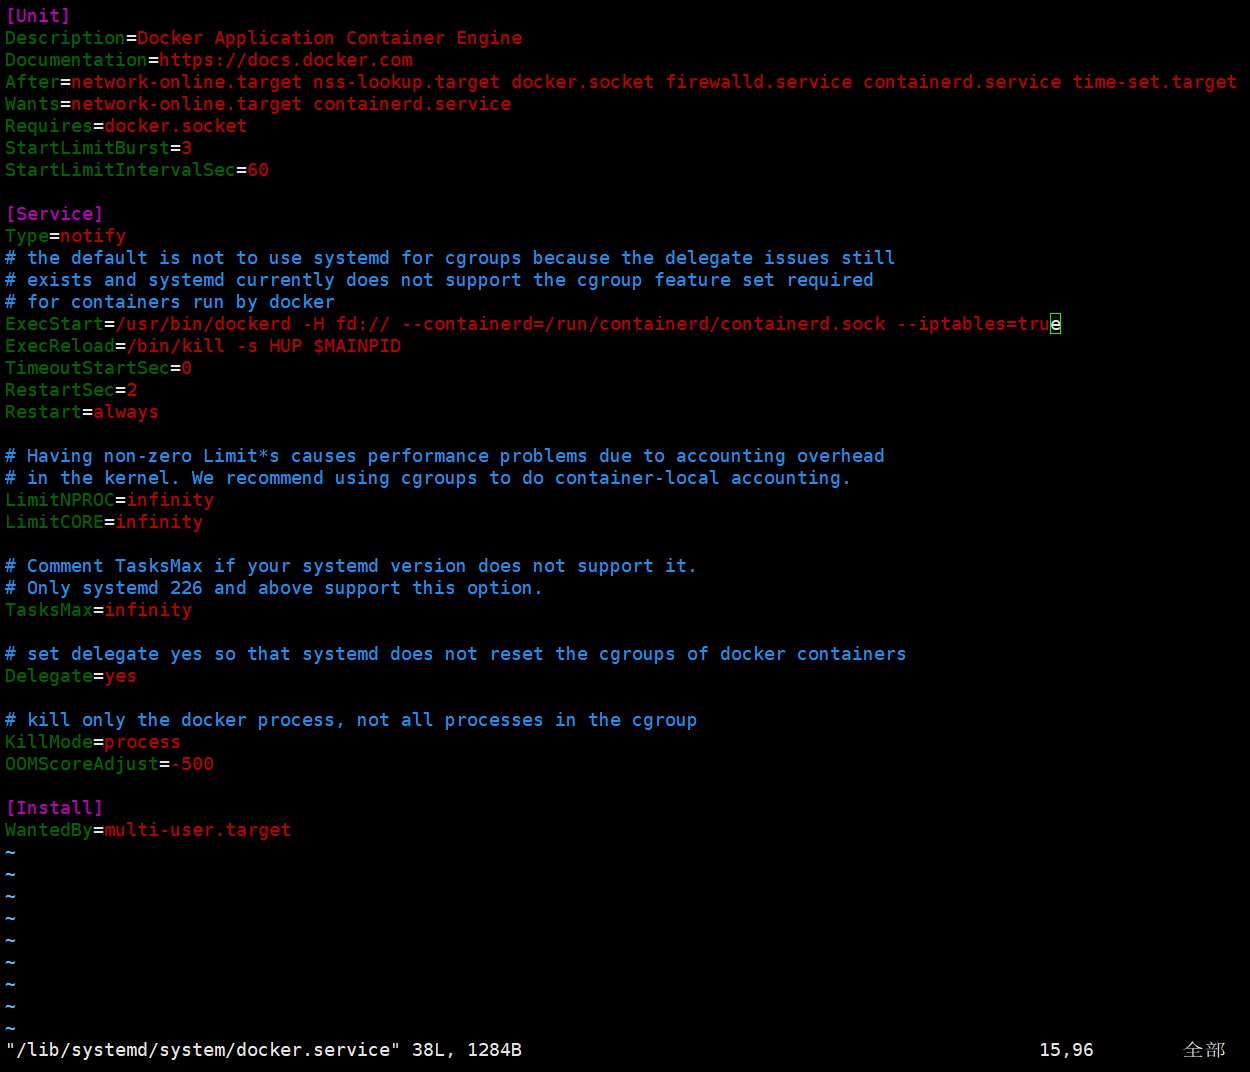
[root@harbor ~]# systemctl daemon-reload

[root@harbor ~]# systemctl enable --now docker
Created symlink /etc/systemd/system/multi-user.target.wants/docker.service → /usr/lib/systemd/system/docker.service.
2.2.3生成key
[root@harbor ~]# mkdir /data/certs -p

[root@harbor ~]# openssl req -newkey  rsa:4096 \
-nodes -sha256 -keyout /data/certs/timinglee.org.key \
-addext "subjectAltName = DNS:reg.timinglee.org" \
-x509 -days 365 -out /data/certs/timinglee.org.crt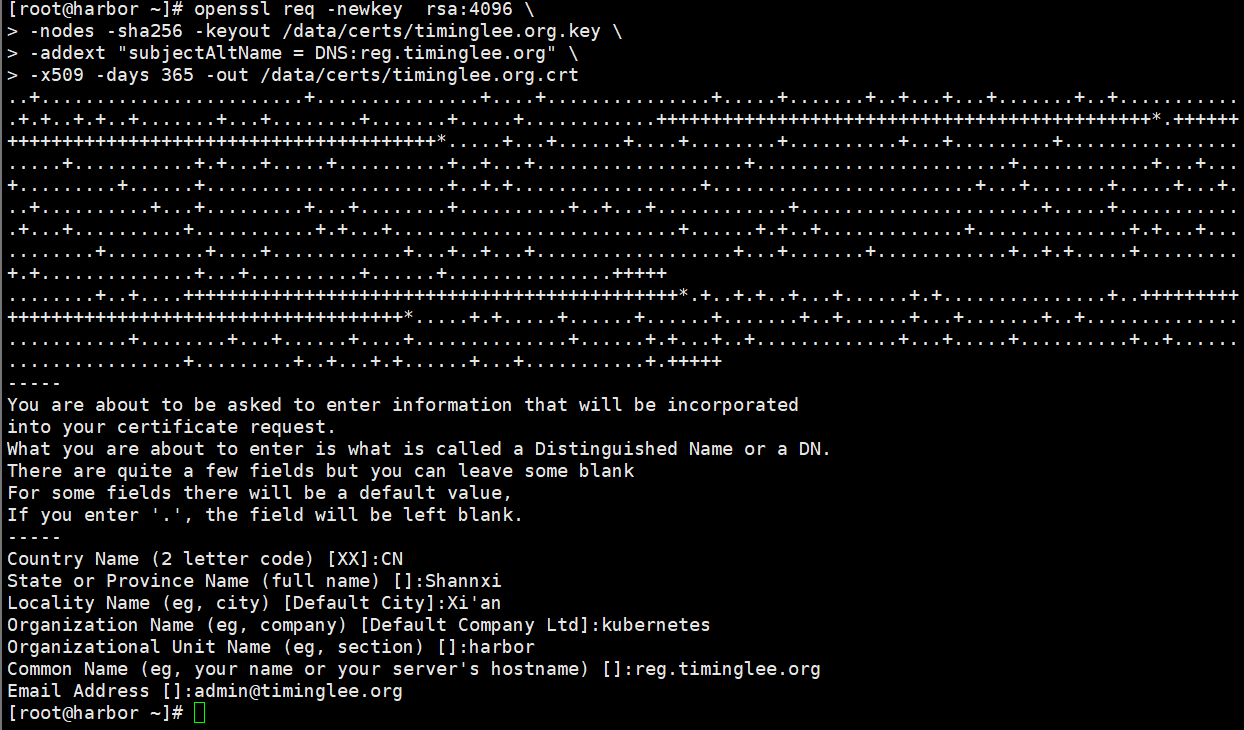
2.2.4编辑harbor配置文件
往虚拟机里导入文件harbor-offline-installer-v2.5.4.tgz

[root@harbor ~]# tar zxf  harbor-offline-installer-v2.5.4.tgz -C /opt/

[root@harbor ~]# cd /opt/harbor/

[root@harbor harbor]# ls
common.sh  harbor.v2.5.4.tar.gz  harbor.yml.tmpl  install.sh  LICENSE  prepare
[root@harbor harbor]# cp harbor.yml.tmpl harbor.yml
[root@harbor harbor]# vim harbor.yml
修改
hostname: reg.timinglee.org
  certificate: /data/certs/timinglee.org.crt
  private_key: /data/certs/timinglee.org.key
harbor_admin_password: lee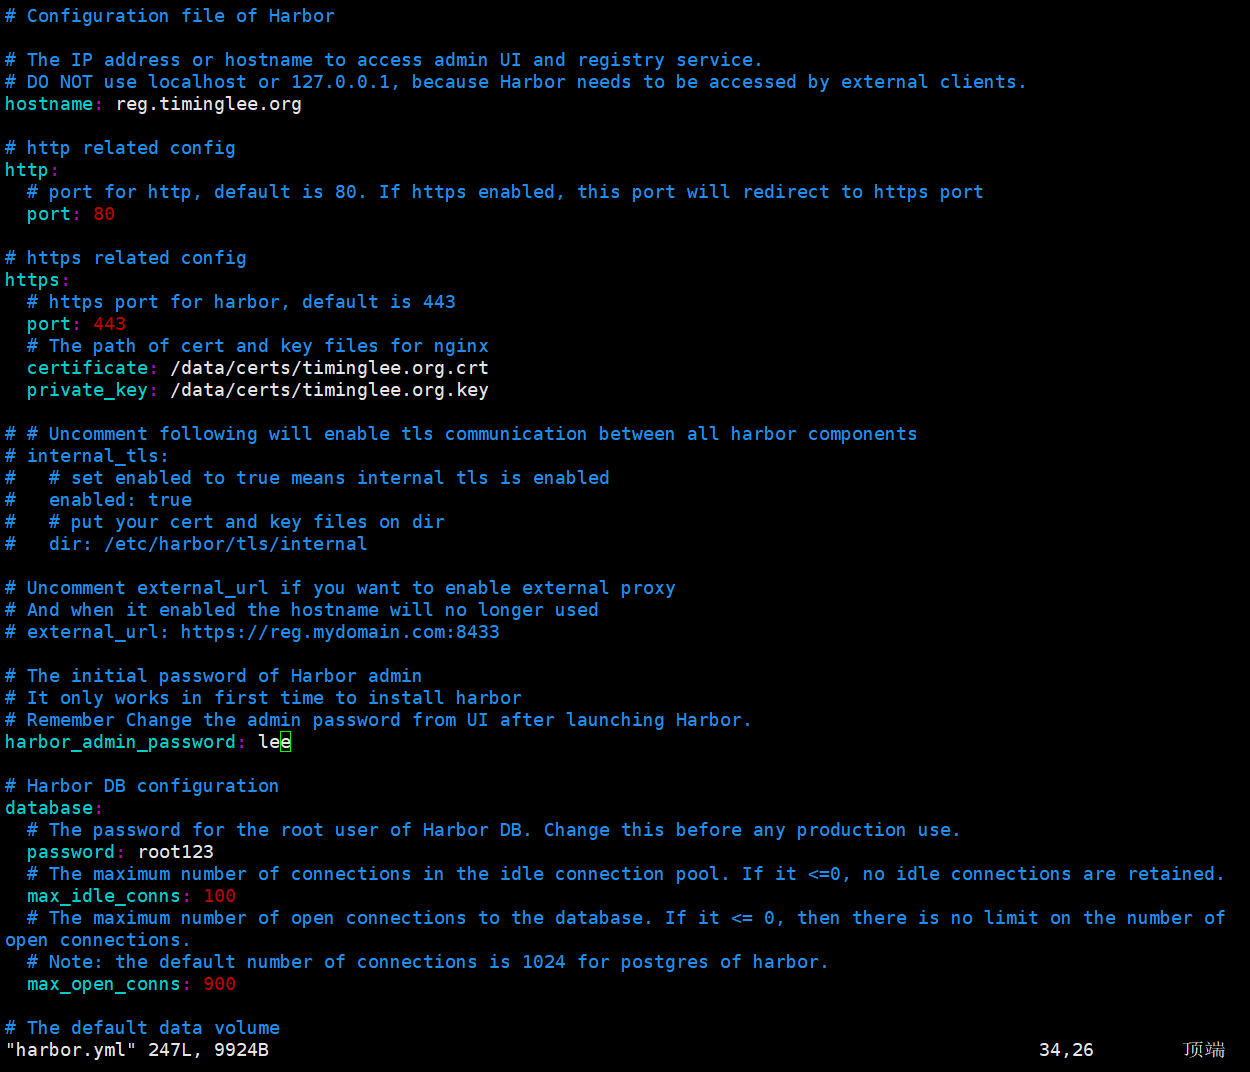
[root@harbor harbor]# ./install.sh --with-chartmuseum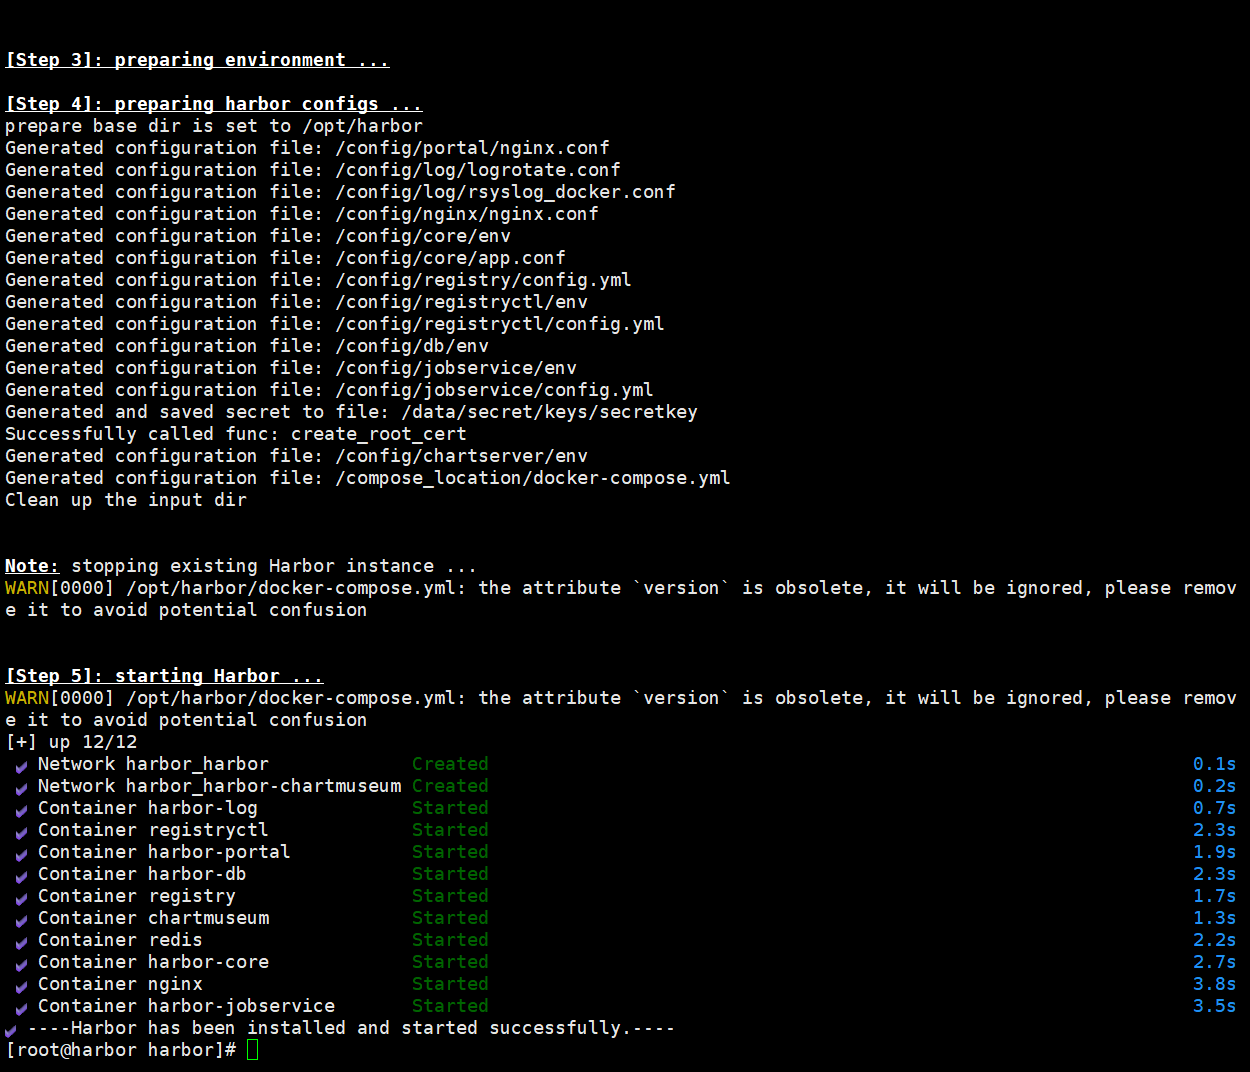
#编写启动脚本
[root@harbor ~]# vim /lib/systemd/system/harbor.service
[Unit]
Description=harbor with Docker Compose
Documentation=https://reg.timinglee.com/compose/
After=docker.service network-online.target
Requires=docker.service

[Service]
Type=oneshot
WorkingDirectory=/opt/harbor
ExecStart=/usr/bin/docker compose up -d
ExecStop=/usr/bin/docker compose down
RemainAfterExit=yes

[Install]
WantedBy=multi-user.target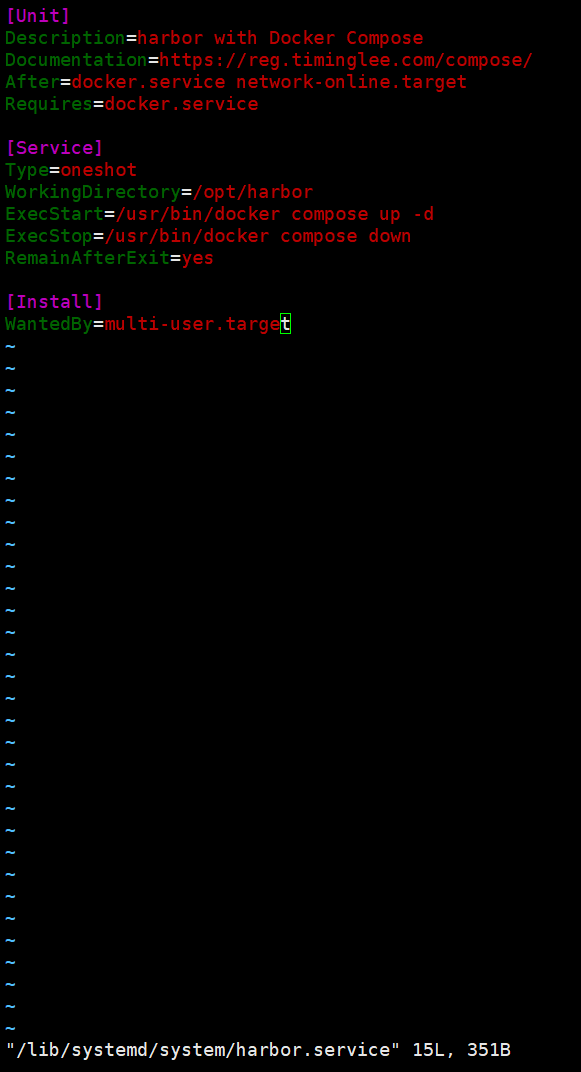
[root@harbor harbor]# docker compose down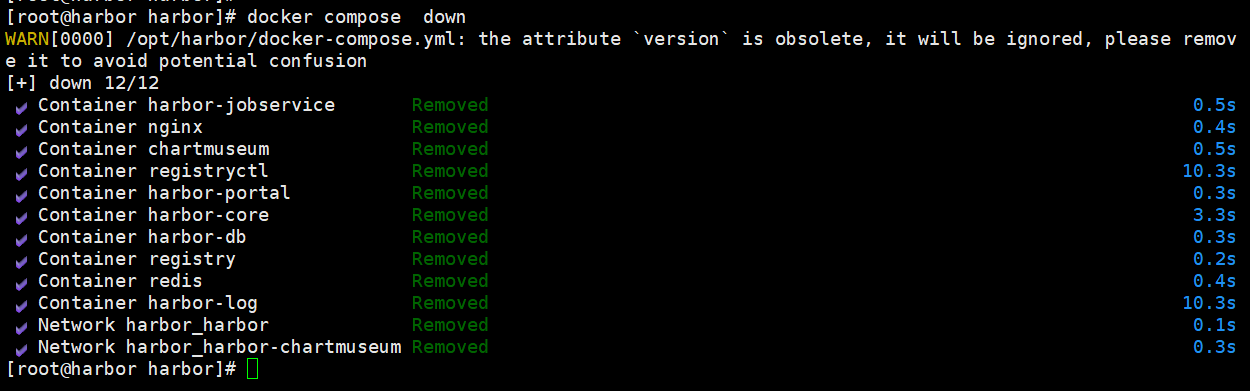
[root@harbor ~]# systemctl enable --now harbor
Created symlink /etc/systemd/system/multi-user.target.wants/harbor.service → /usr/lib/systemd/system/harbor.service.


[root@harbor harbor]# docker compose  ps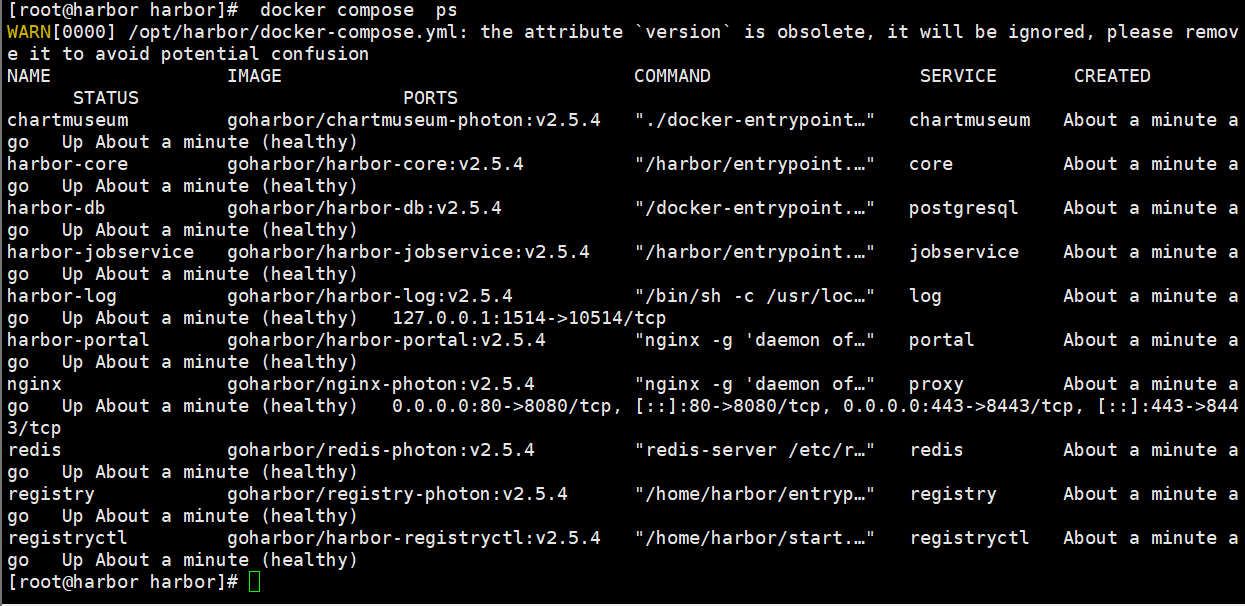
2.2.5启动并验证
[root@harbor harbor]# mkdir  /etc/docker/certs.d/reg.timinglee.org/ -p

[root@harbor harbor]# cp /data/certs/timinglee.org.crt /etc/docker/certs.d/reg.timinglee.org/ca.crt

[root@harbor harbor]# vim /etc/hosts
添加
127.0.0.1   localhost localhost.localdomain localhost4 localhost4.localdomain4
::1         localhost localhost.localdomain localhost6 localhost6.localdomain6
172.25.254.250     harbor reg.timinglee.org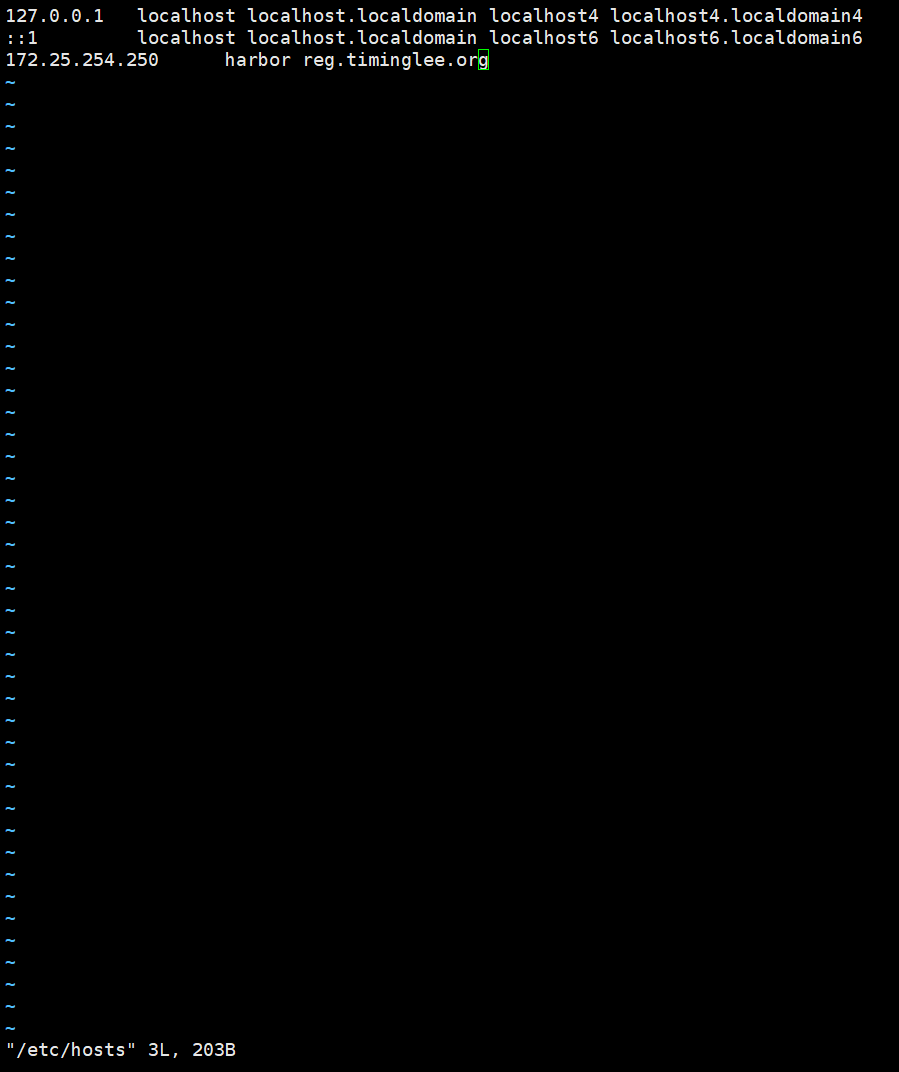
[root@harbor harbor]# systemctl restart docker

[root@harbor harbor]# docker compose up -d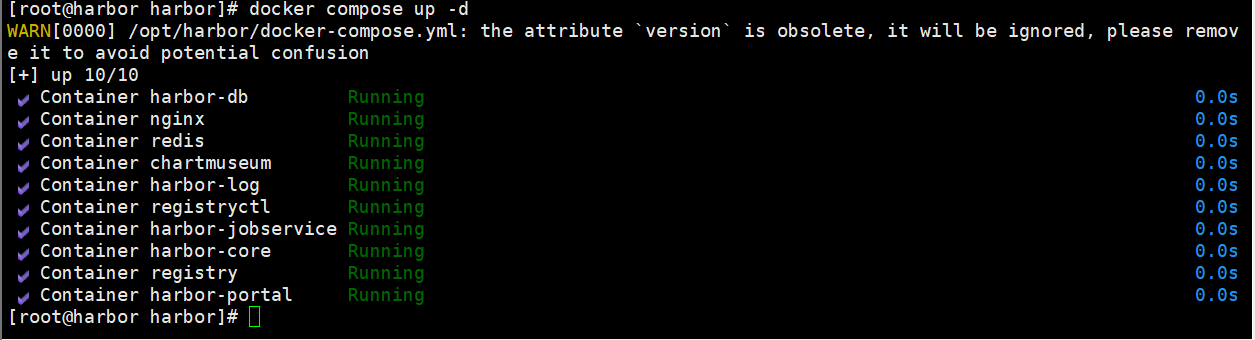
[root@harbor harbor]# docker login  reg.timinglee.org -u admin
Password: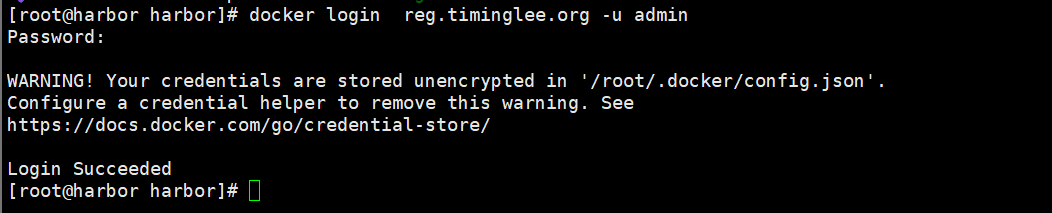
2.3利用Ansible部署kubernetes运行环境
2.3.1所有主机配置
临时关闭swap
swapoff -a
关闭swap
systemctl disable --now  swap.target
systemctl mask swap.target
Created symlink /etc/systemd/system/swap.target → /dev/null.

sed '/swap/s/^/#/g' -i /etc/fstab

所有主机彼此建立解析
vim /etc/hosts
127.0.0.1   localhost localhost.localdomain localhost4 localhost4.localdomain4
::1         localhost localhost.localdomain localhost6 localhost6.localdomain6
172.25.254.250      harbor reg.timinglee.org
172.25.254.100      master
172.25.254.10       node1
172.25.254.20       node2
2.3.2安装ansible
[root@harbor ~]# vim /etc/yum.repos.d/epel.repo
[epel]
name = epel
baseurl = https://mirrors.aliyun.com/epel/9/Everything/x86_64/
gpgcheck = 0

[root@harbor ~]# dnf install ansible-core.x86_64 ansible.noarch -y
2.3.3配置所需用户
[root@harbor ~]# useradd  devops

[root@harbor ~]# echo lee | passwd --stdin devops
更改用户 devops 的密码 。
passwd:所有的身份验证令牌已经成功更新

[root@harbor ~]# su - devops

[devops@harbor ~]$ mkdir  ansible

[devops@harbor ~]$ cd ansible/

[devops@harbor ansible]$
2.3.4生成ansible的临时配置文件并建立运行环境
[devops@harbor ansible]$ vim inventory
[servers]
172.25.254.100
172.25.254.20
172.25.254.10

[devops@harbor ansible]$ vim ansible.cfg
[defaults]
inventory = /home/devops/ansible/inventory
remote_user = root
ask_pass = false
host_key_checking = false


免密认证:
[devops@harbor ~]$ ssh-keygen -t rsa
一直回车

[devops@harbor ~]$ ssh-copy-id root@172.25.254.10
/usr/bin/ssh-copy-id: INFO: Source of key(s) to be installed: "/home/devops/.ssh/id_rsa.pub"
/usr/bin/ssh-copy-id: INFO: attempting to log in with the new key(s), to filter out any that are already installed
/usr/bin/ssh-copy-id: INFO: 1 key(s) remain to be installed -- if you are prompted now it is to install the new keys
root@172.25.254.10's password:

Number of key(s) added: 1

Now try logging into the machine, with: "ssh 'root@172.25.254.10'"
and check to make sure that only the key(s) you wanted were added.

[devops@harbor ~]$ ssh-copy-id root@172.25.254.20
/usr/bin/ssh-copy-id: INFO: Source of key(s) to be installed: "/home/devops/.ssh/id_rsa.pub"
/usr/bin/ssh-copy-id: INFO: attempting to log in with the new key(s), to filter out any that are already installed
/usr/bin/ssh-copy-id: INFO: 1 key(s) remain to be installed -- if you are prompted now it is to install the new keys
root@172.25.254.20's password:

Number of key(s) added: 1

Now try logging into the machine, with: "ssh 'root@172.25.254.20'"
and check to make sure that only the key(s) you wanted were added.

[devops@harbor ~]$ ssh-copy-id root@172.25.254.100
/usr/bin/ssh-copy-id: INFO: Source of key(s) to be installed: "/home/devops/.ssh/id_rsa.pub"
/usr/bin/ssh-copy-id: INFO: attempting to log in with the new key(s), to filter out any that are already installed
/usr/bin/ssh-copy-id: INFO: 1 key(s) remain to be installed -- if you are prompted now it is to install the new keys
root@172.25.254.100's password:

Number of key(s) added: 1

Now try logging into the machine, with: "ssh 'root@172.25.254.100'"
and check to make sure that only the key(s) you wanted were added.


[devops@harbor ansible]$ ansible all -m ping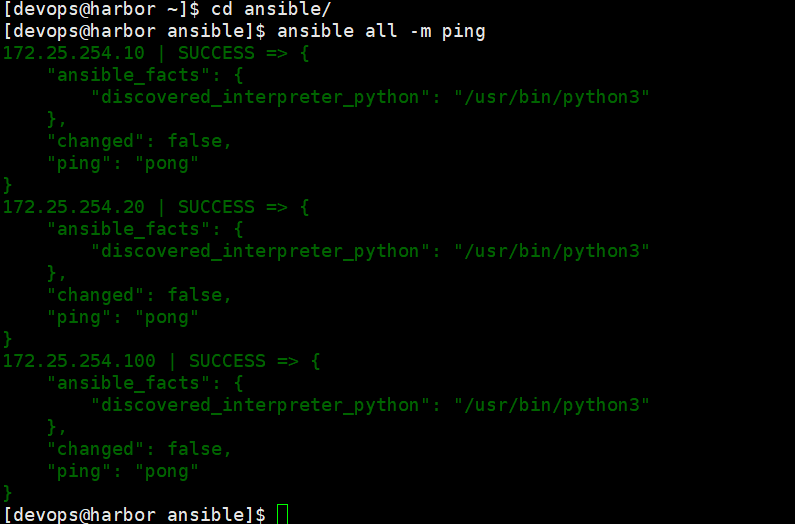
#建立用户
[devops@harbor ansible]$ ansible all -m user -a "name=devops state=present"

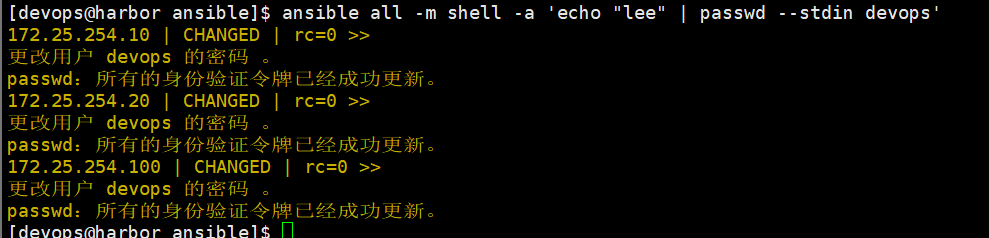
[devops@harbor ansible]$ ansible all -m shell -a 'echo "lee" | passwd --stdin devops'

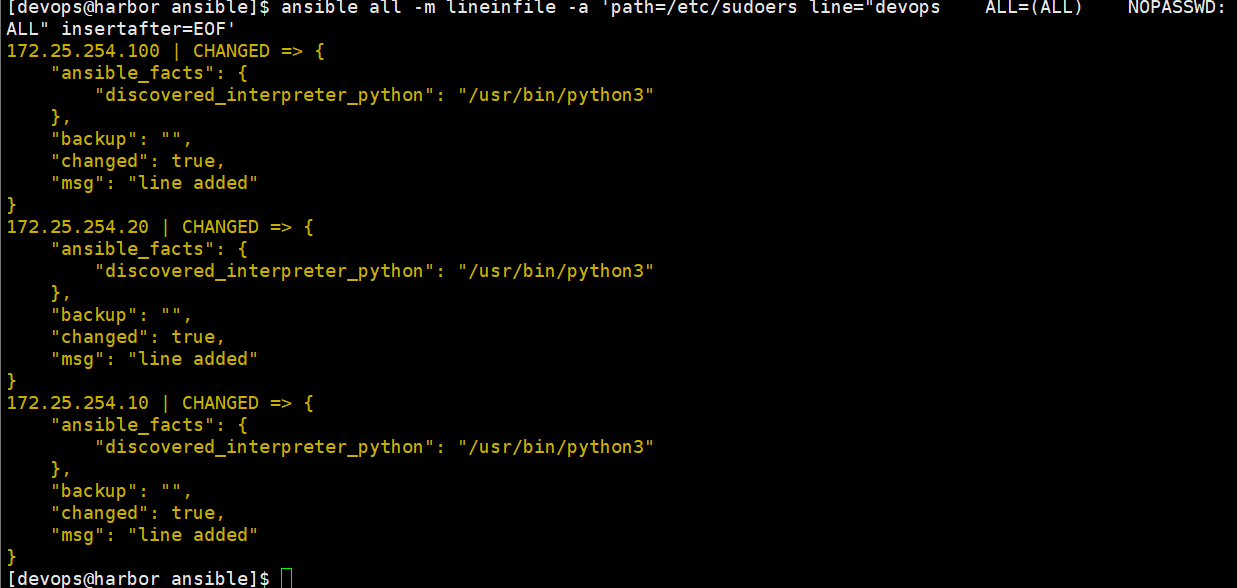
[devops@harbor ansible]$ ansible all -m lineinfile -a 'path=/etc/sudoers line="devops    ALL=(ALL)    NOPASSWD: ALL" insertafter=EOF'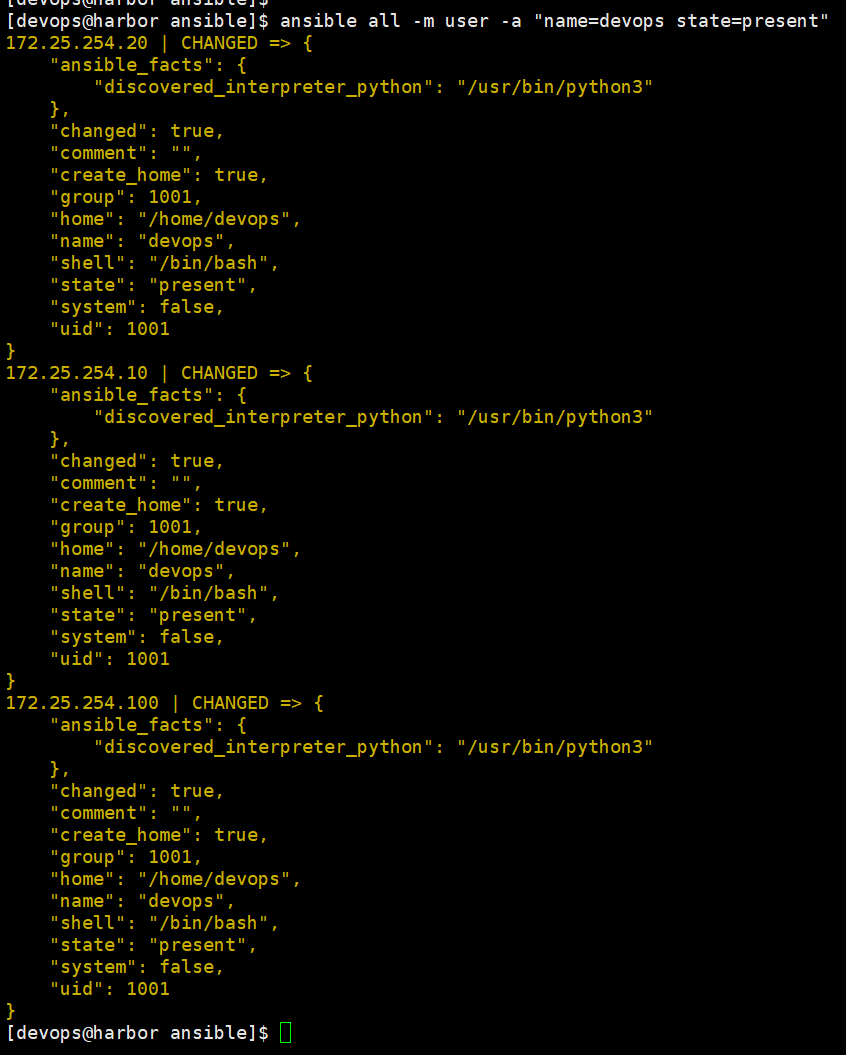
2.4生成ansible的主配置文件并测试
[devops@harbor ansible]$ vim ansible.cfg
[defaults]
inventory = /home/devops/ansible/inventory
remote_user = devops
ask_pass = false
host_key_checking = false

[privilege_escalation]
become = true
become_method = sudo
become_user = root
become_ask_pass = false

devops用户免密
[devops@harbor ansible]$ ssh-copy-id devops@172.25.254.10
/usr/bin/ssh-copy-id: INFO: Source of key(s) to be installed: "/home/devops/.ssh/id_rsa.pub"
/usr/bin/ssh-copy-id: INFO: attempting to log in with the new key(s), to filter out any that are already installed
/usr/bin/ssh-copy-id: INFO: 1 key(s) remain to be installed -- if you are prompted now it is to install the new keys
devops@172.25.254.10's password:

Number of key(s) added: 1

Now try logging into the machine, with: "ssh 'devops@172.25.254.10'"
and check to make sure that only the key(s) you wanted were added.

[devops@harbor ansible]$ ssh-copy-id devops@172.25.254.20
/usr/bin/ssh-copy-id: INFO: Source of key(s) to be installed: "/home/devops/.ssh/id_rsa.pub"
/usr/bin/ssh-copy-id: INFO: attempting to log in with the new key(s), to filter out any that are already installed
/usr/bin/ssh-copy-id: INFO: 1 key(s) remain to be installed -- if you are prompted now it is to install the new keys
devops@172.25.254.20's password:

Number of key(s) added: 1

Now try logging into the machine, with: "ssh 'devops@172.25.254.20'"
and check to make sure that only the key(s) you wanted were added.

[devops@harbor ansible]$ ssh-copy-id devops@172.25.254.100
/usr/bin/ssh-copy-id: INFO: Source of key(s) to be installed: "/home/devops/.ssh/id_rsa.pub"
/usr/bin/ssh-copy-id: INFO: attempting to log in with the new key(s), to filter out any that are already installed
/usr/bin/ssh-copy-id: INFO: 1 key(s) remain to be installed -- if you are prompted now it is to install the new keys
devops@172.25.254.100's password:

Number of key(s) added: 1

Now try logging into the machine, with: "ssh 'devops@172.25.254.100'"
and check to make sure that only the key(s) you wanted were added.


[devops@harbor ansible]$ ansible all -m shell -a 'whoami '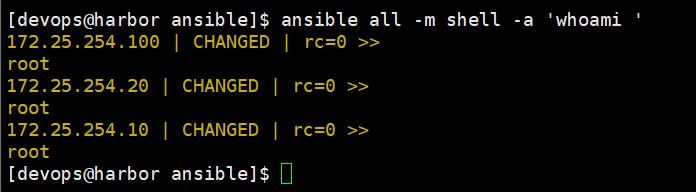
2.5利用ansible脚本部署docker
[devops@harbor ansible]$ vim kubernetes-devops.yml
- name: devops k8s from ansible
  hosts: all
  tasks:
  - name: setup docker repo
    yum_repository:
      name: docker
      description: docker
      baseurl: http://172.25.254.250:4444/docker
      file: docker
      gpgcheck: no

  - name: install docker
    dnf:
      name: docker-ce
      state: present


  - name: setup docker.service
    replace:
      path: /lib/systemd/system/docker.service
      regexp: "ExecStart=/usr/bin/dockerd -H fd:// --containerd=/run/containerd/containerd.sock"
      replace: "ExecStart=/usr/bin/dockerd -H fd:// --containerd=/run/containerd/containerd.sock  --iptables=true"

- name: setup docker registry
    copy:
      content: |
        {
          "registry-mirrors":["https://reg.timinglee.org"]
        }
      dest: /etc/docker/daemon.json

  - name: setup docker certs
    file:
      path: /etc/docker/certs.d/reg.timinglee.org
      state: directory


  - name: cp certs file
    copy:
      src: "{{item.src}}"
      dest: "{{item.dest}}"
    loop:
      - src: /etc/docker/certs.d/reg.timinglee.org/ca.crt
        dest: /etc/docker/certs.d/reg.timinglee.org/ca.crt

      - src: /etc/docker/certs.d/reg.timinglee.org/ca.crt
        dest: /etc/pki/ca-trust/source/anchors/ca.crt

 - name: load module
    copy:
      dest: "{{item.dest}}"
      content: "{{item.value}}"
    loop:
      - dest: /etc/modules-load.d/docker_mod.conf
        value: br_netfilter
      - dest: /etc/sysctl.d/docker.conf
        value: |
          net.bridge.bridge-nf-call-iptables = 1
          net.bridge.bridge-nf-call-ip6tables = 1
          net.ipv4.ip_forward = 1

  - name: update ca cert
    shell: "update-ca-trust extract;sysctl --system"

  - name: start services
    service:
      name: "{{item}}"
      state: restarted
      enabled: yes
    loop:
      - docker
      - systemd-modules-load.service

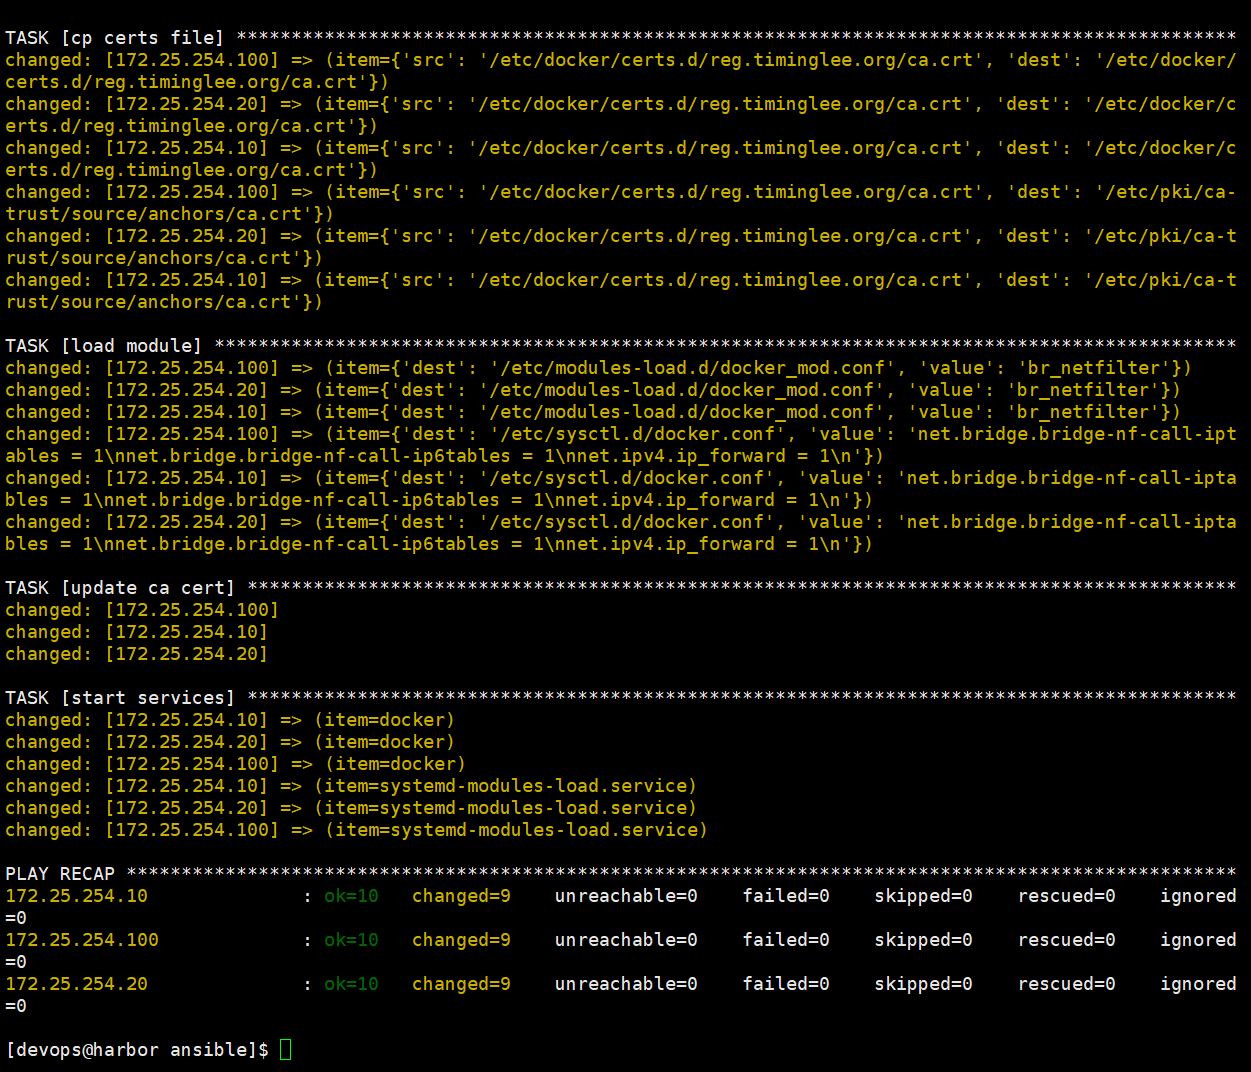
[devops@harbor ansible]$ ansible-playbook kubernetes-devops.yml
2.6利用ansible安装cri-dockerd
[devops@harbor ansible]$ tar zxf cri-dockerd-0.4.4.amd64.tgz
[devops@harbor ansible]$ ls
ansible.cfg  cri-dockerd  cri-dockerd-0.4.4.amd64.tgz  inventory  kubernetes-devops.yml
[devops@harbor ansible]$ cd cri-dockerd/
[devops@harbor cri-dockerd]$ ls
cri-dockerd  cri-docker.service  cri-docker.socket
[devops@harbor cri-dockerd]$ vim cri-docker.service
[Service]
Type=notify
ExecStart=/usr/bin/cri-dockerd --container-runtime-endpoint fd:// --network-plugin=cni --pod-infra-container-image=reg.timinglee.org/k8s/pause:3.10.1
ExecReload=/bin/kill -s HUP $MAINPID
TimeoutSec=0
RestartSec=2
Restart=always


[devops@harbor ansible]$ vim kubernetes-devops.yml
- name: devops k8s from ansible
  hosts: all
  tasks:
  - name: setup docker repo
    yum_repository:
      name: docker
      description: docker
      baseurl: http://172.25.254.250:4444/docker
      file: docker
      gpgcheck: no

  - name: install docker
    dnf:
      name: docker-ce
      state: present


  - name: setup docker.service
    replace:
      path: /lib/systemd/system/docker.service
      regexp: "ExecStart=/usr/bin/dockerd -H fd:// --containerd=/run/containerd/containerd.sock"
      replace: "ExecStart=/usr/bin/dockerd -H fd:// --containerd=/run/containerd/containerd.sock  --iptables=true"

  - name: setup docker registry
    copy:
      content: |
        {
          "registry-mirrors":["https://reg.timinglee.org"]
        }
      dest: /etc/docker/daemon.json

  - name: setup docker certs
    file:
      path: /etc/docker/certs.d/reg.timinglee.org
      state: directory


  - name: cp certs file
    copy:
      src: "{{item.src}}"
      dest: "{{item.dest}}"
    loop:
      - src: /etc/docker/certs.d/reg.timinglee.org/ca.crt
        dest: /etc/docker/certs.d/reg.timinglee.org/ca.crt

      - src: /etc/docker/certs.d/reg.timinglee.org/ca.crt
        dest: /etc/pki/ca-trust/source/anchors/ca.crt


########################################################
  - name: stup cri-dockerd
    copy:
      src: "{{item.src}}"
      dest: "{{item.dest}}"
      mode: '0755'
    loop:
      - src: ./cri-dockerd/cri-dockerd
        dest: /usr/bin/cri-dockerd

      - src: "./cri-dockerd/cri-docker.service"
        dest: "/lib/systemd/system/cri-docker.service"

      - src: "./cri-dockerd/cri-docker.socket"
        dest: "/lib/systemd/system/cri-docker.socket"

  - name: update ca cert
    shell: "update-ca-trust extract;sysctl --system;systemctl daemon-reload"

  - name: start services
    service:
      name: "{{item}}"
      state: restarted
      enabled: yes
    loop:
      - docker
      - systemd-modules-load.service
      - cri-docker

[devops@harbor ansible]$ ansible-playbook kubernetes-devops.yml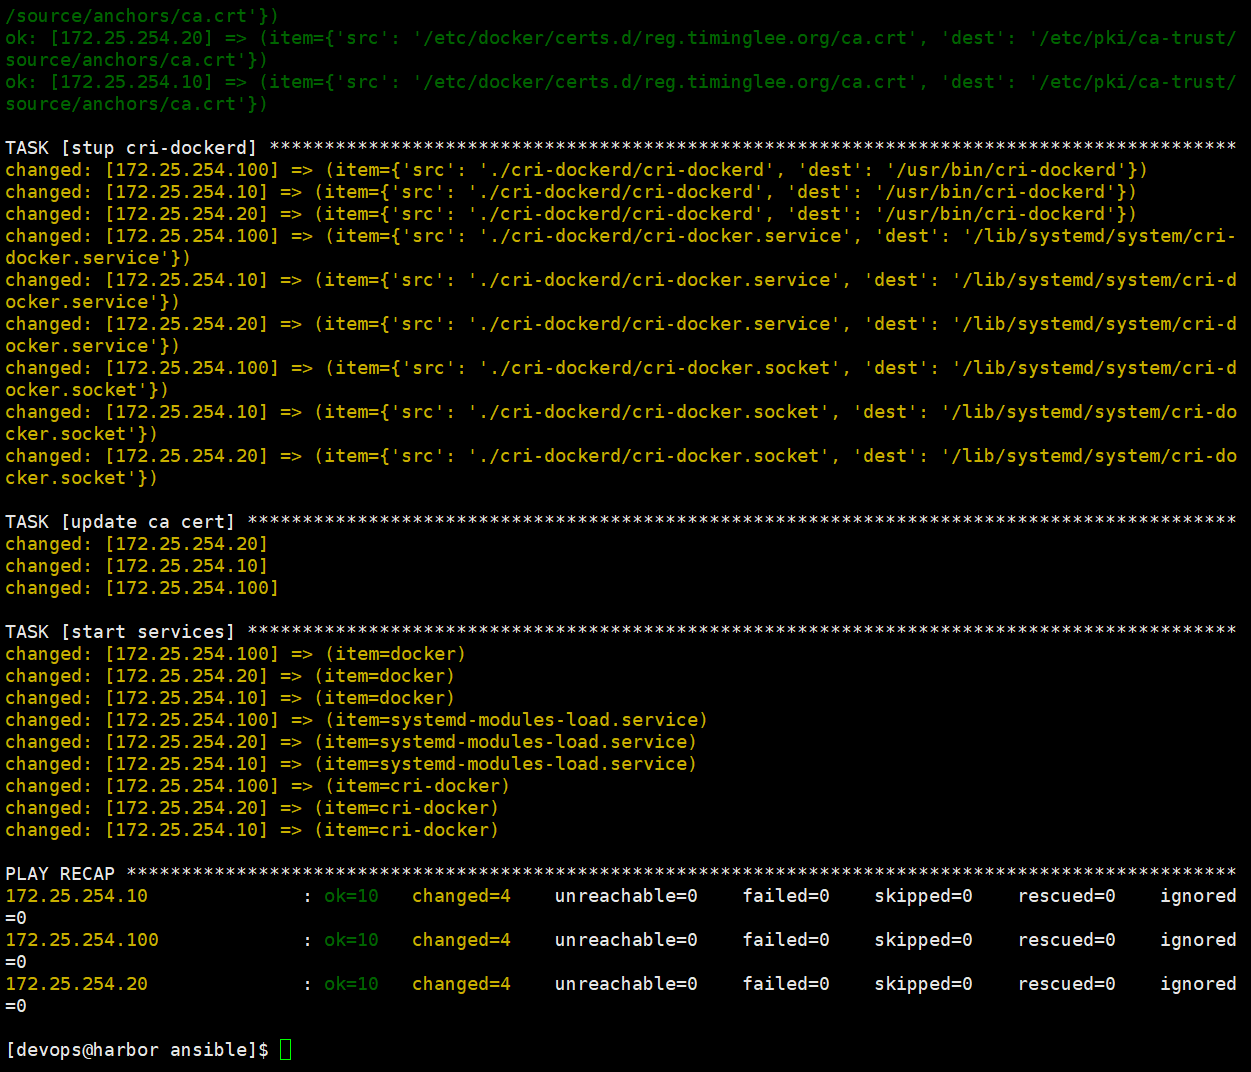

2.7利用ansible部署k8s软件
[devops@harbor ansible]$ vim kubernetes-devops.yml
- name: install kubernetes from ansible
  hosts: all
  tasks:
  - name: setup k8s repo
    yum_repository:
      name: kubernetes
      description: kubernetes
      baseurl: https://mirrors.aliyun.com/kubernetes-new/core/stable/v1.35/rpm
      file: kubernetes
      gpgcheck: no

  - name: install software in master
    dnf:
      name: "{{item}}"
      state: present
    loop:
      - kubeadm-1.35.7-150500.1.1
      - kubelet-1.35.7-150500.1.1
      - kubectl-1.35.7-150500.1.1
    when: inventory_hostname == "172.25.254.100"

  - name: install software in work node
    dnf:
      name: "{{item}}"
      state: present
    loop:
      - kubeadm-1.35.7-150500.1.1
      - kubelet-1.35.7-150500.1.1
    when: inventory_hostname == "172.25.254.10" or inventory_hostname == "172.25.254.20"

  - name: setup kubectl kubeadm complication
    lineinfile:
      path: /root/.bashrc
      line: |
        source <(kubectl completion bash)
        source <(kubeadm completion bash)
    when: inventory_hostname == "172.25.254.100"

  - name: start kubelet
    service:
      name: kubelet
      state: started
      enabled: yes


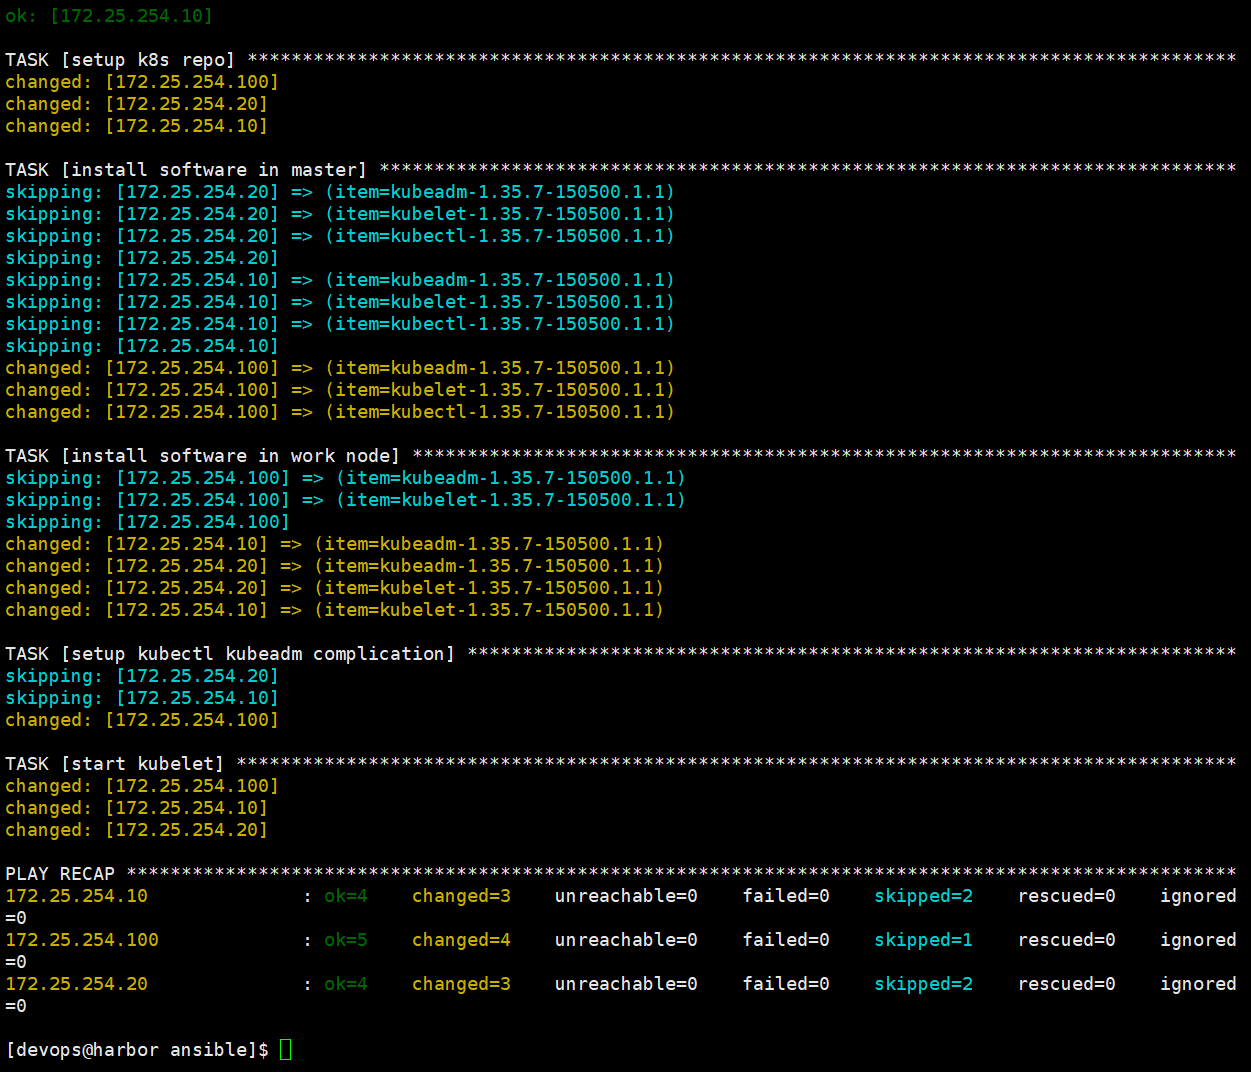
[devops@harbor ansible]$ ansible-playbook kubernetes-devops.yml
#让补齐功能生效
[root@k8s-master mnt]# source  ~/.bashrc
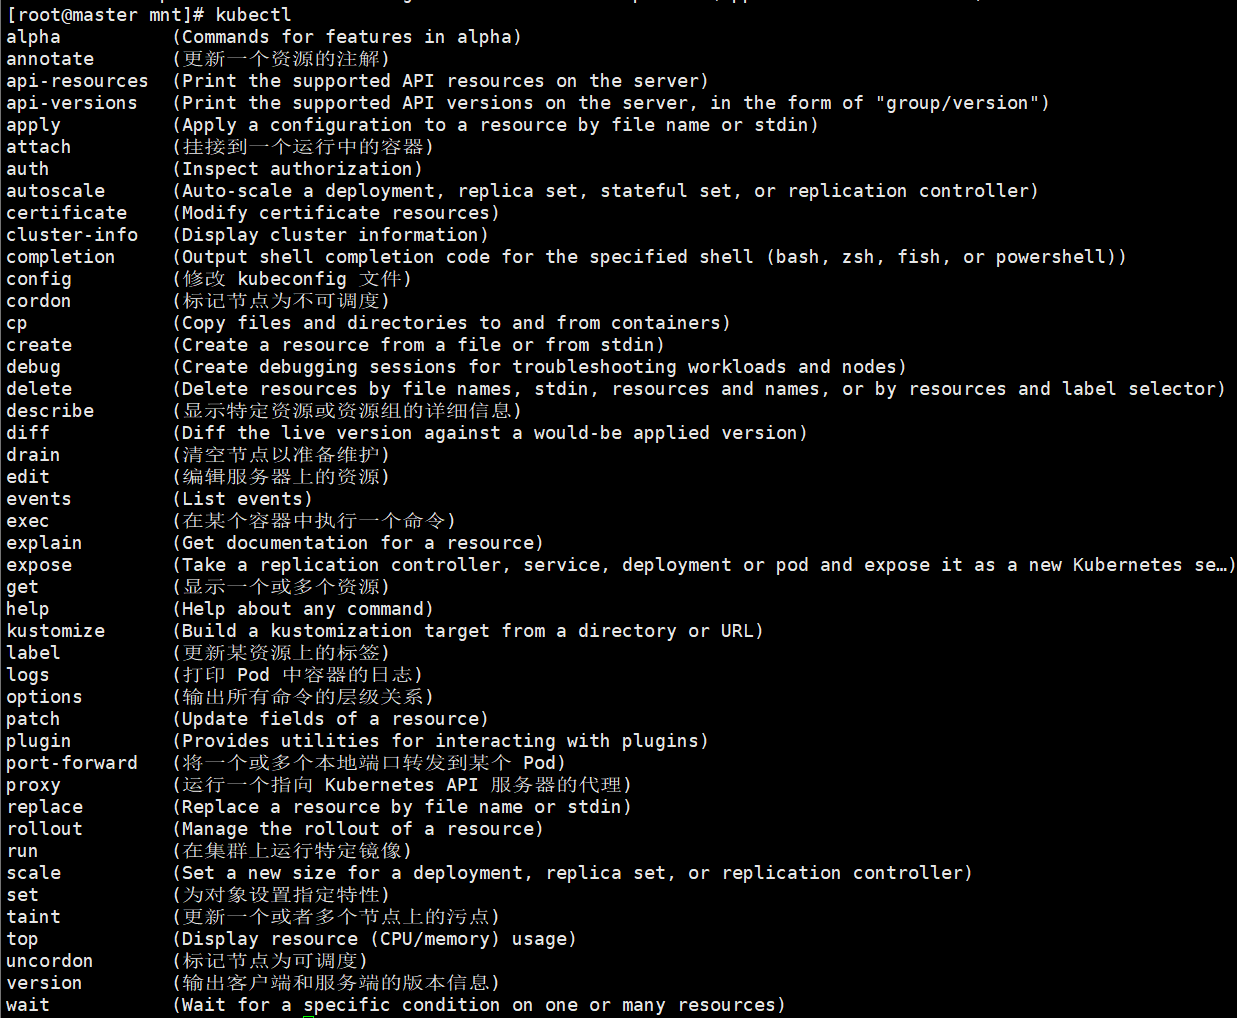
[root@k8s-master mnt]# kubectl 空一格按2次tab键 出现下列成功
alpha          (Commands for features in alpha)
annotate       (更新一个资源的注解)
api-resources  (Print the supported API resources on the server)
api-versions   (Print the supported API versions on the server, in the form of "group/version")
apply          (Apply a configuration to a resource by file name or stdin)
attach         (挂接到一个运行中的容器)
auth           (Inspect authorization)
autoscale      (Auto-scale a deployment, replica set, stateful set, or replication controller)
certificate    (Modify certificate resources)

[root@k8s-master mnt]# kubeadm 空一格按2次tab键 出现下列成功
certs       config      init        kubeconfig  token       version
completion  help        join        reset       upgrade

[root@k8s-master mnt]# systemctl status kubelet.service
2.8下载kubernetes集群所需镜像
查看镜像
[root@master ~]# kubeadm config images list
I0822 18:34:37.125570   39235 version.go:260] remote version is much newer: v1.36.4; falling back to: stable-1.35
registry.k8s.io/kube-apiserver:v1.35.8
registry.k8s.io/kube-controller-manager:v1.35.8
registry.k8s.io/kube-scheduler:v1.35.8
registry.k8s.io/kube-proxy:v1.35.8
registry.k8s.io/coredns/coredns:v1.13.1
registry.k8s.io/pause:3.10.1
registry.k8s.io/etcd:3.6.6-0

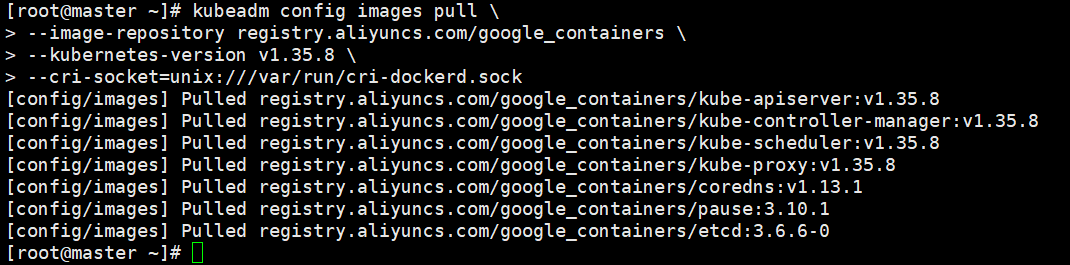
下载镜像

[root@master ~]# kubeadm config images pull \
> --image-repository registry.aliyuncs.com/google_containers \
> --kubernetes-version v1.35.8 \
> --cri-socket=unix:///var/run/cri-dockerd.sock
上传镜像到本地harbor
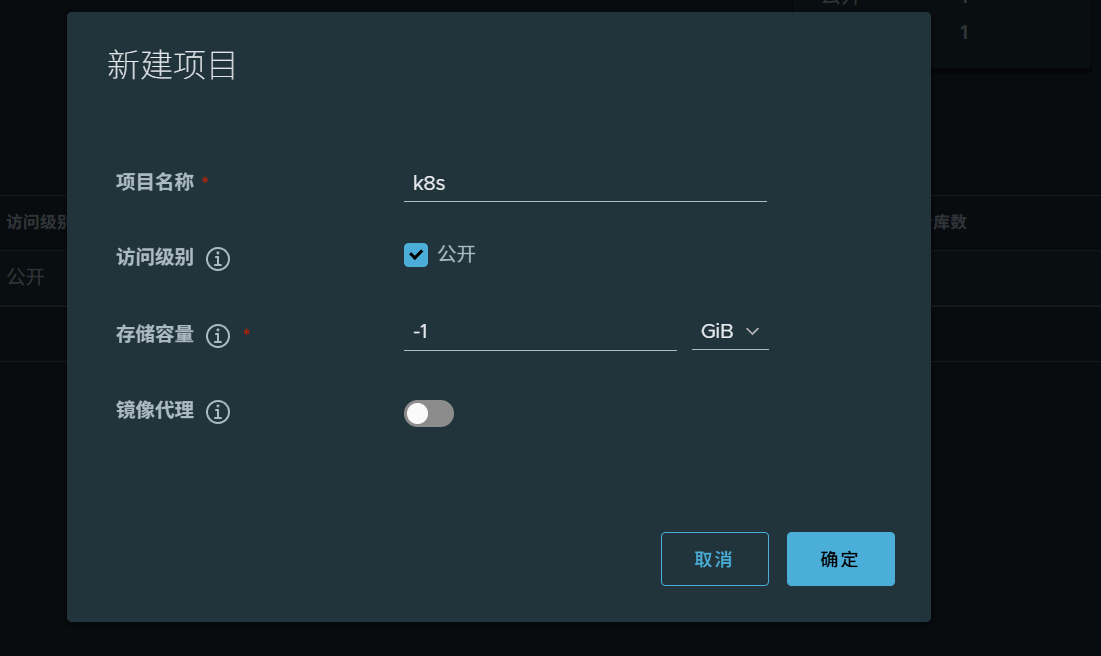
要先在harbor上创建仓库k8s
[root@master ~]# docker  login  reg.timinglee.org -u admin
Password:

WARNING! Your credentials are stored unencrypted in '/root/.docker/config.json'.
Configure a credential helper to remove this warning. See
https://docs.docker.com/go/credential-store/

Login Succeeded


[root@master ~]# docker images  --format  "{{.Repository}}:{{.Tag}}" | awk -F "/" '/google/{system("docker tag "$0" reg.timinglee.org/k8s/"$3)}'

[root@master ~]# docker images  --format  "{{.Repository}}:{{.Tag}}" | awk -F "/" '/timinglee/{system("docker push "$0)}'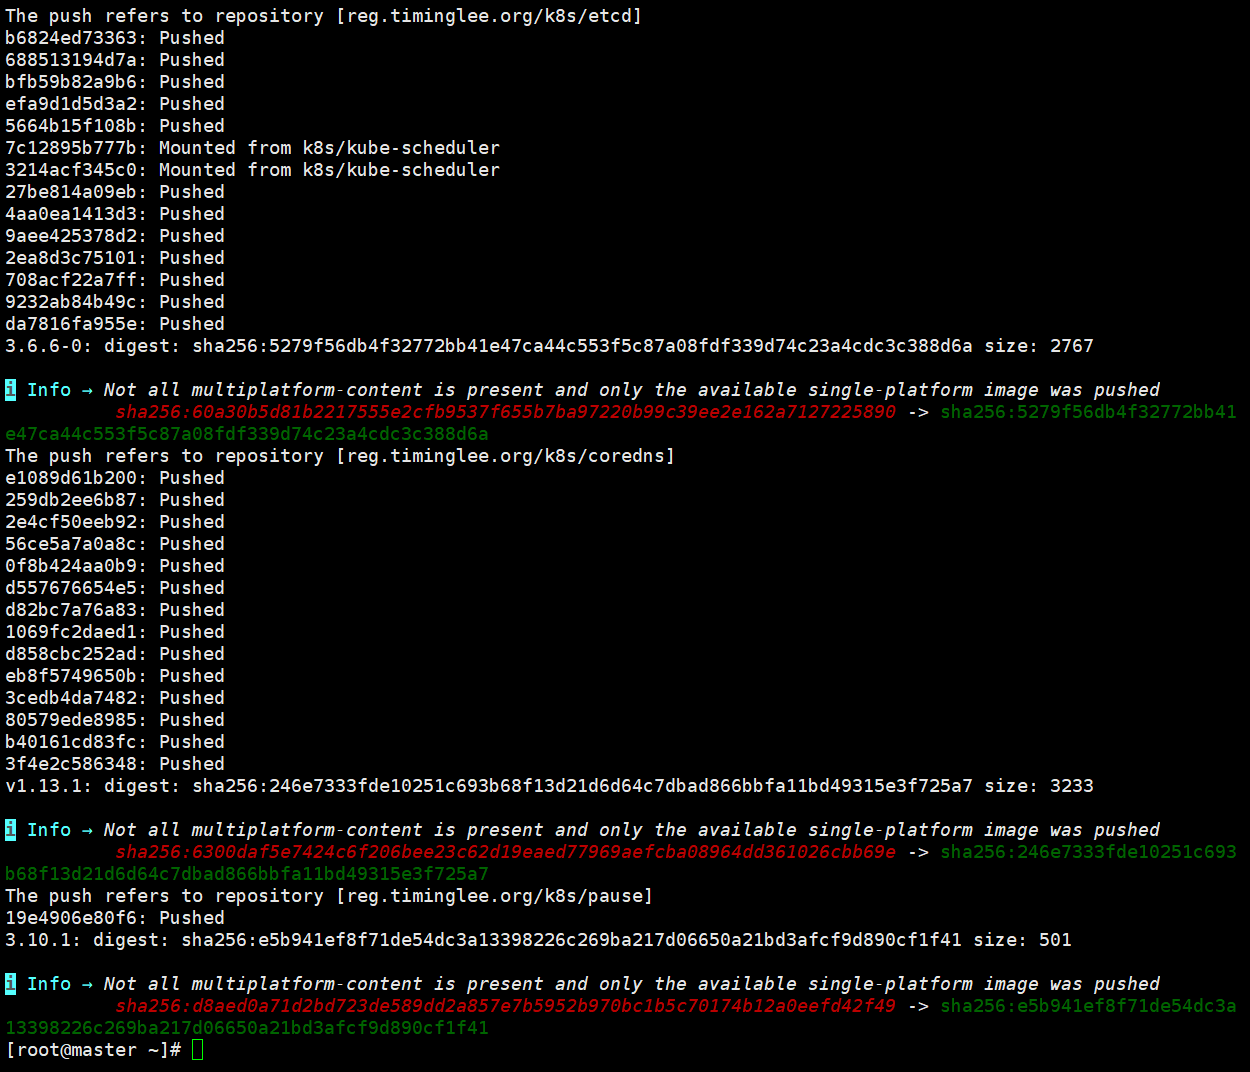
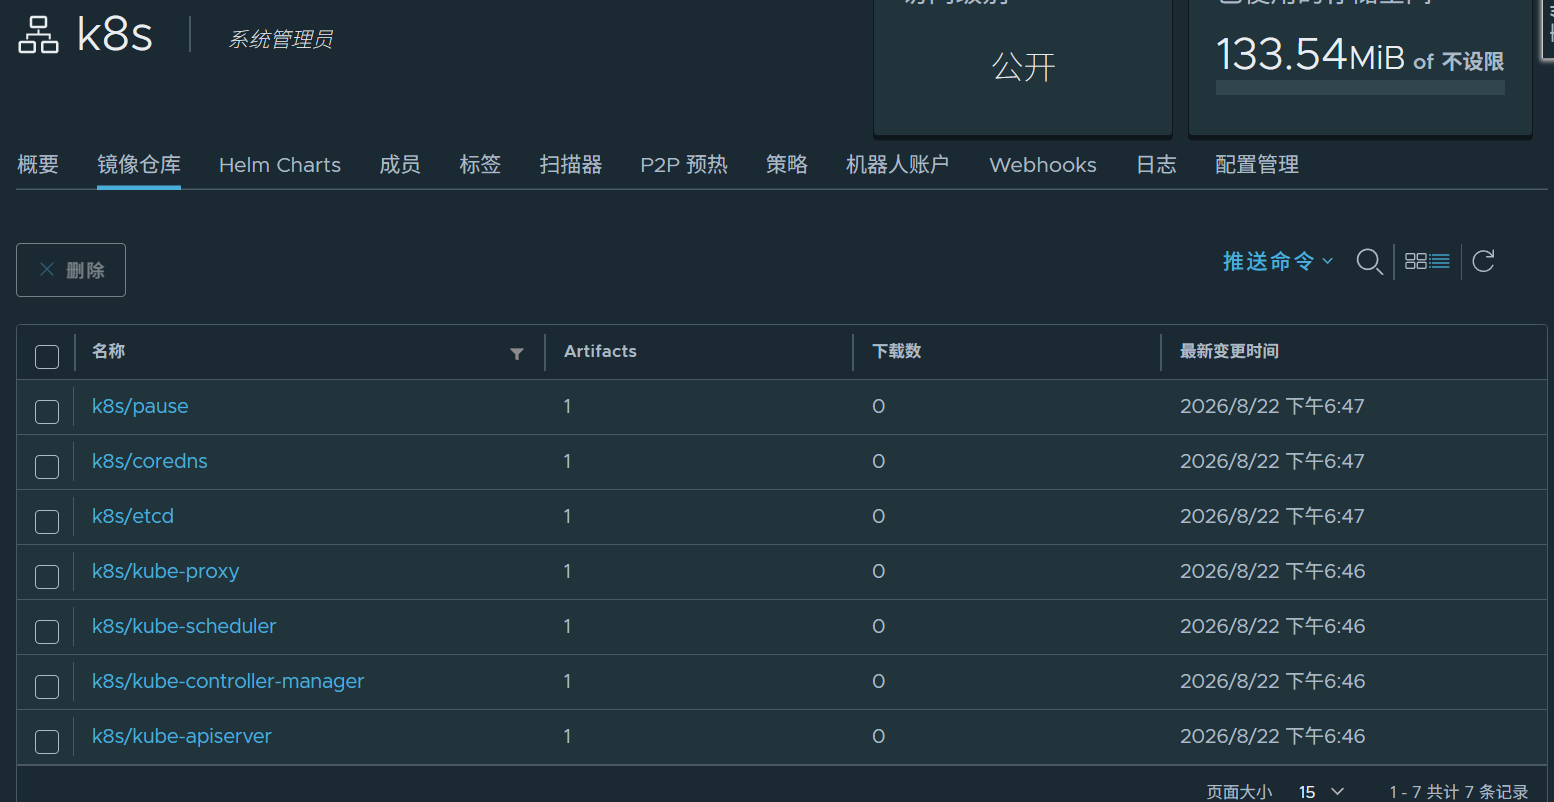
| k8s/pause | Pod 的 “根容器”,为 Pod 内所有容器提供共享的网络和 PID 命名空间 |
| k8s/coredns | 集群内部 DNS 服务,负责服务发现与域名解析 |
| k8s/etcd | 分布式键值存储,是 k8s 集群的唯一数据源 |
| k8s/kube-proxy | 节点上的网络代理,维护节点的网络规则 |
| k8s/kube-scheduler | 调度器,负责将新建的 Pod 分配到合适的 node 上 |
| k8s/kube-controller-manager | 控制器管理器,运行各种控制器以维护集群状态 |
| k8s/kube-apiserver | k8s API 网关,是集群的唯一入口 |
2.9在master中初始化kubernetes集群
在master中完成集群初始化
[root@master ~]# kubeadm init --pod-network-cidr=10.244.0.0/16 \
> --image-repository reg.timinglee.org/k8s \
> --kubernetes-version v1.35.8 \
> --cri-socket=unix:///var/run/cri-dockerd.sock
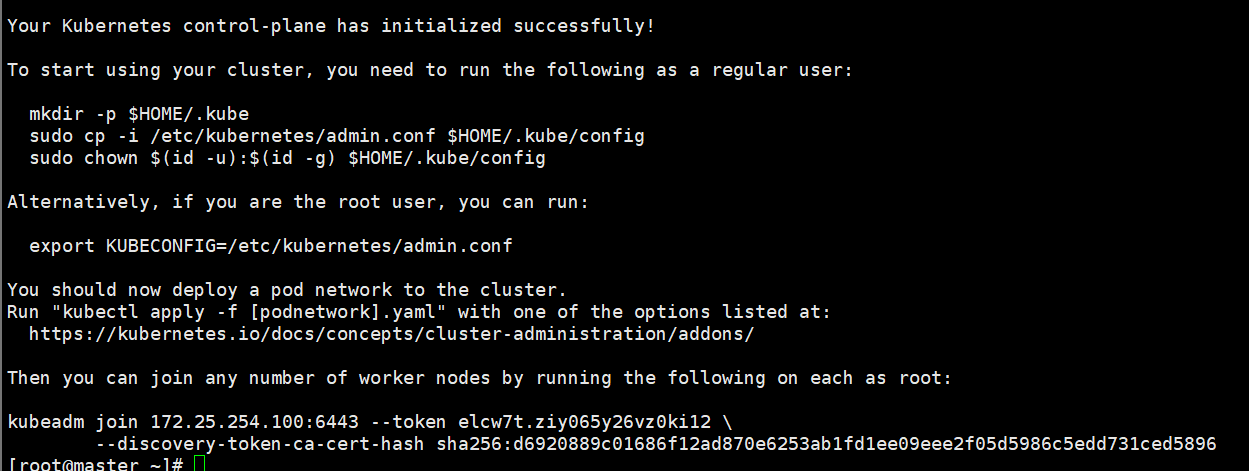
kubeadm join 172.25.254.100:6443 --token elcw7t.ziy065y26vz0ki12 \
	--discovery-token-ca-cert-hash sha256:d6920889c01686f12ad870e6253ab1fd1ee09eee2f05d5986c5edd731ced5896
#如果忘记
[root@master ~]# kubeadm token create --print-join-command
kubeadm join 172.25.254.100:6443 --token jl4ztx.cax3iysvu7onsh5s --discovery-token-ca-cert-hash sha256:6b5950ef2cdba85d6dfdb564ee90d4187fa3d341767dc9852cbdd5c9dee4f927
#如果初始化出问题
[root@master ~]# kubeadm reset --cri-socket=unix:///var/run/cri-dockerd.sock #可以重置集群设定添加kubernets环境变量到本机
[root@master ~]# echo "export KUBECONFIG=/etc/kubernetes/admin.conf" > ~/.bash_profile
[root@master ~]# source ~/.bash_profile
[root@master ~]# kubectl get nodes
添加node节点到本集群
[root@node1 ~]#  kubeadm join 172.25.254.100:6443 --token jl4ztx.cax3iysvu7onsh5s --discovery-token-ca-cert-hash sha256:6b5950ef2cdba85d6dfdb564ee90d4187fa3d341767dc9852cbdd5c9dee4f927 --cri-socket=unix:///var/run/cri-dockerd.sock

node2同理

#测试
[root@master ~]# kubectl get nodes		#可以看到集群中主机但是因为网络插件问题状态是NotReady
2.10安装网络插件
往虚拟机里导入kube-flannel-v0.28.9.tar.gz

[root@k8s-master ~]# tar zxf kube-flannel-v0.28.9.tar.gz
[root@k8s-master ~]# ls
flannel  kube-flannel-v0.28.9.tar.gz
[root@k8s-master ~]# cd flannel/

[root@k8s-master flannel]# docker load  -i kube-flannel-v0.28.9.tar
Loaded image: ghcr.io/flannel-io/flannel-cni-plugin:v1.9.1-flannel3
Loaded image: ghcr.io/flannel-io/flannel:v0.28.9
harbor建立flannel-io仓库
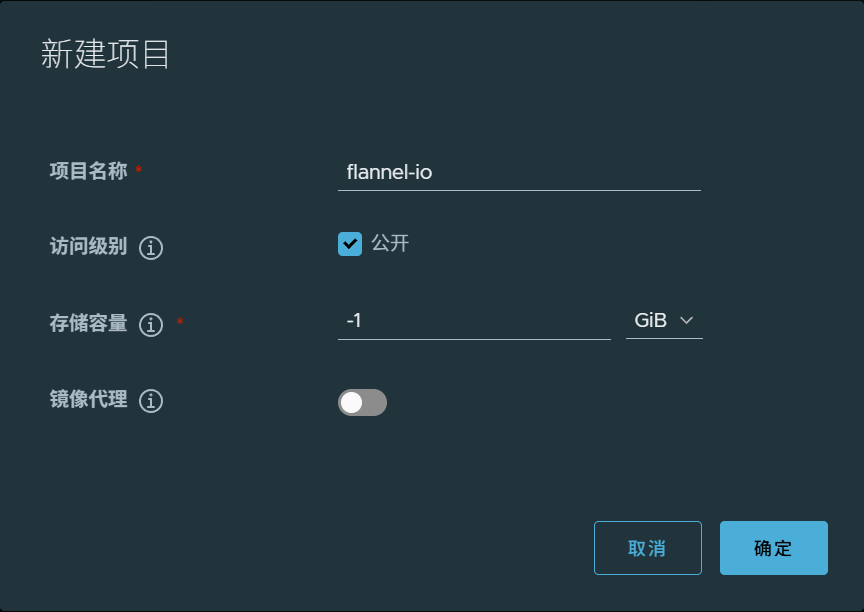
[root@master ~]# docker tag ghcr.io/flannel-io/flannel-cni-plugin:v1.9.1-flannel3 reg.timinglee.org/flannel-io/flannel-cni-plugin:v1.9.1-flannel3

[root@master ~]# docker push  reg.timinglee.org/flannel-io/flannel-cni-plugin:v1.9.1-flannel3

[root@master ~]# docker tag ghcr.io/flannel-io/flannel:v0.28.9 reg.timinglee.org/flannel-io/flannel:v0.28.9

[root@master ~]# docker push reg.timinglee.org/flannel-io/flannel:v0.28.9
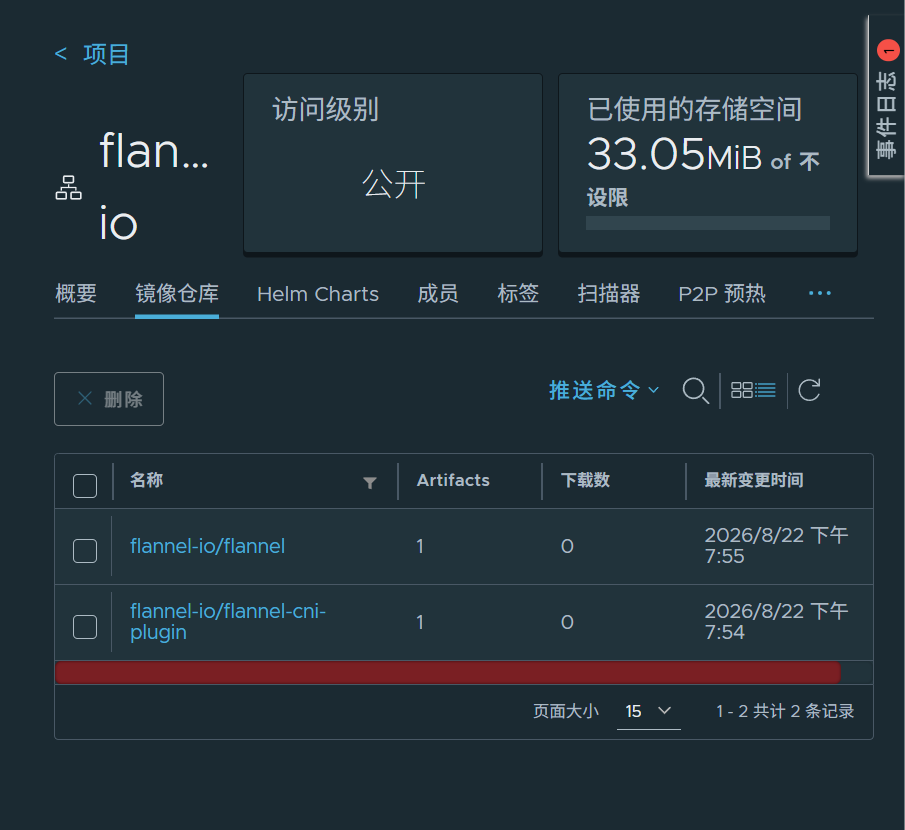
[root@master ~]# vim kube-flannel.yml
修改
      image: flannel-io/flannel:v0.28.9
      image: flannel-io/flannel-cni-plugin:v1.9.1-flannel3
      image: flannel-io/flannel:v0.28.9

[root@k8s-master flannel]# grep -n  image: kube-flannel.yml
148:        image: flannel-io/flannel:v0.28.9
175:        image: flannel-io/flannel-cni-plugin:v1.9.1-flannel3
186:        image: flannel-io/flannel:v0.28.9
[root@master ~]# kubectl apply -f kube-flannel.yml
namespace/kube-flannel created
serviceaccount/flannel created
clusterrole.rbac.authorization.k8s.io/flannel created
clusterrolebinding.rbac.authorization.k8s.io/flannel created
configmap/kube-flannel-cfg created
daemonset.apps/kube-flannel-ds created
#测试
[root@master ~]# kubectl get nodes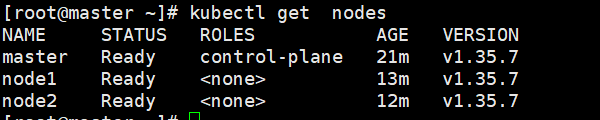

openEuler 是由开放原子开源基金会孵化的全场景开源操作系统项目,面向数字基础设施四大核心场景(服务器、云计算、边缘计算、嵌入式),全面支持 ARM、x86、RISC-V、loongArch、PowerPC、SW-64 等多样性计算架构
更多推荐

 1
1 0
0- 0


 已为社区贡献1条内容

所有评论(0)