PXE+Kickstart自动化安装RHEL7.9系统
·
一、环境准备
-
1.rhel7 主机
-
2.关闭防火墙和 selinux
-
3.开启主机图形 init 5 开启图形(有图形界面可不做)
# 最小化安装可以yum安装以下图形界面
yum group install "Server with GUI" -y
# 开启图形界面
init 5
-
4.配置网络可用
-
5.关闭 VMware dhcp 功能
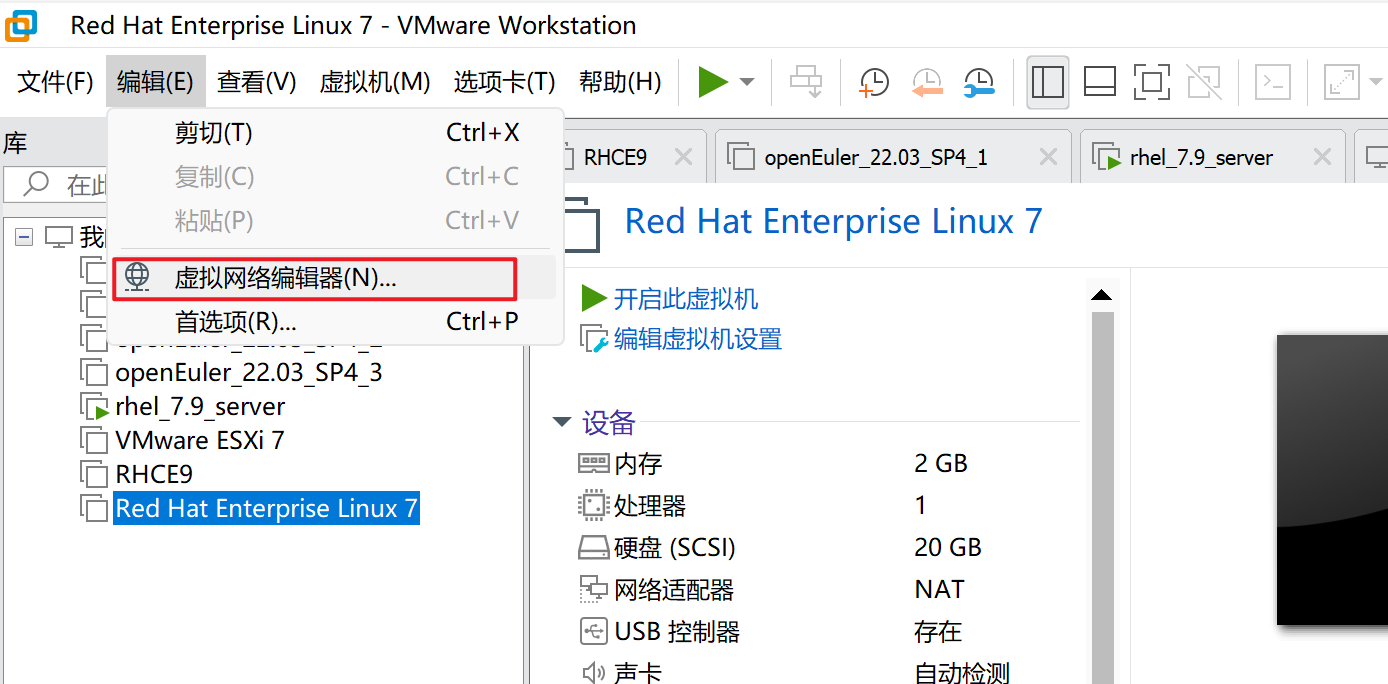
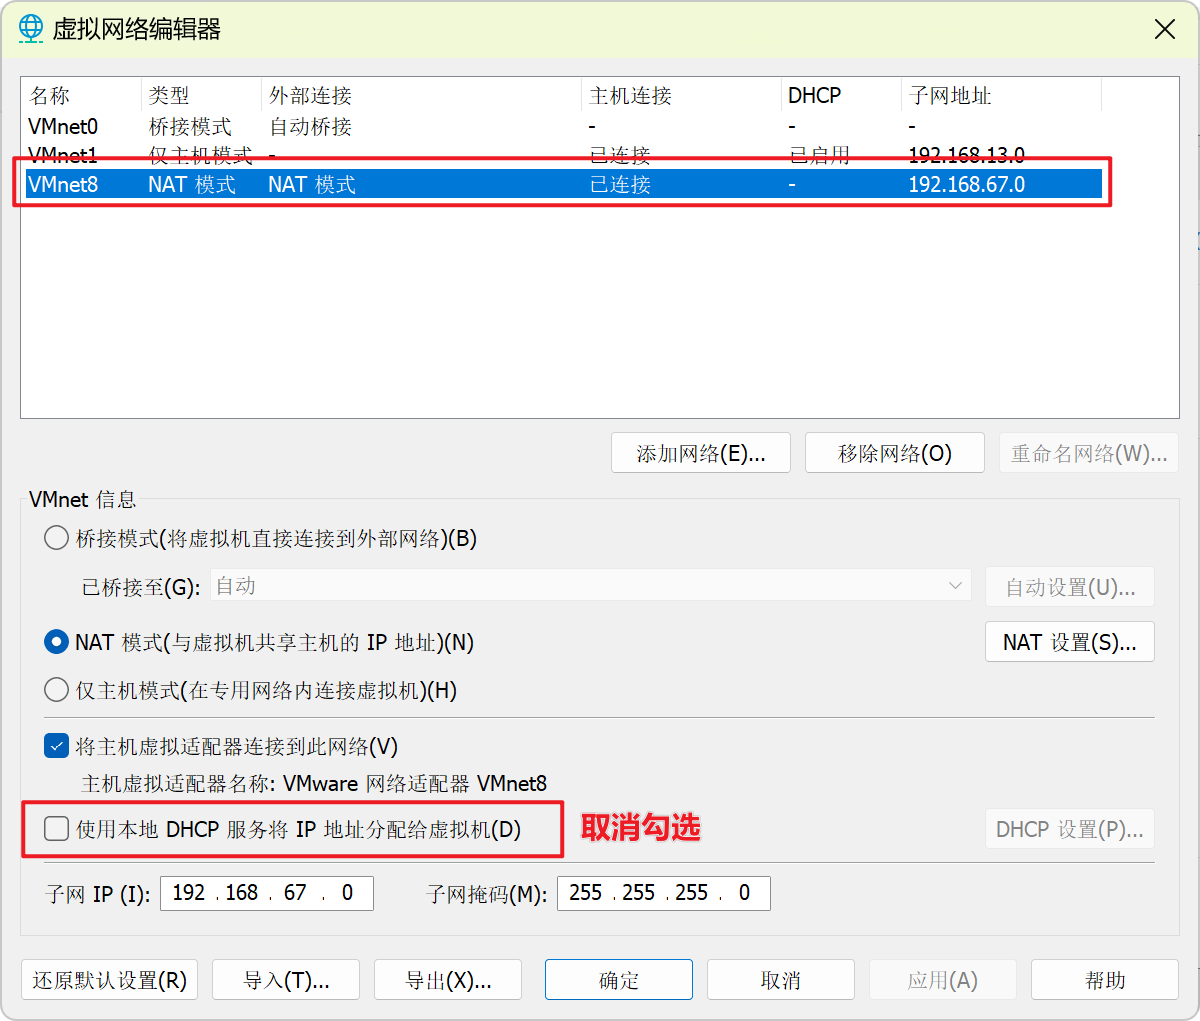
二、配置 Kickstart
2.1.安装 Kickstart 工具
- 下载安装 Kickstart
- 注意:RHEL7.9后 就没有 system-config-kickstart 工具
yum install system-config-kickstart -y
- 启动 Kickstart
system-config-kickstart
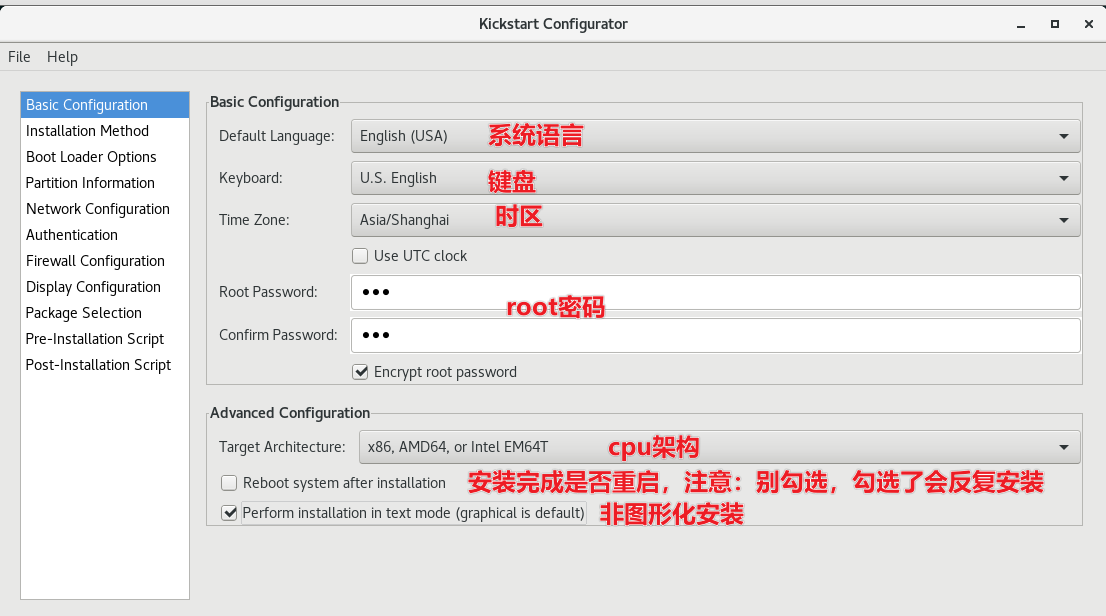
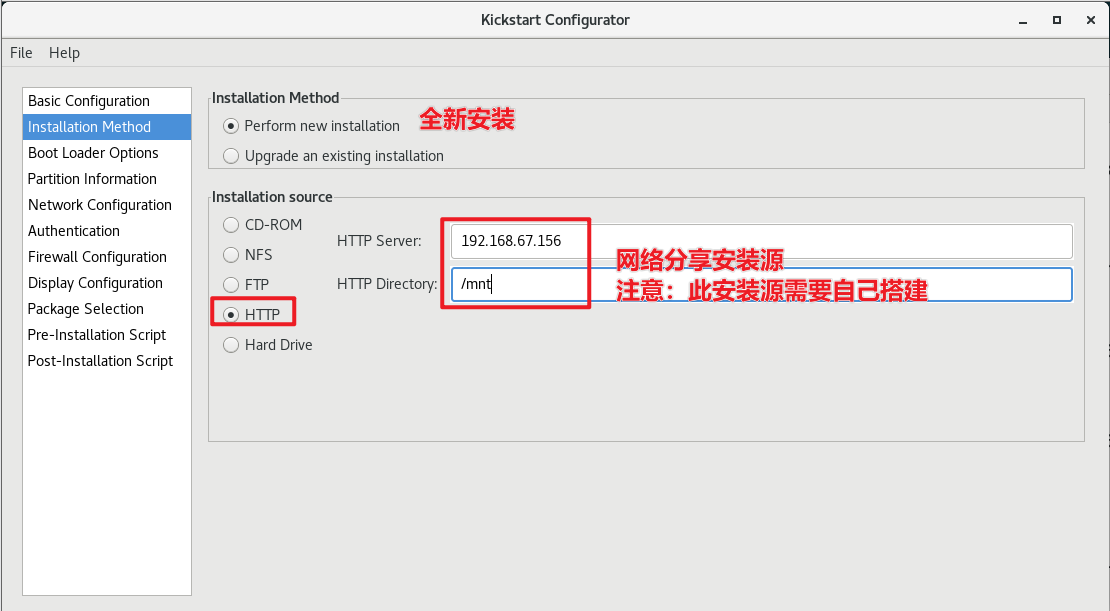
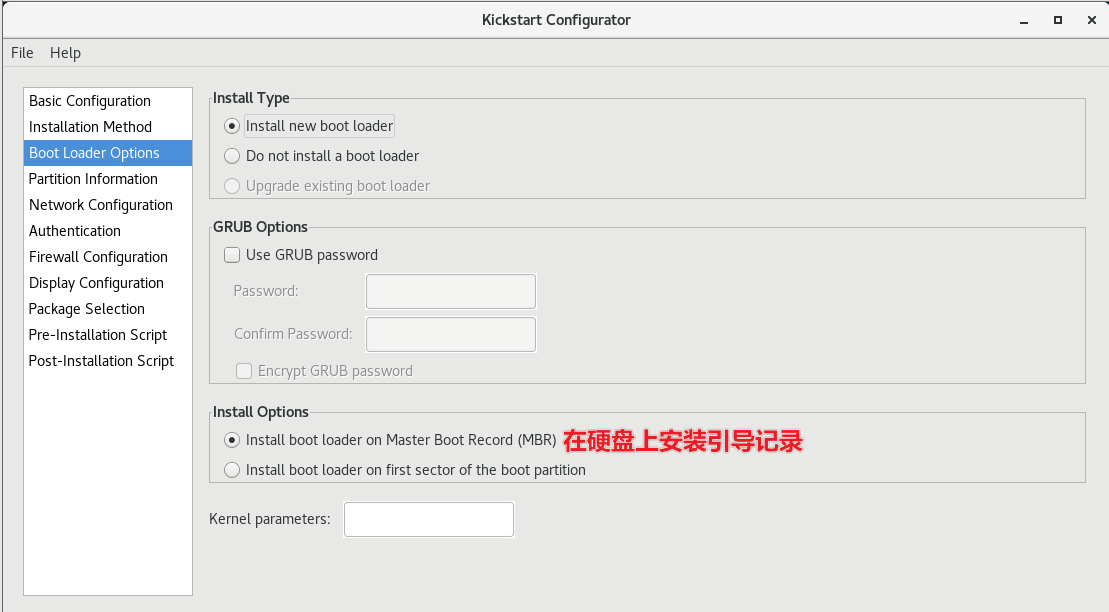
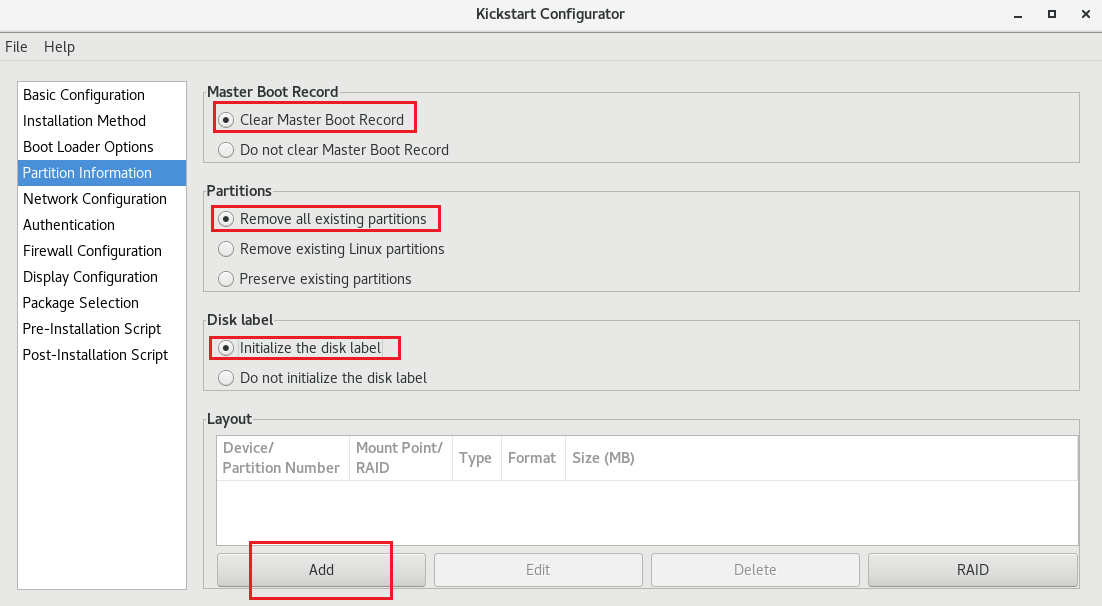
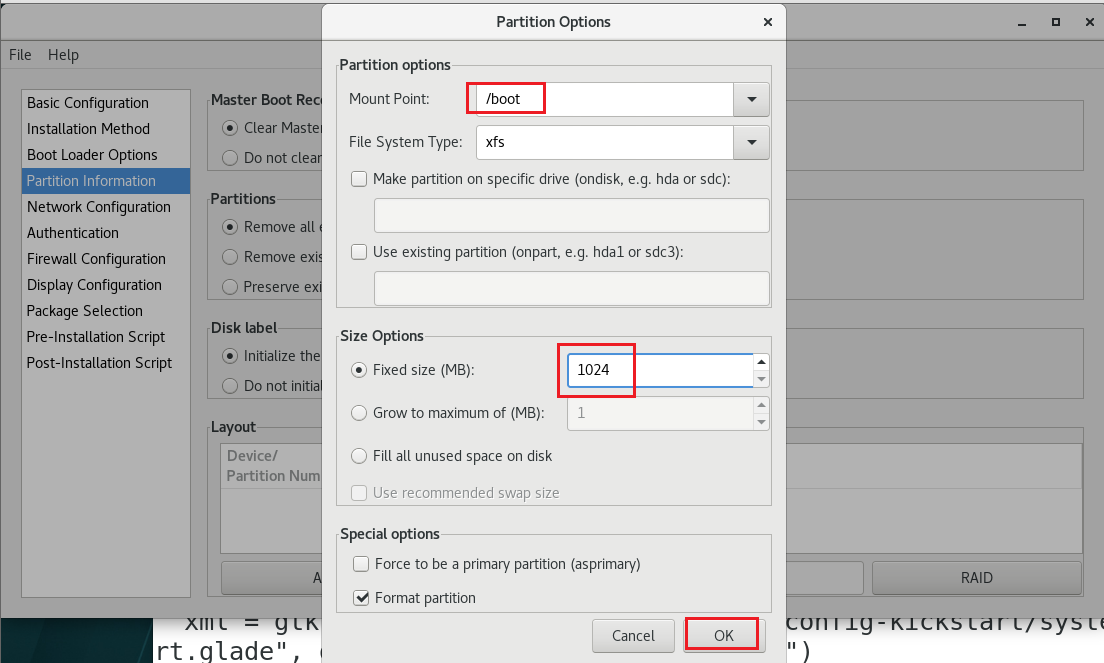
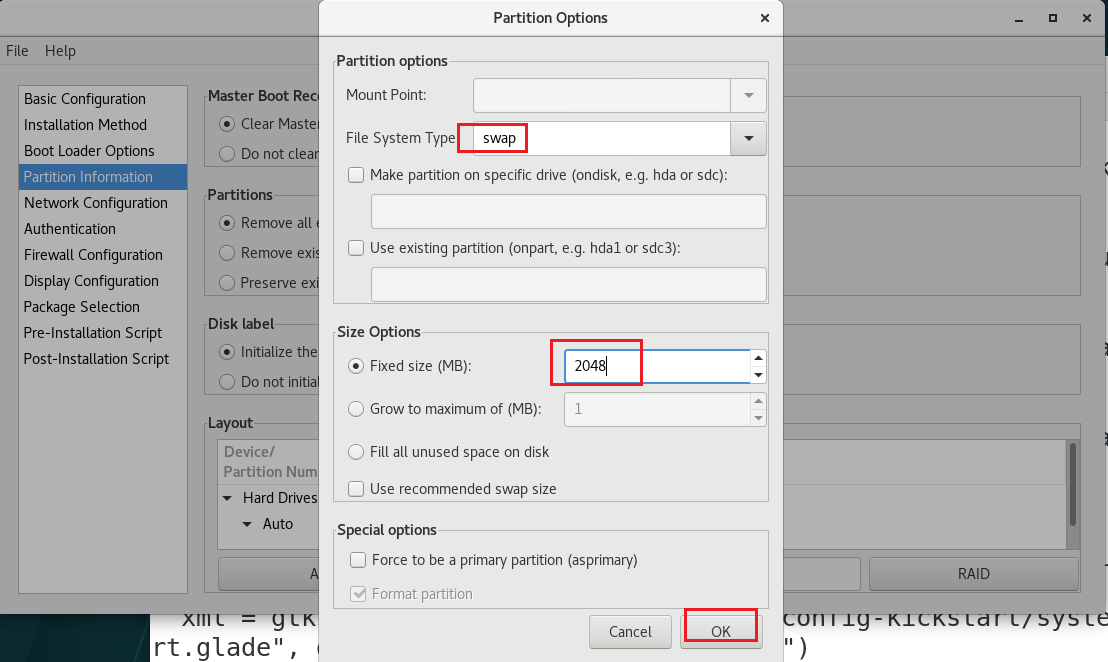
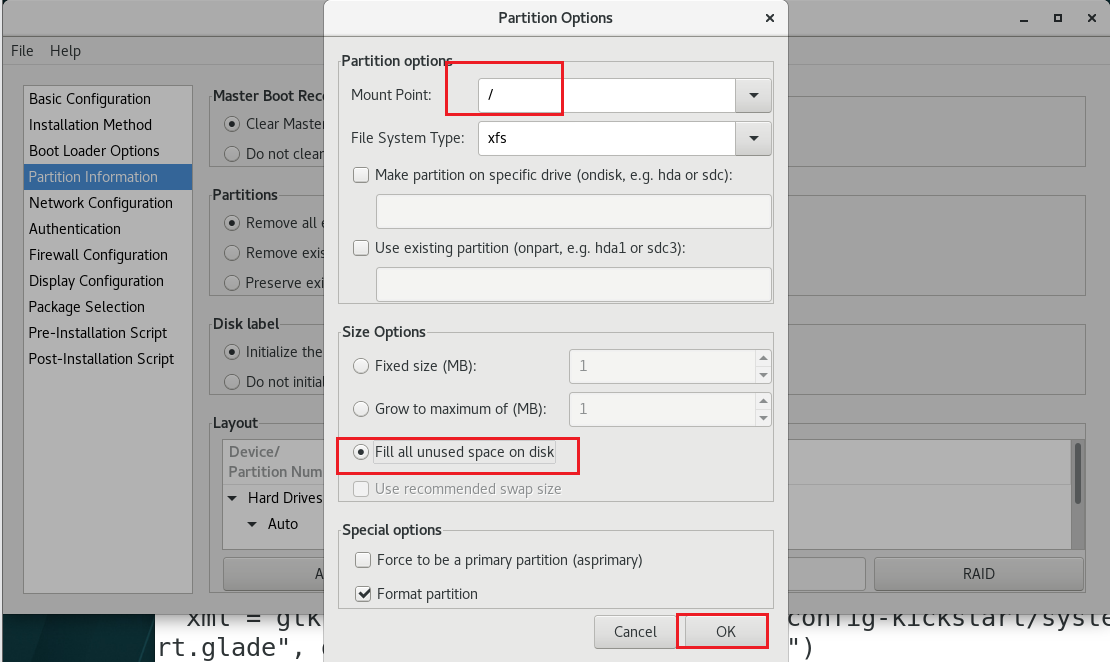
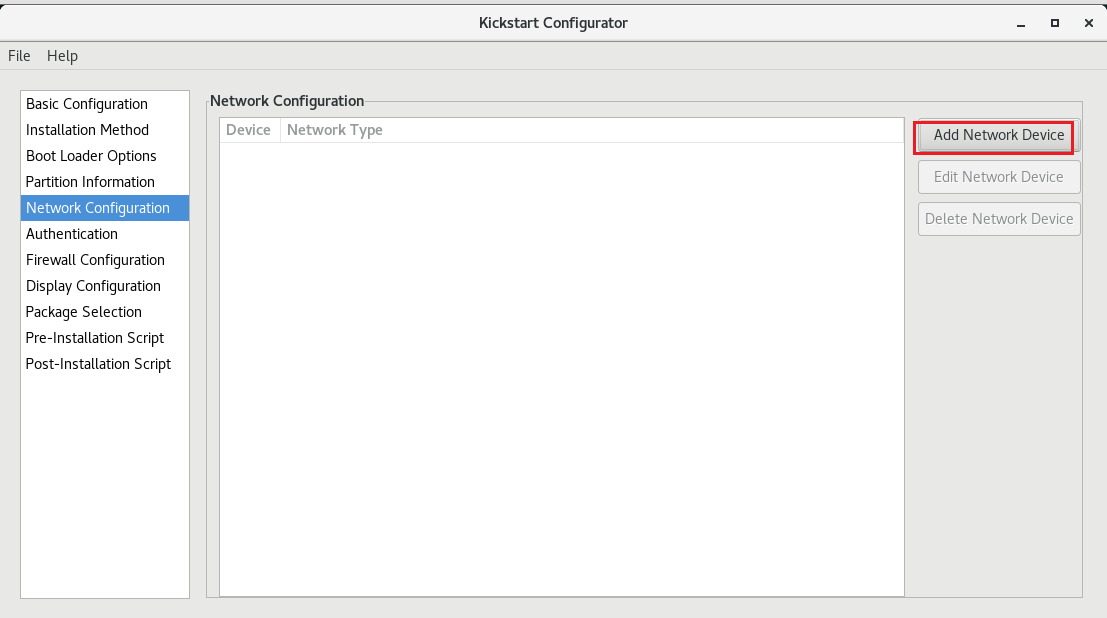
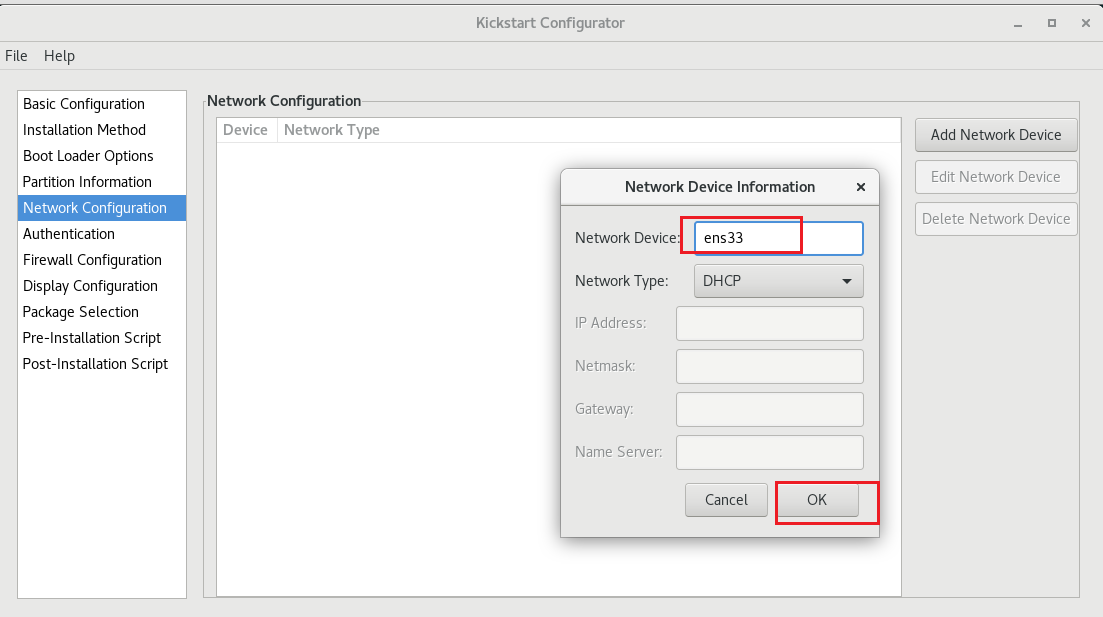
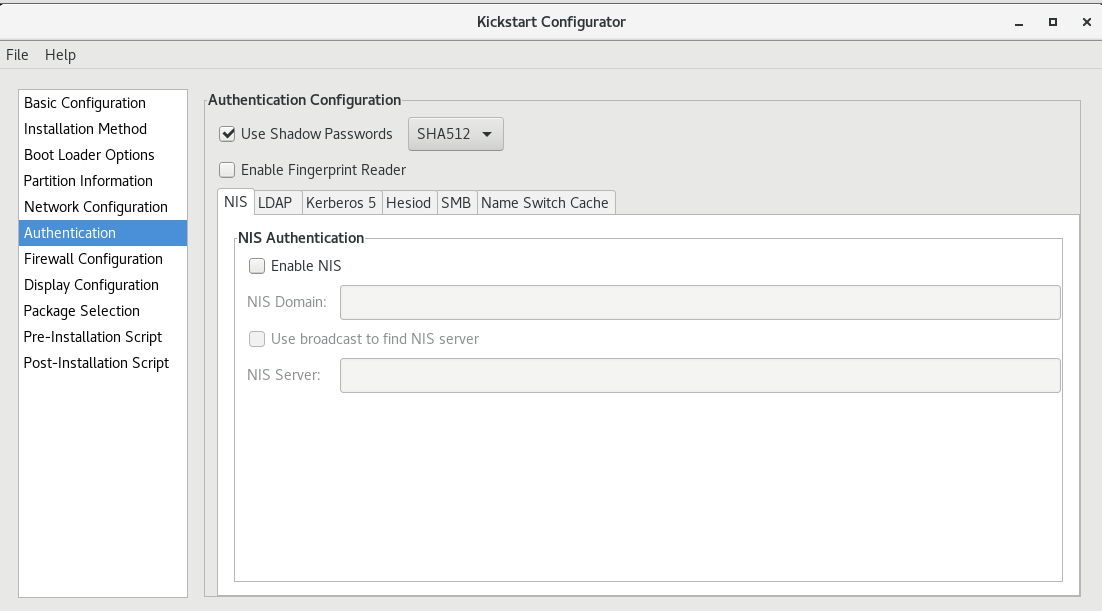
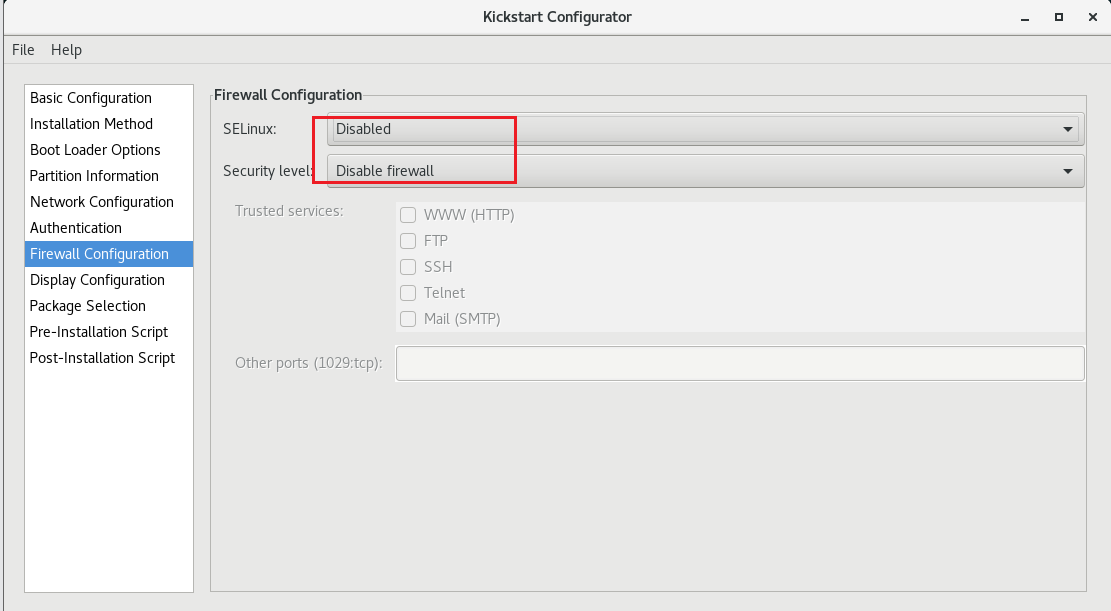
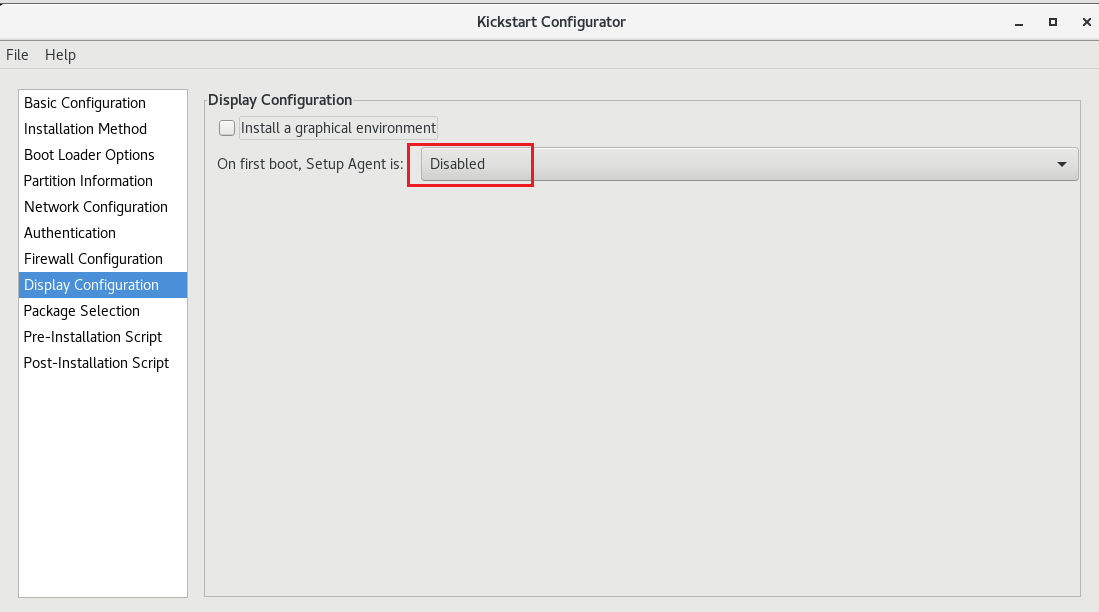
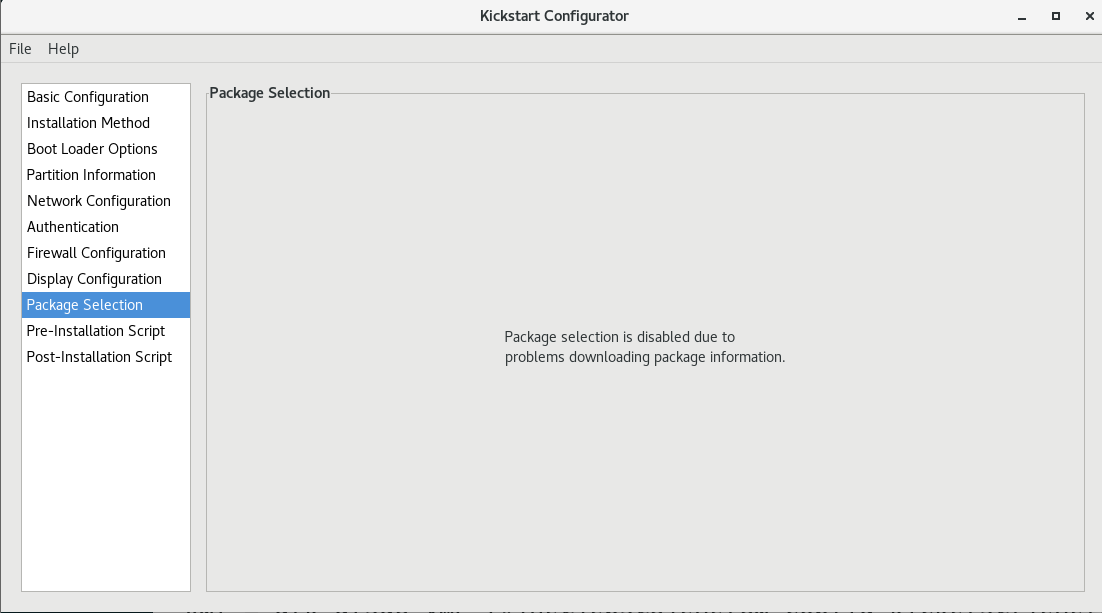
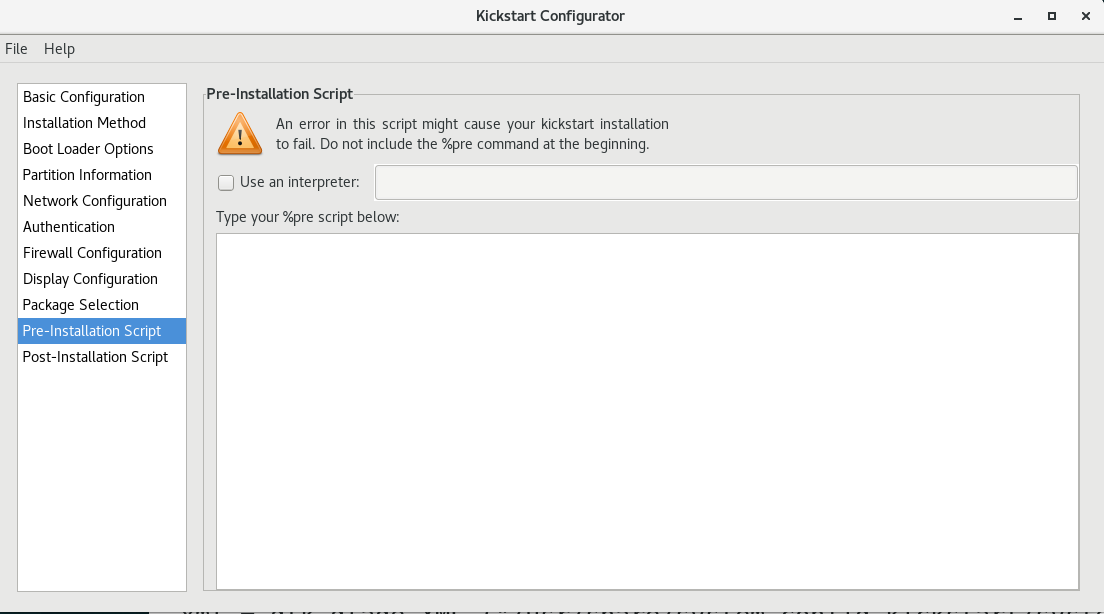
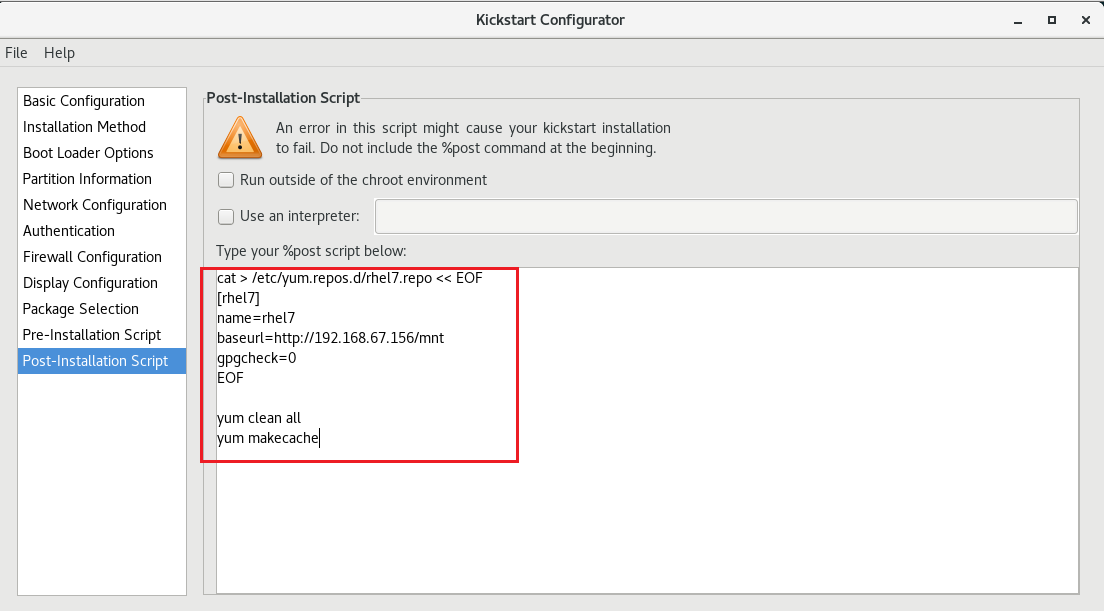
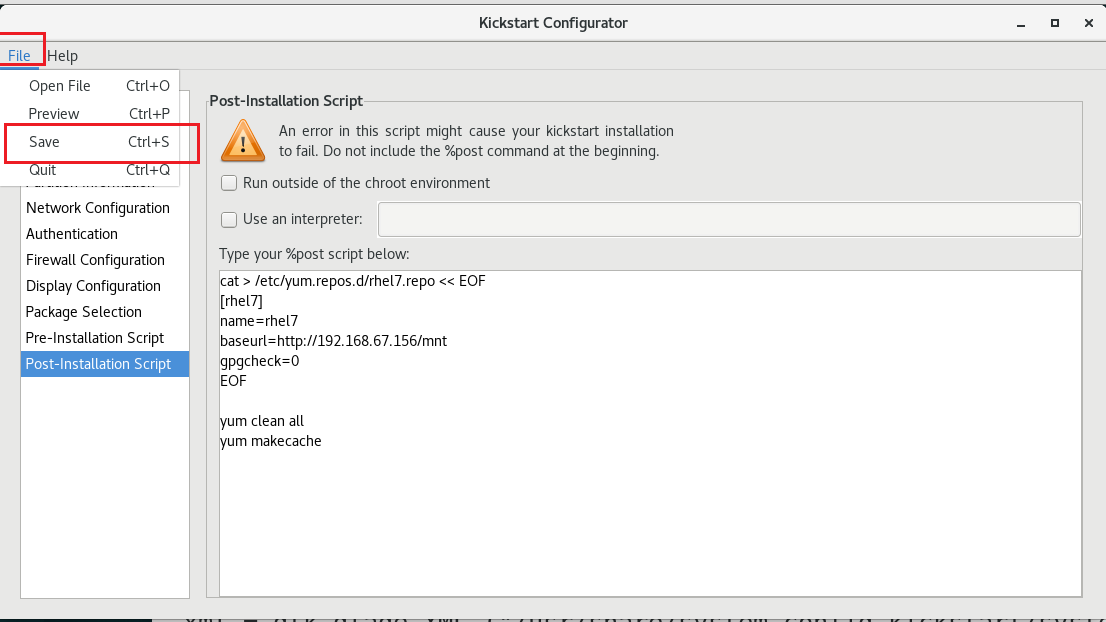
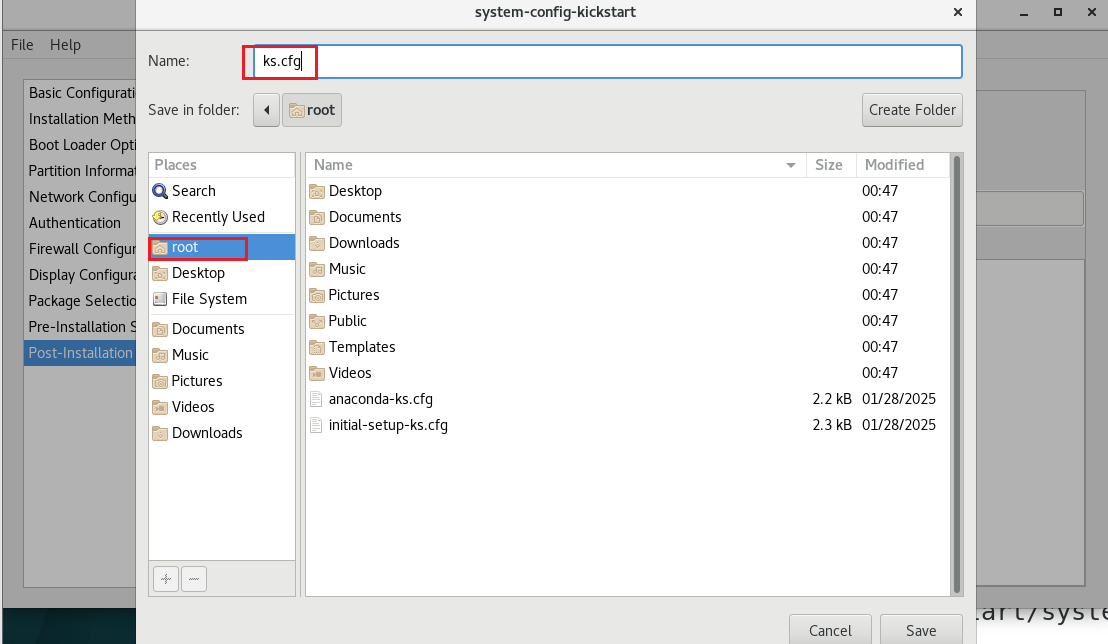

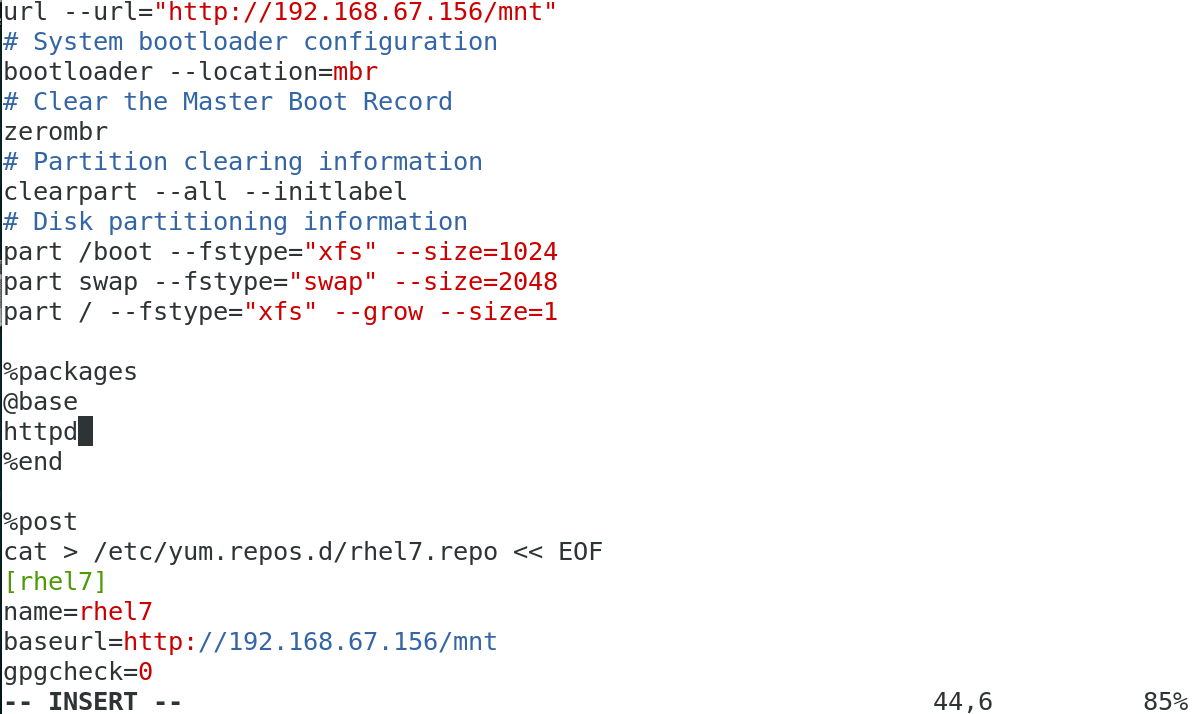
- 修改 ks.cfg 文件,添加上需要安装的软件
vim ks.cfg
2.2.HTTP 搭建安装源
- 安装 httpd
yum install httpd -y
- 查看 /dev/sr0 挂载的目录,把目录链接到 /var/www/html/ 下
[root@rhel-7-server ~]# df
Filesystem            1K-blocks    Used Available Use% Mounted on
devtmpfs                 914520       0    914520   0% /dev
tmpfs                    931512       0    931512   0% /dev/shm
tmpfs                    931512   10536    920976   2% /run
tmpfs                    931512       0    931512   0% /sys/fs/cgroup
/dev/mapper/rhel-root  14665728 4925284   9740444  34% /
/dev/sda1               2086912  187108   1899804   9% /boot
/dev/sr0                4420474 4420474         0 100% /mnt
tmpfs                    186304      24    186280   1% /run/user/0
[root@rhel-7-server ~]# ln -s /mnt/ /var/www/html/
[root@rhel-7-server ~]# cd /var/www/html
[root@rhel-7-server html]# ls
mnt
- 把 ks.cfg 文件通过 httpd 共享到网络,以供使用
[root@rhel-7-server ~]# ls
anaconda-ks.cfg  Documents  initial-setup-ks.cfg  Music     Public     Videos
Desktop          Downloads  ks.cfg                Pictures  Templates
[root@rhel-7-server ~]# vim ks.cfg
[root@rhel-7-server ~]# ls
anaconda-ks.cfg  Documents  initial-setup-ks.cfg  Music     Public     Videos
Desktop          Downloads  ks.cfg                Pictures  Templates
[root@rhel-7-server ~]# mv ks.cfg /var/www/html/
[root@rhel-7-server ~]# cd /var/www/html
[root@rhel-7-server html]# ls
ks.cfg  mnt
- 开启 httpd
systemctl enable --now httpd
- 通过浏览器查看是否搭建好安装源
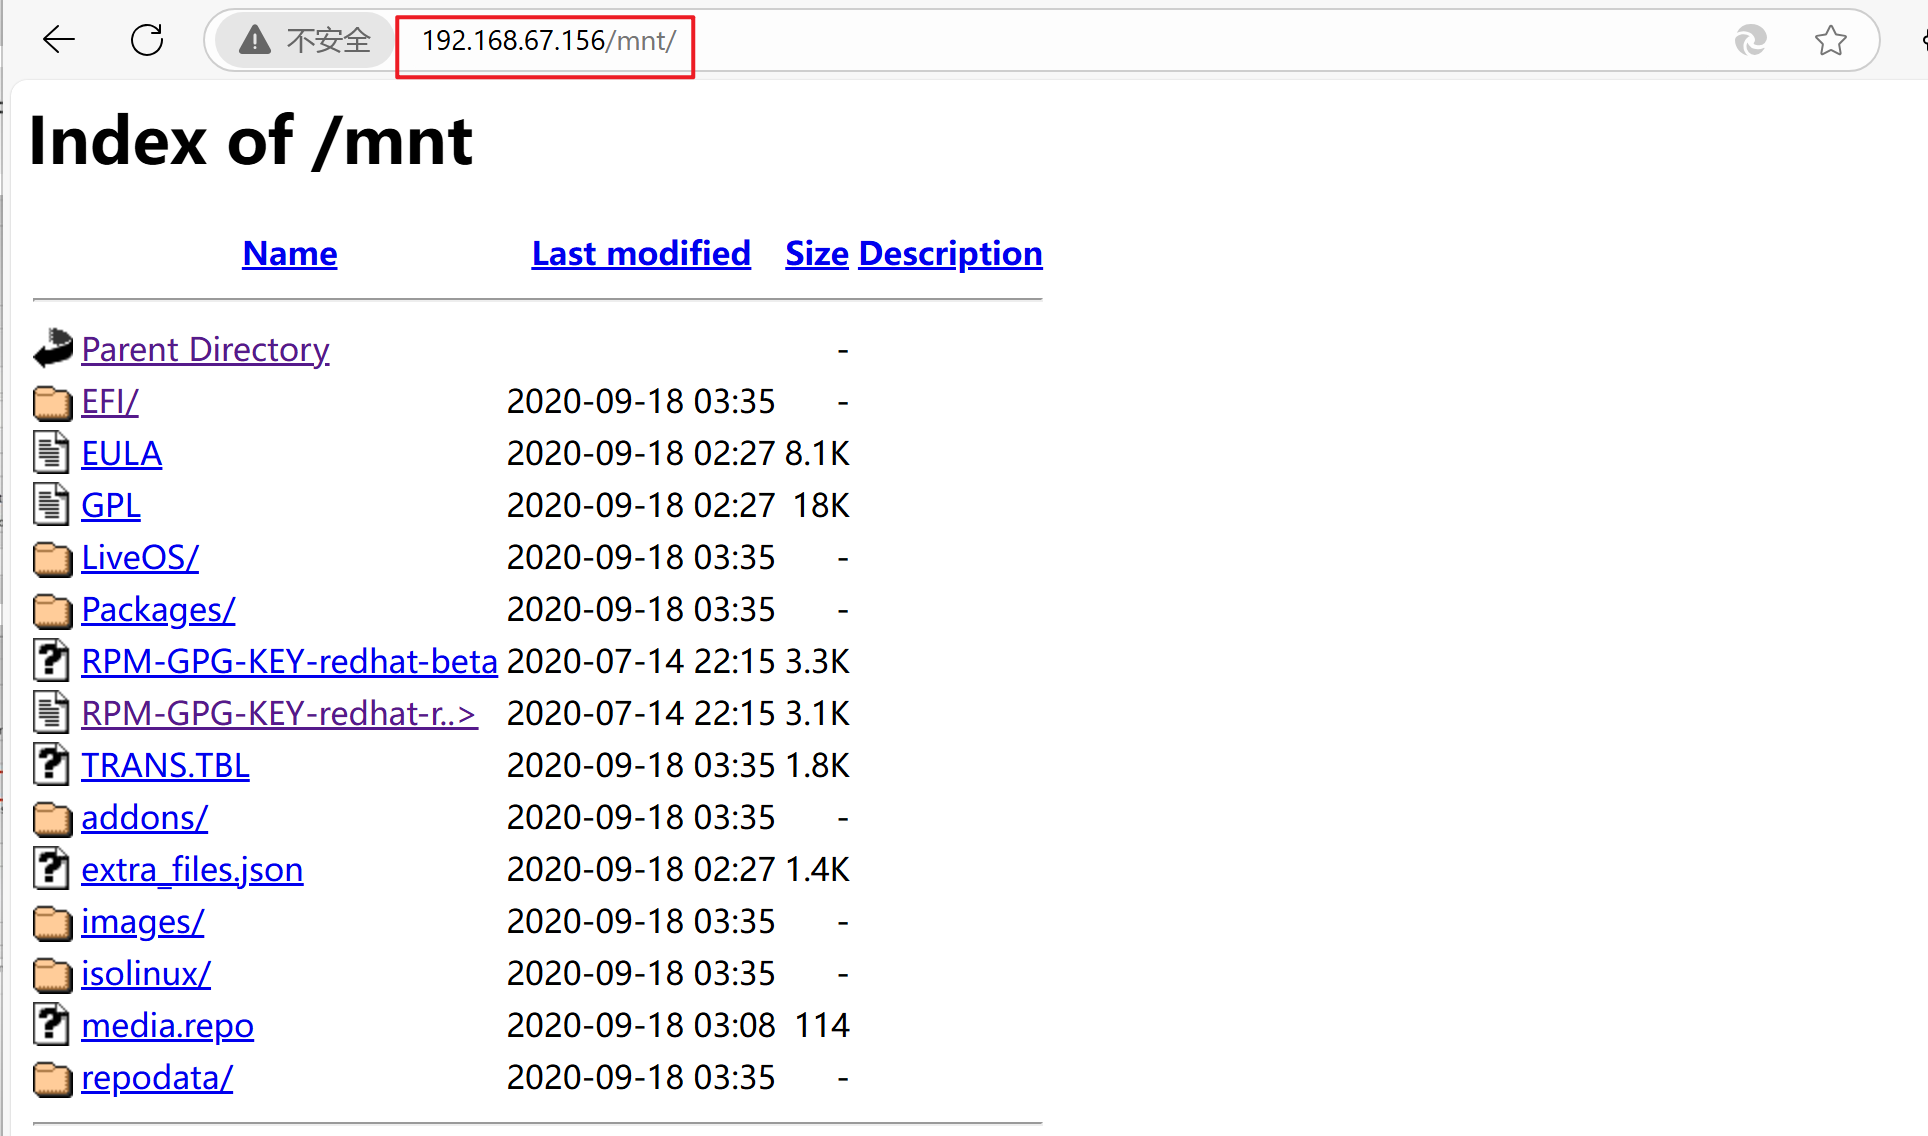
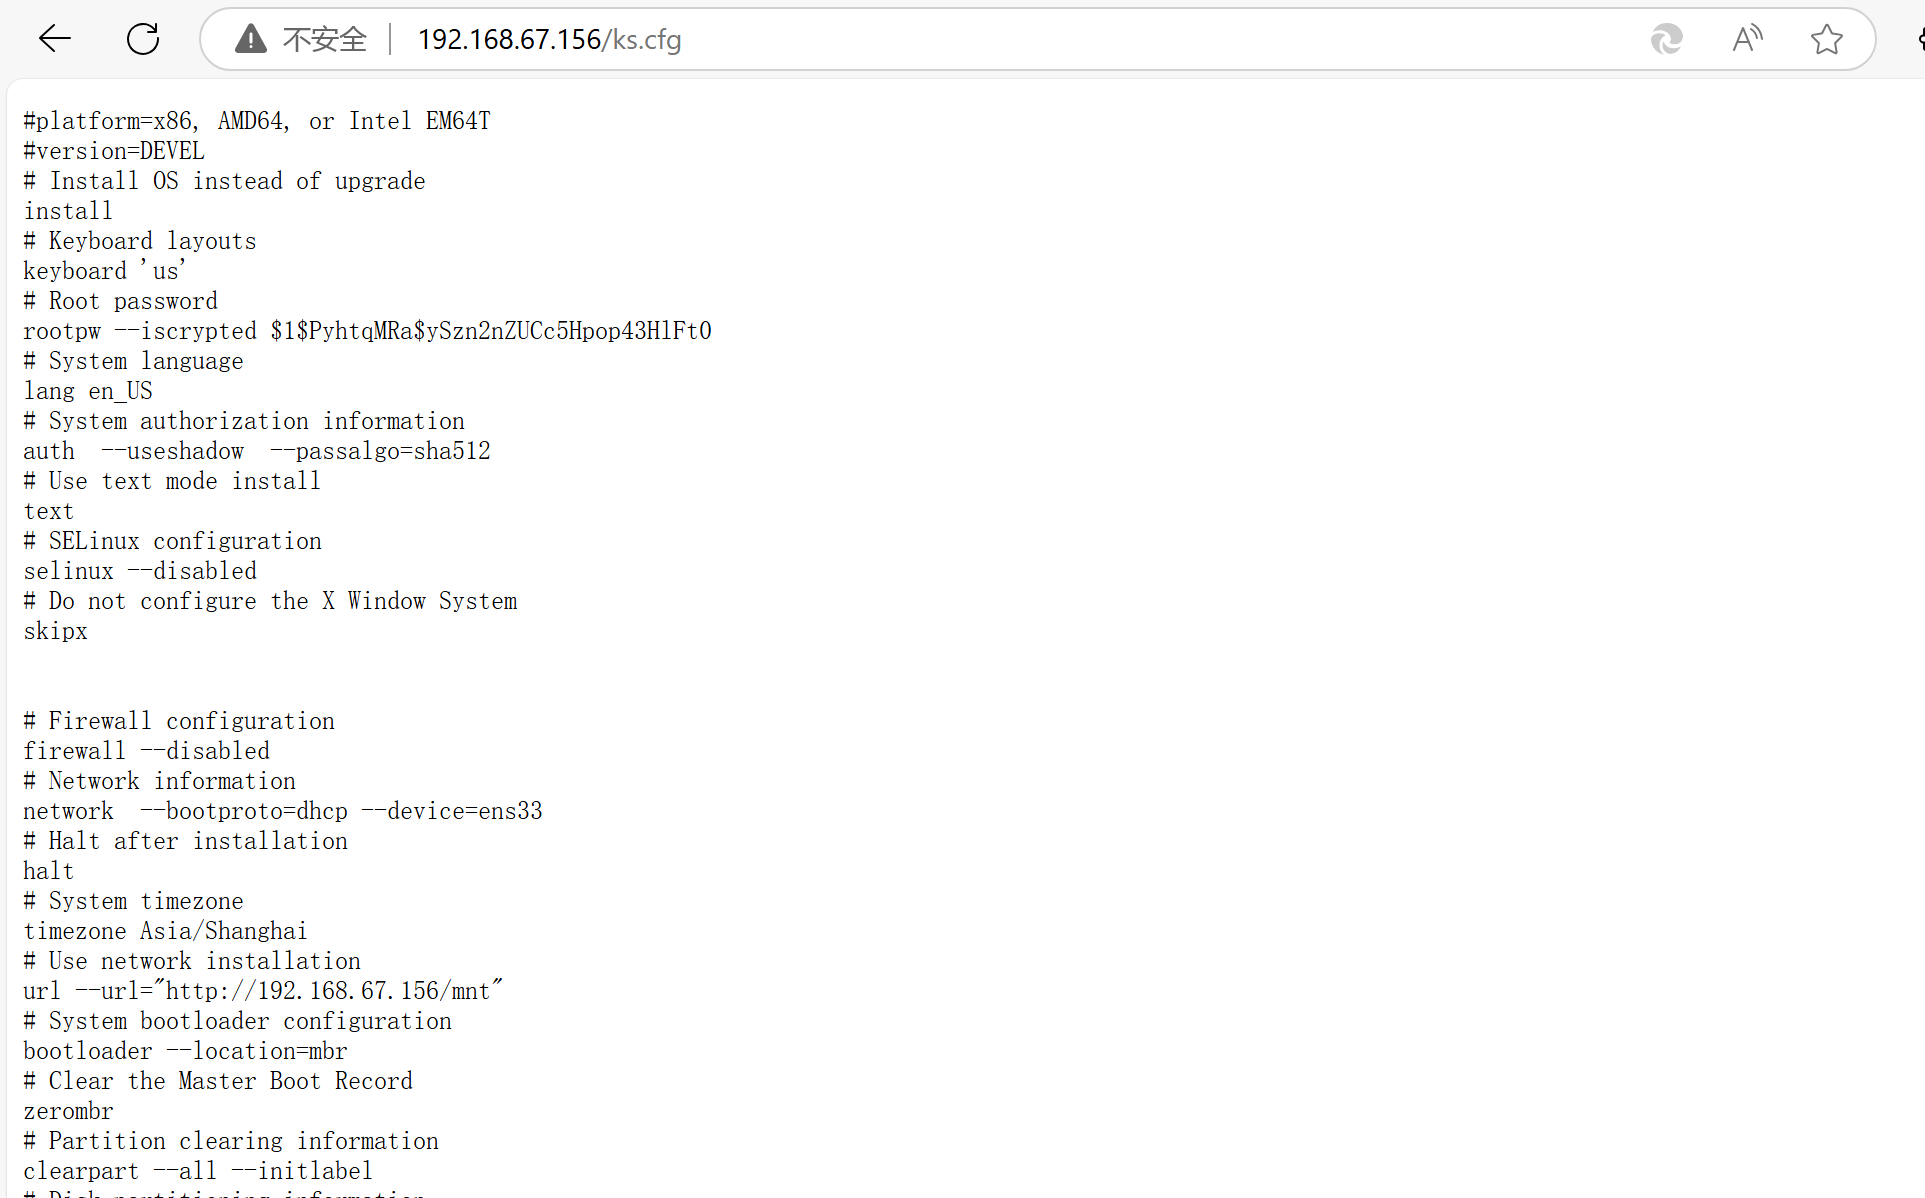
三、搭建 DHCP 服务器
-
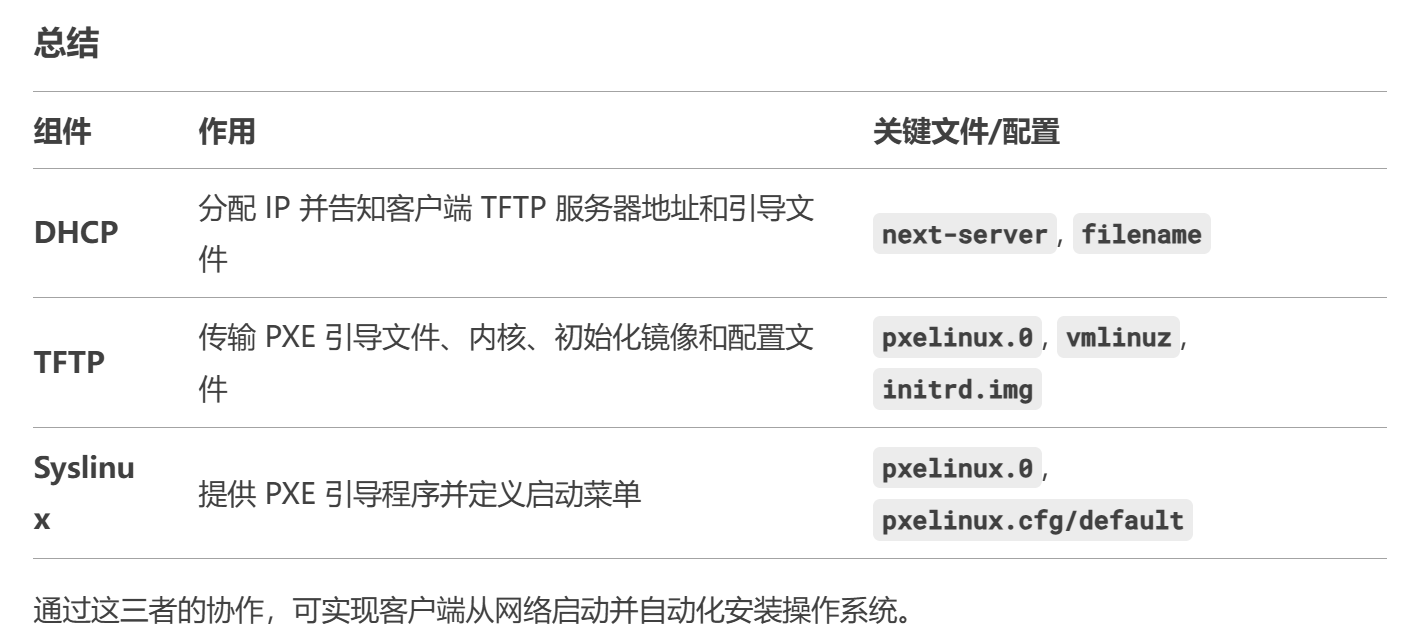
IP 地址分配:为客户端自动分配 IP 地址,使无盘或未安装系统的设备能接入网络。
-
PXE 引导参数传递:通过 DHCP 协议的 next-server 和 filename 选项,告知客户端:
-
next-server:TFTP 服务器的 IP 地址。
-
filename:PXE 引导文件(如 pxelinux.0)在 TFTP 服务器上的路径。
-
- 下载安装DHCP
yum install dhcp -y
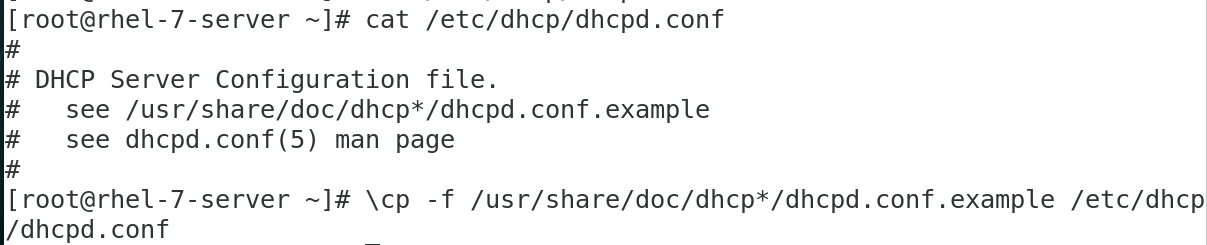
- 复制 DHCP 配置文件模板到 /etc/dhcp/dhcp.conf
\cp -f /usr/share/doc/dhcp*/dhcpd.conf.example /etc/dhcp/dhcpd.conf
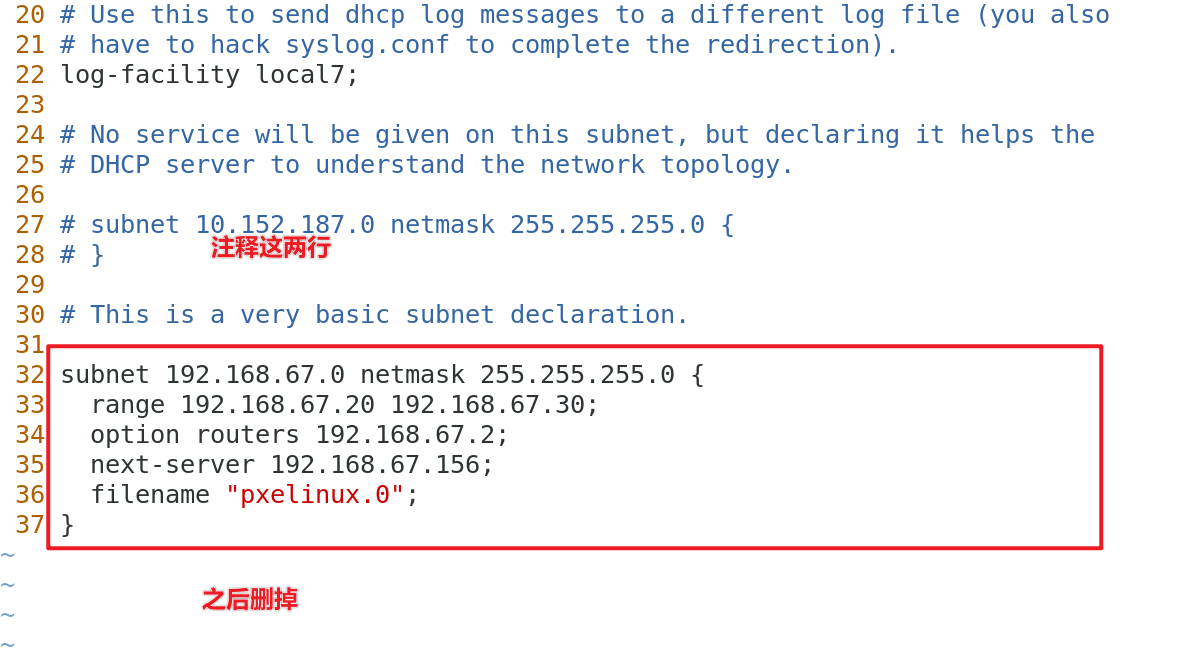
- 编辑DHCP配置文件
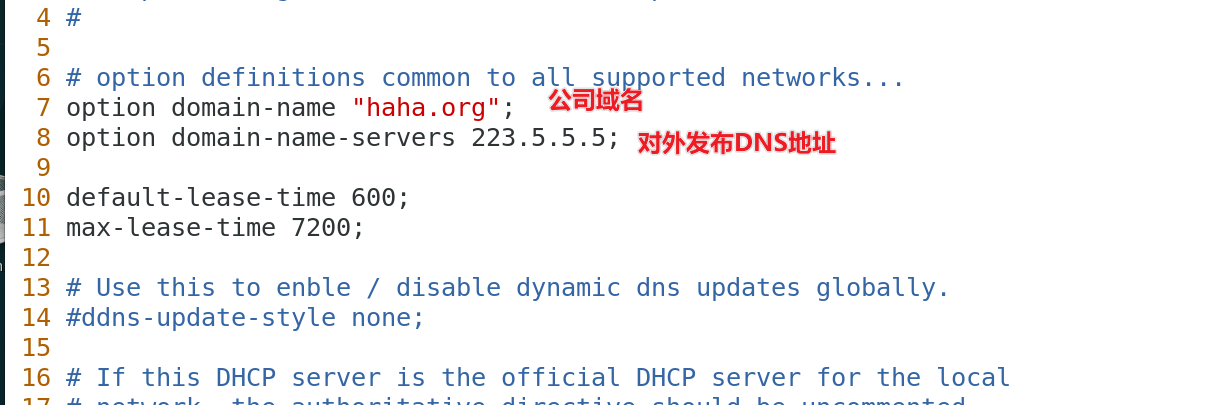
vim /etc/dhcp/dhcpd.conf

option domain-name "haha.org";
option domain-name-servers 223.5.5.5;

default-lease-time 600;
max-lease-time 7200;
log-facility local7;
subnet 192.168.67.0 netmask 255.255.255.0 {
  range 192.168.67.20 192.168.67.30;
  option routers 192.168.67.2;
  next-server 192.168.67.156;
  filename "pxelinux.0";
}

- 开启DHCP
systemctl enable --now dhcpd
四、搭建 TFTP 服务器
4.1.THTP 简介
TFTP作用:
-
传输引导文件:通过简单的无认证文件传输协议(TFTP),向客户端提供以下文件:
-
PXE 引导文件:如 pxelinux.0(由 Syslinux 提供)。
-
内核与初始化镜像:如 vmlinuz(Linux 内核)和 initrd.img(初始化内存盘)。
-
配置文件:如 pxelinux.cfg/default(启动菜单配置文件)。
-
-
典型文件结构
/var/lib/tftpboot/
├── pxelinux.0                 # Syslinux 提供的 PXE 引导程序
├── vmlinuz                    # Linux 内核
├── initrd.img                 # 初始化内存镜像
└── pxelinux.cfg/
    └── default                # 启动菜单配置文件
- 下载安装TFTP
yum install tftp-server -y
4.2.Syslinux 简介
Syslinux作用:
-
提供 PXE 引导程序:生成 pxelinux.0 文件,作为 PXE 启动的引导加载程序(Bootloader)。
-
配置启动菜单:通过 pxelinux.cfg/default 文件定义启动选项,例如:
-
加载内核和初始化镜像。
-
指定 Kickstart 自动安装配置文件(ks.cfg)的路径。
-
-
下载安装Syslinux
yum install syslinux -y
4.3.搭建服务器
- 复制 ISO 文件到 TFTP 目录
- 从 Syslinux 复制 PXE 引导文件
cp /mnt/isolinux/* /var/lib/tftpboot/
cp /usr/share/syslinux/pxelinux.0 /var/lib/tftpboot/
- 创建 TFTP 根目录
- 复制启动菜单文件
cd /var/lib/tftpboot/
mkdir pxelinux.cfg
cp isolinux.cfg pxelinux.cfg/default
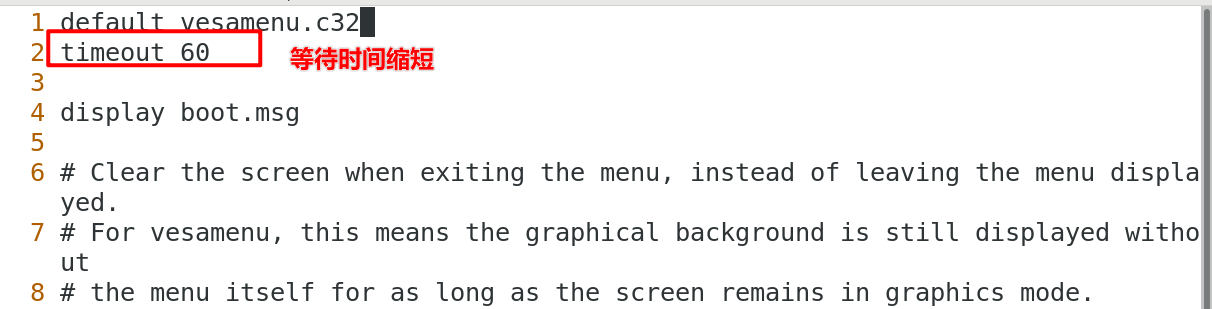
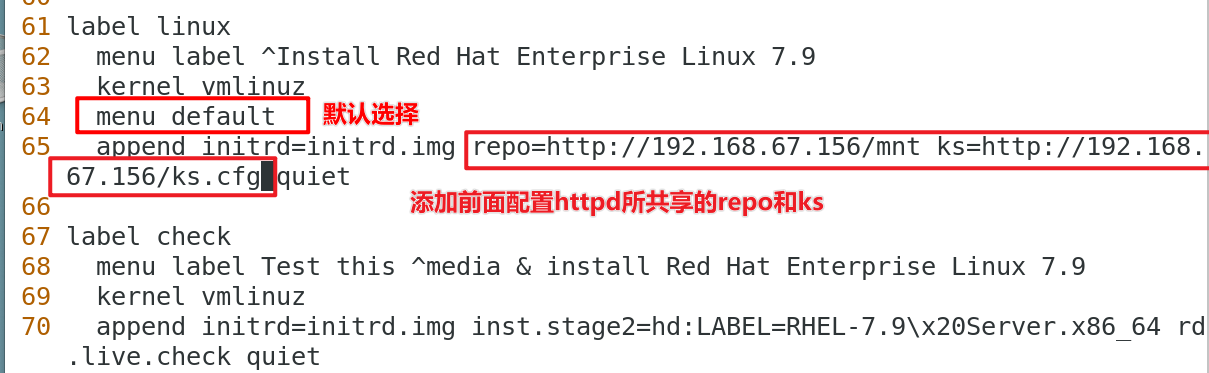
- 配置启动菜单文件
- 注意:保存文件时用wq!
vim pxelinux.cfg/default
default vesamenu.c32
timeout 60

display boot.msg

# Clear the screen when exiting the menu, instead of leaving the menu displayed.
# For vesamenu, this means the graphical background is still displayed without
# the menu itself for as long as the screen remains in graphics mode.
menu clear
menu background splash.png
menu title Red Hat Enterprise Linux 7.9
menu vshift 8
menu rows 18
menu margin 8
#menu hidden
menu helpmsgrow 15
menu tabmsgrow 13

# Border Area
menu color border * #00000000 #00000000 none

# Selected item
menu color sel 0 #ffffffff #00000000 none
# Title bar
menu color title 0 #ff7ba3d0 #00000000 none

# Press [Tab] message
menu color tabmsg 0 #ff3a6496 #00000000 none

# Unselected menu item
menu color unsel 0 #84b8ffff #00000000 none

# Selected hotkey
menu color hotsel 0 #84b8ffff #00000000 none

# Unselected hotkey
menu color hotkey 0 #ffffffff #00000000 none

# Help text
menu color help 0 #ffffffff #00000000 none

# A scrollbar of some type? Not sure.
menu color scrollbar 0 #ffffffff #ff355594 none

# Timeout msg
menu color timeout 0 #ffffffff #00000000 none
menu color timeout_msg 0 #ffffffff #00000000 none

# Command prompt text
menu color cmdmark 0 #84b8ffff #00000000 none
menu color cmdline 0 #ffffffff #00000000 none

# Do not display the actual menu unless the user presses a key. All that is displayed is a timeout message.

menu tabmsg Press Tab for full configuration options on menu items.

menu separator # insert an empty line
menu separator # insert an empty line

label linux
  menu label ^Install Red Hat Enterprise Linux 7.9
  kernel vmlinuz
  menu default
  append initrd=initrd.img repo=http://192.168.67.156/mnt ks=http://192.168.67.156/ks.cfg quiet

label check
  menu label Test this ^media & install Red Hat Enterprise Linux 7.9
  kernel vmlinuz
  append initrd=initrd.img inst.stage2=hd:LABEL=RHEL-7.9\x20Server.x86_64 rd.live.check quiet

menu separator # insert an empty line

# utilities submenu
menu begin ^Troubleshooting
  menu title Troubleshooting

label vesa
  menu indent count 5
  menu label Install Red Hat Enterprise Linux 7.9 in ^basic graphics mode
  text help
        Try this option out if you're having trouble installing
        Red Hat Enterprise Linux 7.9.
  endtext
  kernel vmlinuz
  append initrd=initrd.img inst.stage2=hd:LABEL=RHEL-7.9\x20Server.x86_64 xdriver=vesa nomodeset quiet

label rescue
  menu indent count 5
  menu label ^Rescue a Red Hat Enterprise Linux system
  text help
        If the system will not boot, this lets you access files
        and edit config files to try to get it booting again.
  endtext
  kernel vmlinuz
  append initrd=initrd.img inst.stage2=hd:LABEL=RHEL-7.9\x20Server.x86_64 rescue quiet

label memtest
  menu label Run a ^memory test
  text help
        If your system is having issues, a problem with your
        system's memory may be the cause. Use this utility to
        see if the memory is working correctly.
  endtext
  kernel memtest

menu separator # insert an empty line

label local
  menu label Boot from ^local drive
  localboot 0xffff

menu separator # insert an empty line
menu separator # insert an empty line

label returntomain
  menu label Return to ^main menu
  menu exit

menu end

- 启动 TFTP
systemctl enable --now tftp
五、测试
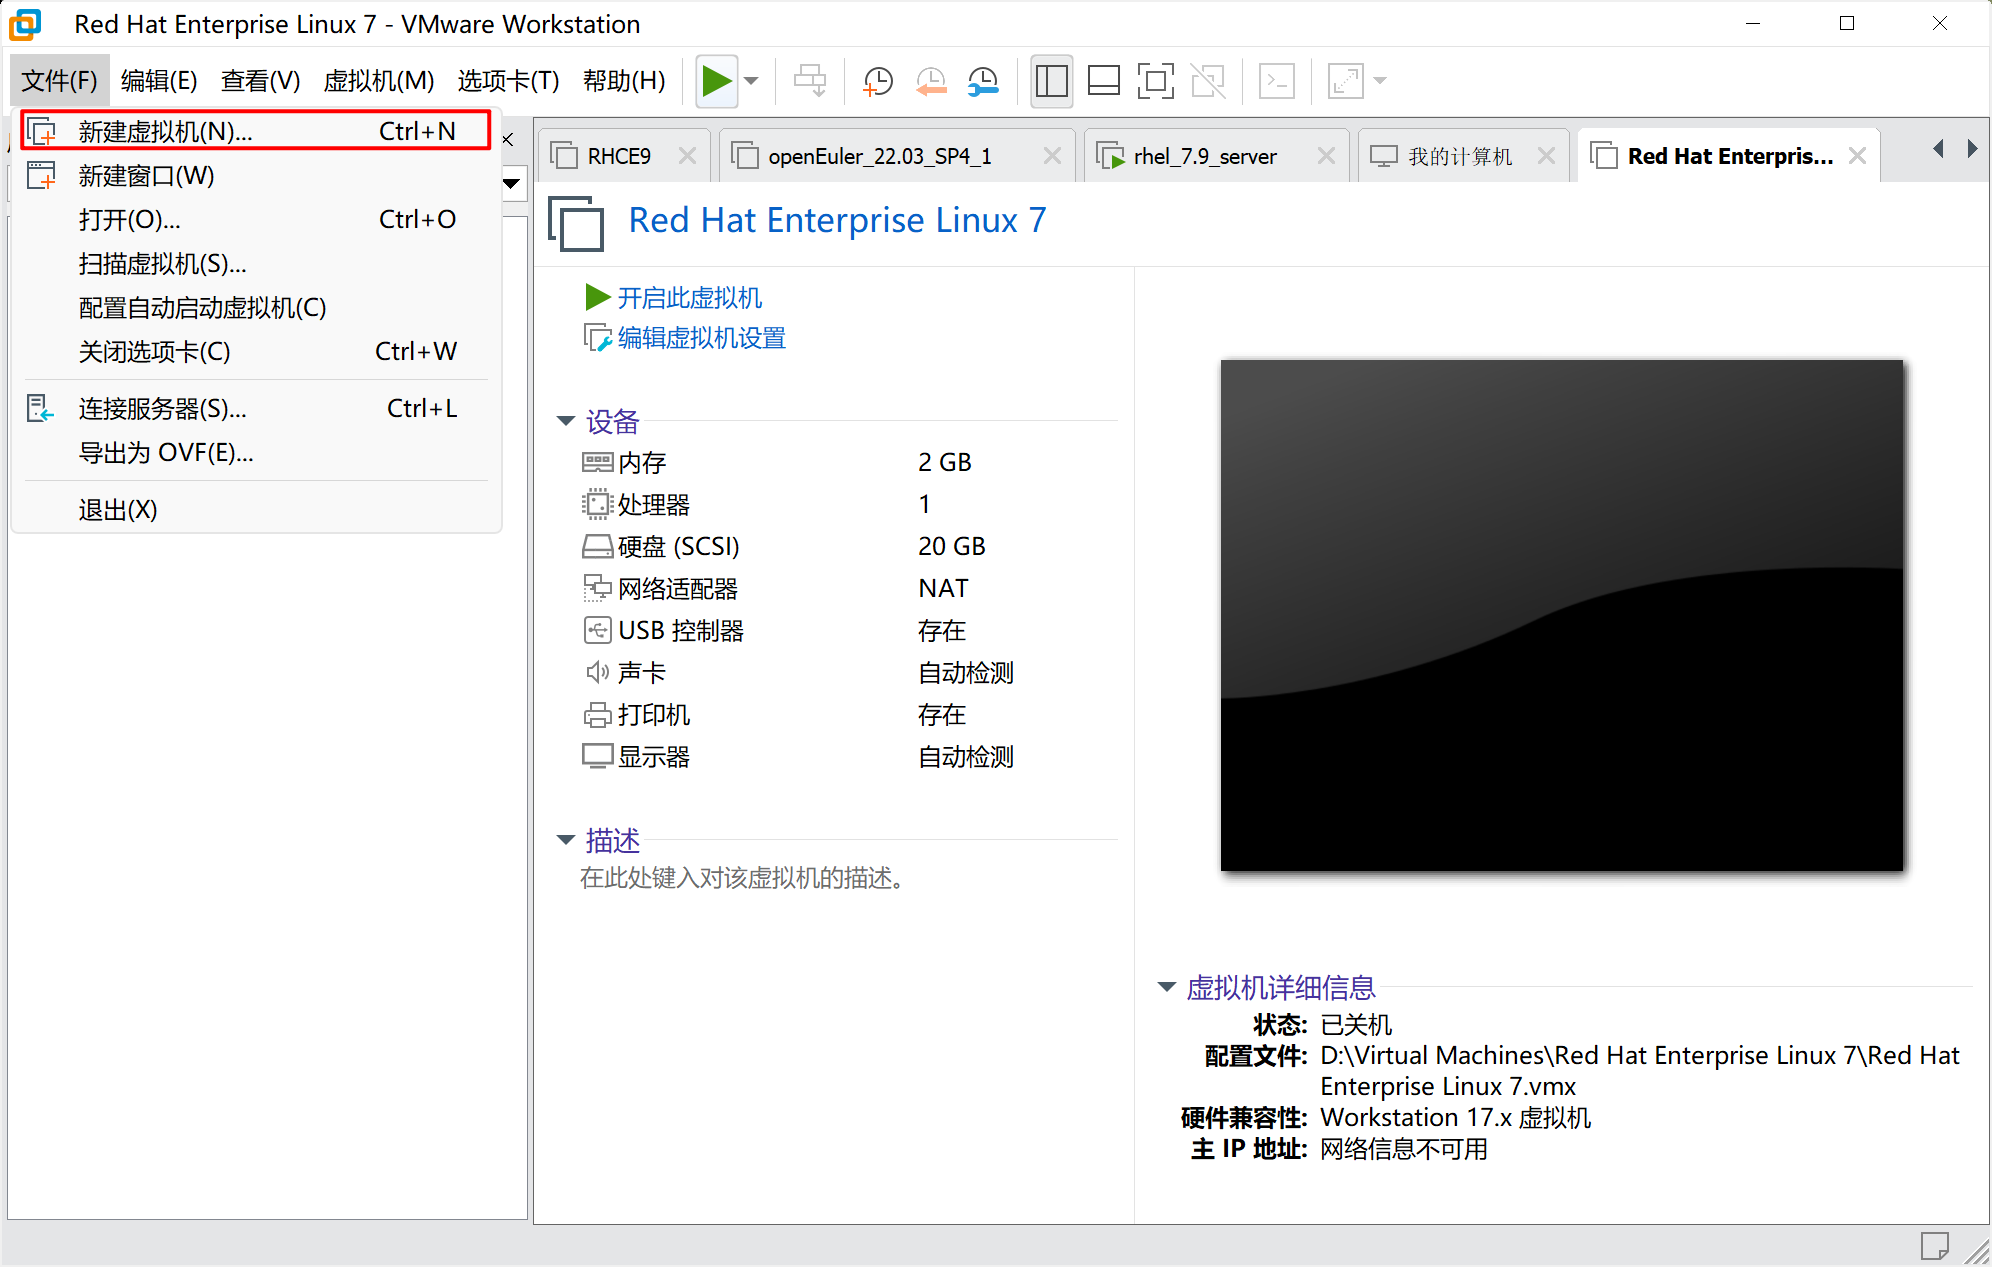
- 新建虚拟机:此步骤省略
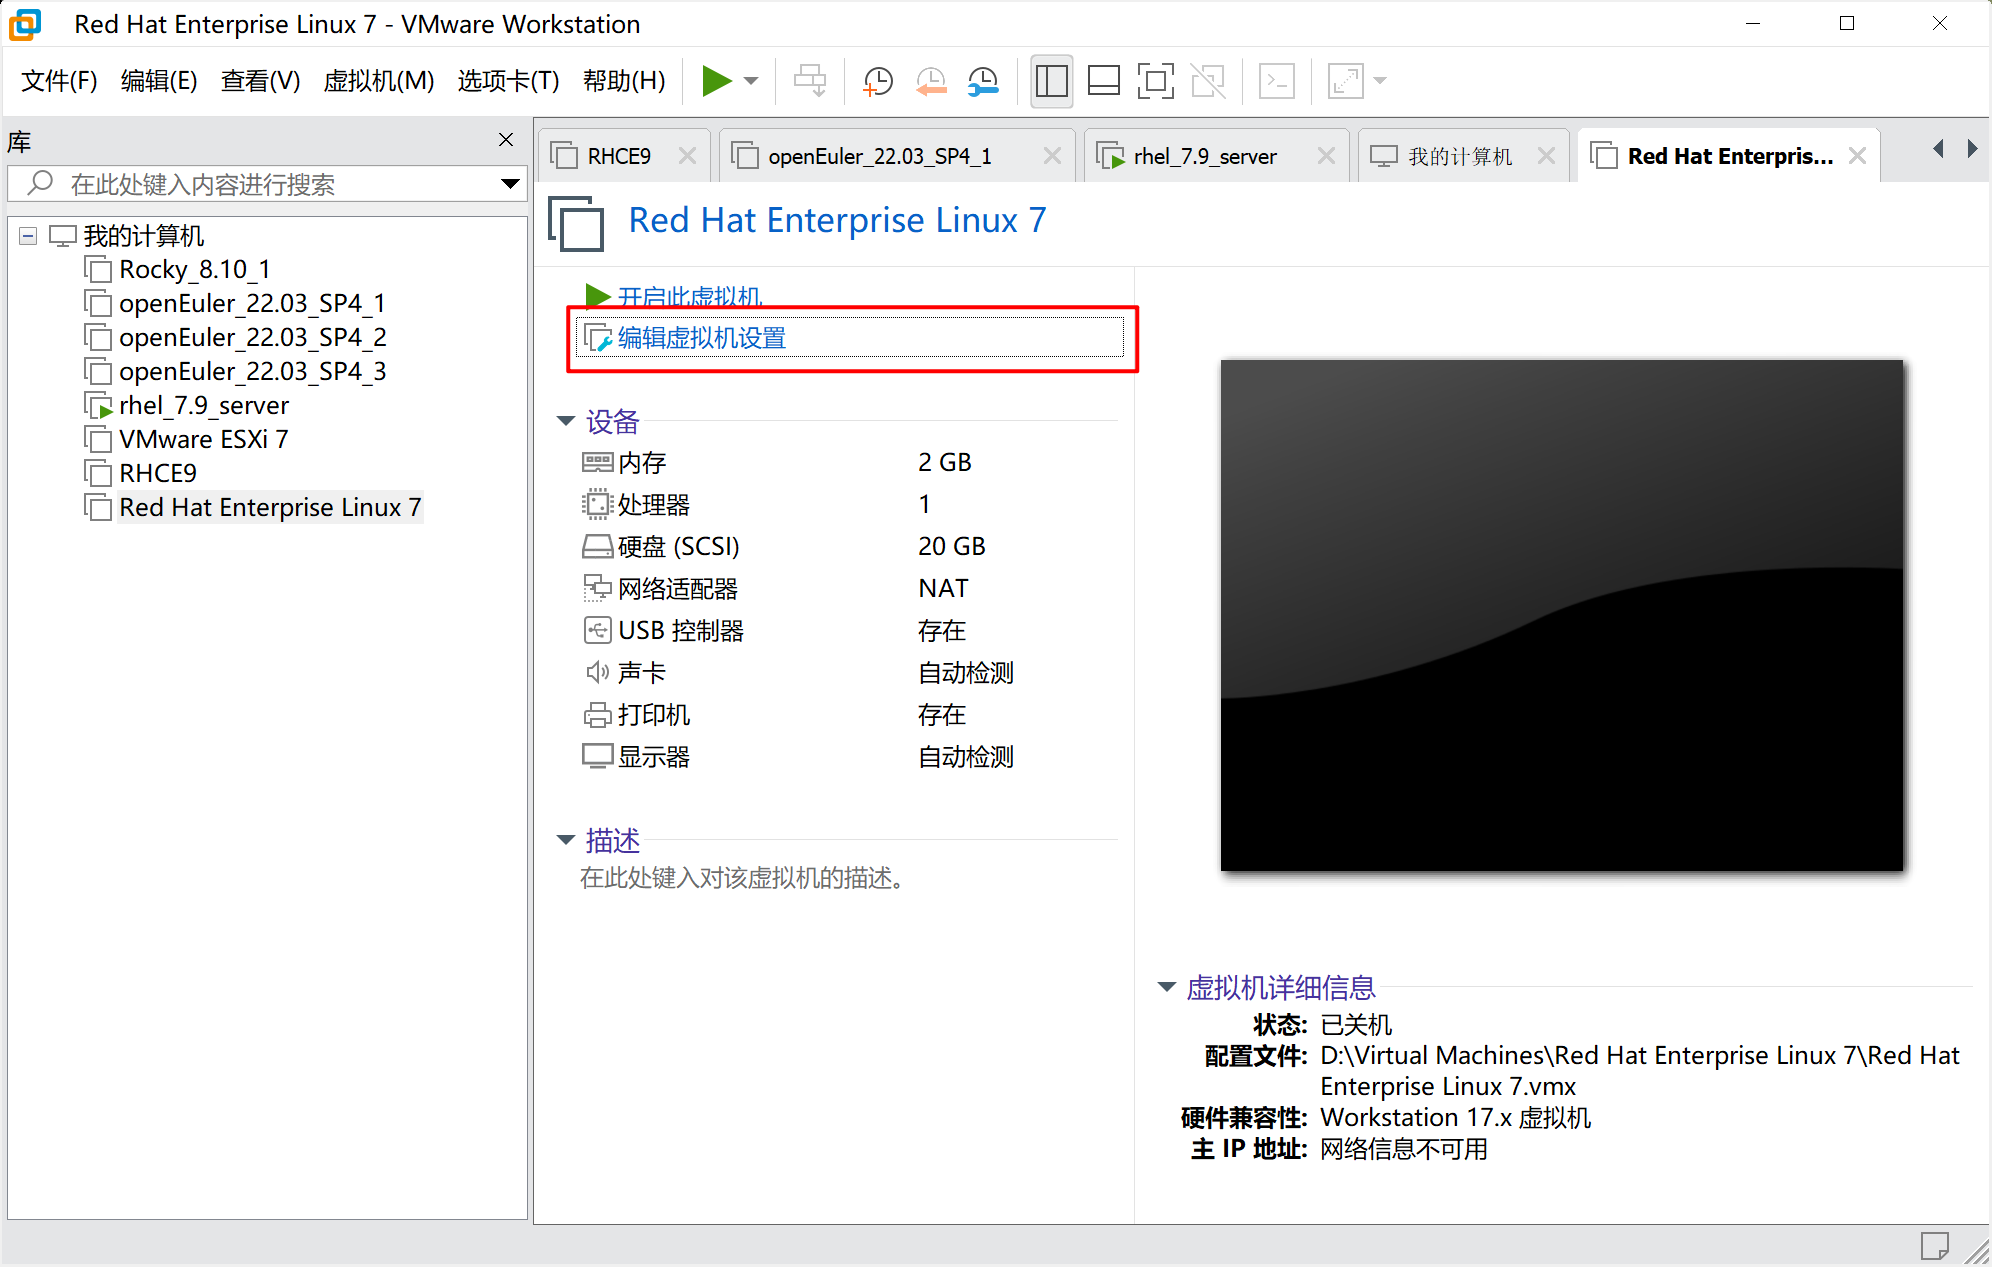
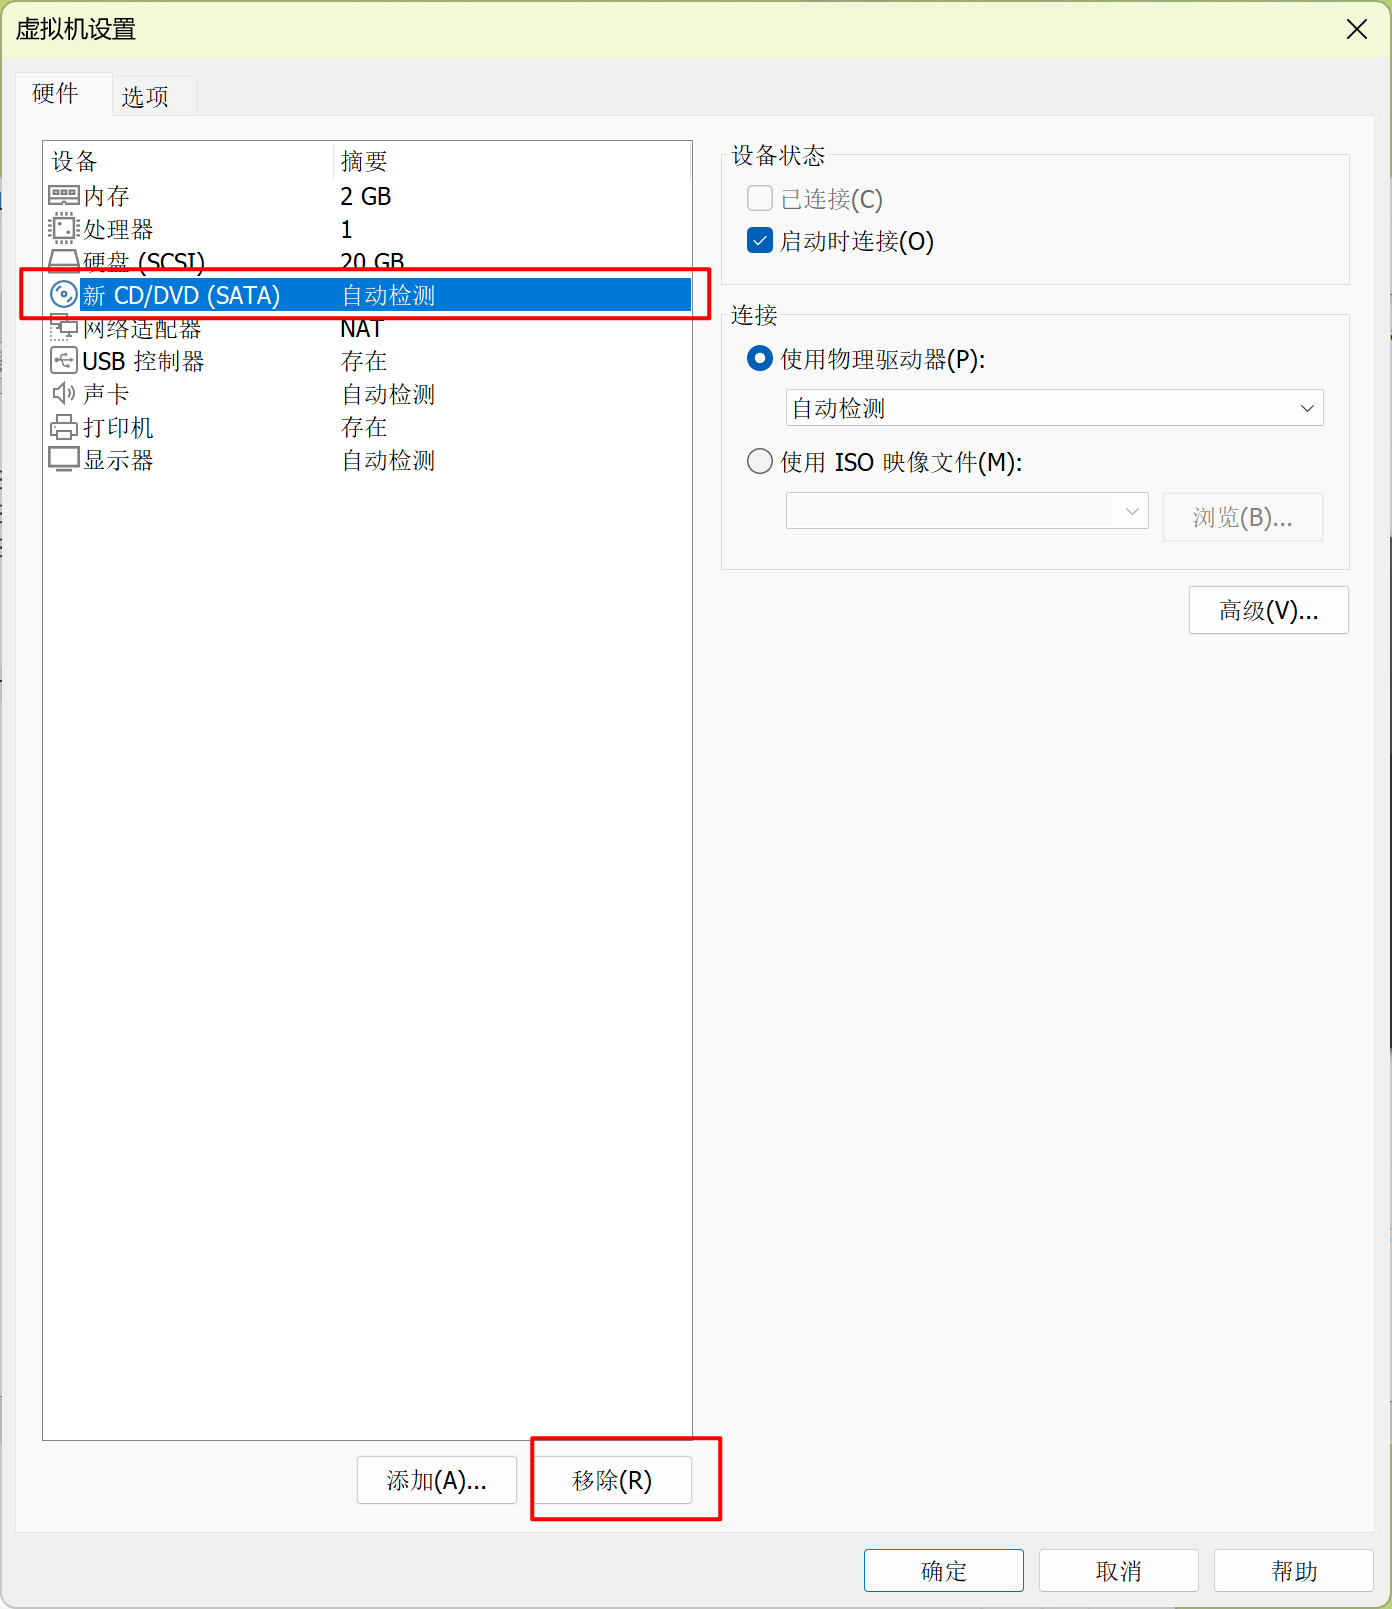
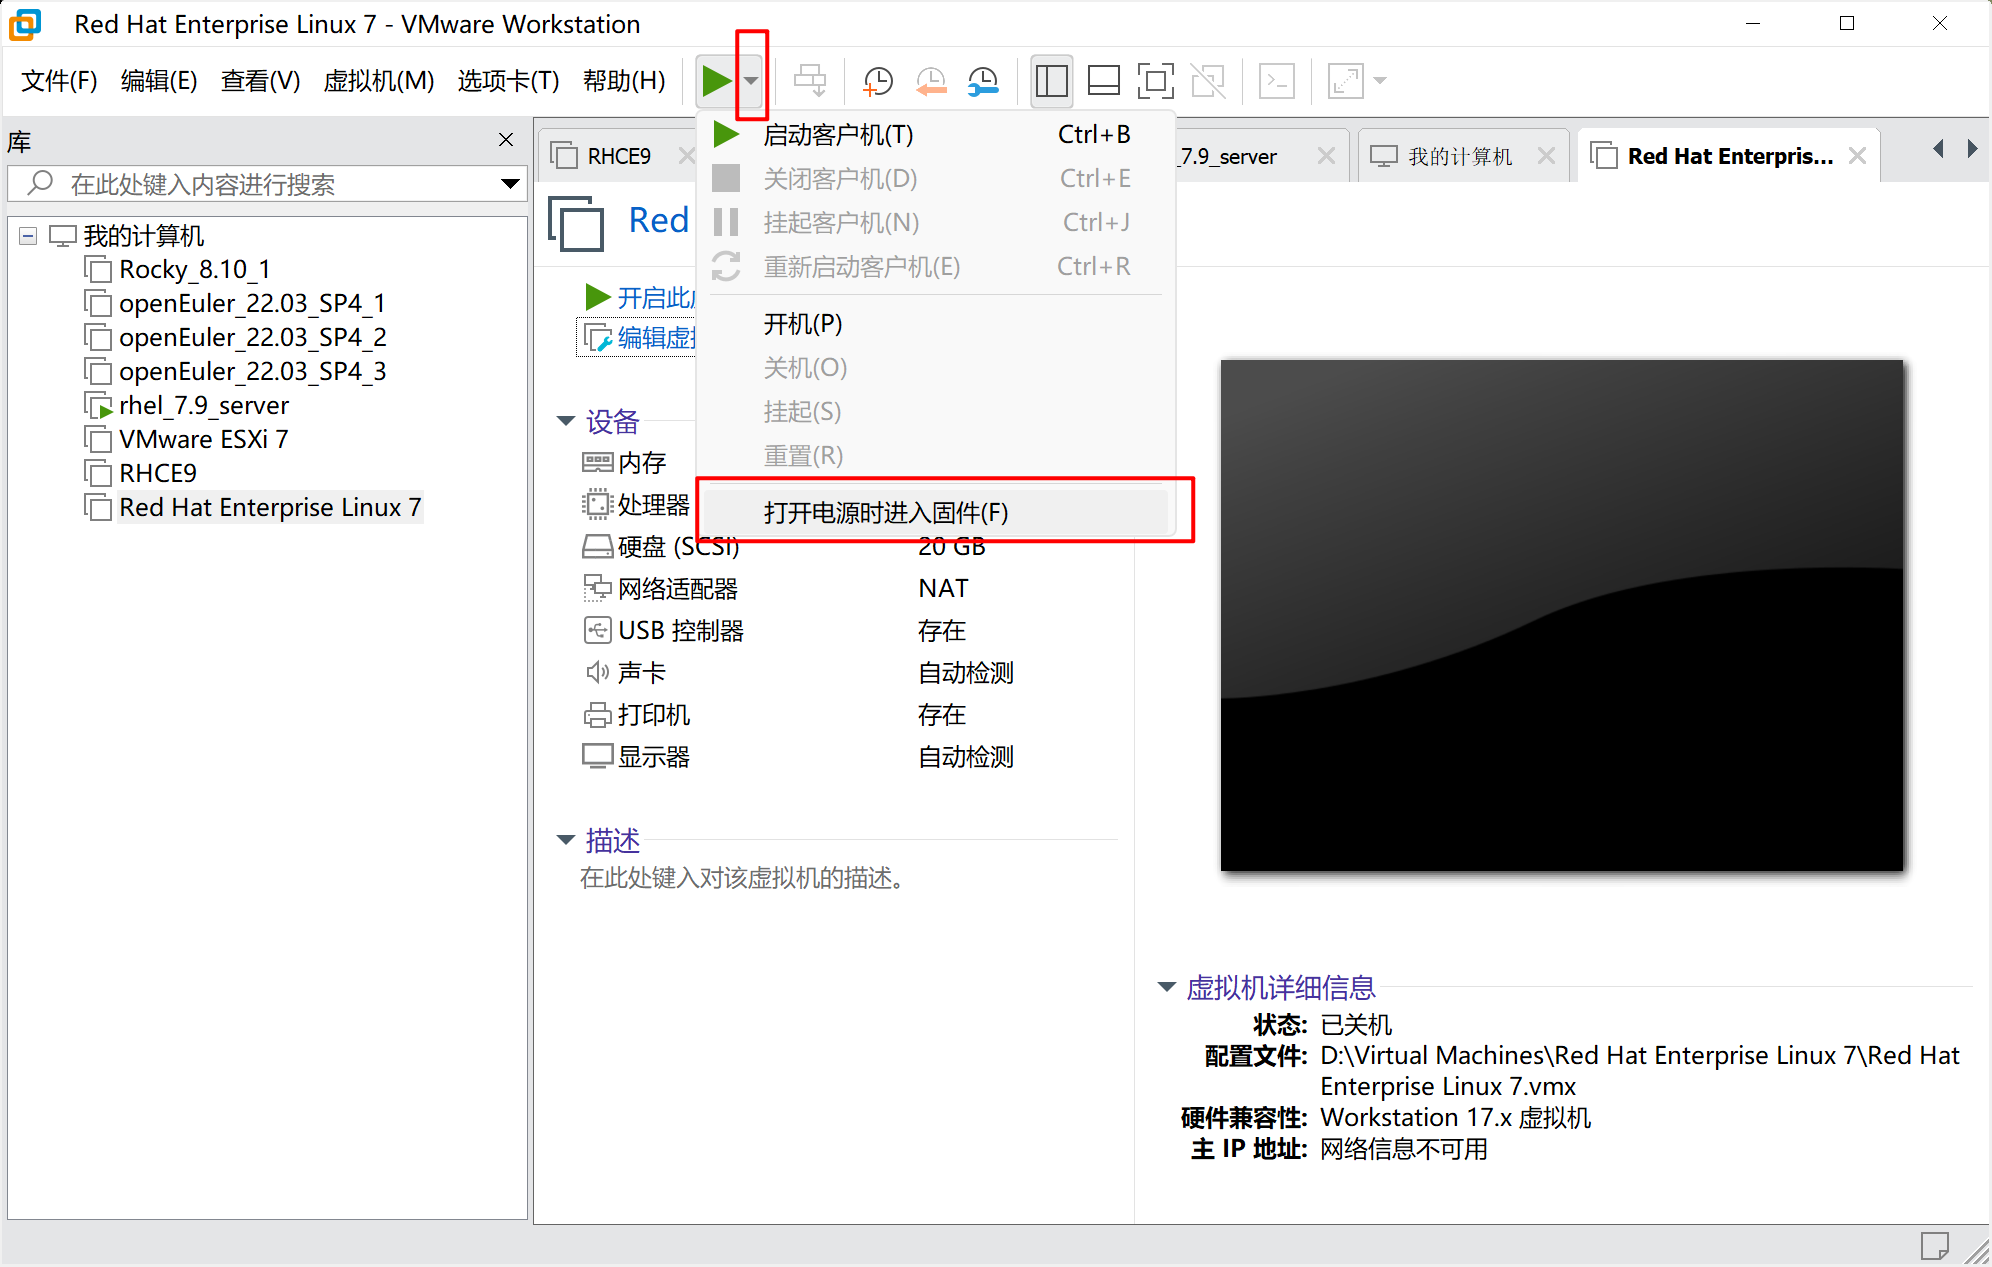
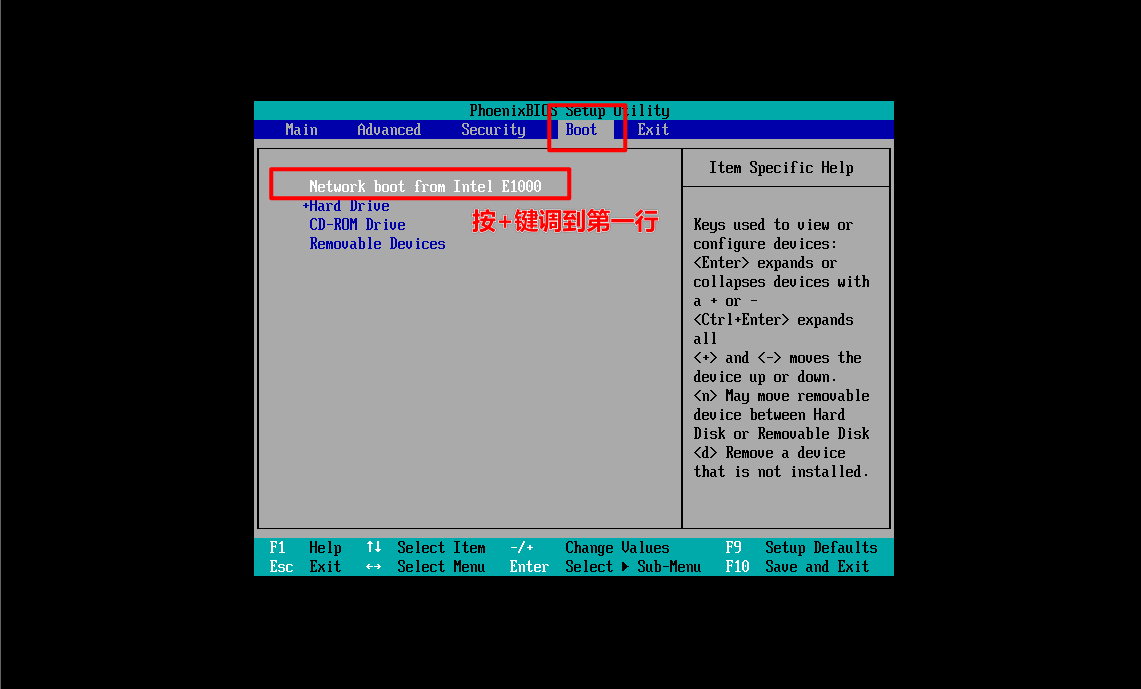
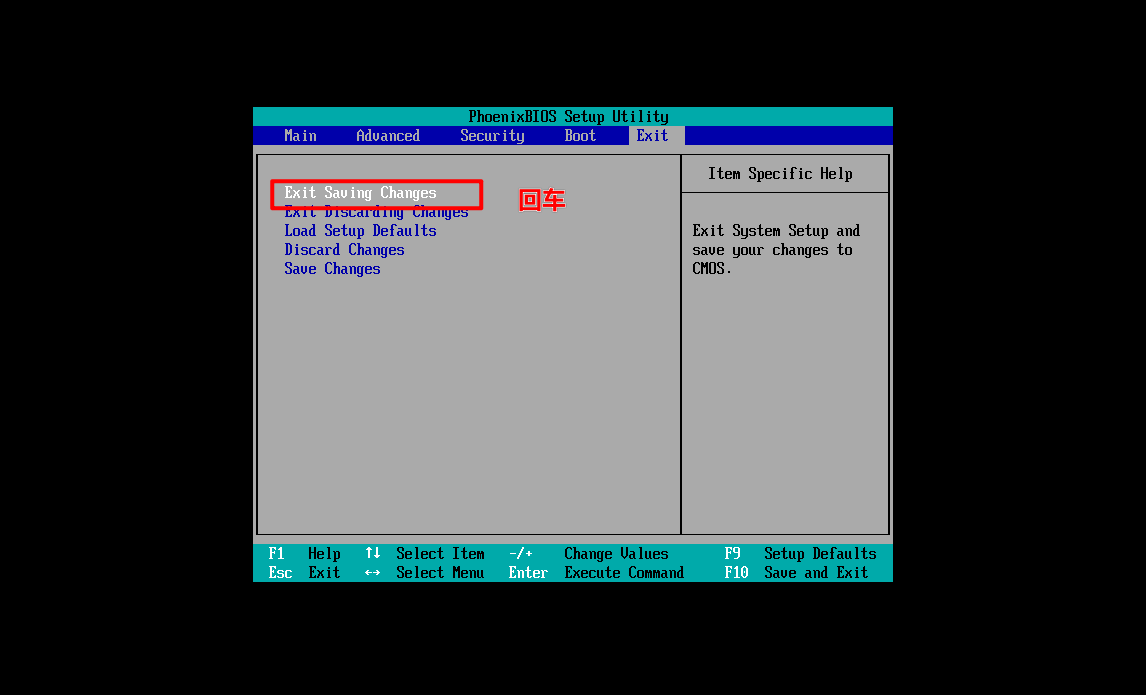
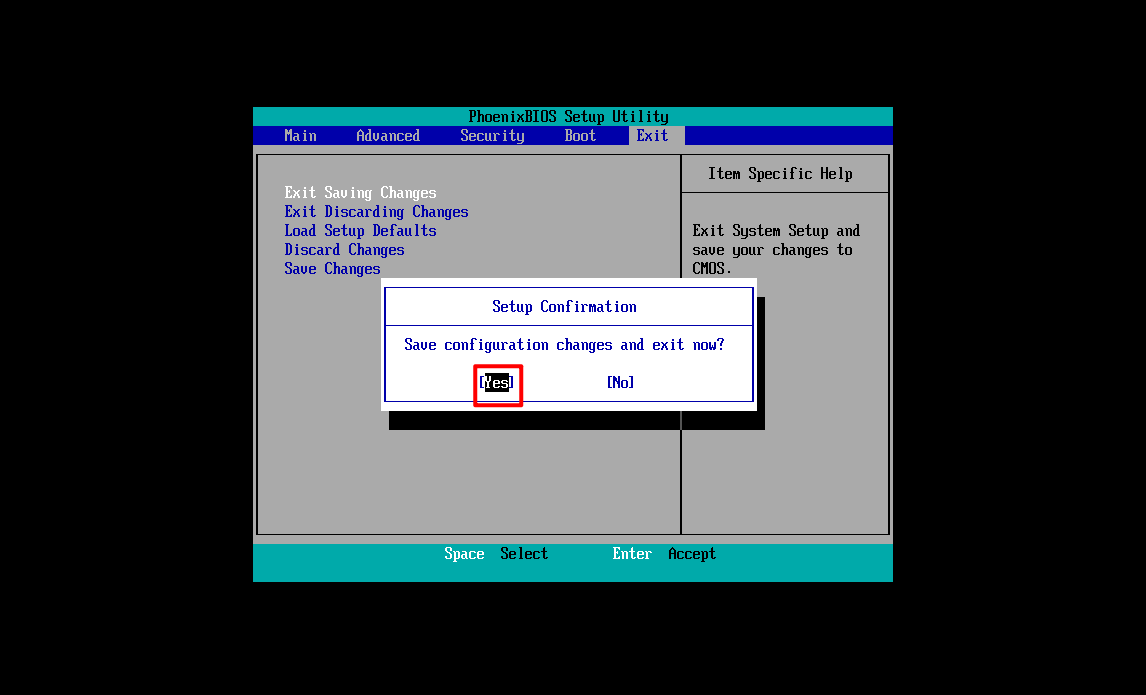
- 此后不用操作,等待自动安装完成
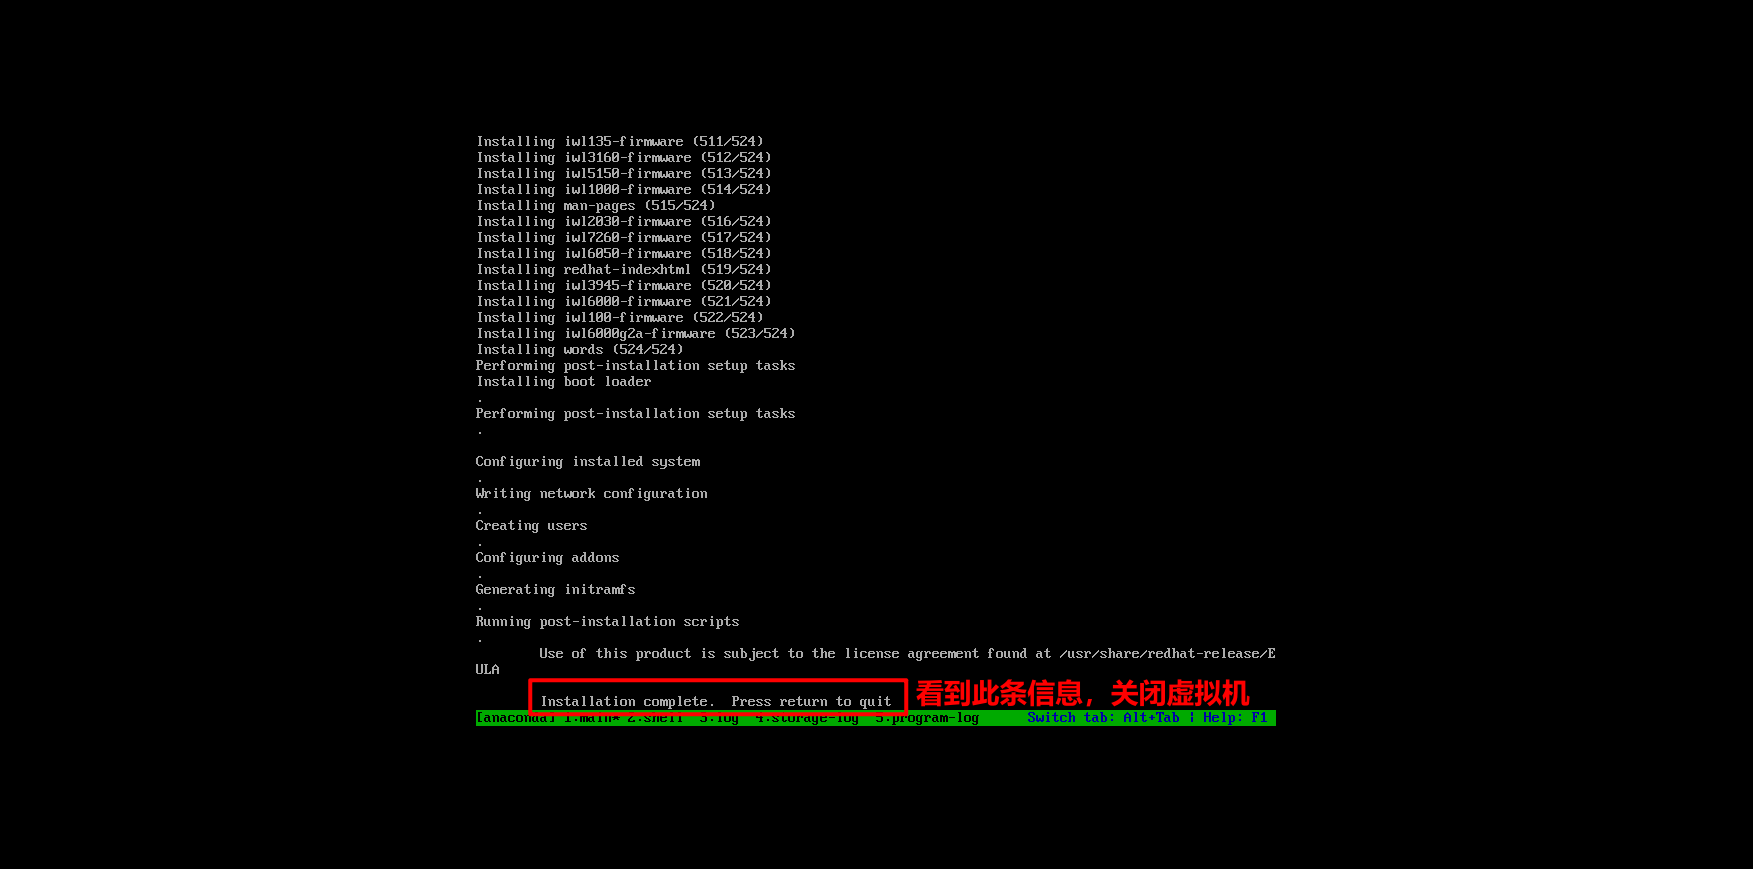
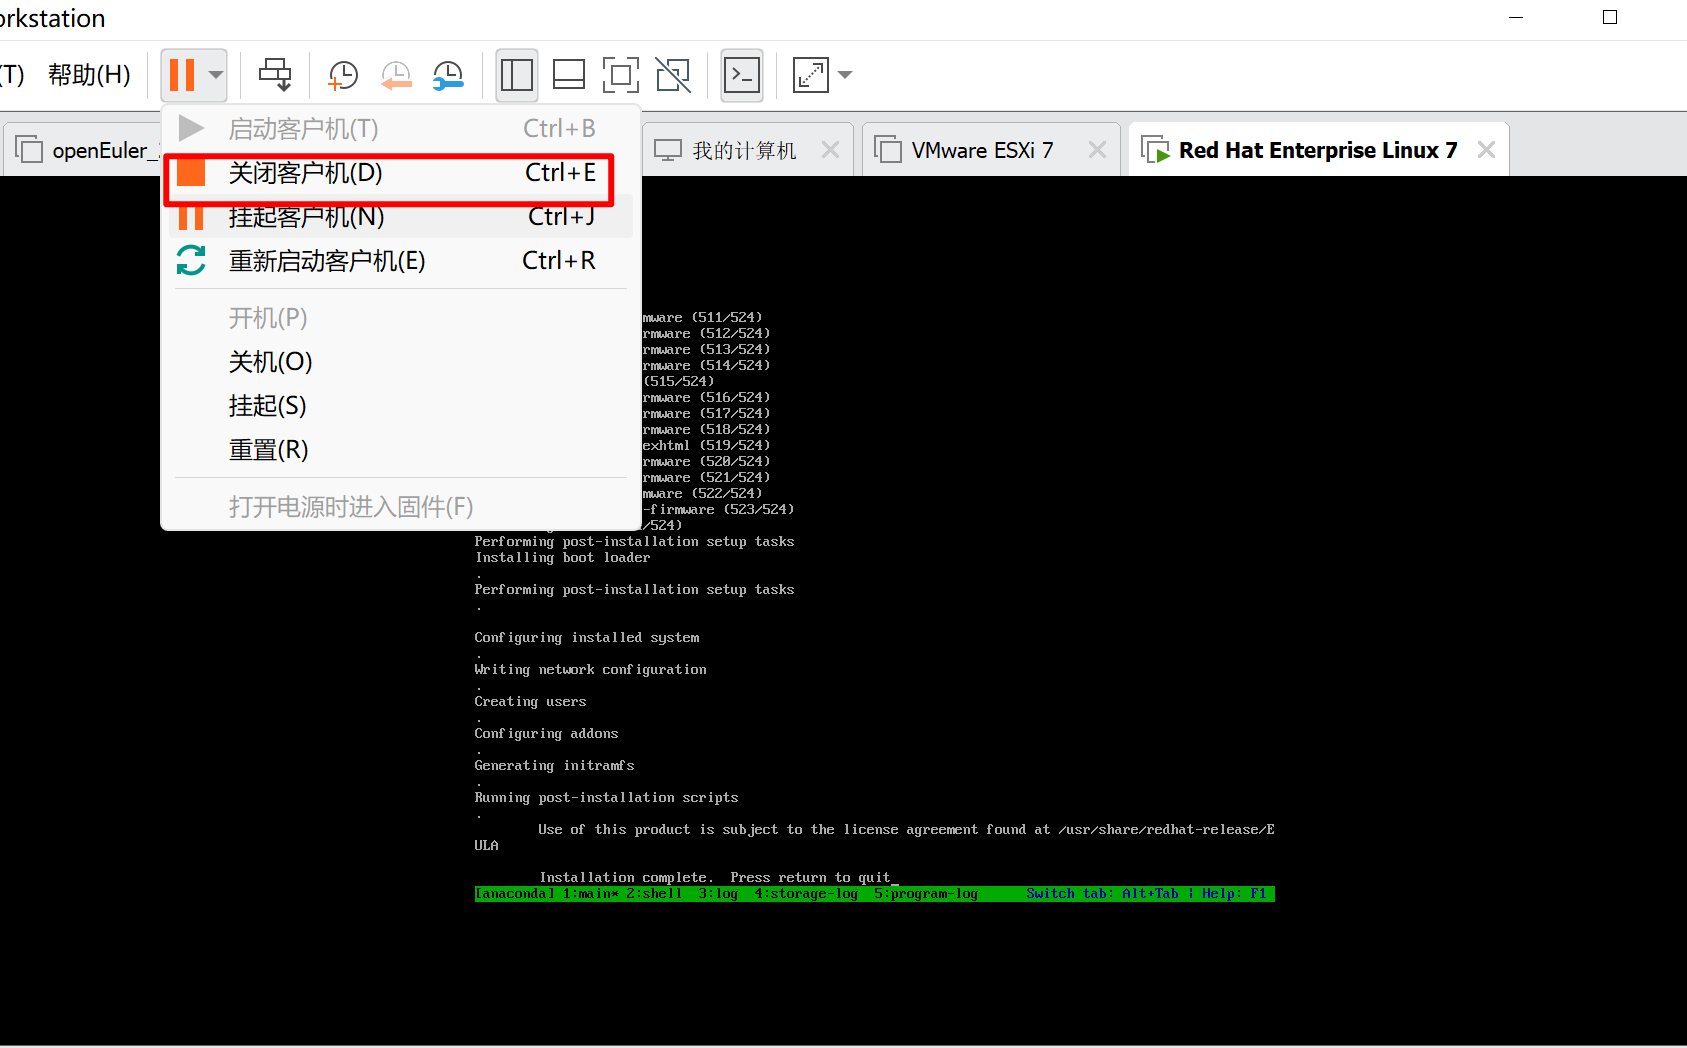
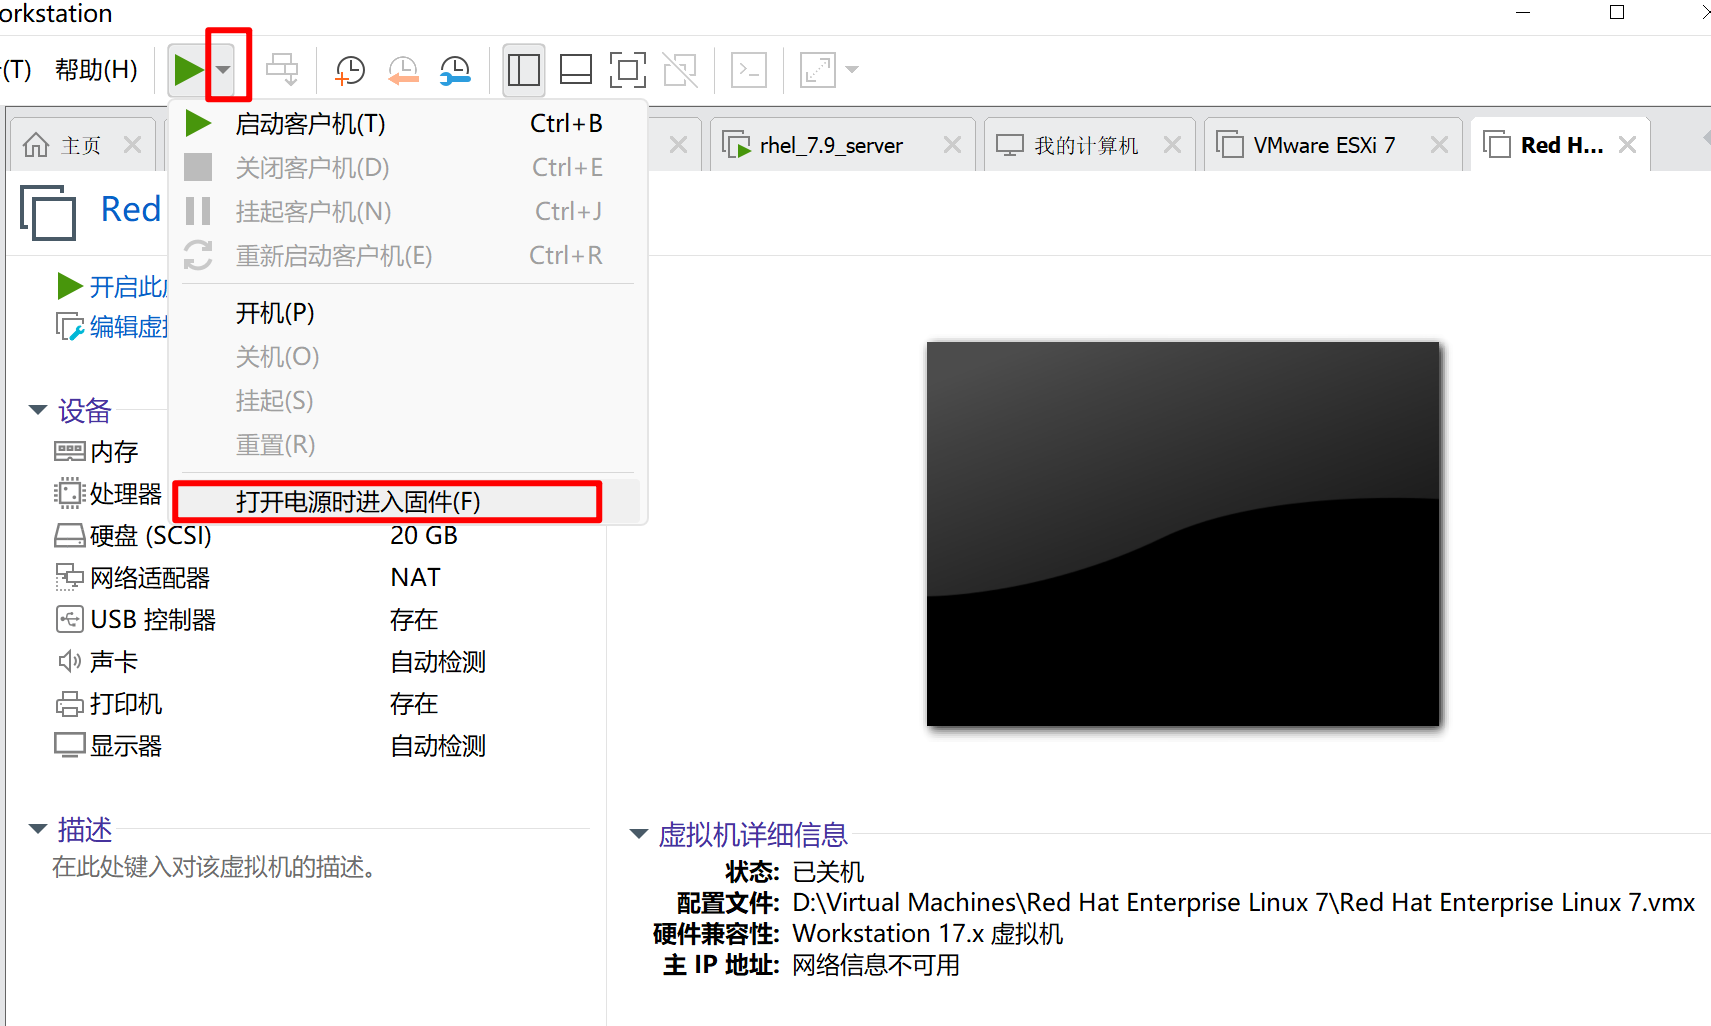
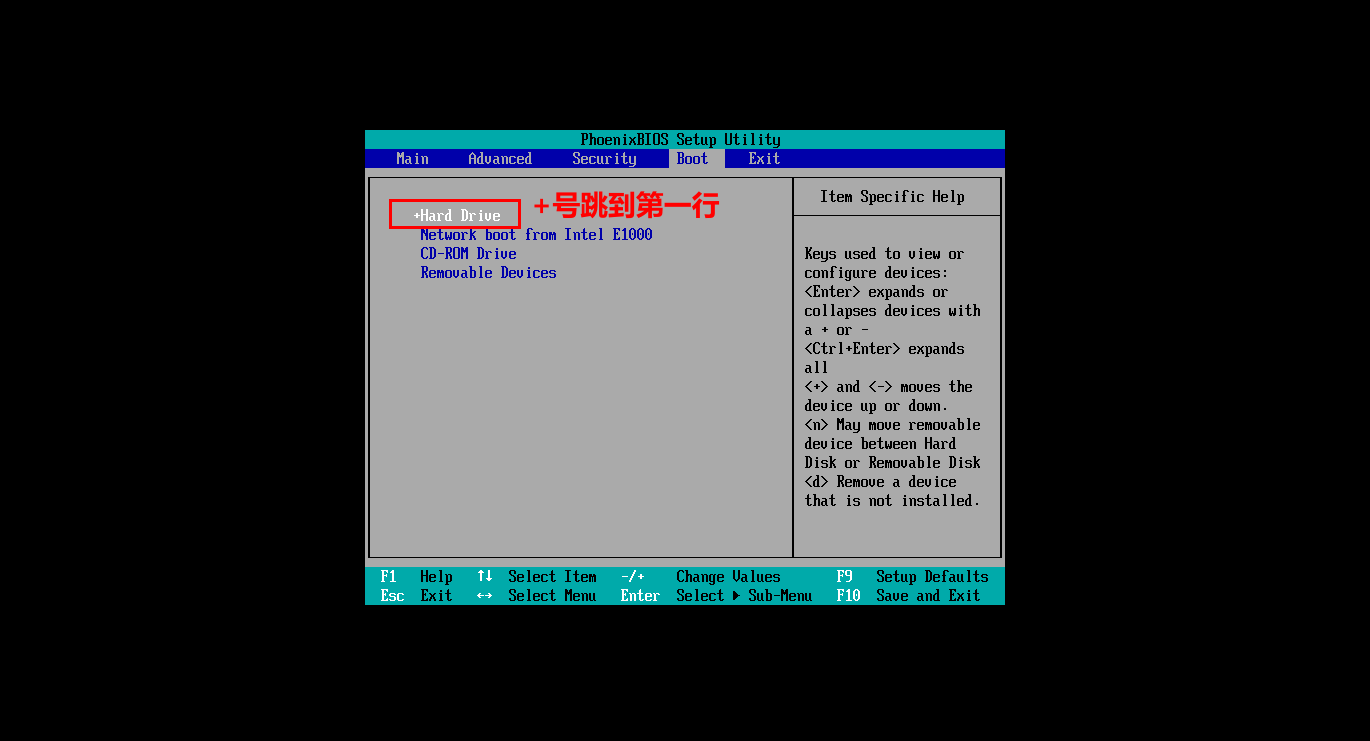
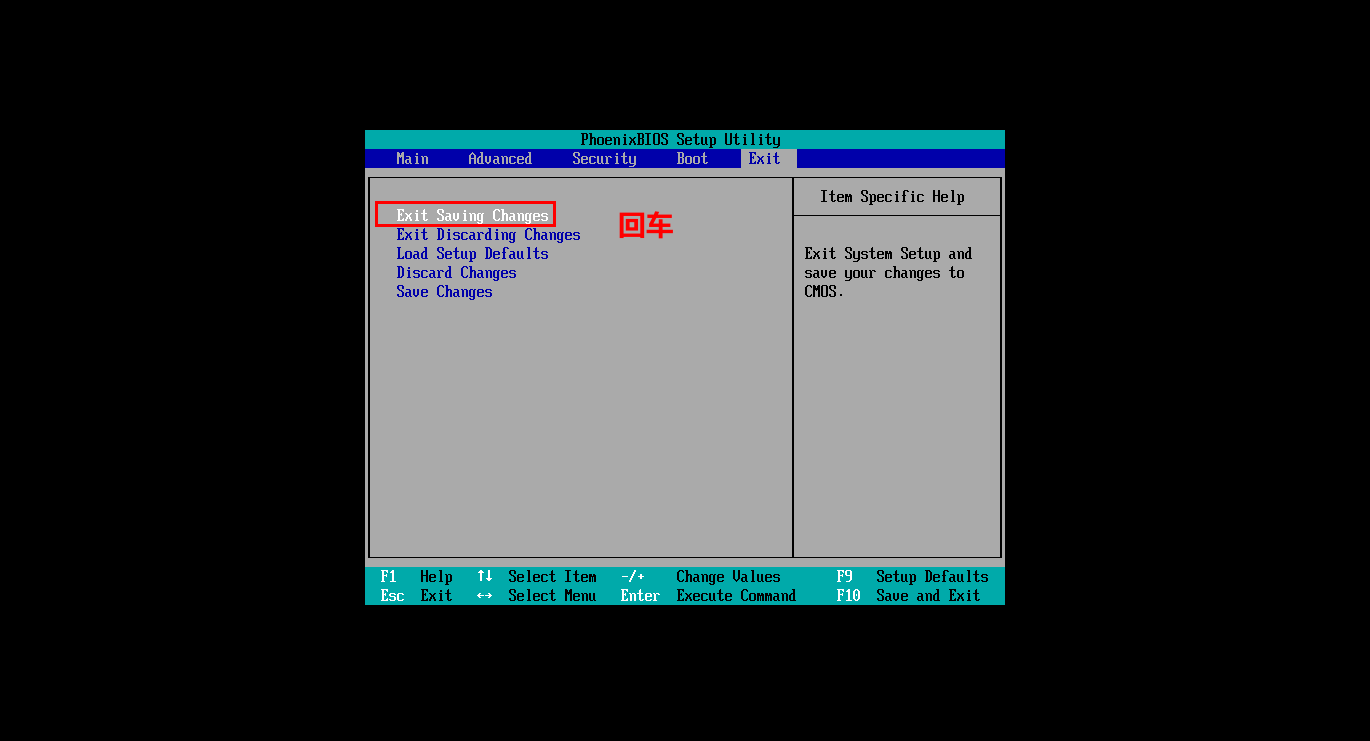
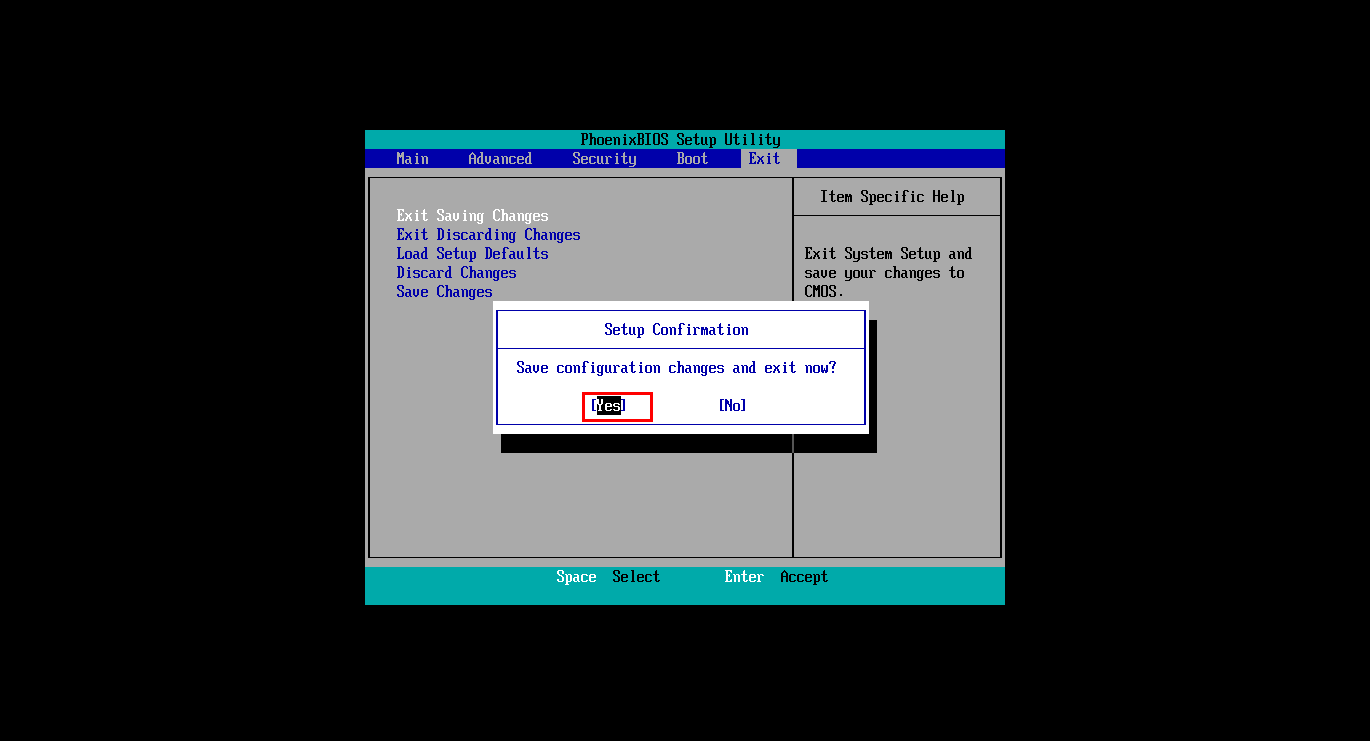
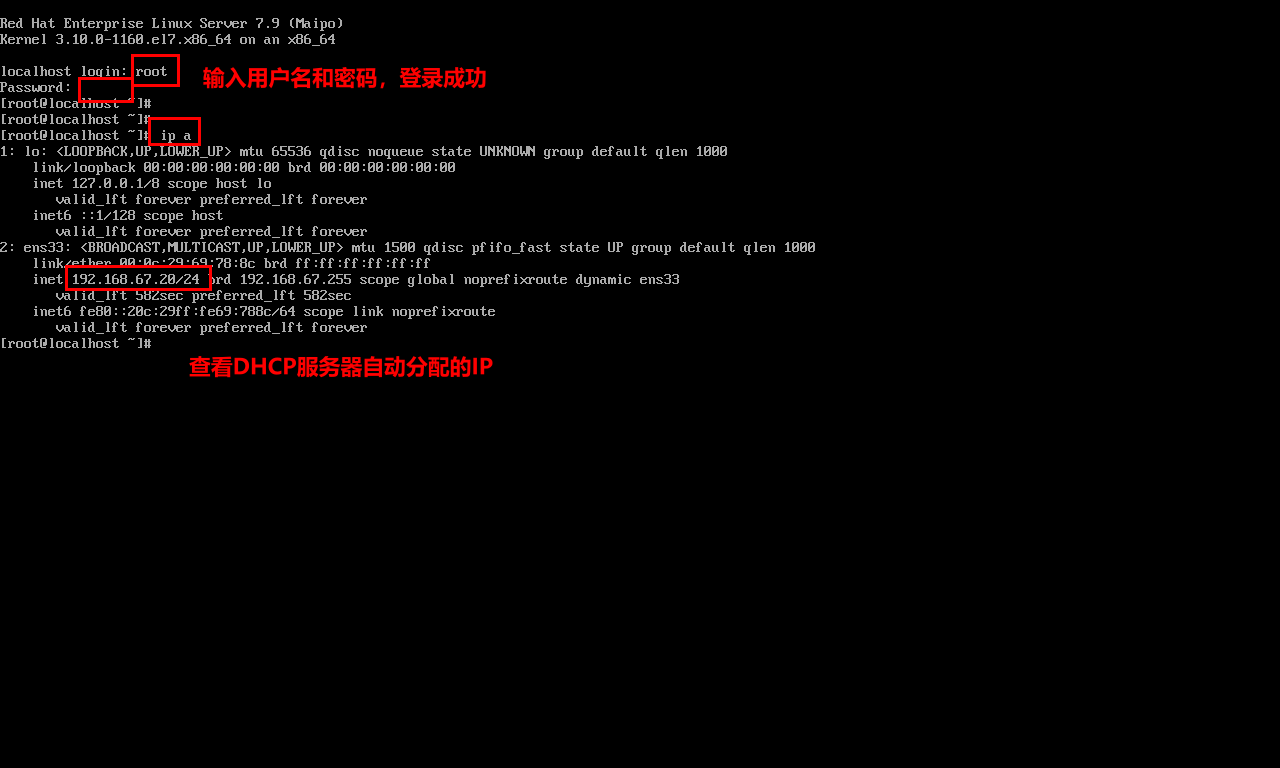
- 等待虚拟机自动启动
六、总结

openEuler 是由开放原子开源基金会孵化的全场景开源操作系统项目,面向数字基础设施四大核心场景(服务器、云计算、边缘计算、嵌入式),全面支持 ARM、x86、RISC-V、loongArch、PowerPC、SW-64 等多样性计算架构
更多推荐
 10
10 0
0- 0


 已为社区贡献2条内容

所有评论(0)